Photography Tutorial · 2018-11-11
Photoshop Channels Explained: Master Color Grading and Selection Skills
Thomas Chu Photo
One tutorial every week, making photography easy to learn
In "The Foundation of Photoshop: Layers and Masks," Thomas shared two important Photoshop concepts: layers and masks.
In today's tutorial, Thomas explains another key post-processing concept — channels — and demonstrates their use in editing, especially for making selections.
1
What Are Channels?
A computer needs a way to store and describe digital images. A channel is one such way: using a grayscale map to describe digital information.
A channel is typically a black-and-white (grayscale) image like the one below. Every pixel in a channel corresponds to a grayscale value from 0 to 255.
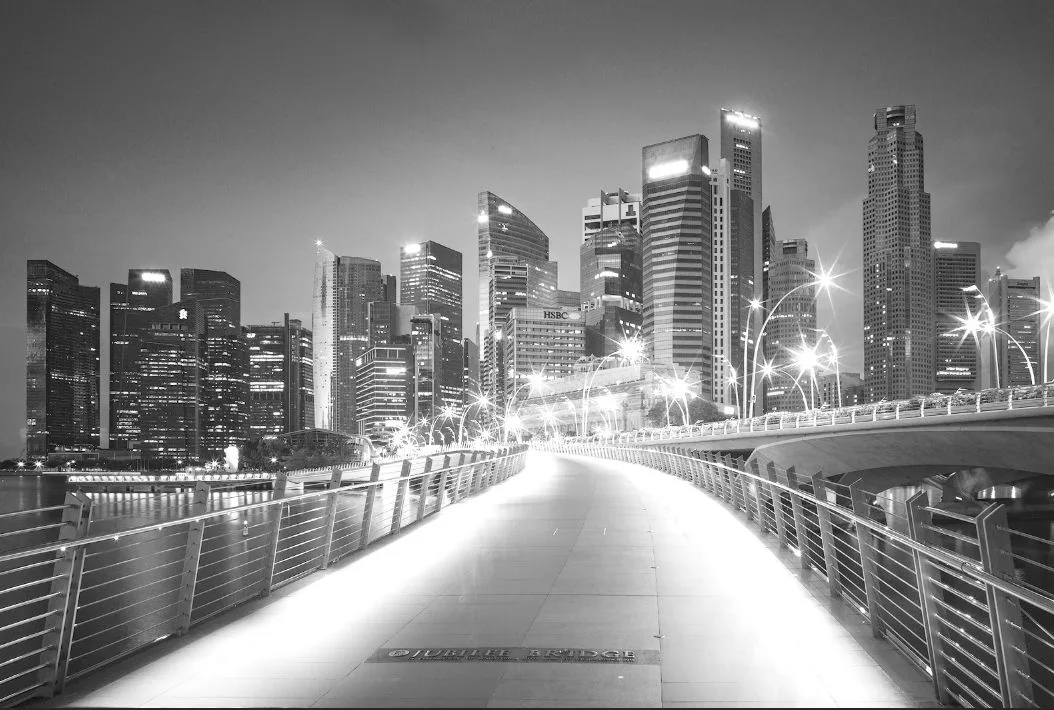
For a black-and-white photo, a single channel describes all its information. A color image needs multiple channels to fully describe its color information.
Computers describe color through modes such as RGB, CMYK, HSB, and LAB. In RGB mode, the computer needs three channels — R (red), G (green), B (blue) — to store color information.
(Per Photoshop's rules, a photo can have up to 56 channels recording various kinds of information; all channels share the image's dimensions and pixel count.)
In the digital photo below, the red circle in the middle has an RGB value of (200, 100, 50). Let's open this photo in Photoshop.
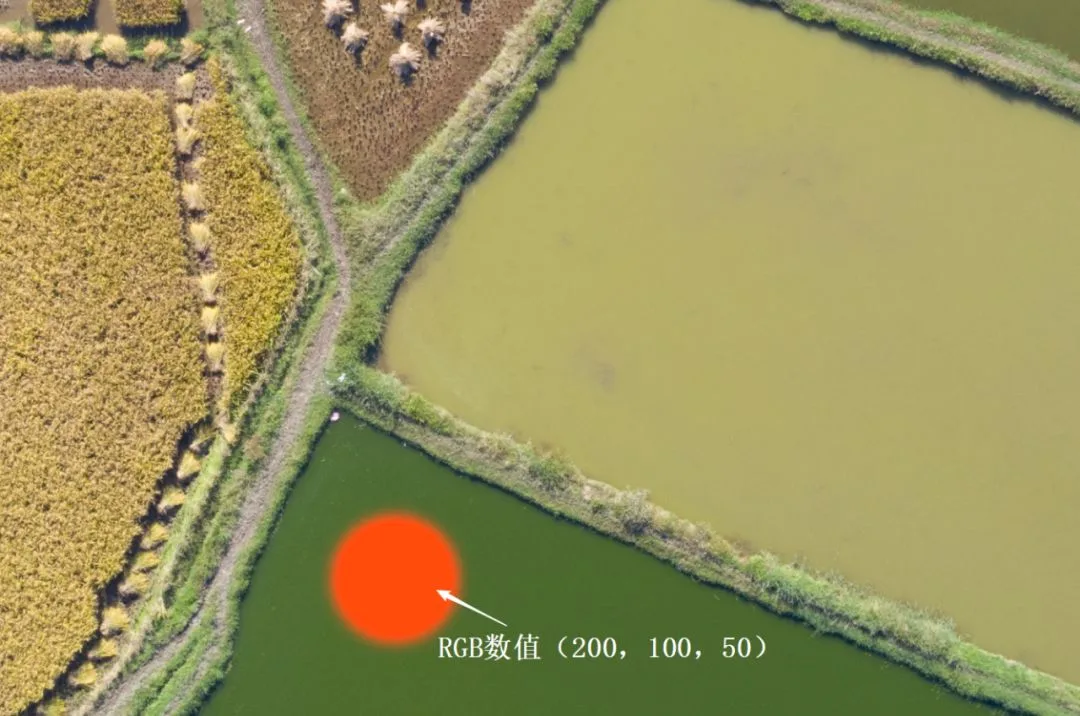
To the right of the Layers panel in the bottom-right corner sits the Channels panel. For an image in RGB mode, there are three base channels — Red, Green, Blue — plus a composite RGB channel.
The composite channel is formed by algorithmically mixing the base channels, making editing more convenient.
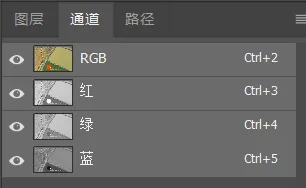
Next, we can click through the Red, Green, and Blue channels one by one to preview their differences.
Below is the grayscale map stored in the Red channel: the circle's brightness value is 200 — which is exactly the R value of the circle's color (200, 100, 50).
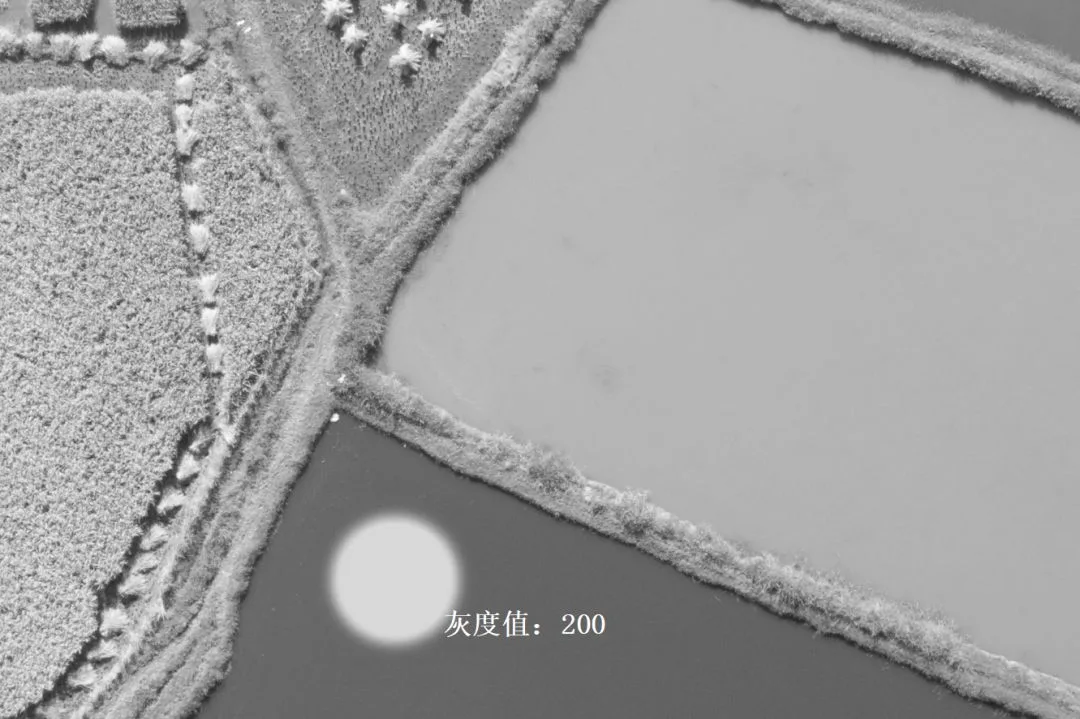
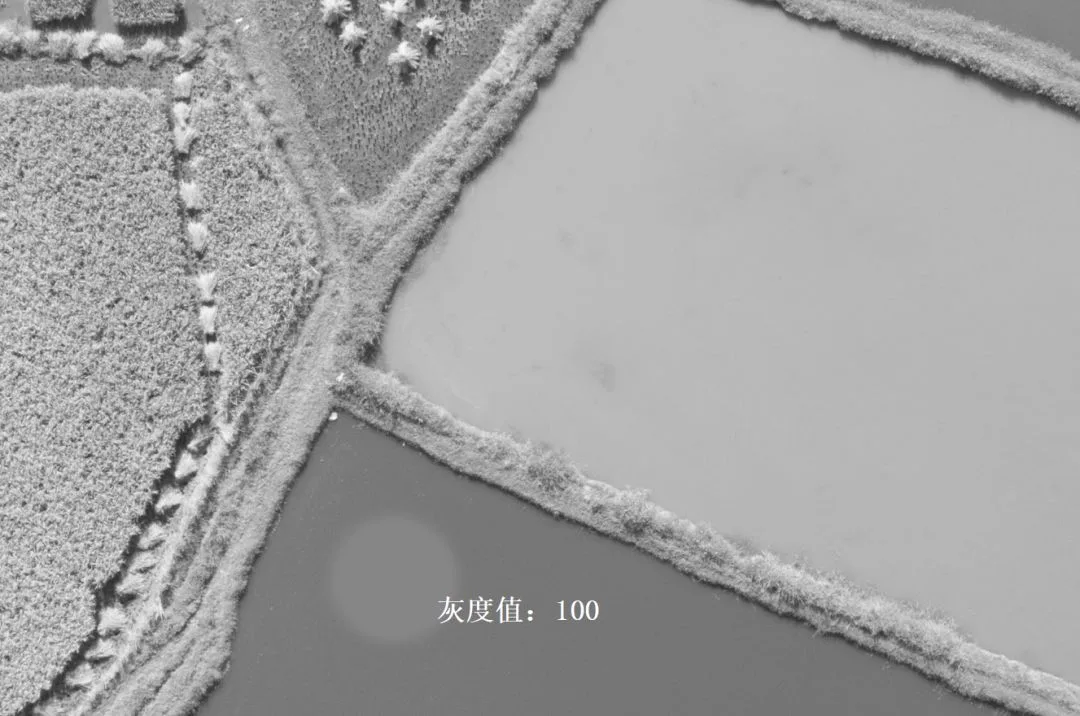
Below is the grayscale map in the Green channel: the circle looks darker, with a brightness of 100 — the G value of its color (200, 100, 50).
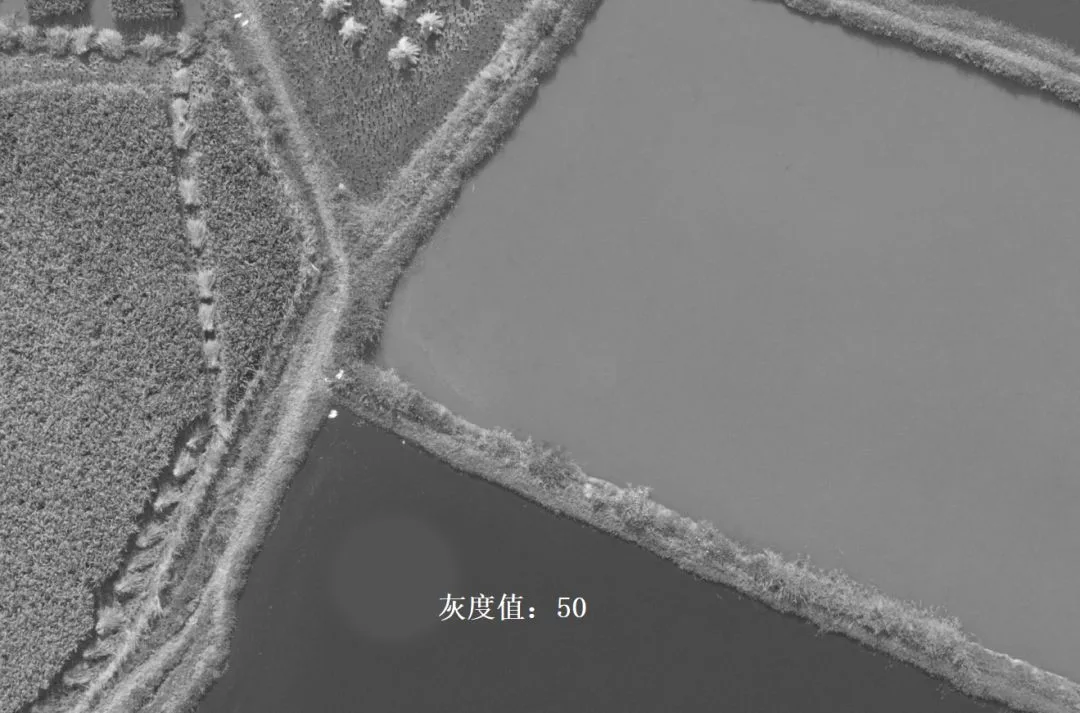
Below is the grayscale map in the Blue channel: the circle looks darker still, with a brightness of 50 — the stored B value of its color.
In short, a channel is a grayscale map that stores certain information about a photo — brightness, color components, opacity, and so on. In RGB mode, an image has three base channels: Red, Green, and Blue.
2
Applications of Channels
Channels have two main applications: color grading and building selections.
Since in RGB mode each channel stores information about one color component, we can adjust a photo's colors by directly modifying its channels.
A channel is a grayscale image — and so is the mask (selection) we learned about earlier. That means we can convert a channel into a mask (selection), making local selections more efficient in certain situations.
The photo below is my channel-grading demo. Suppose I want to push it toward autumn colors, making the overall tone more orange.
If you've read "Learn Color Grading by Understanding Color First," you'll know this image is dominated by yellows and greens — and adding red to either shifts them toward orange.
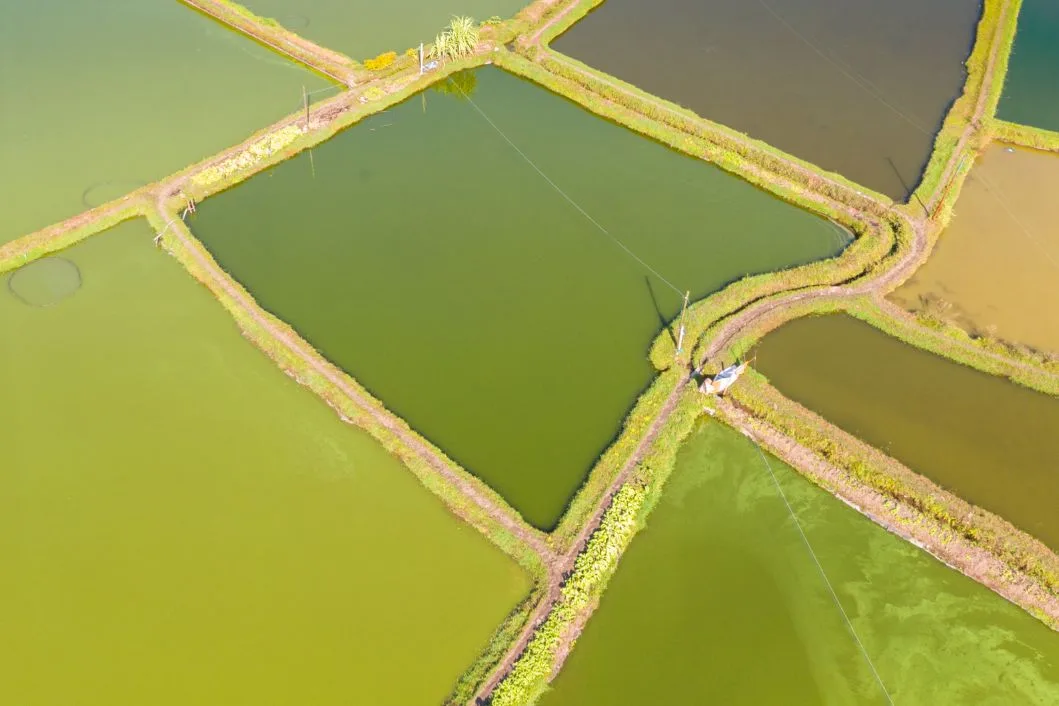
The Red channel stores the R value of every color in the photo, so brightening the Red channel raises the R value of all colors — adding red.
So we can select the Red channel alone,
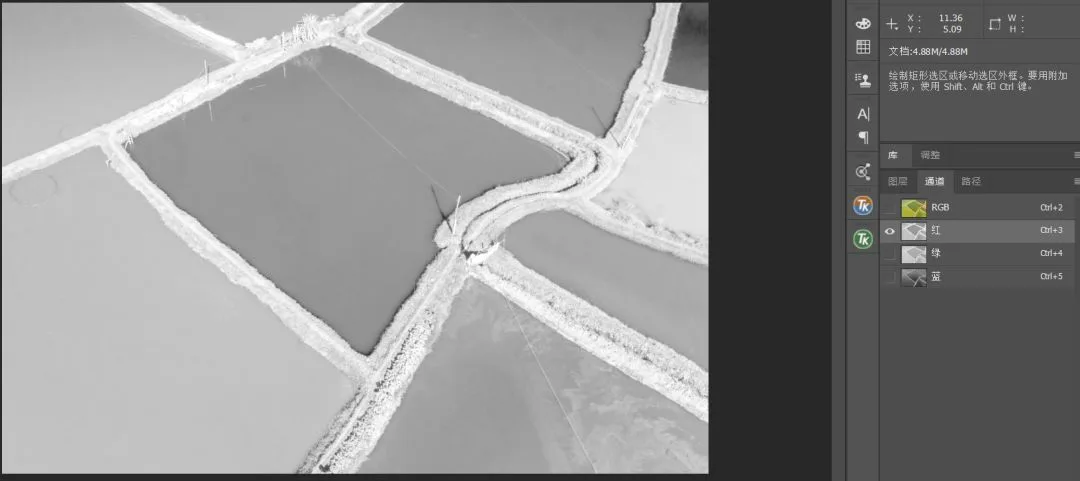
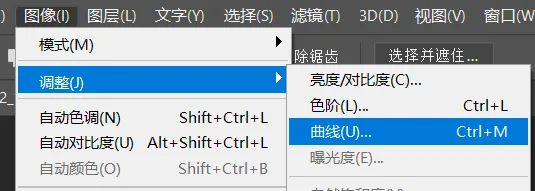
then choose Image > Adjustments > Curves,
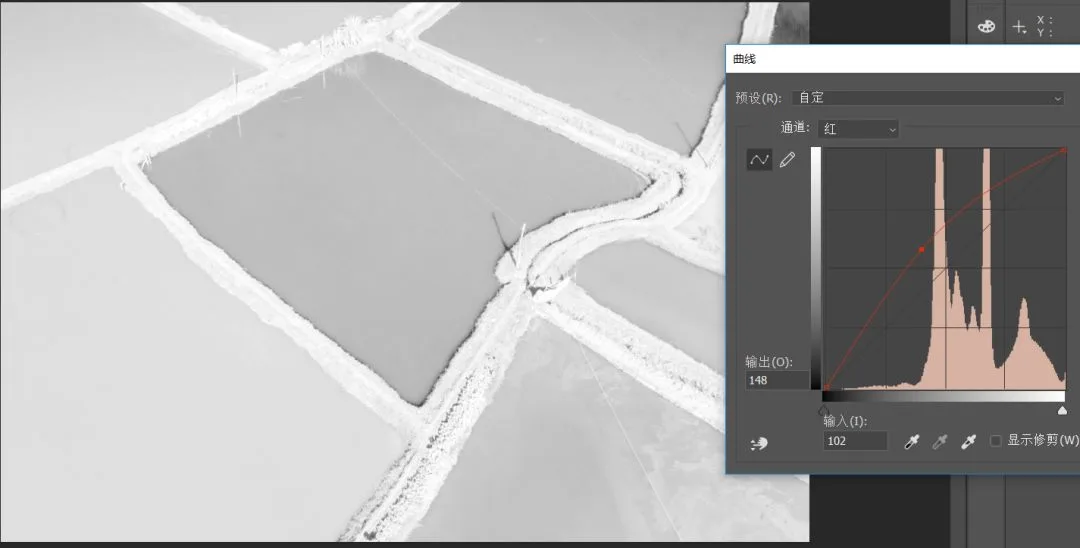
and lift the curve — the Red channel is brightened.
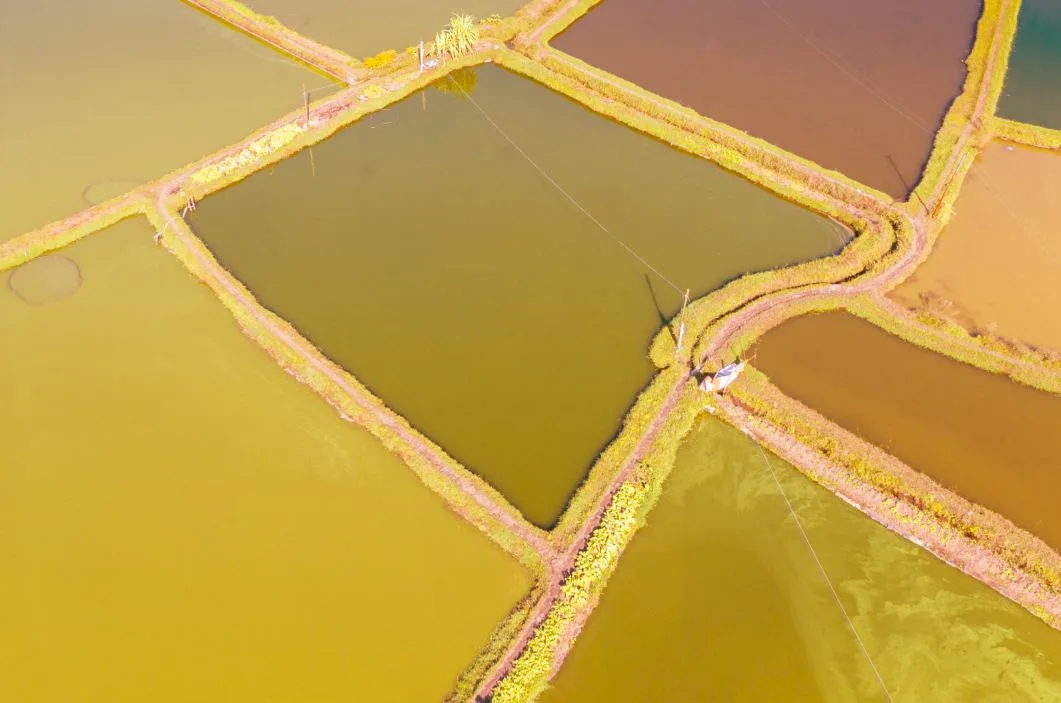
The photo then leans redder, taking on an orange-yellow tone.
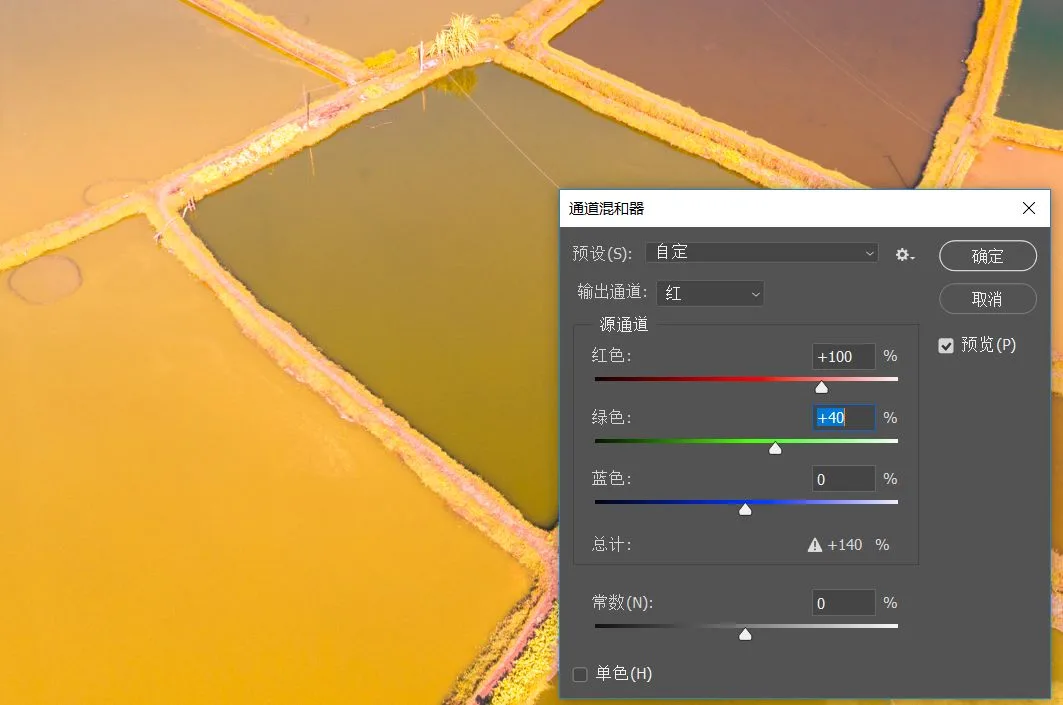
Photoshop also has dedicated channel-based grading tools, such as channel curves and the Channel Mixer — Thomas will share those in future tutorials.
Beyond grading, channels also build selections. Different channels have different grayscale maps, so the same edge shows different contrast in different channels — we can pick the channel with the strongest contrast to build our selection.
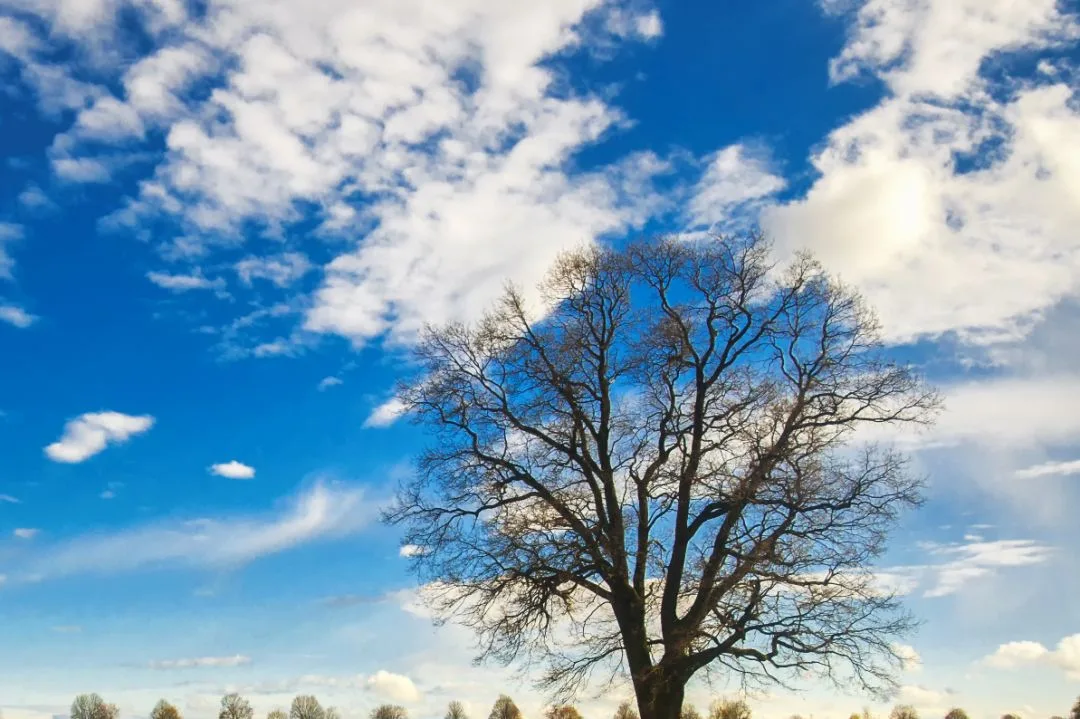
In the photo below, for example, selecting only the sky is no easy task without the help of channels.
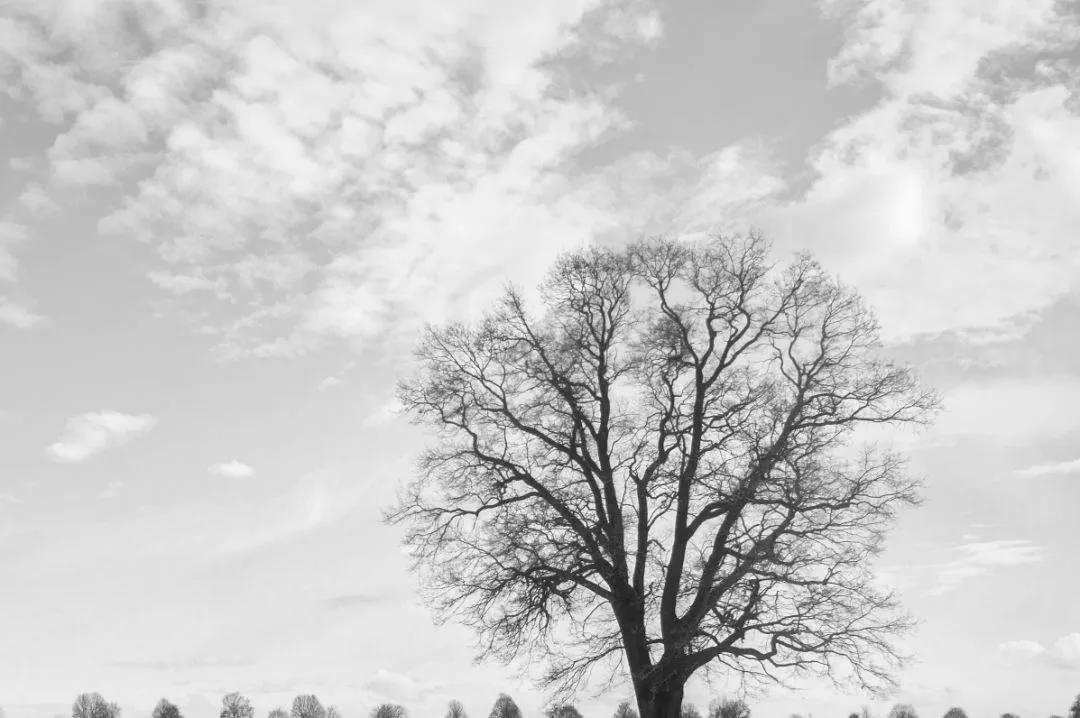
Check the Red channel first: the contrast between sky and trees is weak — not suitable for a selection.
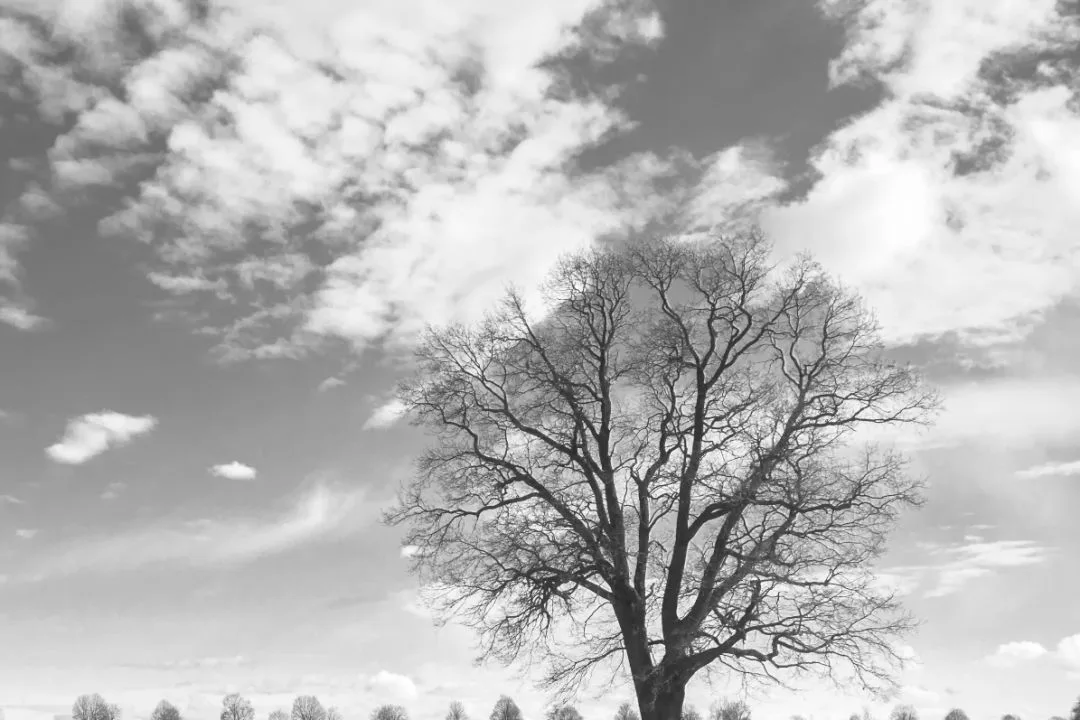
Now the Green channel: stronger contrast between sky and trees — already usable.
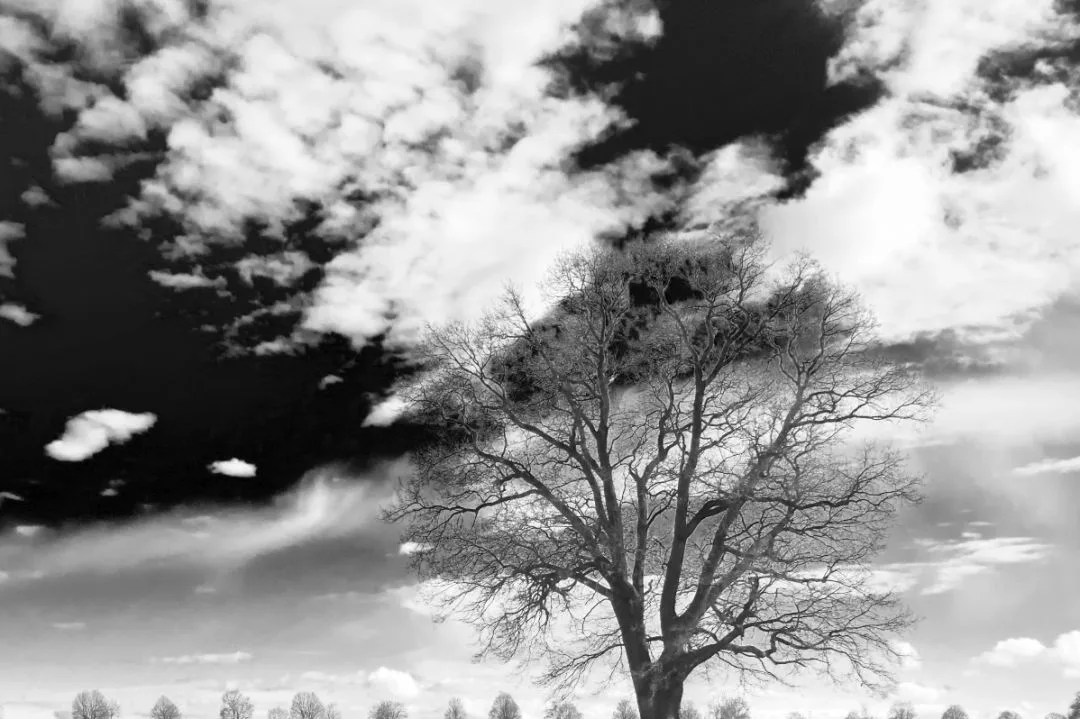
But look at the Blue channel: the sky is bright, the trees are dark — the contrast is greatest here, making it the best choice for the selection.
3
Converting Between Channels, Selections, and Masks
Channels, selections, and masks are interconvertible. Let's continue with this photo to see how a channel becomes a selection and then a mask.
Open the Channels panel; by default, all channels are selected.
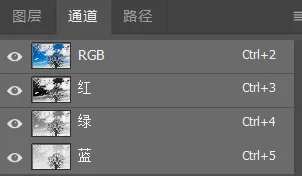
We've established that the Blue channel separates sky from trees best, so left-click to select the Blue channel.
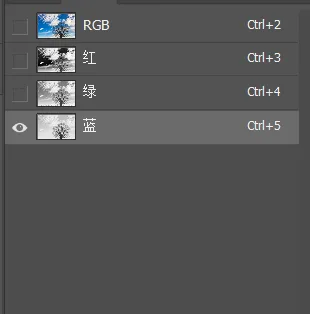
To convert the Blue channel into a selection, hold Ctrl and left-click the Blue channel.
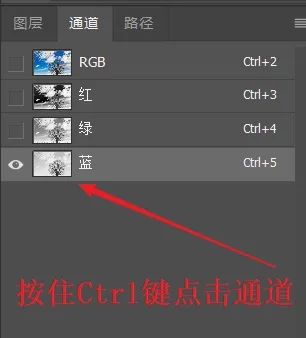
Marching ants now appear in the frame — we've successfully converted the channel into a selection.
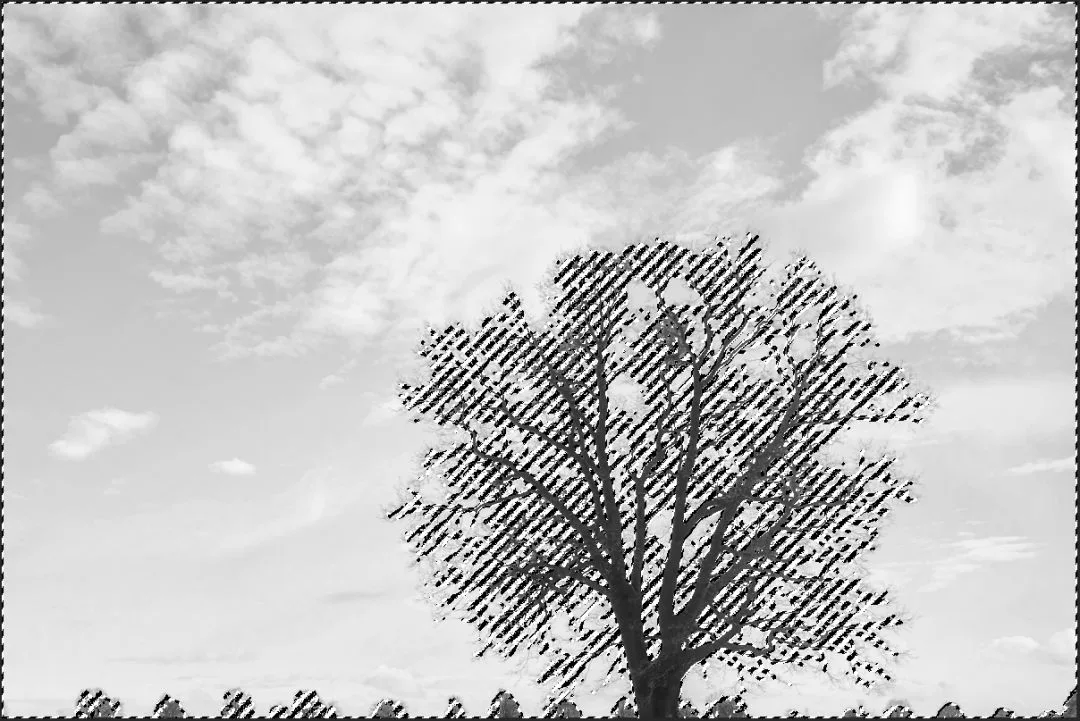
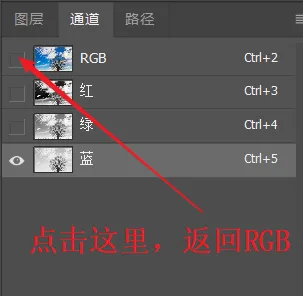
Left-click the box in front of the RGB channel to return to the normal all-channels preview.
There are three cases when converting a selection into a layer mask:
1) Converting it into the mask of a new adjustment layer.
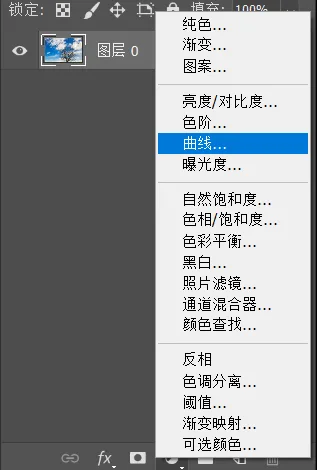
When you create an adjustment layer — Curves, Levels, Selective Color, and so on — Photoshop automatically gives it a mask: a white mask if no selection is loaded, or a mask matching the selection if one is.
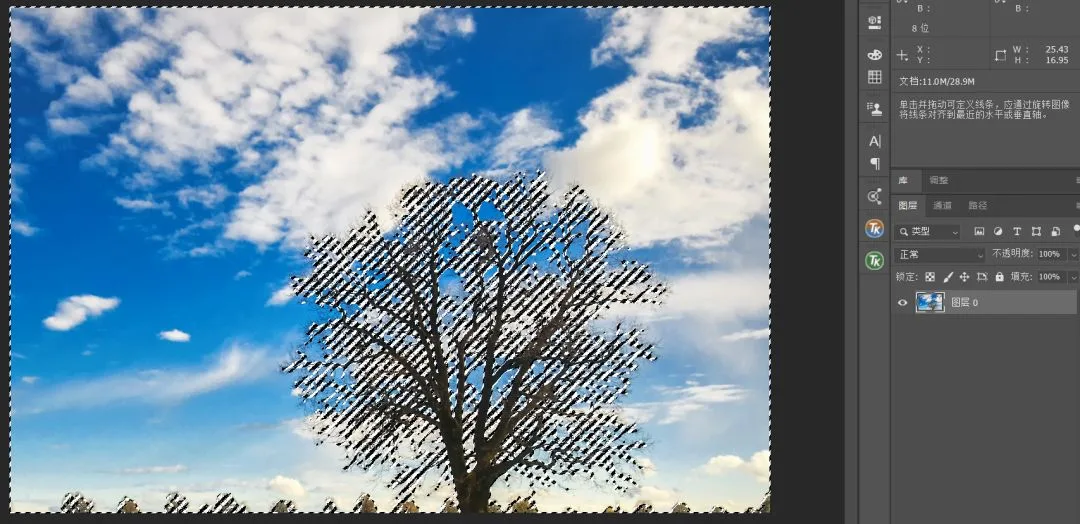
For example, with the Blue channel selection loaded, let's create a Curves adjustment layer.
The selection is automatically turned into the Curves layer mask, whose grayscale map is identical to the Blue channel: the tree areas are dark grey and barely affected by the curve, while the sky areas are light grey and receive the adjustment.
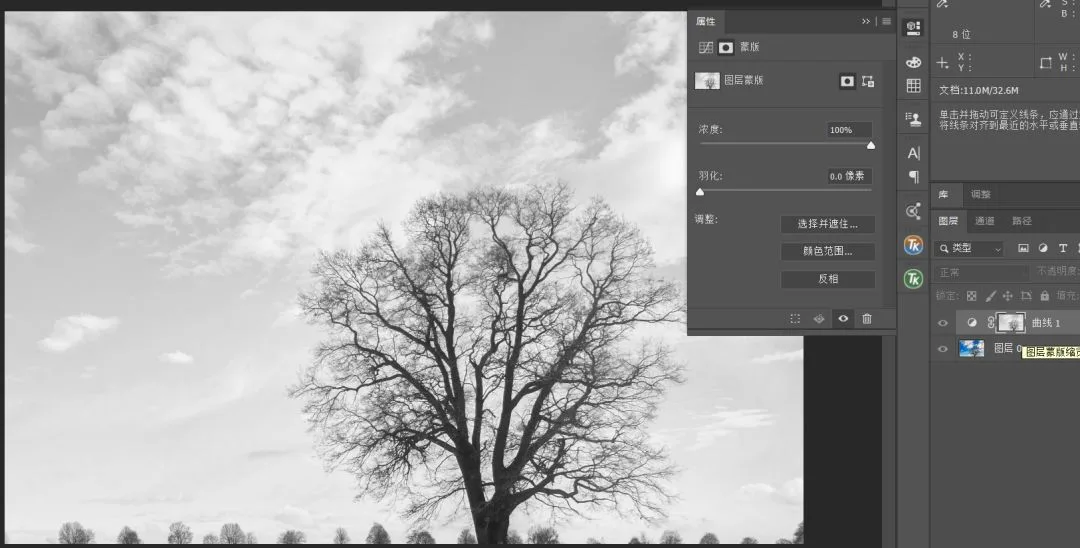
Try adding a point on the curve and lifting it: only the sky brightens; the landscape is nearly unaffected.
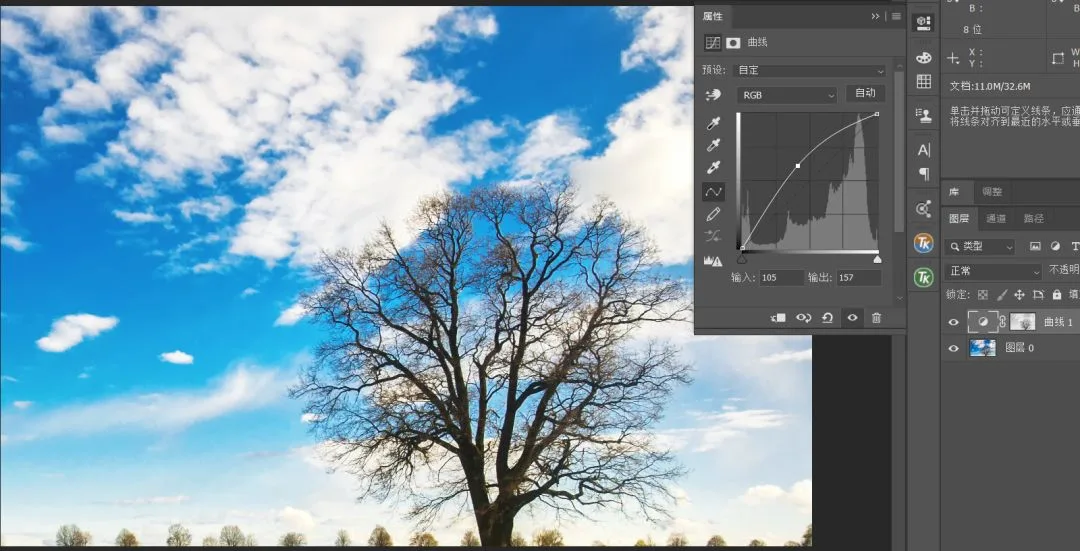
2) The second case: adding a mask to a normal layer.
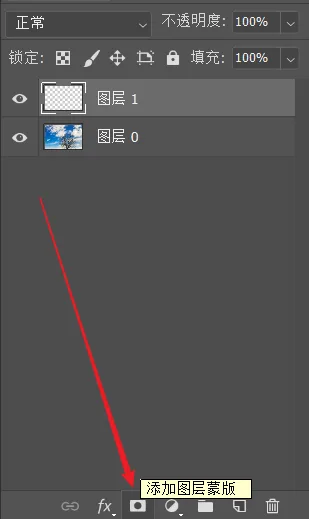
With no selection loaded, clicking the "Add Layer Mask" button at the bottom-right of the panel creates a white mask. With a selection loaded, the same button creates a mask matching the selection.
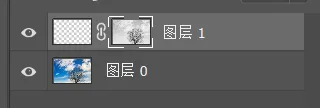
3) The last case: the target layer already has a mask that you want to replace.
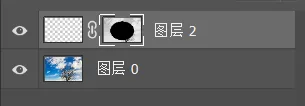
This is simple too: right-click the existing layer mask icon and choose "Delete Layer Mask" from the menu.
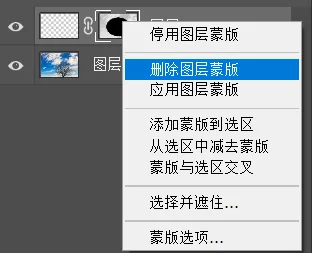
Once deleted, the layer is back to having no mask.
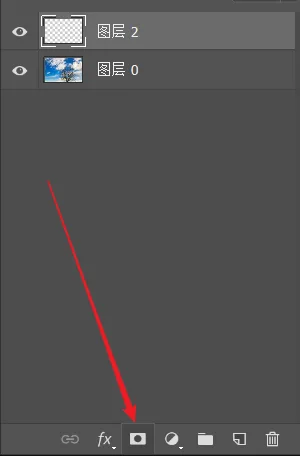
Then proceed exactly as in case (2): with the selection loaded, add a layer mask, and the selection converts into the mask.
Just as channels convert into selections, selections can be stored as channels. Selections made with other tools, like Quick Selection, can be saved into a channel for later reuse.
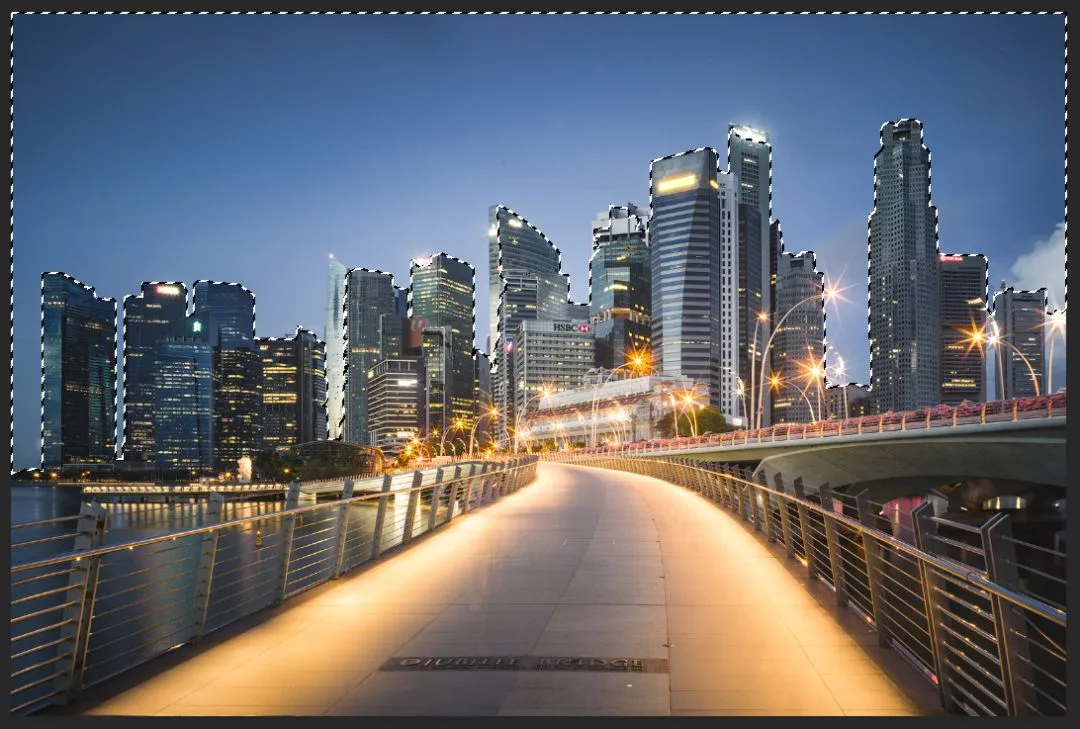
With a selection loaded, go to the Channels panel and click the second icon at the bottom: "Save Selection as Channel."
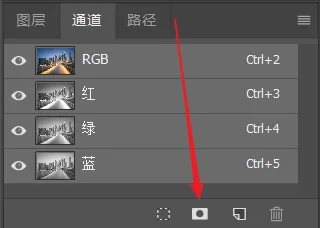
A new Alpha channel then appears in the Channels panel, storing the selection. It's called an Alpha channel because — unlike the photo's native R, G, B color channels — it doesn't affect how the photo's colors display. An Alpha channel is simply a way to store a selection.
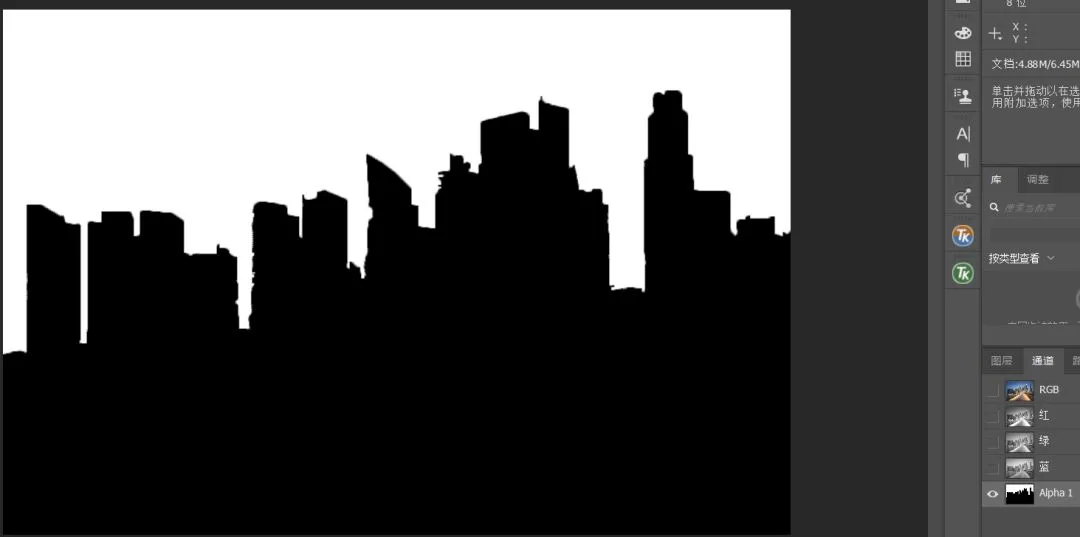
Hold Ctrl and click the Alpha channel, or use the first icon at the bottom of the Channels panel, to convert the Alpha channel back into a selection.
4
Refining Channels and Masks
Finally, let me demonstrate how to further refine a generated mask for a more accurate selection, using the mask from earlier.
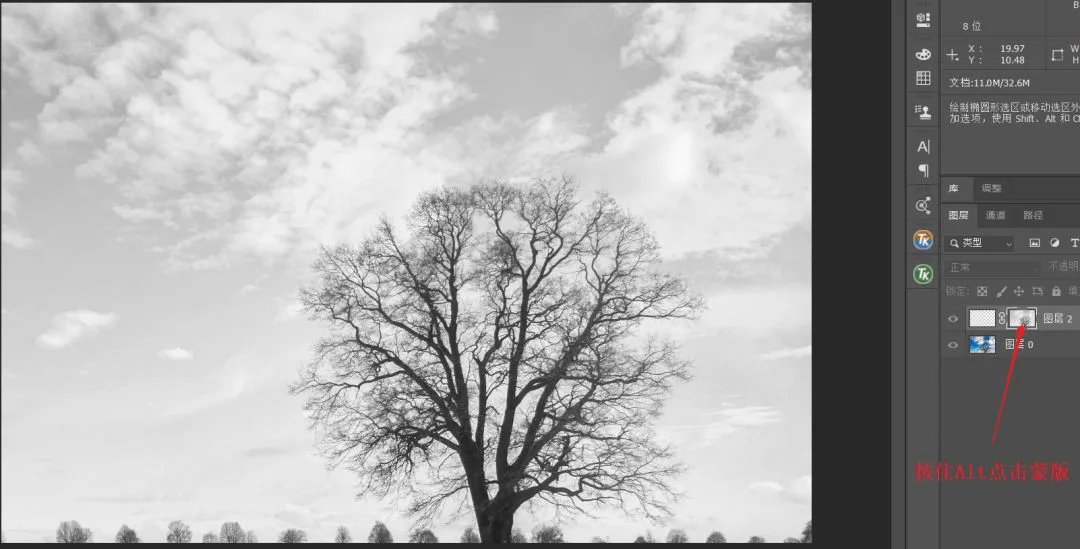
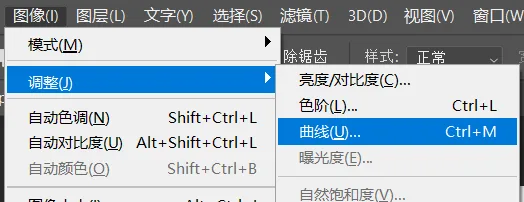
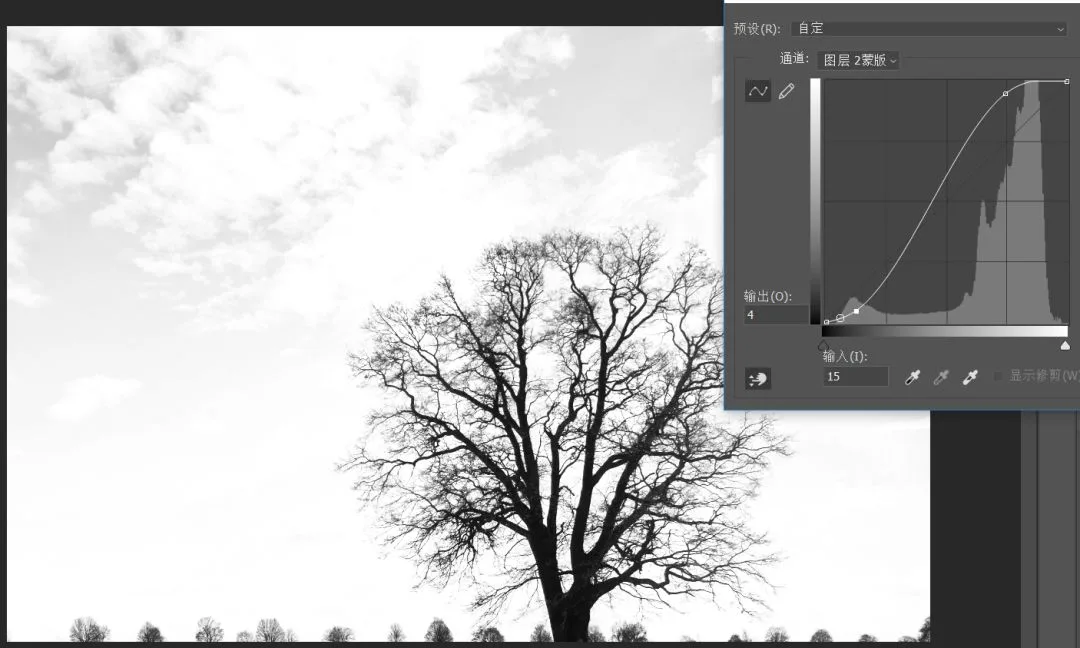
Hold Alt and click the layer mask icon to switch to mask preview: the image view changes from the color photo to the layer's mask. Then open Image > Adjustments > Curves.
Take the Curves hand tool, click on the sky area of the image, and drag the curve up — the sky portion of the mask brightens. (With only one point on the curve, lifting it lifts the whole curve, brightening the entire mask.)
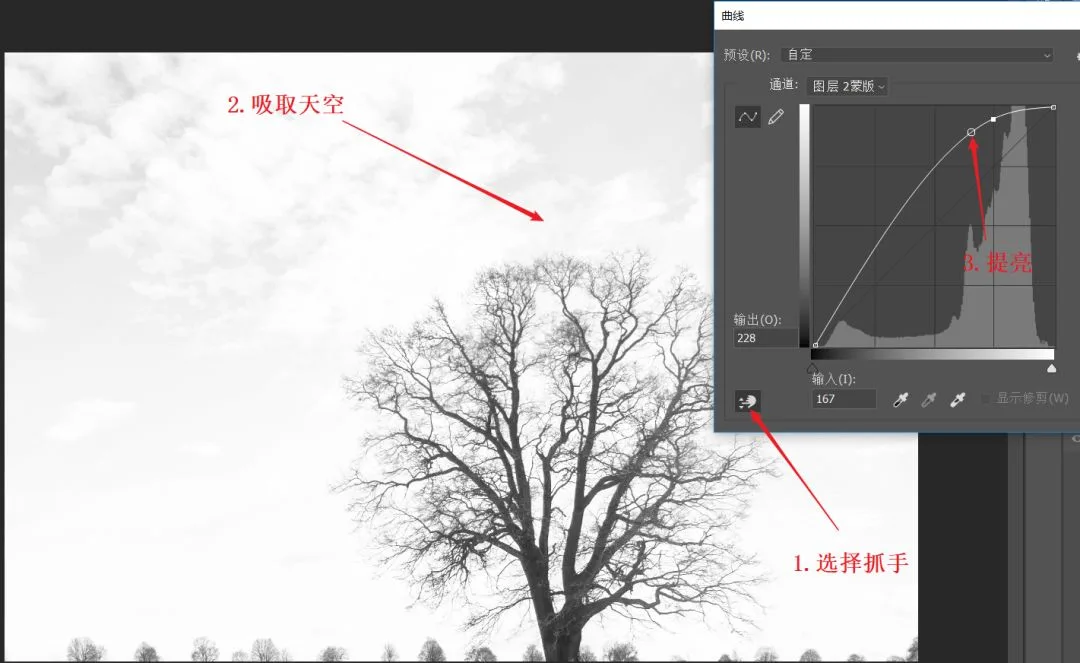
Then use the hand tool on the tree trunks and drag the curve down — the tree portion of the mask darkens. After these two curve moves, the sky is whiter and the landscape blacker: a more accurate selection.
By converting the Blue channel into a mask and then strengthening the mask's contrast, we obtain a refined mask that selects only the sky.
Beyond Curves, channels and masks can also be modified through calculations — the luminosity masks we often talk about are generated by further calculations on channels. We'll share more in future tutorials.