Photography Tutorial · 2016-06-05
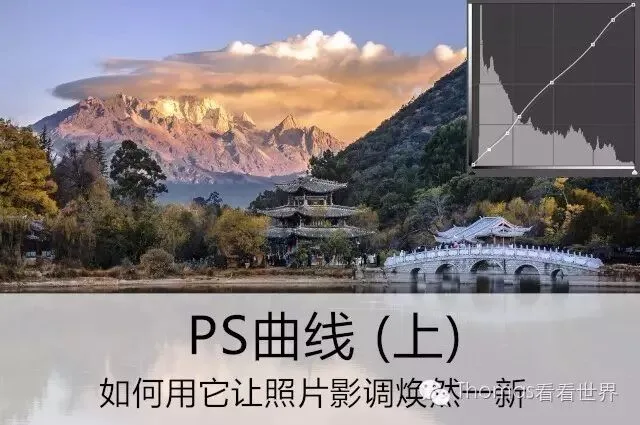
PS Curves (Part 1): Refresh Your Photo's Tonality with Curves
If the histogram from the last two weeks is the photographer's 'X-ray', then the Curves tool must be the photographer's 'scalpel'.
As an essential tonal and color adjustment tool, Curves sits prominently not only in Photoshop but also in ACR, Lightroom and even many phone editing apps. This article explains in detail what the RGB curve is, and how to use basic shapes — brighten/darken, black-white point, contrast, and local curves — to adjust a photo's tonality.
Next week's PS Curves (Part 2) will continue with how to combine these basic shapes for more complex looks like film, bleach and Japanese styles.
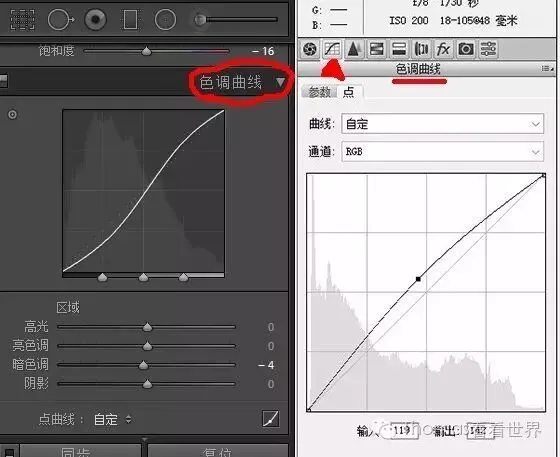
Where is the Curves tool?
In both Lightroom and Adobe Camera Raw, the Tone Curve panel is the second panel right after Basic — a hint of its importance.
In Photoshop we usually use a Curves adjustment layer. At the bottom right of PS's Layers panel, the fourth icon is 'New Adjustment Layer' — click it and choose 'Curves' to create one.
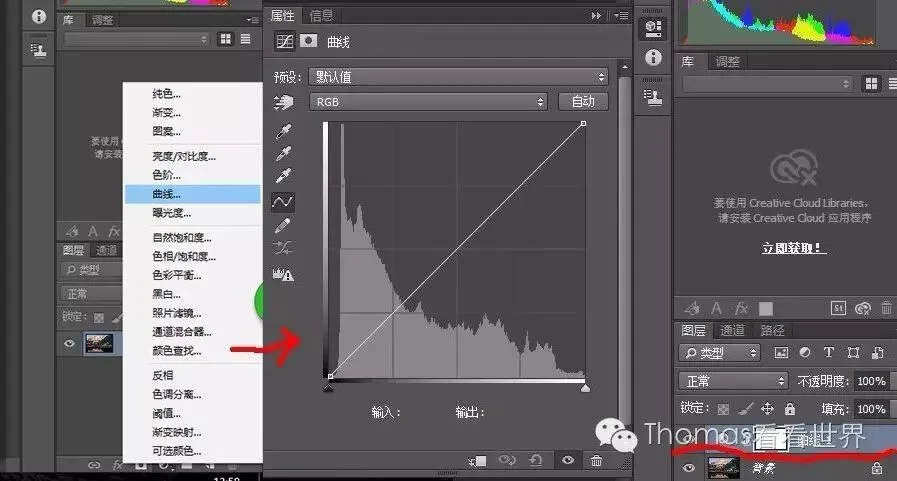
Creating an adjustment layer instead of changing the curve directly on the original layer lets us conveniently undo/redo any adjustment.
What is a curve?
This article focuses on the RGB channel curve, formed by overlaying the curves of the Red, Green and Blue channels — it can be 'approximately' understood as the image's brightness curve.
The core of RGB curve adjustment is transforming the original image's brightness.
The curve's horizontal axis is the original image's brightness distribution: from left to right, 0 for pure black, 1-254 for mid-grays, and 255 for the brightest pure white. A histogram is overlaid on the axis, showing how many pixels exist at each brightness.
The curve's vertical axis is the target (adjusted) brightness, again 0-255 from bottom to top.
The line in the middle is our 'curve'. Pick any point on it: its 'input value' is its horizontal-axis value — the original brightness; its 'output value' is its vertical-axis value — the adjusted brightness.
Unadjusted, the curve is a diagonal — input (original) and output (target) brightness are equal. Here I picked a point whose input and output are both 193.
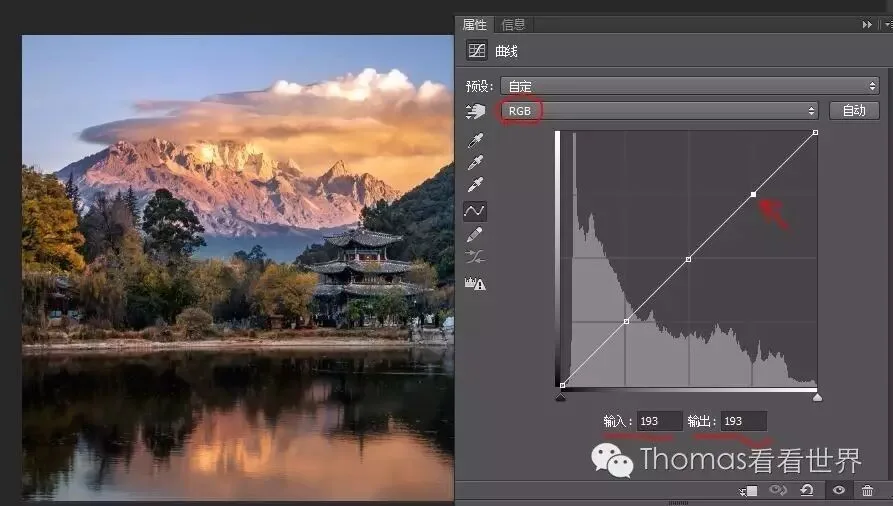
If I move this point up, its output becomes 232 — meaning all pixels at brightness 193 in the original histogram are brightened to 232.
Notice a key trait of curves: when we move one point, neighboring points move along — the further from the adjusted point, the smaller the change. This keeps curve-adjusted images smooth and natural in most cases.
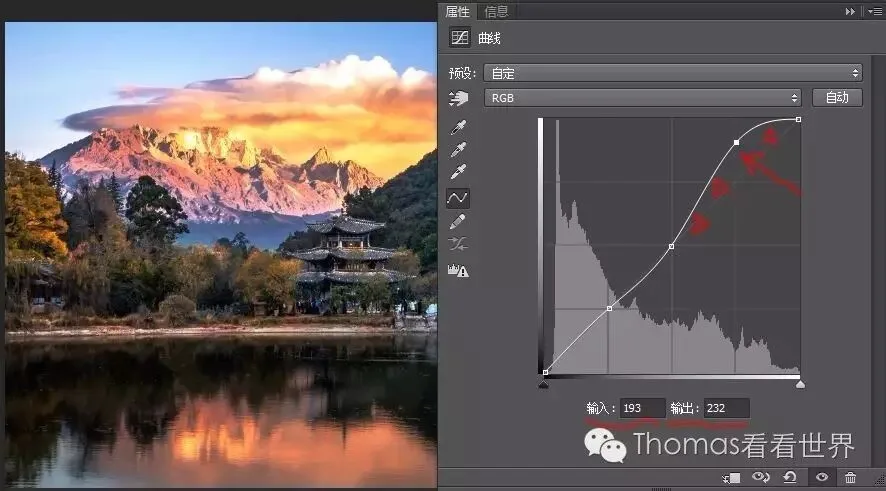
By adding control points (anchors) to the curve, we can bend it into all kinds of shapes to achieve the tonal effect we want. Next I'll explain curves through some basic shapes.
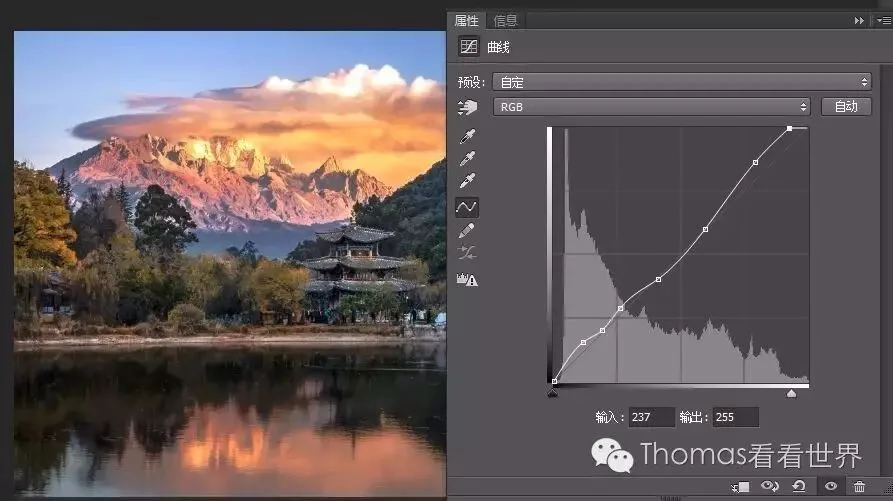
Brighten and darken curves
Brightening or darkening an image is not adding or subtracting the same brightness value for every point, as you might imagine. The curve below, for instance, raises every pixel's brightness by 64, causing 2 bad results:
(1) The highlights blow out directly
(2) The shadows and blacks brighten drastically, starving the image of true black and making it seriously gray.
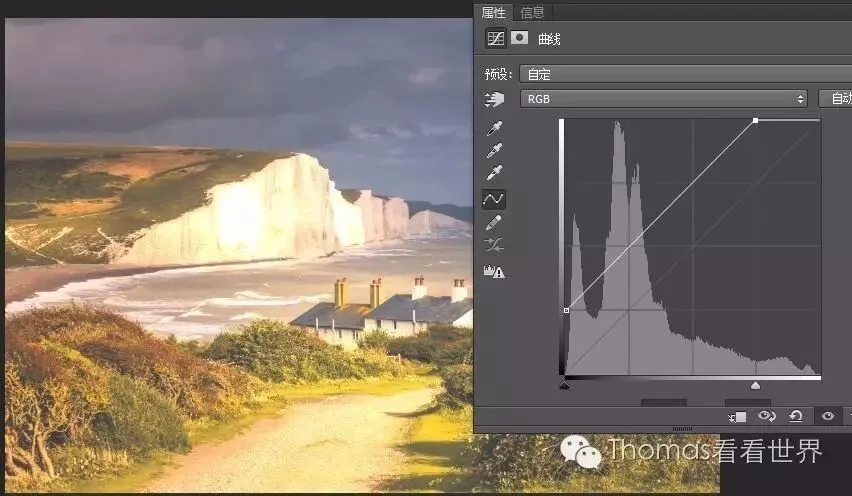
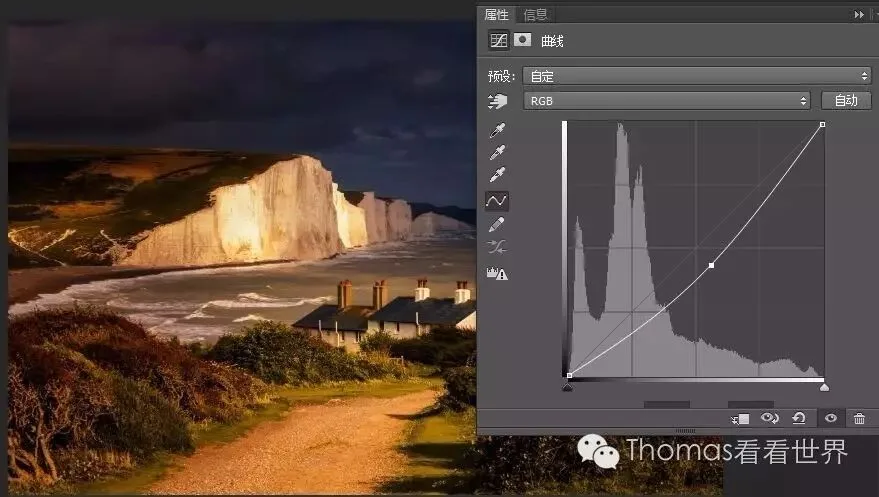
So we usually brighten with a curve like this: place the anchor near the midtones and lift. The photo's midtones brighten most; highlights rise less, preventing blowout; shadows and blacks rise only slightly, preserving contrast.
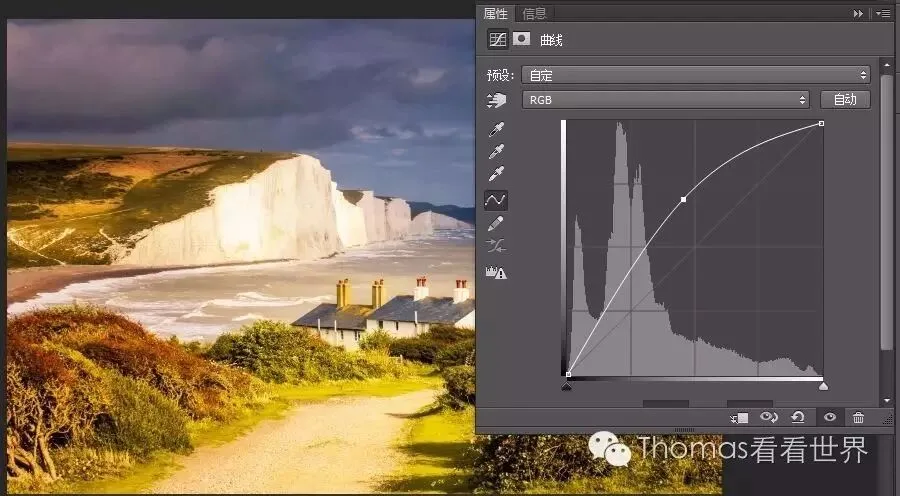
Likewise, to darken an image we anchor the midtones and pull down — protecting shadows from underexposure and keeping contrast in highlights and whites.
Black-point/white-point curves
We call the darkest point of a photo the black point and the brightest the white point; the difference between them determines the photo's contrast.
By shifting the curve's left and right endpoints horizontally or vertically, we widen or narrow that black-white difference.
The image below is a grayish, low-contrast picture: its darkest area is only a dark gray above 50, its brightest a light gray just past 200. The black and white regions have no pixels at all.
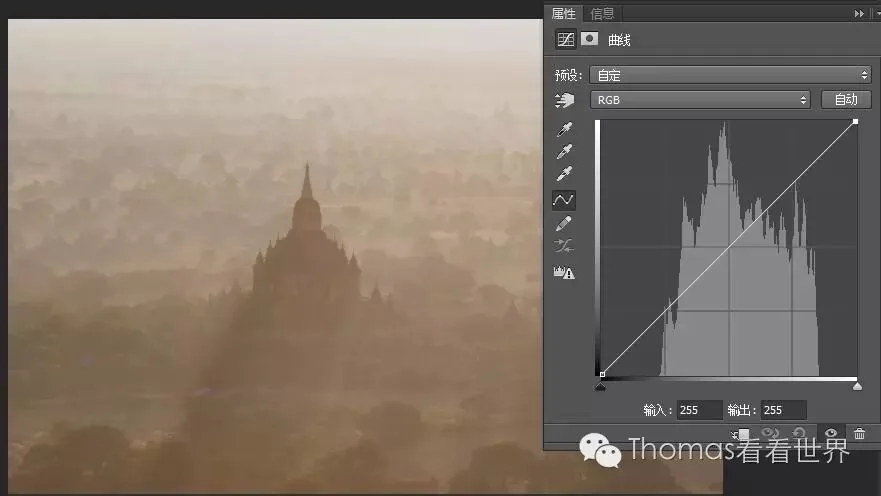
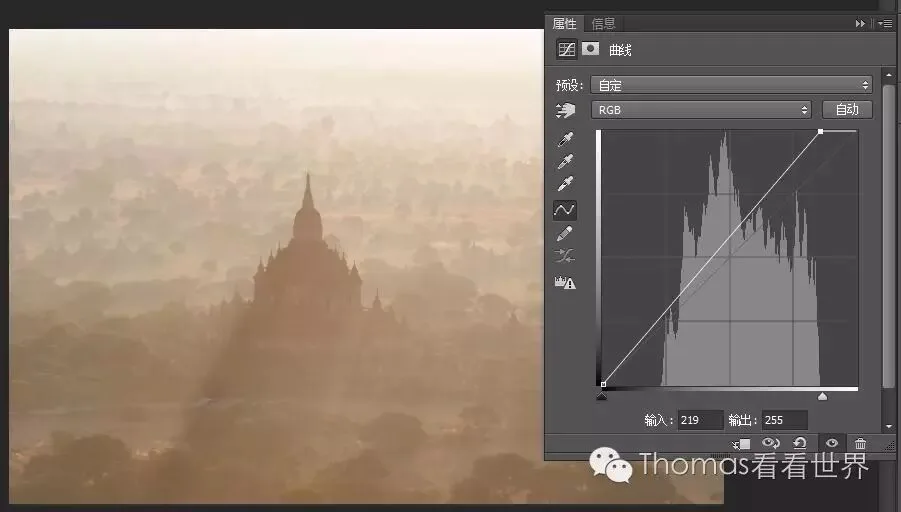
So I moved the curve's right end leftward horizontally — pixels originally at input 219 all brighten to output 255, pure white. The photo finally has bright white parts.
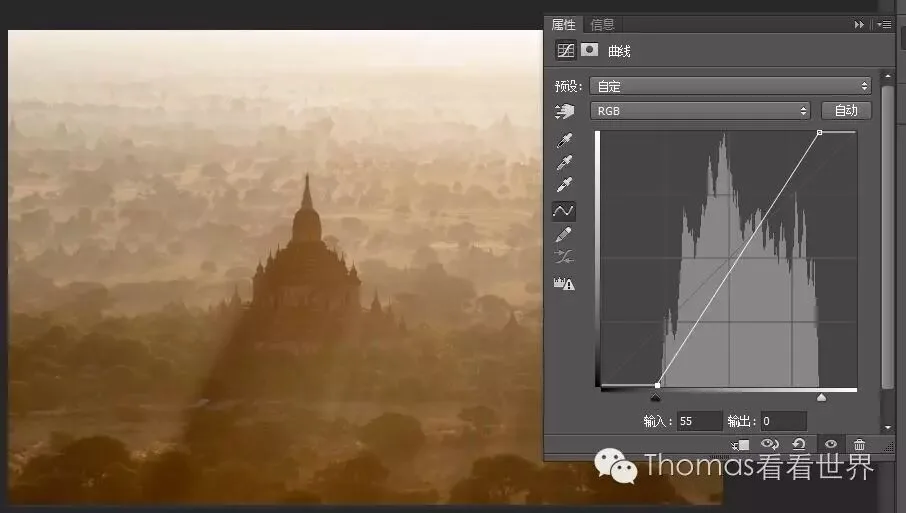
Similarly, I created an anchor at the curve's left end and pulled it right horizontally — the original dark-gray area at 55 all outputs as pure black at 0. The photo regains deep blacks. These two steps widen the black-white gap, greatly increasing contrast.
Images with a large black-white gap are generally rich, vivid and sharp. But bigger isn't always better. A common misconception is that the black point must be 0 and the white point 255.
Not really — take this photo: its black point is 0, and the many deep-black areas give strong contrast, which may not be the effect we want.

I created an anchor at the curve's left end and pulled it up vertically: input 0 (pure black) is lifted to brightness 38. The photo no longer has pure black — the darkest part (the black point) is a dark gray at 38. The photo looks softer and more ethereal, matching the mood we want.

Contrast curves
Contrast curves are the nearly universal S-curve and inverse-S-curve of photography.
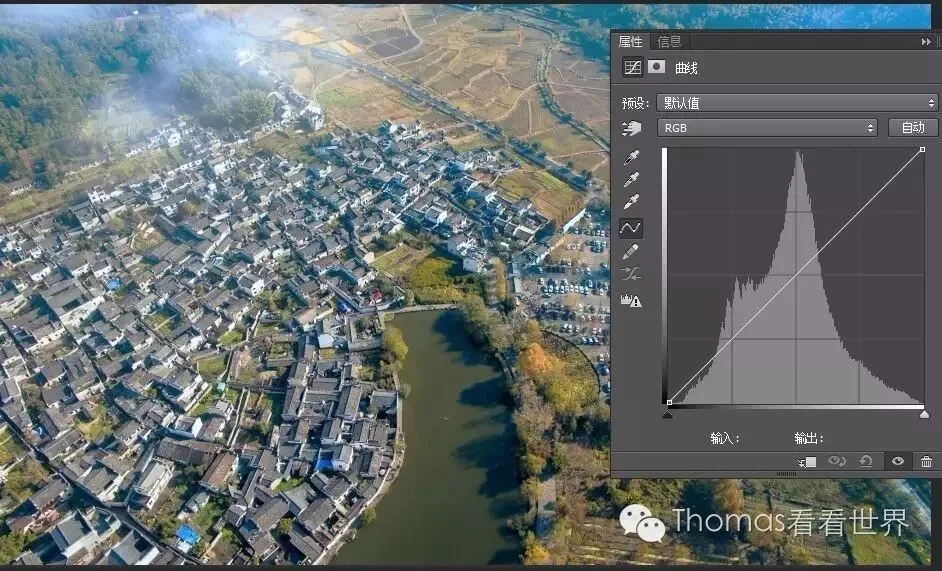
The contrast-increasing curve (S-curve) is simply an anchor raised in the highlights and an anchor lowered in the shadows, forming a shape like the letter S.
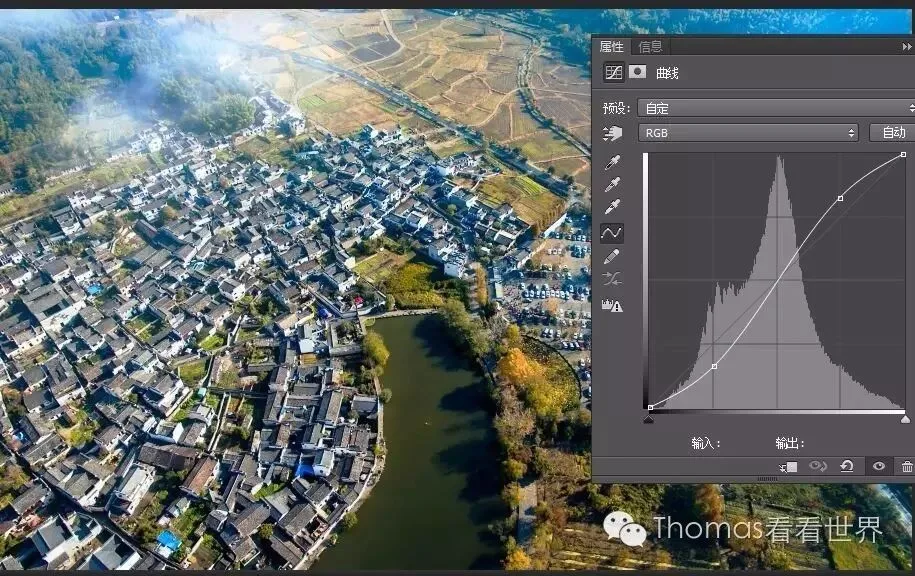
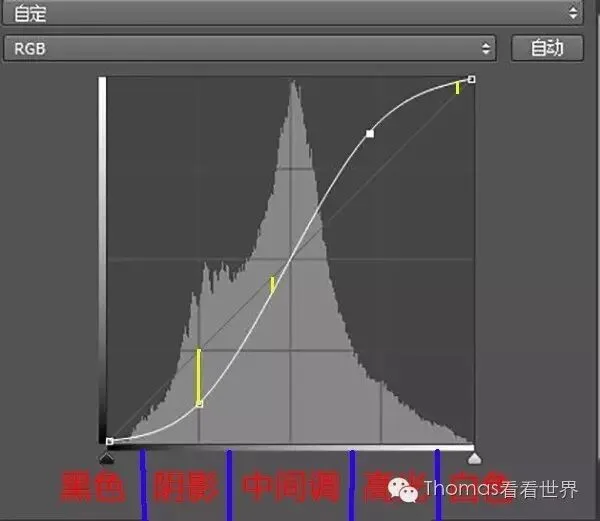
Look closely at the S-curve and we can understand the principle behind it. Earlier tutorials mentioned that a photo divides into 5 brightness parts: Blacks, Shadows, Midtones (Exposure), Highlights and Whites.
The midtone region has the finest transitions and detail. In the middle of the S-curve, input and output barely change — so the S-curve barely affects the midtones, protecting the photo's most detail-rich part.
Whites and Blacks sit at the extreme ends, where the S-curve also changes little — effectively preventing over- and under-exposure clipping.
The S-curve mainly raises the highlights' brightness and lowers the shadows', pushing the photo toward harder gradation. Protecting the black/white points and midtone detail while effectively raising contrast, the S-curve has become an almost mandatory step for most photos.
Similarly, lowering the highlight anchor and raising the shadow anchor forms an inverse-S — the contrast-reducing curve.
Local adjustment curves
The three shapes above act on the whole photo. But a core idea of digital post is adjusting different regions locally — letting each area look its best without affecting others.
In this image, for example, the grass between the snow mountain and the lake is pitch black and needs brightening.
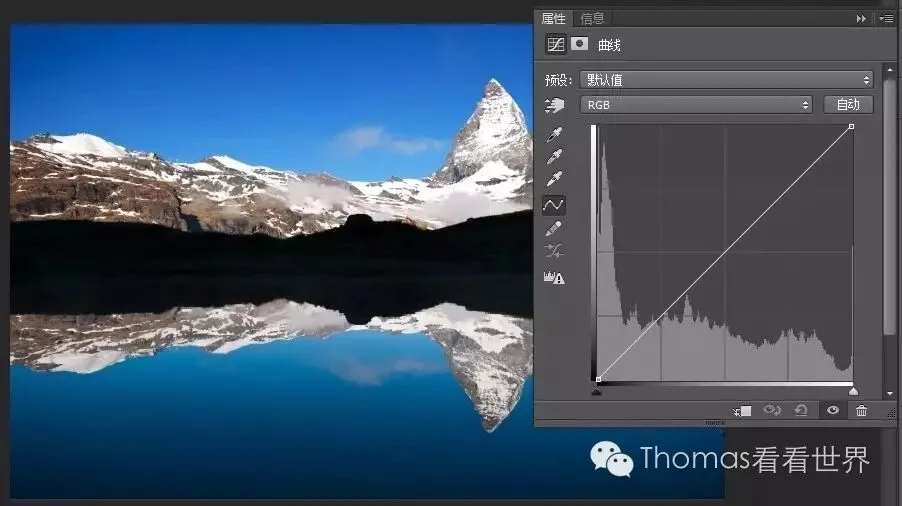
Applying a brighten curve directly brightens the grass — but the snow mountain (highlights) and sky (midtones) blow out instantly.
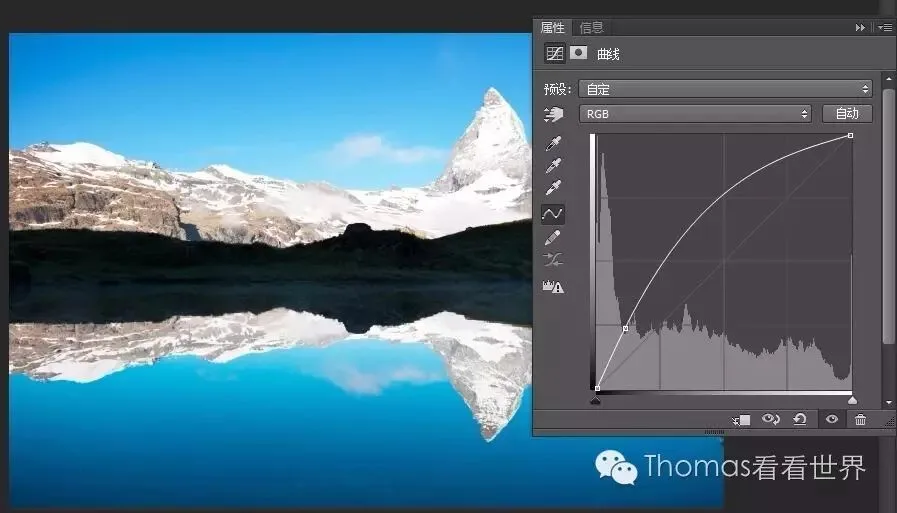
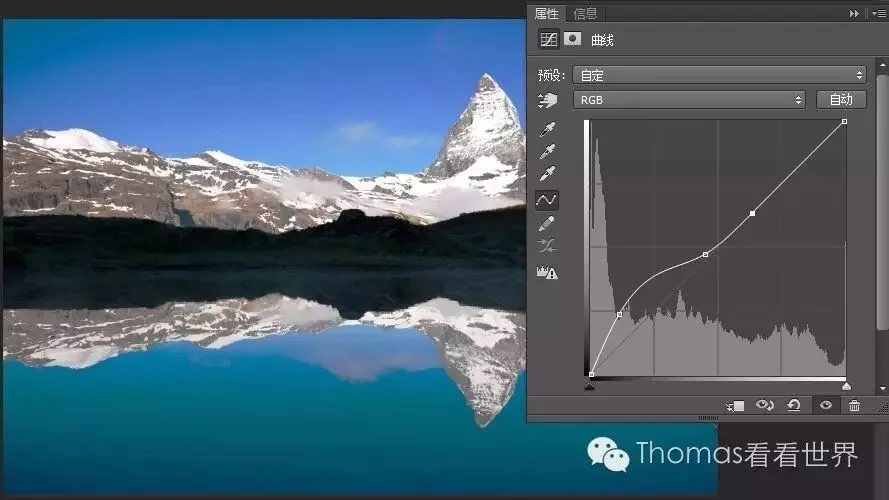
So I create two anchors to pull the highlight and midtone parts back down. Now the curve only raises the shadows' brightness.
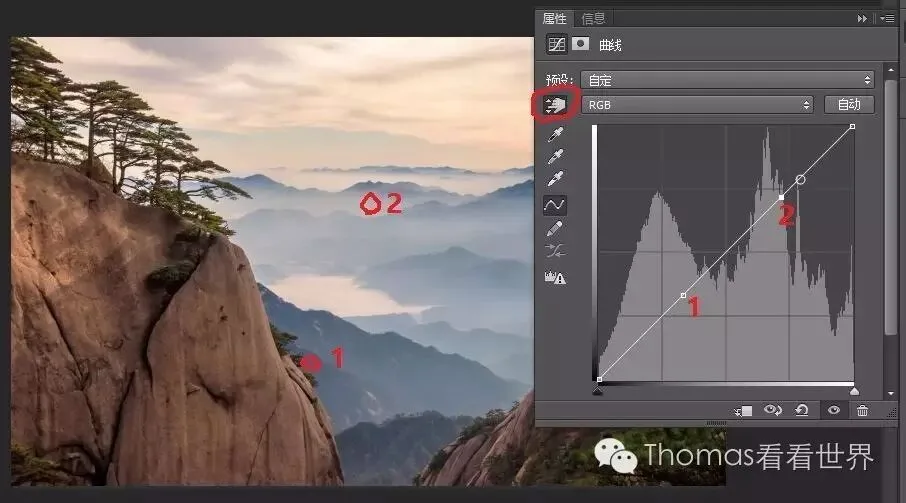
For local curve work there's a very useful tool: the hand-like icon in the circle. Click it, move the mouse into the image, and it becomes an eyedropper — while the curve panel on the right shows in real time where the eyedropper's point maps on the curve.
Click with the eyedropper and that point is recorded as an anchor on the histogram for easy adjustment.
In this image I want to darken the deep-colored mountain while keeping the white mist bright. After selecting the 'hand' icon, I click the mountain at red circle 1 — anchor 1 appears on the curve. Then I click the mist at red circle 2 — anchor 2 appears.
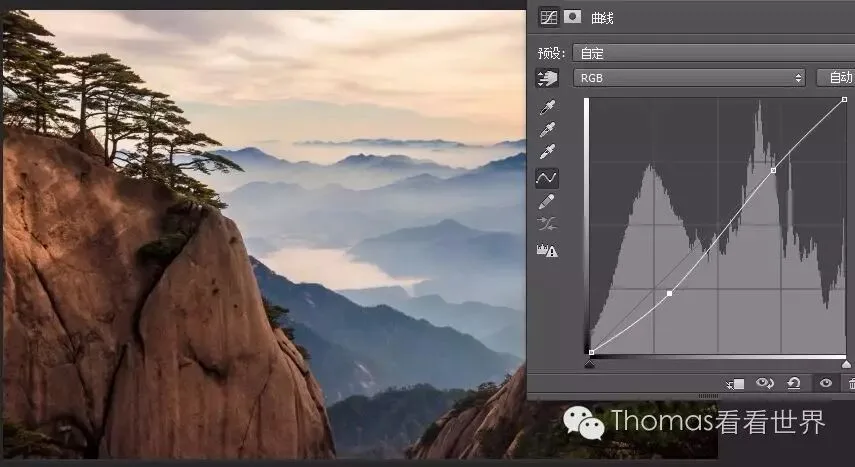
Now I push anchor 1 down while holding anchor 2 — only the shadowed mountain region darkens; the highlight mist is unaffected.
Weekly summary / next week preview
This week covered what the RGB curve is. With three basic shapes — brighten/darken, black-white point, contrast — plus their local application, you can quickly adjust a photo's tonality.
Next Sunday's 'PS Curves (Part 2)' will further discuss combining these basic curves for complex film, bleach and Japanese-style effects.

I'm @Thomas Chu Photo — every Sunday evening I share an original piece of photography know-how.