Photography Tutorial · 2022-11-06
Post-Processing Mini Class: What Are PS Groups For? They Supercharge Layer Masks
In past post-processing tutorials, Thomas often shared his PSD files with you.
Many of you noticed how heavily I use groups in Photoshop.
In today's tutorial, Thomas shares three ways to use PS groups.
Video
▶ Watch the video tutorial on Bilibili
This is the fully illustrated companion to the video above. Anyone who has seen Thomas share his PSD files will have noticed his heavy use of Photoshop layer groups. The video sorts their use into three kinds: organizing layers,focused editing on one part of the frame, and — most importantly — stacking masks. The article walks through the video's full case study, brightening and warming a mountain peak, with keyframe screenshots.
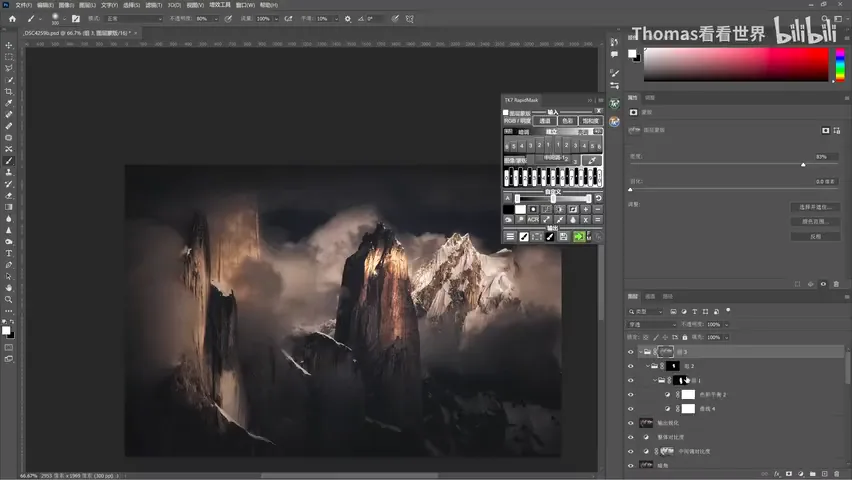
First, the case in full: the video brightens and warms the central peak, and every operation lives inside nested groups. That is the heart of it — a group is not just a folder for tidying layers, but a container for stacking masks and gaining precise control.
01 Grouping: One-Click Show, Hide, Compare
The first use is simply gathering layers for easier viewing and management (at 0:35 in the video). To compare 10 layers' before-and-after: Shift-click to select them in a row, or Ctrl-click individually, then press Ctrl + G to group them (at 0:49 in the video) — or use the group icon at the bottom of the Layers panel. Double-click a group's name to rename it.
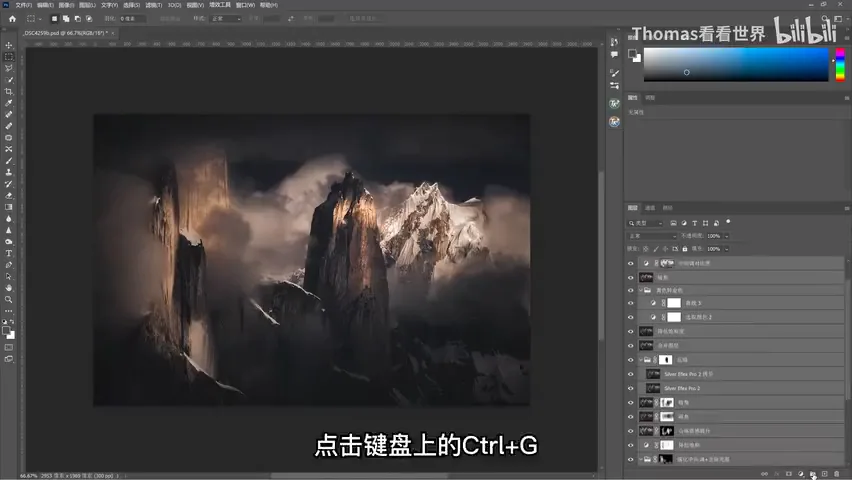
Once grouped, clicking the eye icon hides or shows every layer inside at once (at 1:16 in the video). That makes before-and-after comparisons of any layer, or any number of layers, effortless.
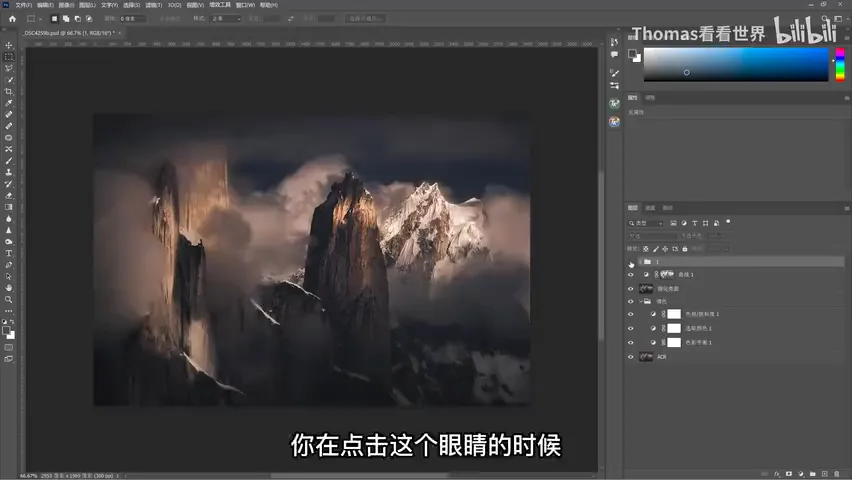
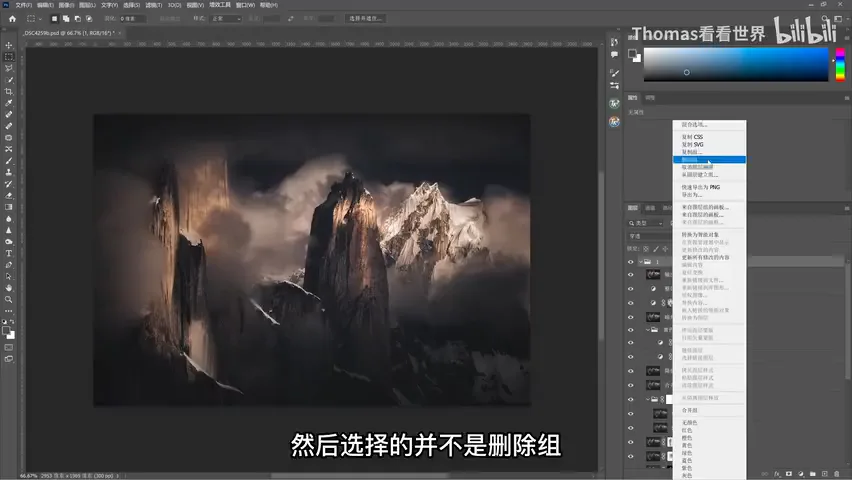
To undo it, right-click the group and choose 'Ungroup Layers' rather than 'Delete Group' — the group disappears while every layer inside survives untouched (at 1:38 in the video).
02 Local Editing: A Complete Peak Case
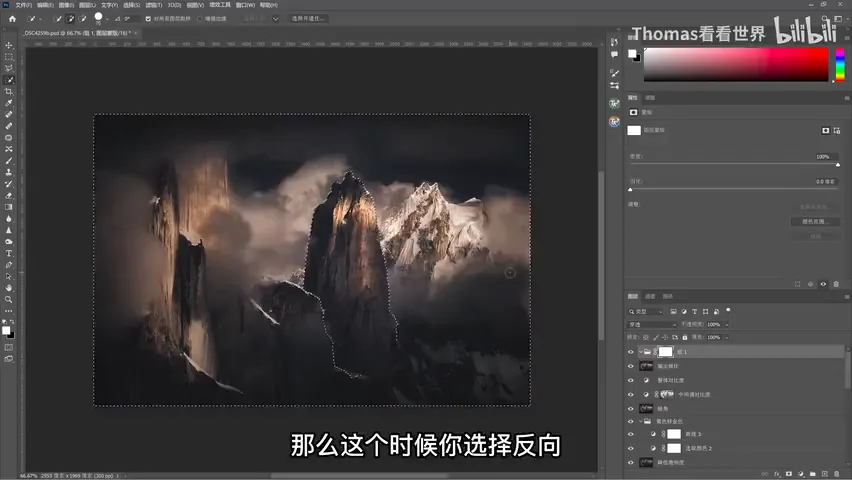
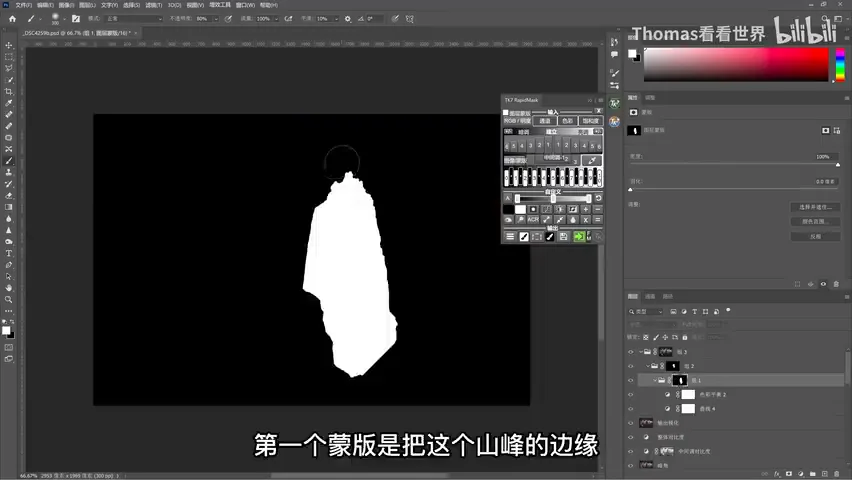
The second use is concentrated editing on one region, one part, one object (at 1:47 in the video). To work on the peak: create a group, add a mask, select the peak, invert the selection, and press Ctrl + Delete to fill with the background color black — now the peak is white on the mask, everything else is black, and every adjustment inside the group affects only the peak (at 2:04 in the video).
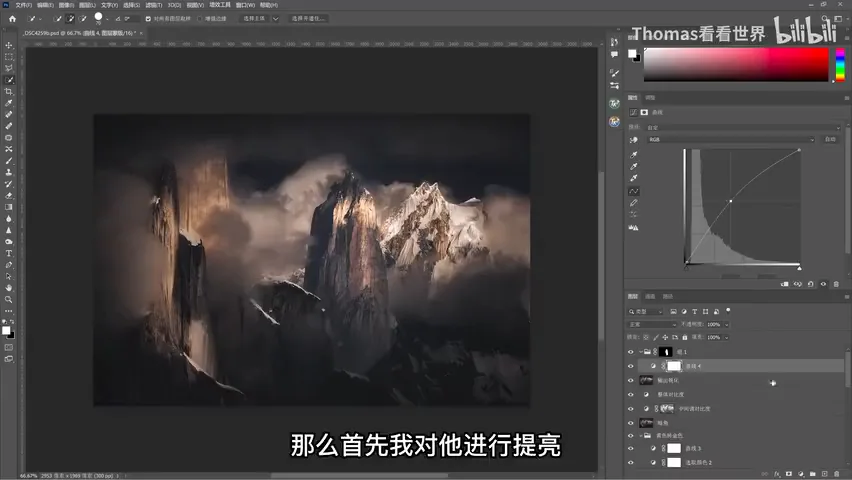
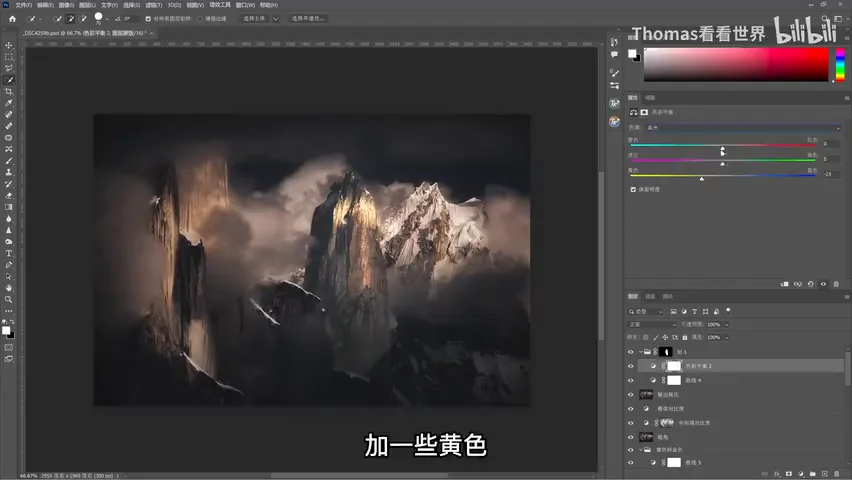
Then add adjustment layers inside: with the group selected, new layers land inside it by default. First a Curves layer to brighten the peak (at 2:54 in the video), then a Color Balance set to Highlights, adding yellow and gold (at 2:57 in the video) — every layer touching that object now lives neatly in one group. Layers can also be dragged in and out freely: outside the group the mask no longer constrains them; drag them back and it does (at 2:35 in the video).
Groups also come with bonus abilities: you can use a group as a clipping mask, and the group's Blending Options apply to all layers inside at once — inner shadow, inner glow and so on, though those lean more toward design work (at 3:16 in the video). Applying effects to a whole group behaves differently, and often better, than setting them layer by layer.
03 Mask Stacking: Groups Within Groups
The third use is the biggest one for landscape photographers: stacking masks (at 3:39 in the video). When you need one more constraint, don't paint over the existing mask — that only makes later edits harder. Instead, create a new group and drag the old group into it, forming a parent-child hierarchy (at 4:18 in the video). A fresh group sits parallel by default; only dragging it inside creates the nesting.
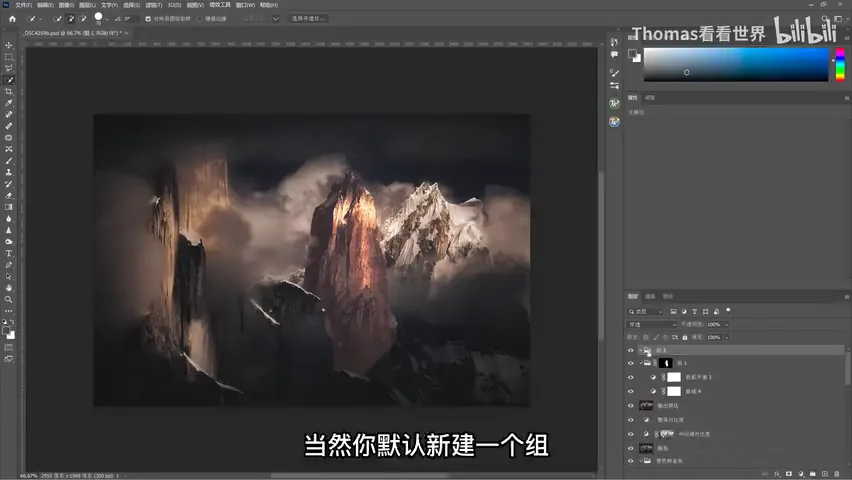
Give group two its own mask: press Ctrl + I to invert the whole mask to black, then set the brush opacity to around 80% and paint white over the regions this step should affect (at 4:56 in the video). Now the Color Balance layer inside is constrained by masks on several levels — its own layer mask first, then group one's mask, then group two's mask — and only after all of them act does the final effect show (at 4:41 in the video).
And one more level: create a group three, drop group two into it, and add a luminosity mask — in the video, the 'Lights 1' mask from the TK Actions plugin (at 5:36 in the video). Now the brightening and warming only act on the highlights, and the glow never spills into the shadows and darks (at 5:14 in the video).
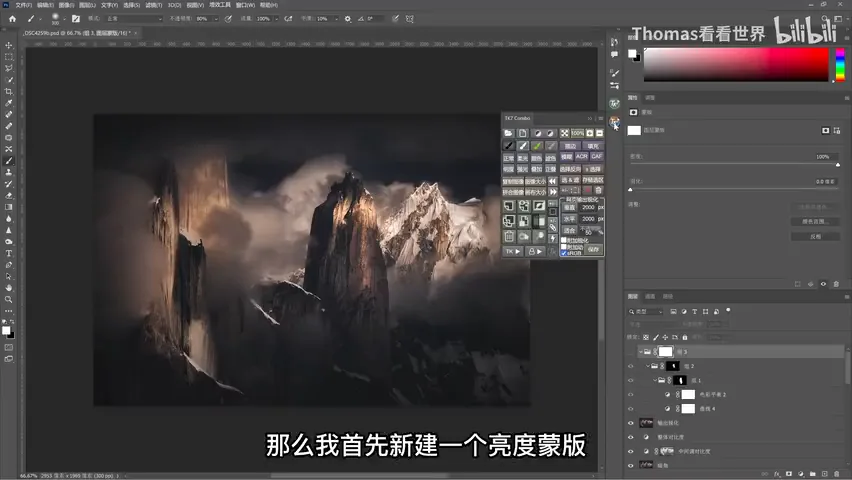
Each mask has its job (at 6:02 in the video): the first traces the peak's edge so no brush escapes it; the second selects the regions this step targets — even if the brush strays past the edge, the first mask holds the line; the third, the luminosity mask, restricts everything to the highlights. Intersected and stacked, they land precisely on 'the bright upper half of the peak' (at 6:49 in the video).
04 Easy Revisions: Mask Density and Non-Destructive Workflow
One mask could do the same job, of course — but revisions become painful (at 7:00 in the video). This is where groups plus masks pay off: want the effect wider? Disable group one and group two's masks and let the brightening and warming act on all the highlights (at 7:16 in the video). Feel the luminosity mask constrains too hard? Double-click the mask thumbnail and lower its Density — at 100% the mask applies fully; lower it and grays appear, softening the effect into a gradual transition (at 7:25 in the video).
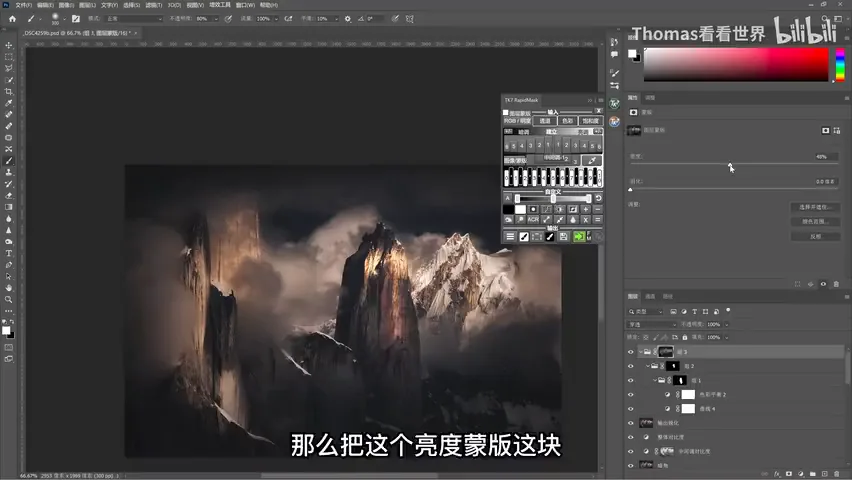
That is the payoff of groups plus masks: every constraint stays adjustable at any time, making the workflow as non-destructive as possible (at 7:43 in the video). A luminosity mask rarely targets the whole frame — it targets a part; pair it with a regional mask, or several more, layer the constraints on top of each other, and every layer in the group answers to all of them at once — precise selections and adjustments that remain easy to revise (at 8:06 in the video).
1. Three uses of groups: organizing (Ctrl + G to group, the eye icon to toggle all at once, right-click Ungroup keeps layers), focused local editing, and mask stacking; 2. Local editing: mask the group, invert the peak selection, Ctrl + Delete fills black, then Curves to brighten and Color Balance on highlights for gold; 3. Mask stacking: nest groups within groups — peak-edge mask × brush-region mask × luminosity mask (TK Actions Lights 1) — pinning the effect to the peak's bright upper half; 4. Easy revisions: toggle any mask off independently, dial the Density down for softer transitions, and let divided masks keep the workflow non-destructive.