Photography Tutorial · 2016-08-21
The Foundation of Photoshop: Layers and Masks
The two most fundamental, core tools in Photoshop are layers and masks. In this week's tutorial, Thomas covers the basics of layers and masks, and the practical use of adjustment layers, element layers, and effect layers in photo post-processing.
Topics: layers, background layer, adjustment layers, opacity, masks
Audience: beginners and above
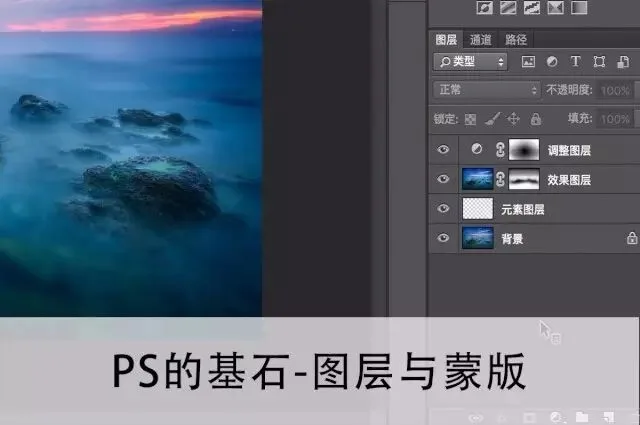
1. Layer and Mask Basics
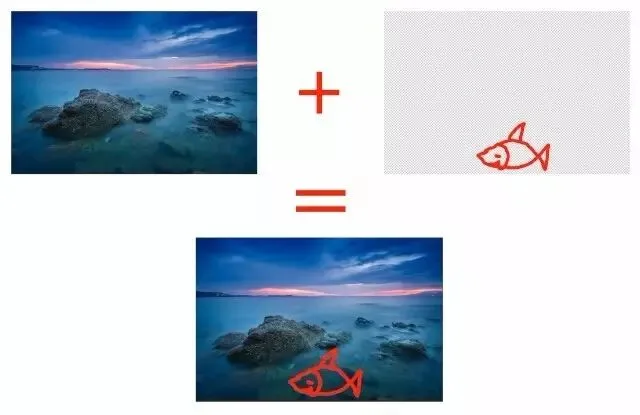
Individual layers are like sheets of transparent plastic. When we stack all the layers together, the transparent parts of an upper layer reveal the image below, while its opaque parts cover the image below.
If the lower layer is a seaside scene and the upper layer is a fish drawn on a transparent background, stacking them produces a fish swimming in the sea. (Layer order matters: with the sea layer on top and the fish below, the fully opaque sea layer would completely cover the fish — no fish in the final image.)
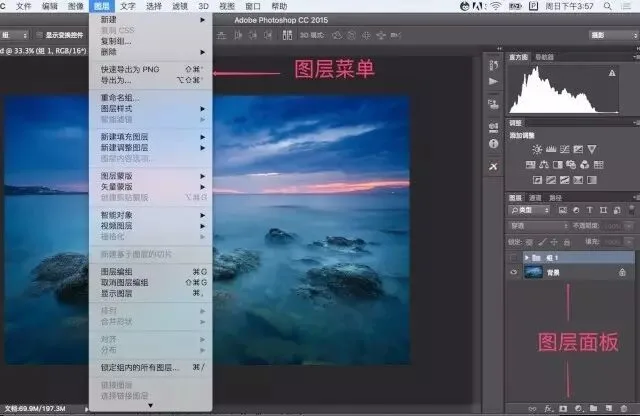
Layers hold the most central position in Photoshop. The menu bar has a dedicated "Layer" menu for creating, editing, grouping, and every other layer operation, and the bottom-right of the workspace has the prominent Layers panel showing the state of every layer in the current file.
Generally, when we open a raw or JPEG file directly in PS, the photo is placed on a locked "Background" layer — pinned to the bottom, unable to be reordered, given an opacity, or changed in blend mode like most layer operations.
We can convert the background layer into a normal layer to lift these restrictions: double-click the background layer in the Layers panel and confirm in the New Layer dialog.
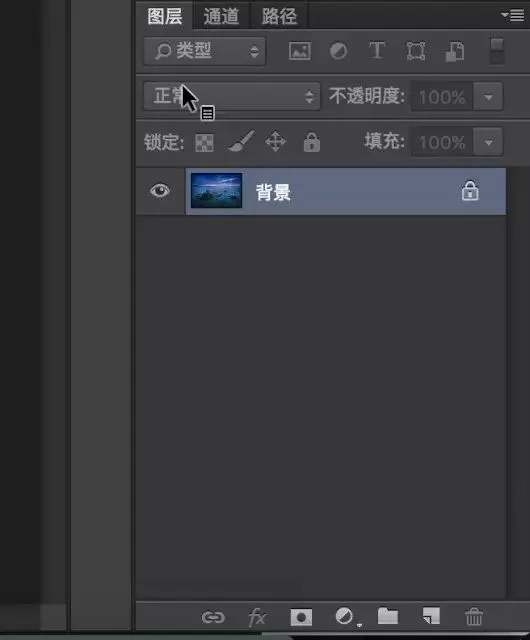
The point of layers is the adjustability that non-destructive editing brings. The final image is a composite of layers, each responsible for part of the content; to adjust one part of the photo, we only need to adjust the corresponding layer.
Say we want to paint a fish over our seascape background: painting directly on the background layer overwrites the background pixels. Removing the fish later — or editing it alone — becomes impossible.
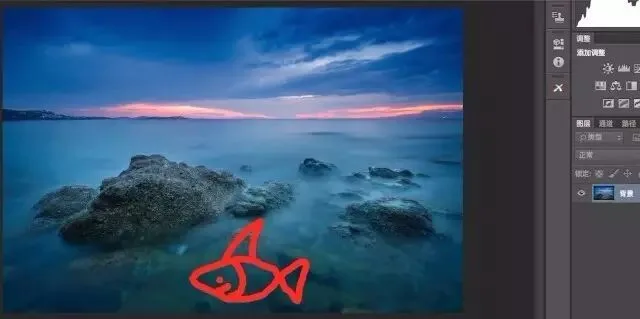
A more modular approach is creating a new blank layer,
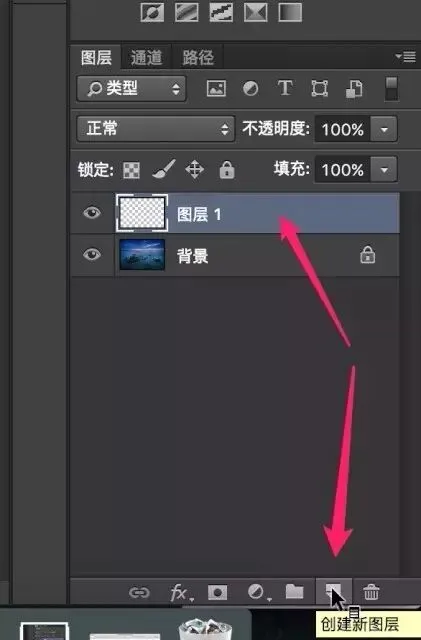
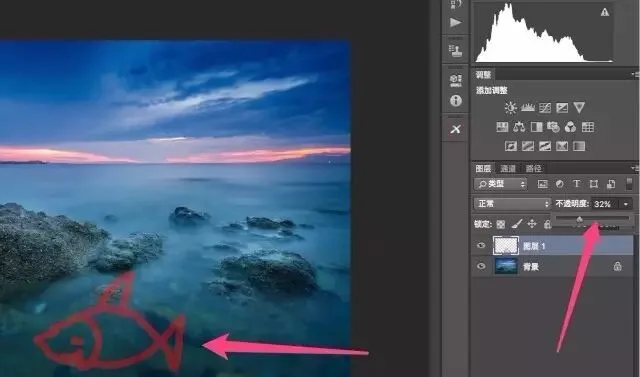
and painting the fish on the new layer. Since the fish lives on its own layer, the original background pixels are intact, and we can adjust the two layers independently.
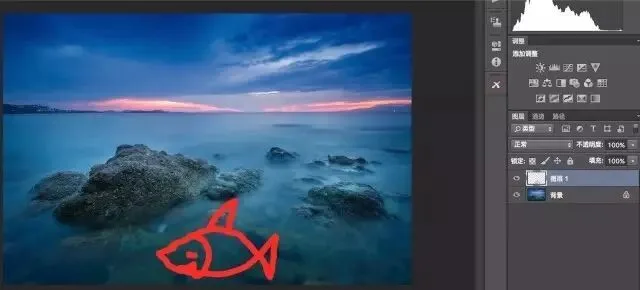
For example, I can select the fish layer in the Layers panel and set its opacity to 32% — the fish becomes semi-transparent, with the seascape showing through its red outline.
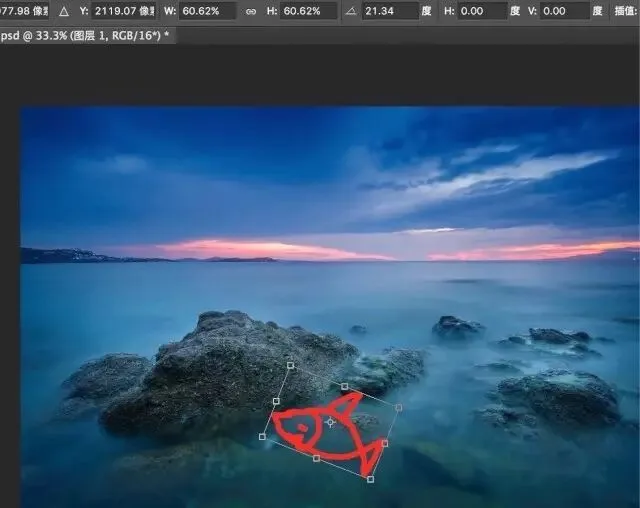
I can also press Ctrl+T to stretch, scale, or rotate the fish layer alone, while the background below remains completely unaffected.
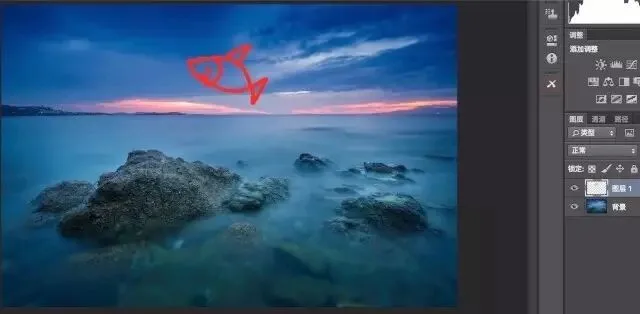
I can even use the Move tool to move the fish into the sky — a "flying fish"...
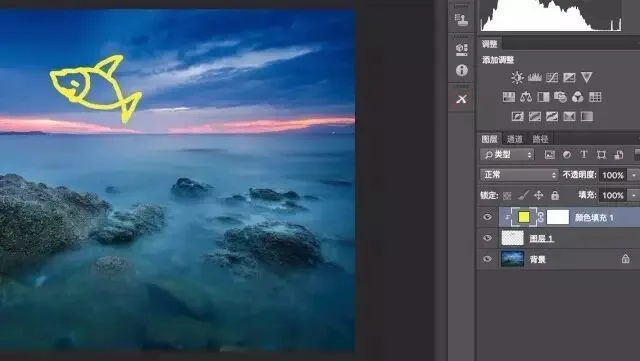
or turn the red fish yellow... All these operations are possible only because the fish and the seascape live on separate, independent layers.
Click the Layer Mask icon at the bottom of the Layers panel to add a mask to a layer. As the name implies, a mask covers its layer: the white parts of the mask make the corresponding areas of the layer opaque, showing the layer's image; the black parts make the corresponding areas fully transparent, revealing the layers below; grey areas render the layer semi-transparent to varying degrees, blending it with what's below.
To make a layer transparent or semi-transparent, you could of course just erase on it — but the eraser is destructive, permanently deleting pixels. A mask is separate from the layer: editing the mask never harms the layer, you can repaint the mask to change which parts are visible, and you can even delete the mask to restore the layer to full visibility.
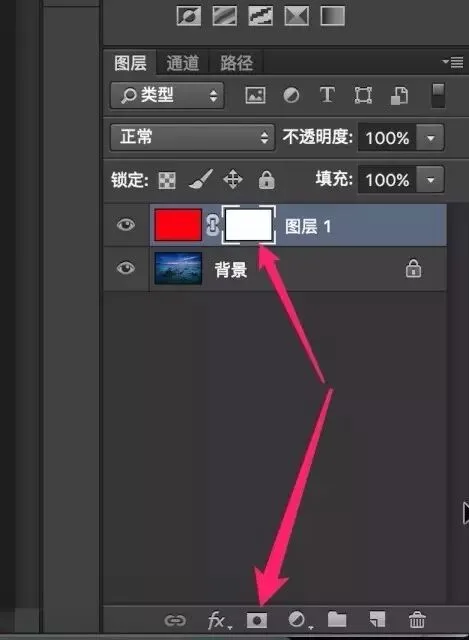
Hold Alt and click the mask to switch to its preview. A new mask is all white by default — the current layer fully opaque.
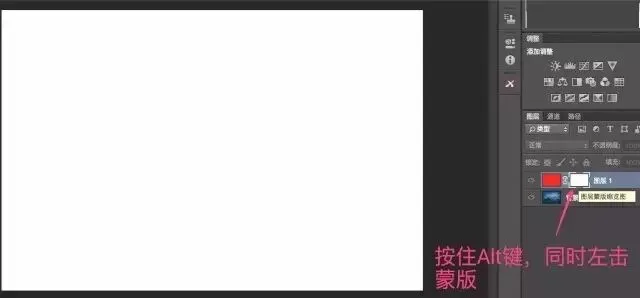
To edit the mask, make sure it's active (click it once), otherwise you'll edit the layer instead of the mask. Here I'll drag a black-to-white gradient.
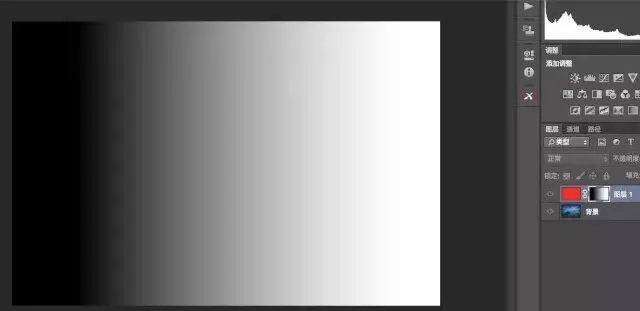
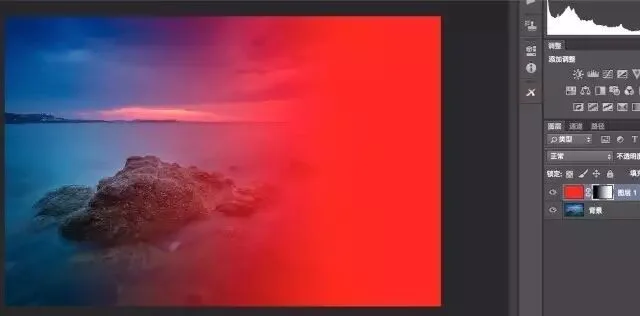
Hold Alt and click the mask again to return to the layer preview. Where the mask is black, the solid red layer is fully transparent and the landscape shows through; where the mask is white on the right, the red layer is fully opaque; the grey zone in between is semi-transparent.
Those are the basics of layers and masks. In photo post-processing, we mainly work with three layer types — element layers, effect layers, and adjustment layers — combined with masks.
2. Element Layers
An element layer adds new elements — flowers, birds, people, skies — on top of the original image, widely used in creative and expressive work.
Here, for instance, I have a bird asset (a PNG with a transparent background).
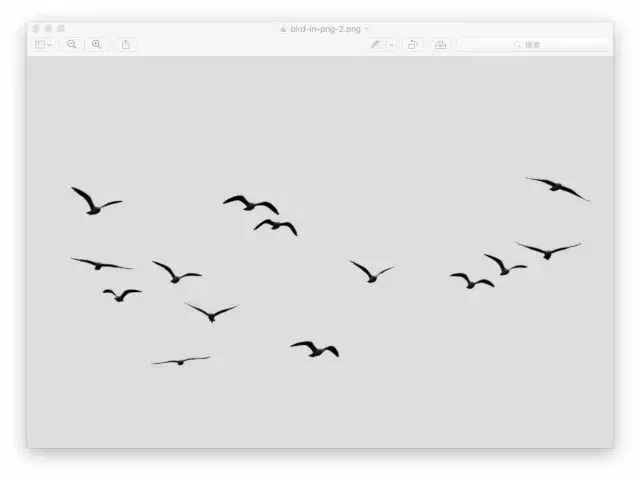
I simply drag the image into PS, and the bird appears as a new layer over the photo. Transforming and moving the bird layer on its own, then adding a touch of cool color (lowering the temp in the Camera Raw filter), blends the bird nicely into the background.
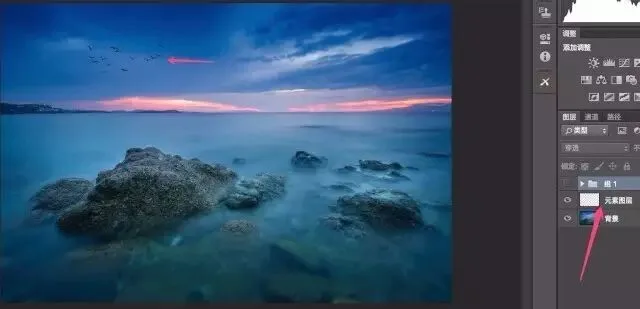
If I feel there are too many birds, I can add a mask and paint with a 100%-opacity black brush to wipe away the unwanted ones.
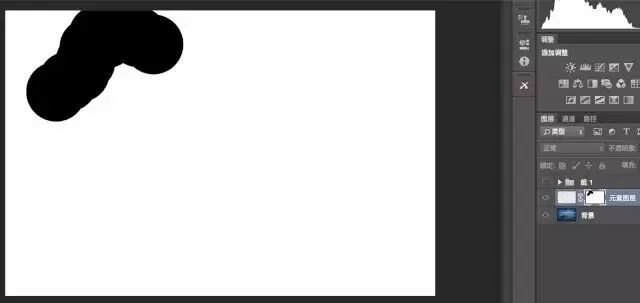
The mask at work: only one bird remains.
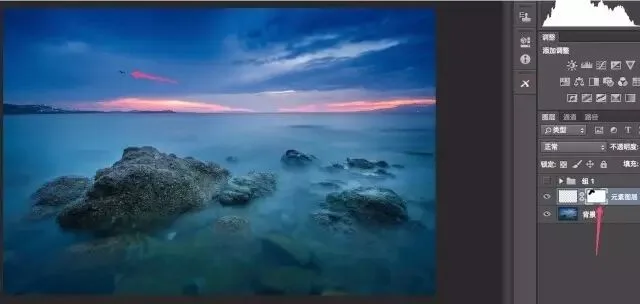
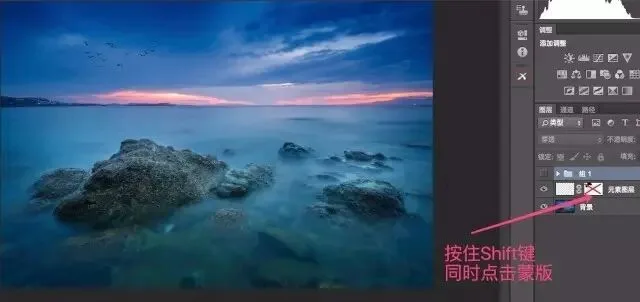
Hold Shift and click the mask to disable it — all the birds come back. (Shift-click again to re-enable the mask.)
3. Effect Layers
An effect layer applies filters on top of the base layer — blur, sharpen, clarity, and other PS filters, or Detail Extractor, Tonal Contrast, and the like in Color Efex Pro 4 — to change the photo's look.
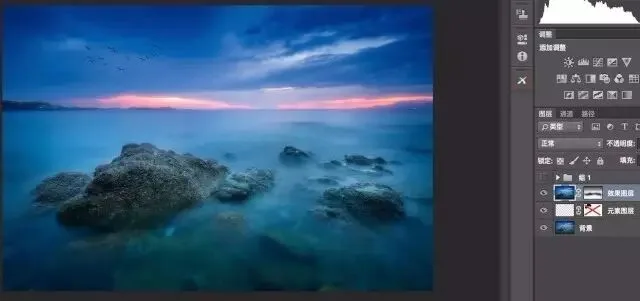
Take this seascape: I want silkier water. Building on the previous steps, I press Ctrl+Alt+Shift+E to stamp visible layers (creating a new layer containing the merged look of all visible layers). On this new layer I apply Color Efex Pro 4's classic Glamour Glow filter plus PS's Gaussian Blur — and the whole photo turns dreamy.
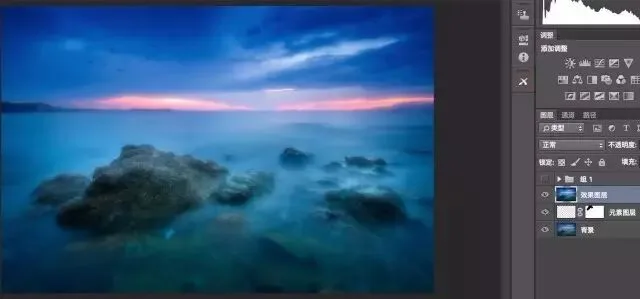
But I want the rocks and the distant sky to stay sharp as before.
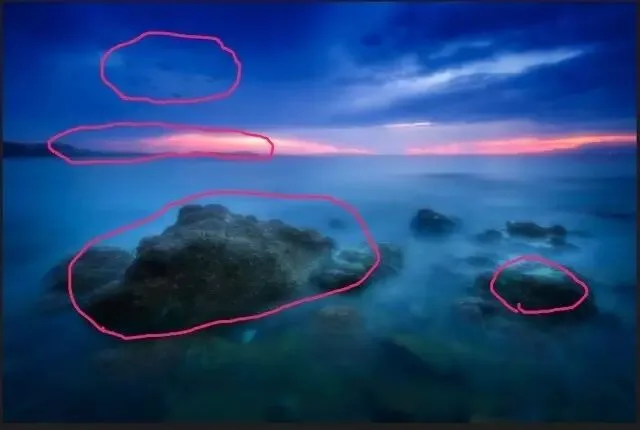
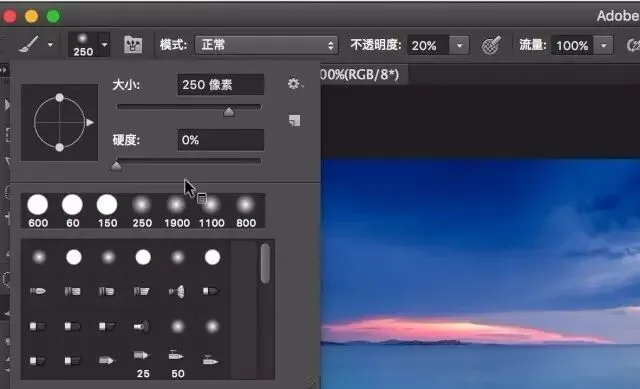
So I add a mask and take a black brush, adjusting its size, hardness, and opacity.
(The key to natural-looking transitions is brushing slowly and repeatedly with low hardness and low opacity — never a single pass at 100% opacity.)
Paint on the mask to get the following result.
Now the rocks under the mask's black area are fully sharp again, while the sky under the grey area is slightly hazy without being as blurred as the water.
4. Adjustment Layers
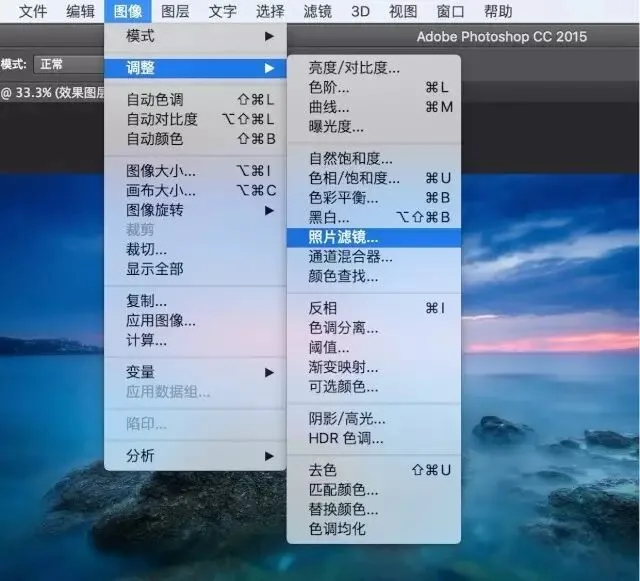
The Image > Adjustments menu offers Levels, Curves, Saturation, and many other options for adjusting tone and color. But those actions are equally destructive and irreversible — so we use adjustment layers instead.
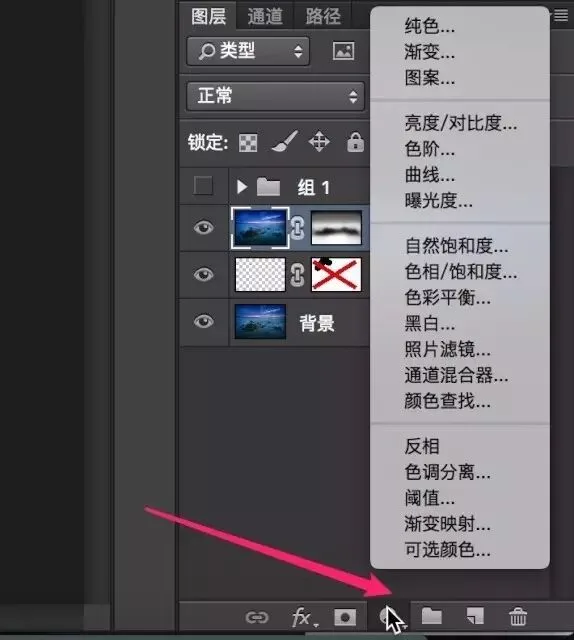
Click the fourth icon at the bottom of the Layers panel to open the adjustment layer panel. New Vibrance, Exposure, and other adjustments all live as separate adjustment layers. If we're unhappy with the result later, we simply re-tune those layers. More importantly, masks can confine an adjustment layer's effect to a chosen area.
Here I create a Curves layer to darken the photo,
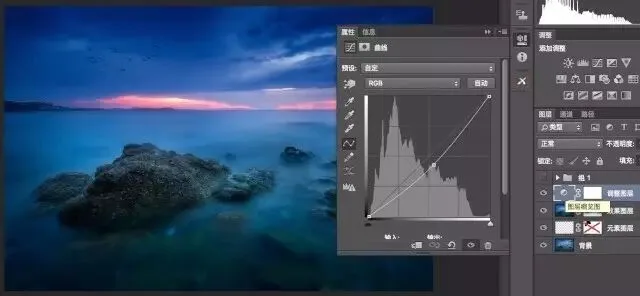
then build a mask so the darkening mainly affects the edges.
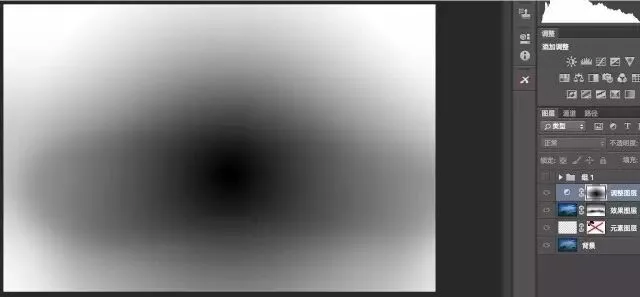
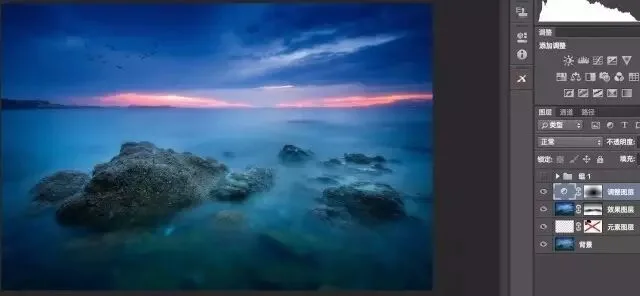
Now the rock in the center, left undarkened, stands out more prominently — and the photo's light-dark contrast becomes more compelling.
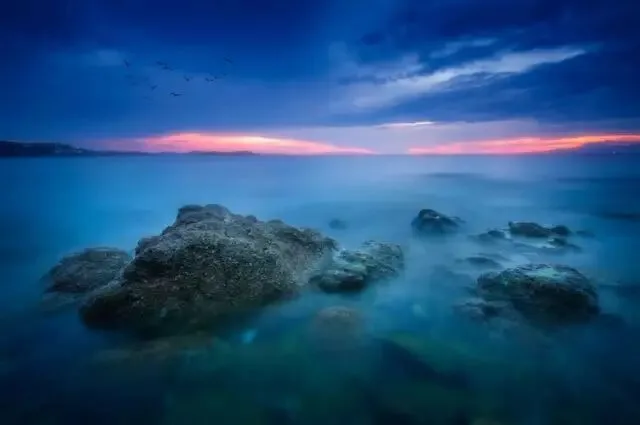
So the original seascape — with birds added via an element layer, silkier water via an effect layer, and edges darkened by curves on an adjustment layer — becomes far more evocative.
This Week's Summary
The core value of layers and masks is local, modular editing of a photo, together with the undoability and re-editability they bring.
Thomas divides the layers used in post-processing into three types — element layers, effect layers, and adjustment layers — corresponding to adding elements, adding effects, and adjusting brightness and color.
A mask acts on a layer, changing the opacity of its various parts.
Of course, as the core of PS, layers and masks have many more features and finer points — those will have to wait for future tutorials.