Photography Tutorial · 2017-08-06
One Move for Exposure Adjustments: The PS Levels Tool
Is there one tool that handles contrast, black point, white point, and overall brightness in a single move?
Yes — the convenient and capable PS Levels tool. In today's tutorial, Thomas teaches you the essentials of Levels in just a few minutes.
1
Where Is the Levels Tool?
Like Curves, Selective Color, and other adjustments, Levels can be opened in two ways:
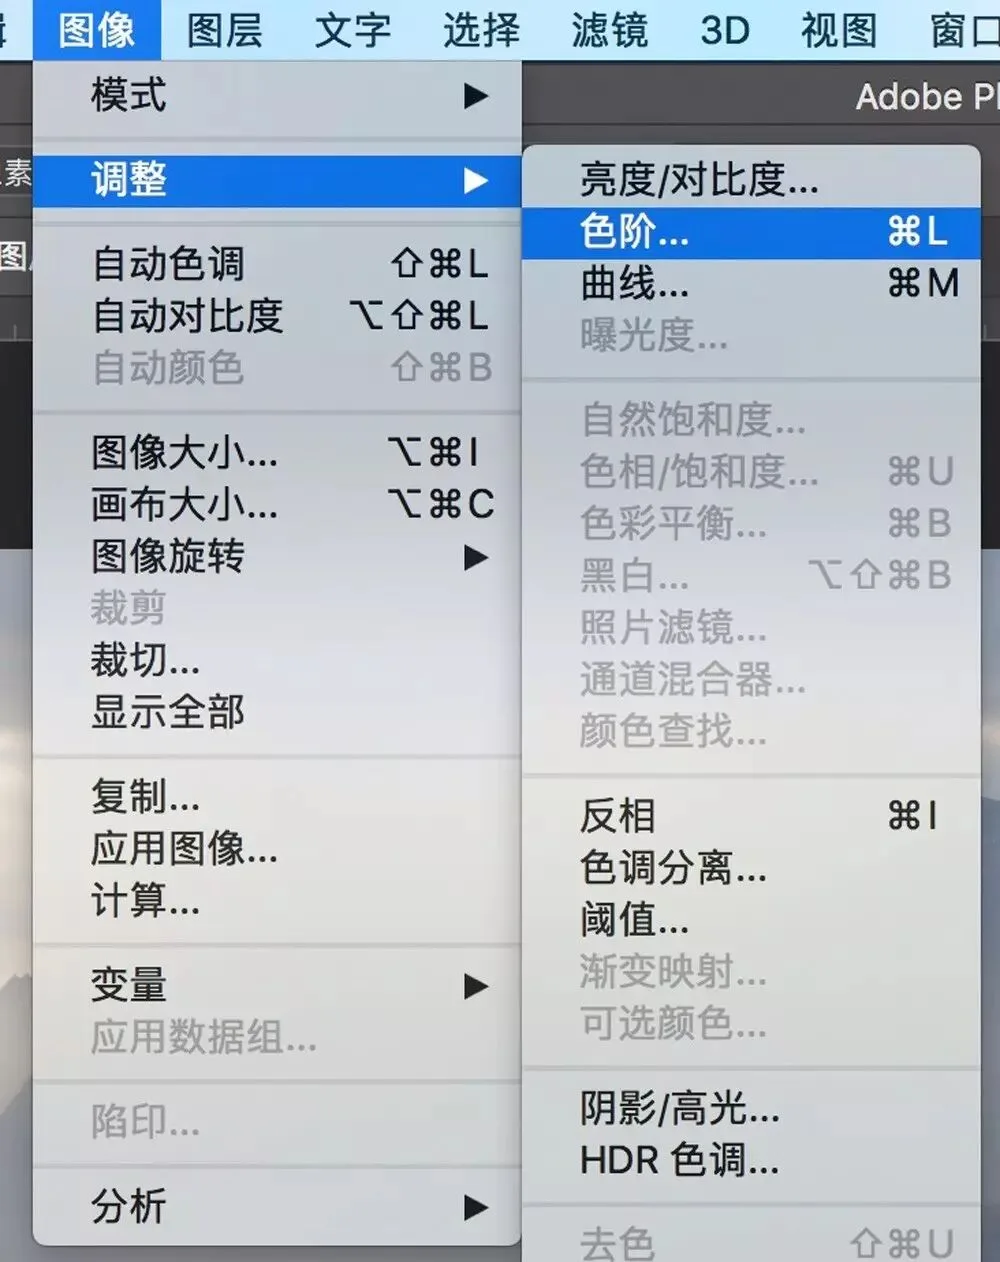
The first is selecting the layer and opening Image > Adjustments > Levels. Adjustments made this way overwrite the original layer directly — they can't be modified or undone later. Not recommended.
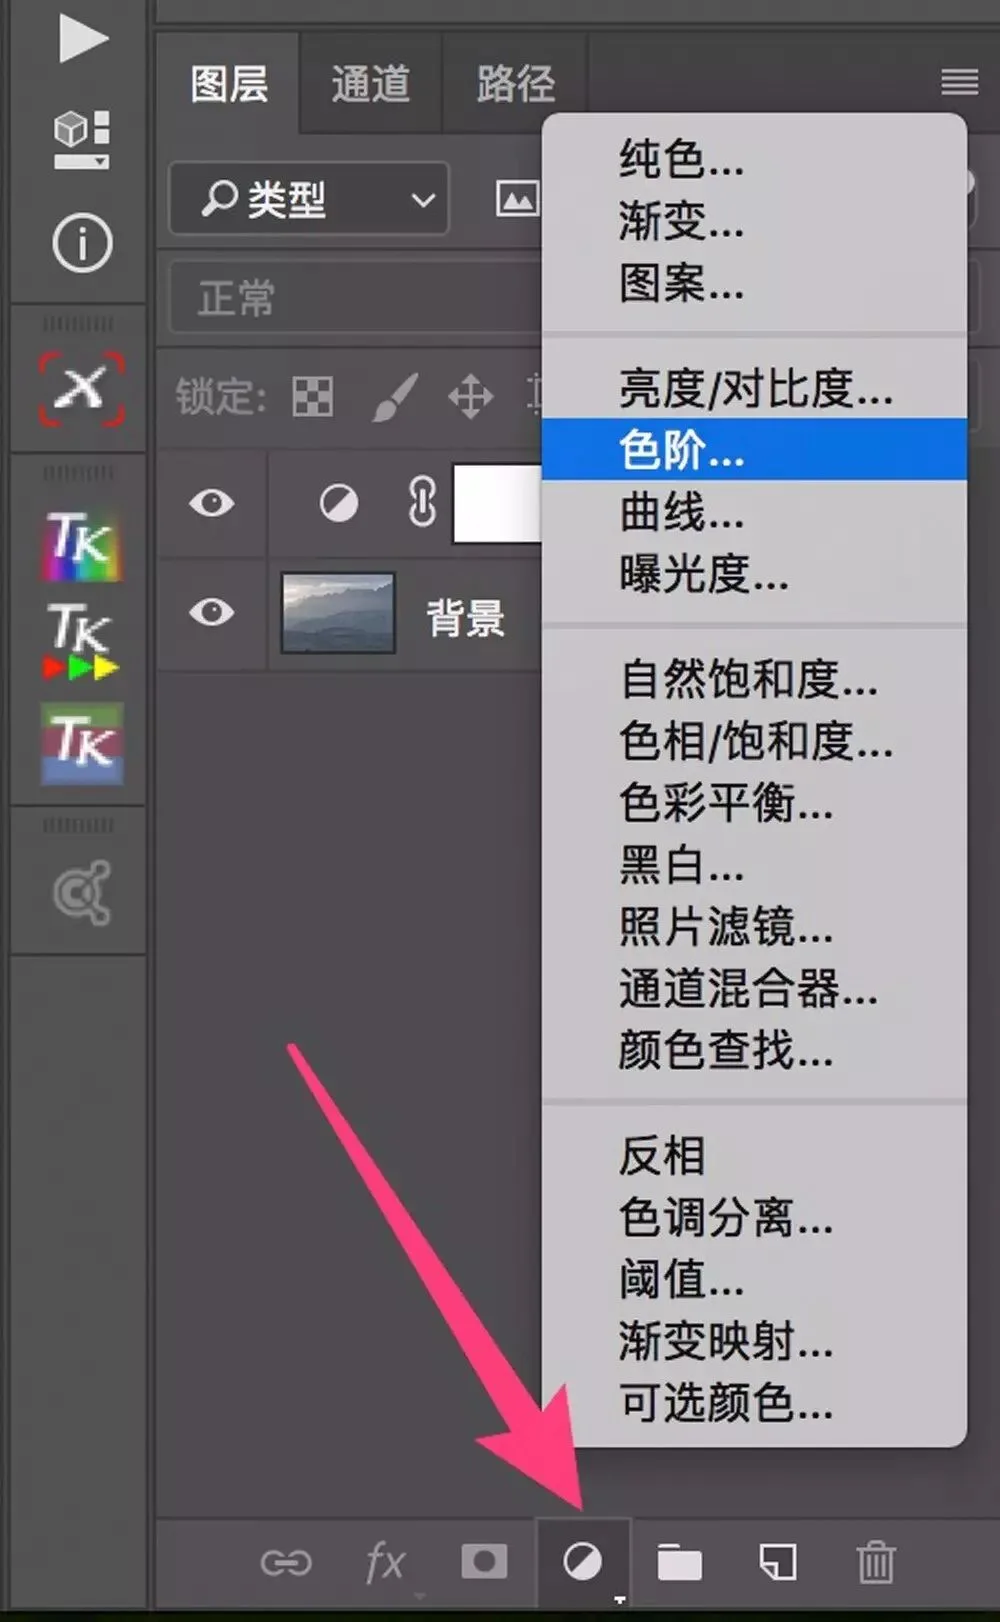
The better approach is an adjustment layer.
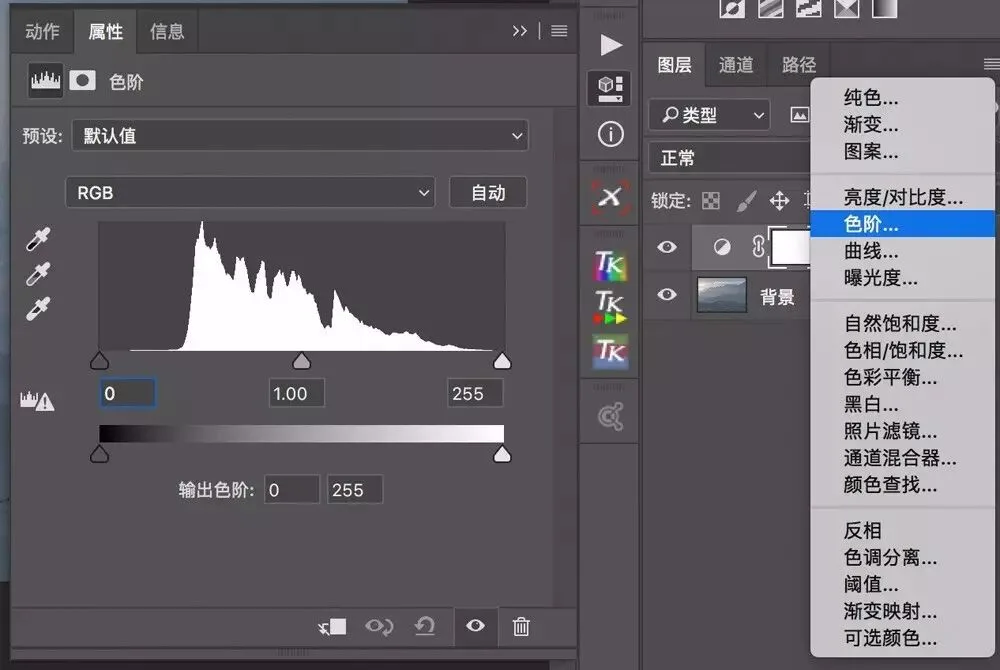
The fourth icon at the bottom of the Layers panel holds all the adjustment layer options. Click it and choose "Levels" to create a Levels adjustment layer.
An adjustment layer exists separately above the original layer without overwriting its data — you can modify or delete the Levels effect at any time. Much more usable.
2
The Five Key Sliders in Levels
The presets, channels, eyedroppers, and other features in Levels are rarely needed. Most of the time, we only need the five sliders framed in red below.
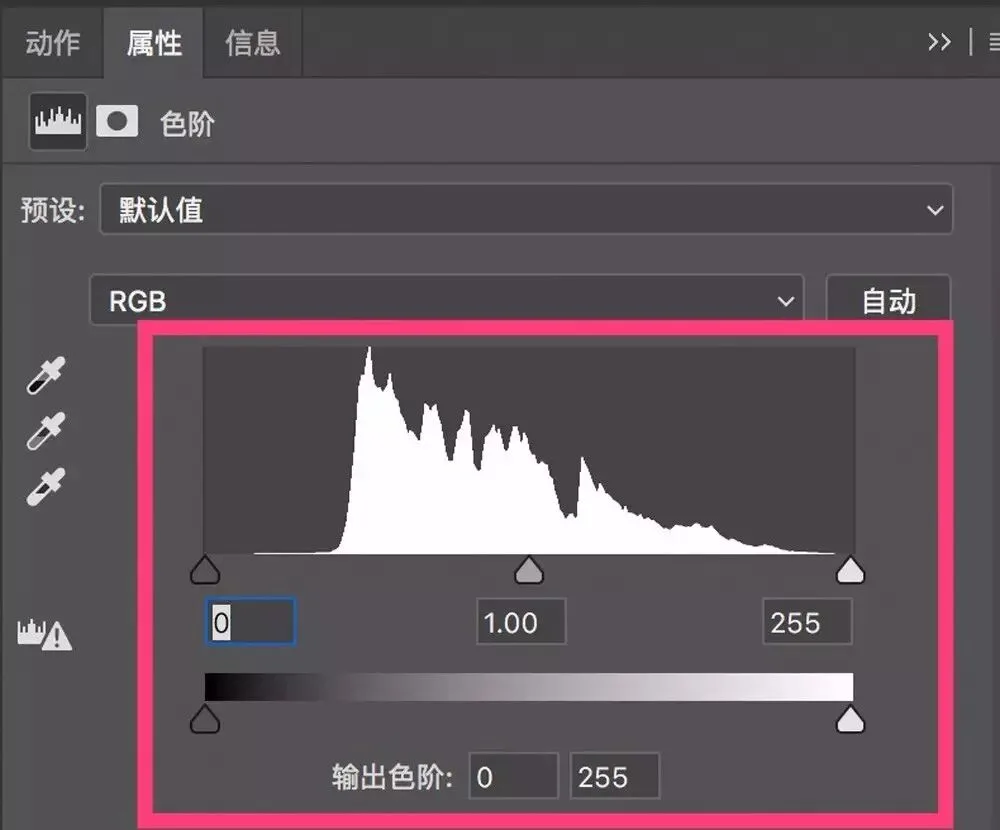
The most striking part of the Levels panel is the huge histogram.
The histogram shows the distribution of all the image's pixels across brightness values 0 to 255 before adjustment. (If histograms are unfamiliar, read "If You Don't Understand Histograms, Can You Even Talk Digital Photography?")
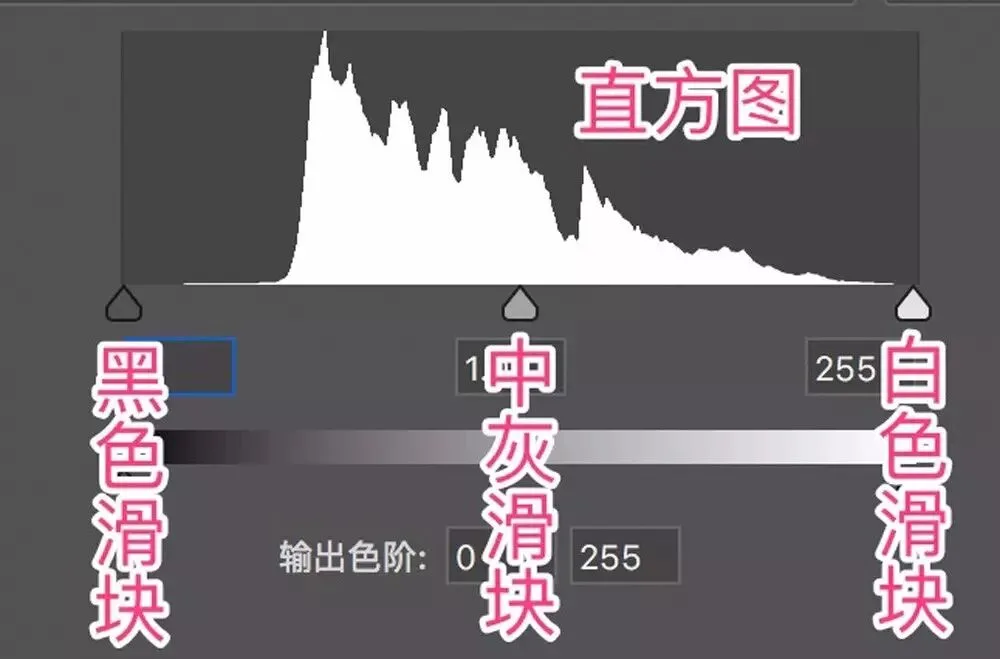
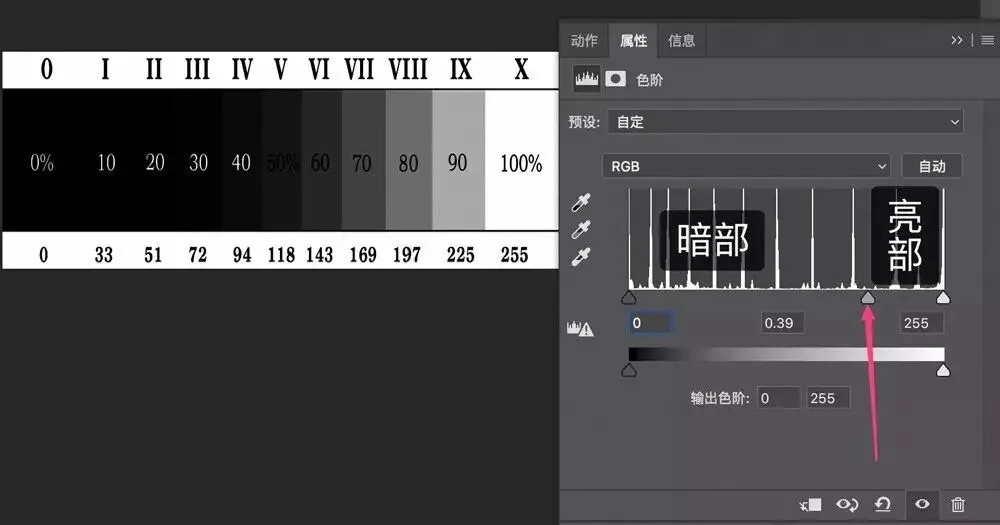
Below the histogram sit three sliders — black, white, and mid-grey — adjusting the photo's darkest parts, brightest parts, and overall brightness respectively.
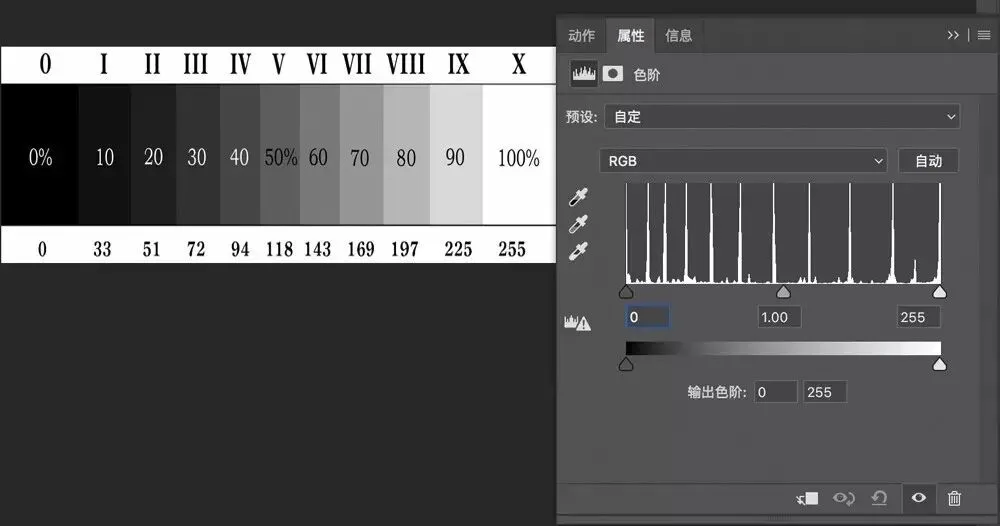
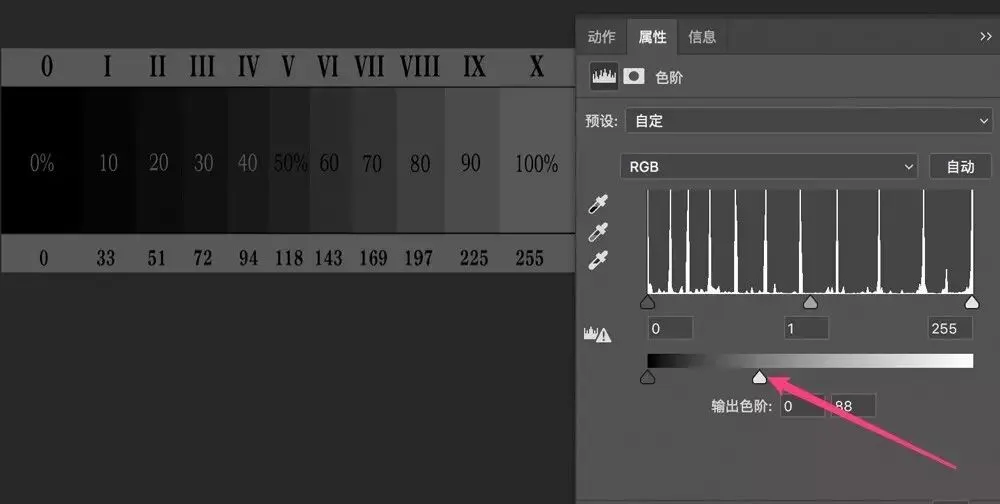
I'll use the grayscale chart below to demonstrate what each Levels slider does.
The chart illustrates Adams's Zone System: from left to right, eleven zones run from pure black through greys of increasing brightness to pure white.
As I adjust the Levels tool, you can visually watch how each brightness zone of the chart changes.
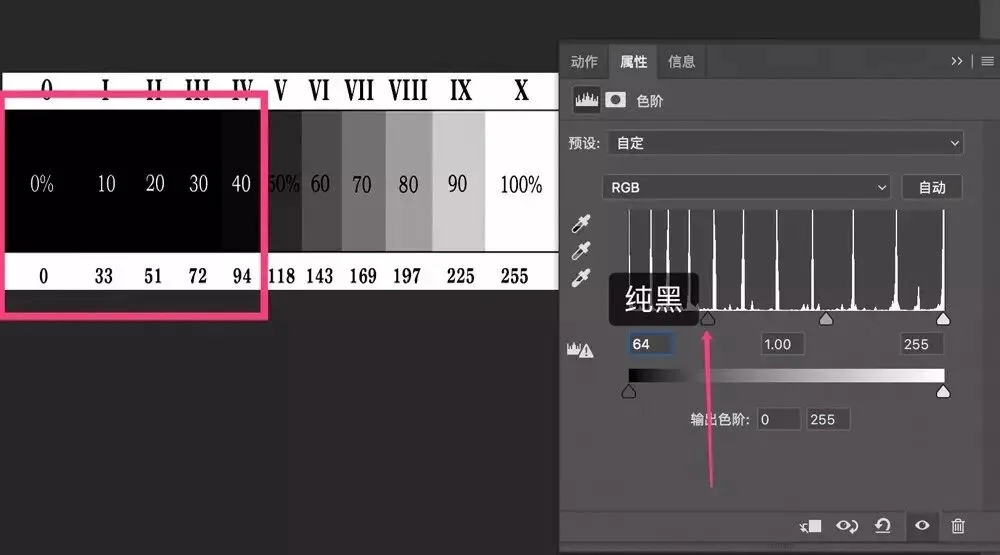
First, the black slider. It defines the photo's black point — how dark the darkest part of the image gets.
Leaving Output Levels untouched, moving the black slider turns every brightness zone to its left pure black, while other zones darken to varying degrees.
Below, I moved the black slider right to a value of 64 — meaning every area of the original darker than 64 is now pure black.
In the chart, zones I, II, III, and IV — formerly distinct dark greys — have merged into one pitch-black mass. The other zones have darkened somewhat too.
Similarly, the white slider defines the photo's white point — the brightest part of the image.
Leaving Output Levels untouched, moving the white slider turns every zone to its right pure white at 255, while other zones brighten proportionally.
Below, I moved the white slider left to 165 — every area of the original brighter than 165 is now pure white at 255.
In the chart, zones VIII, IX, and X — formerly distinct light greys — are now one expanse of pure white.
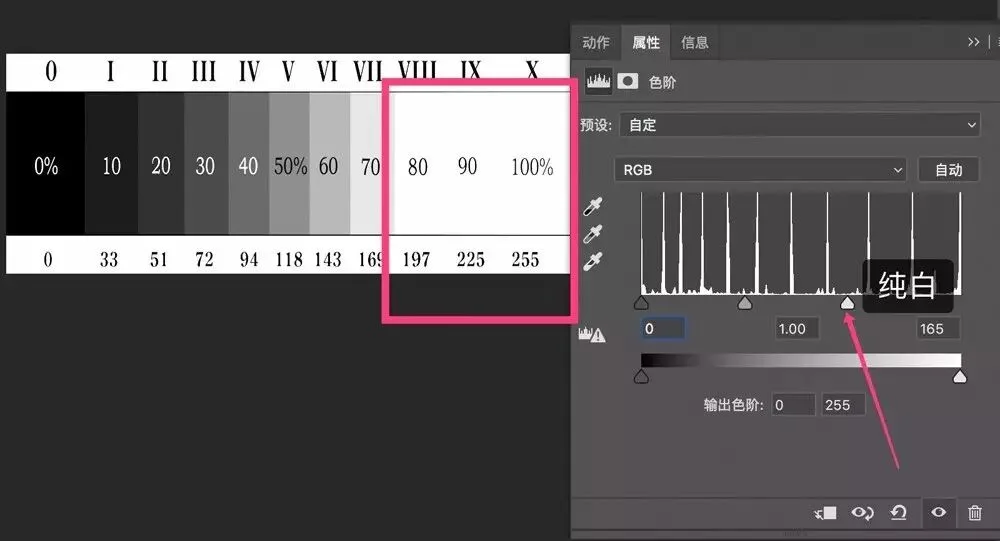
Moving both the black and white sliders toward the middle greatly increases the pure-black and pure-white areas, boosting the photo's contrast.
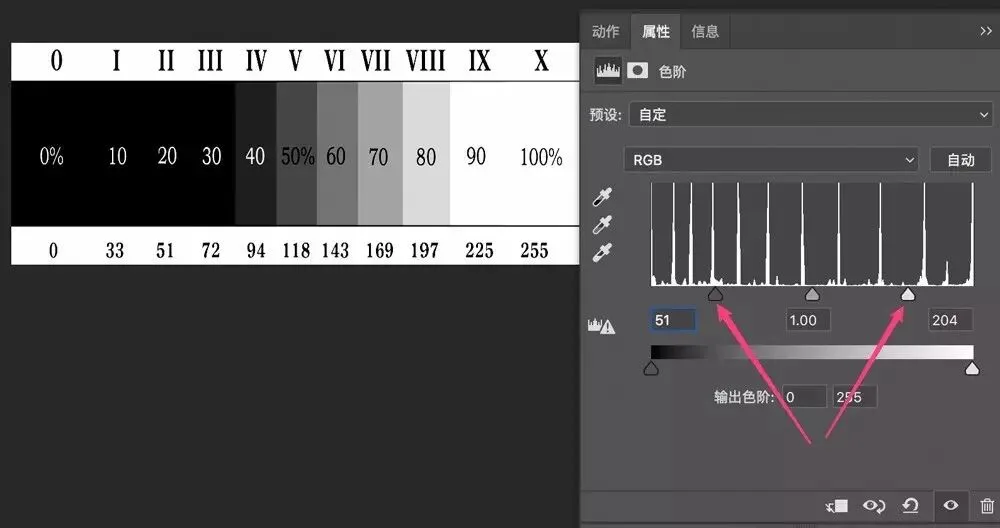
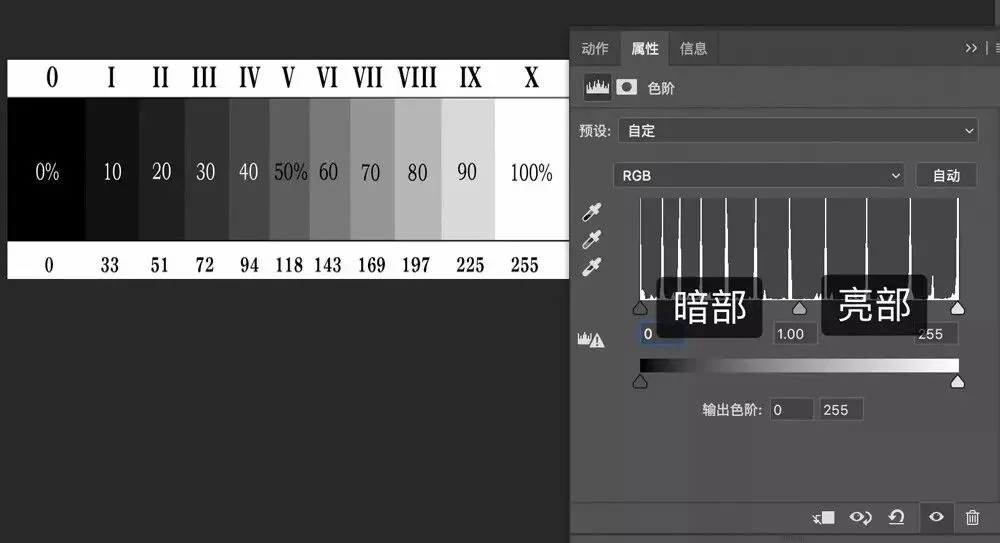
The slider in the middle of the histogram is the mid-grey slider, corresponding to pixels at exactly 128 — middle grey.
Between the mid-grey slider and the black slider lies the photo's shadow range (brightness above 0, below 128).
Between the mid-grey slider and the white slider lies the photo's highlight range.
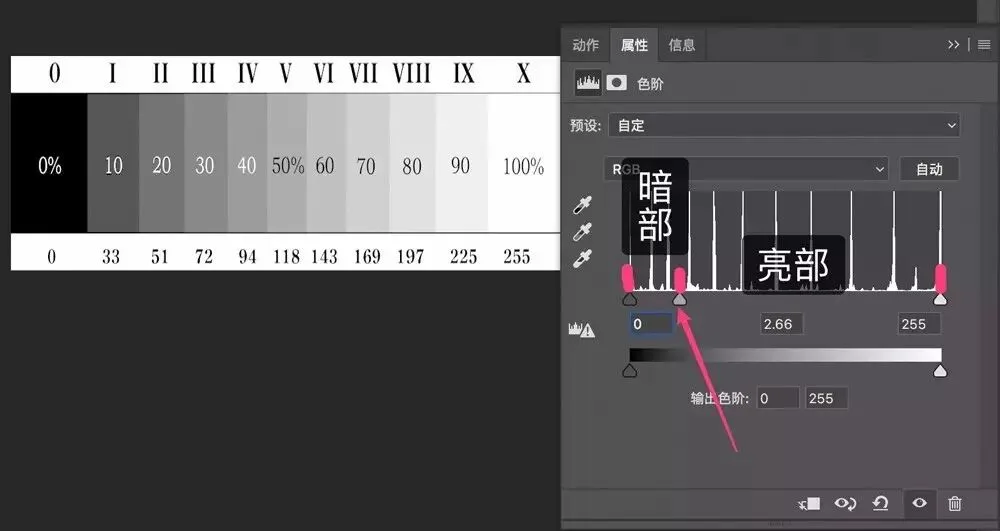
Move the mid-grey slider left, and the highlight range grows while the shadow range shrinks.
Reflected in the photo: the whole image becomes brighter.
Move the mid-grey slider right, and the shadow range expands while highlights shrink — the photo turns darker overall.
By moving the mid-grey slider left or right, we change the photo's overall brightness.
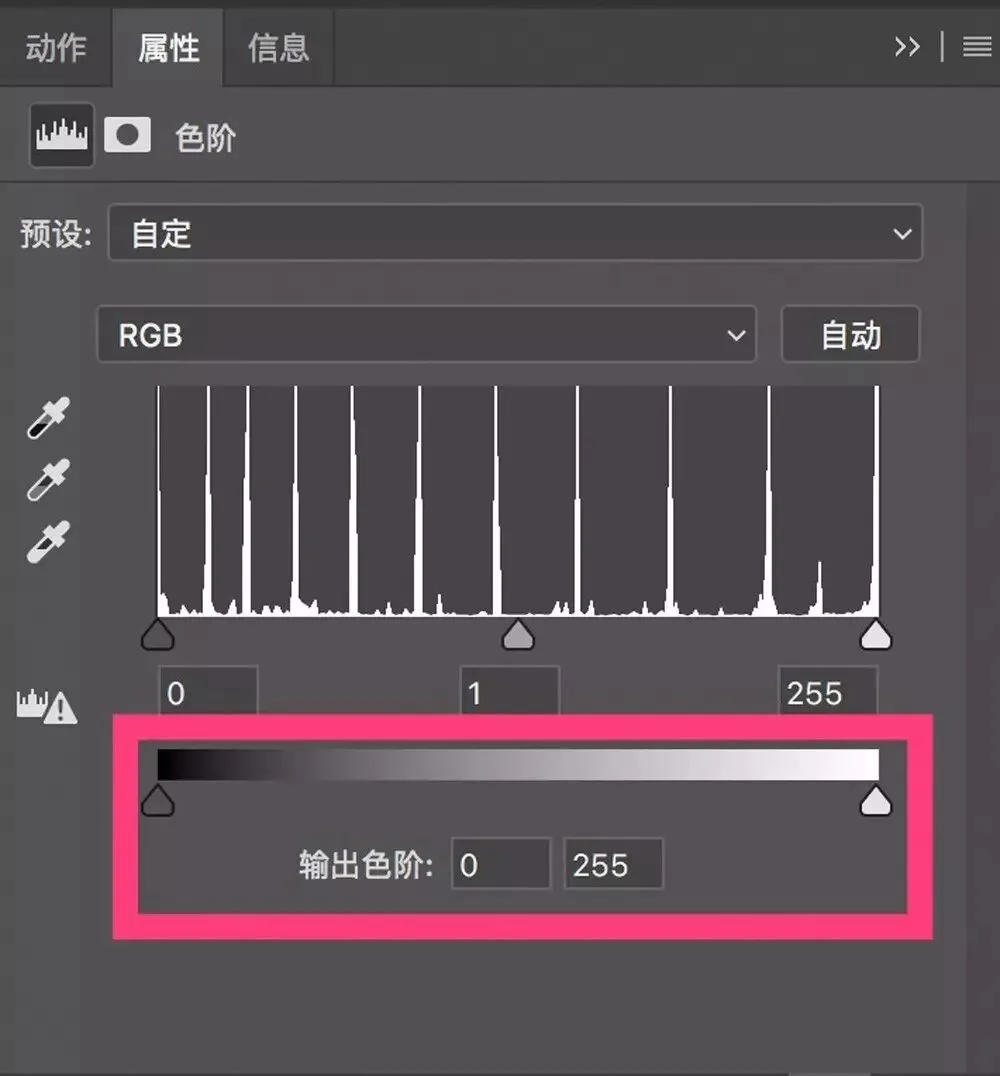
Below the histogram there's another tool: "Output Levels."
As the name suggests, Output Levels controls the brightness range of the adjusted image. The left slider sets the floor — the darkest possible output — and the right slider sets the ceiling.
The default Output Levels range is 0 to 255: after adjustment, the darkest part may be 0 (pure black) and the brightest 255 (pure white).
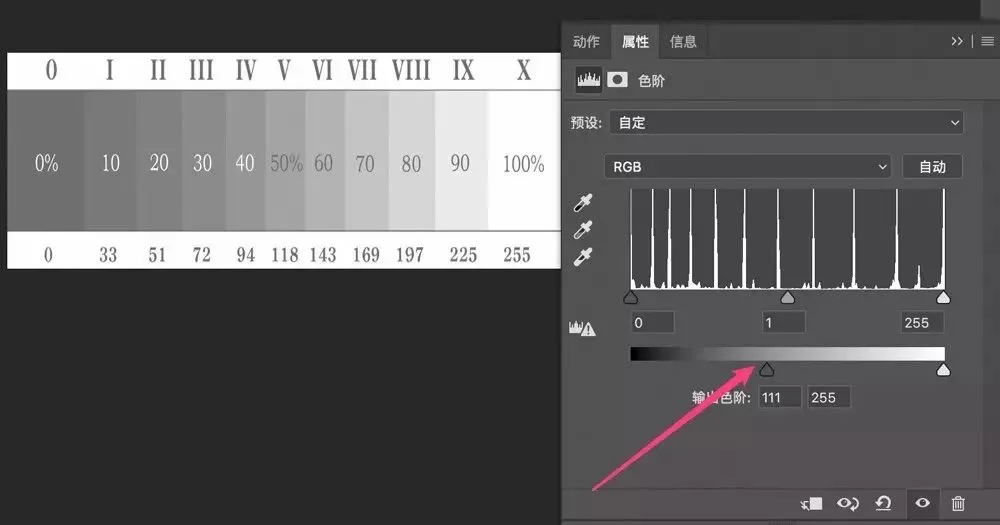
If I move the floor slider right, the output floor rises from 0 to 111 — meaning the darkest part of my adjusted photo can be no darker than 111.
Looking at the chart: after raising the output floor, the pure-black and dark-grey zones all brighten, because the darkest anything can be is a grey of 111.
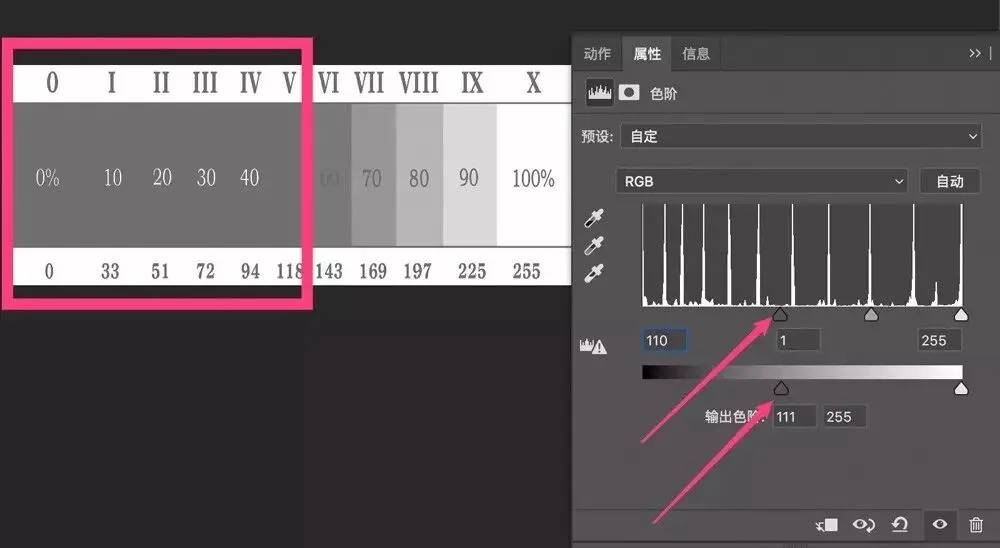
What happens if we move the black slider right at the same time as the output floor?
Moving only the black slider right creates more pure black — zones I, II, III, and IV all collapse from dark grey into one black mass.
But now the output floor has also moved, so the darkest point in the image must still be 111. As the photo's new darkest zones, I, II, III, and IV can only reach a grey of 111.
The Output Levels ceiling slider controls how bright the brightest part of the adjusted photo may be.
Move the ceiling left to 88, and the photo's pure whites and light greys all wash out — nothing in the photo can exceed a brightness of 88.
3
Levels in Practice
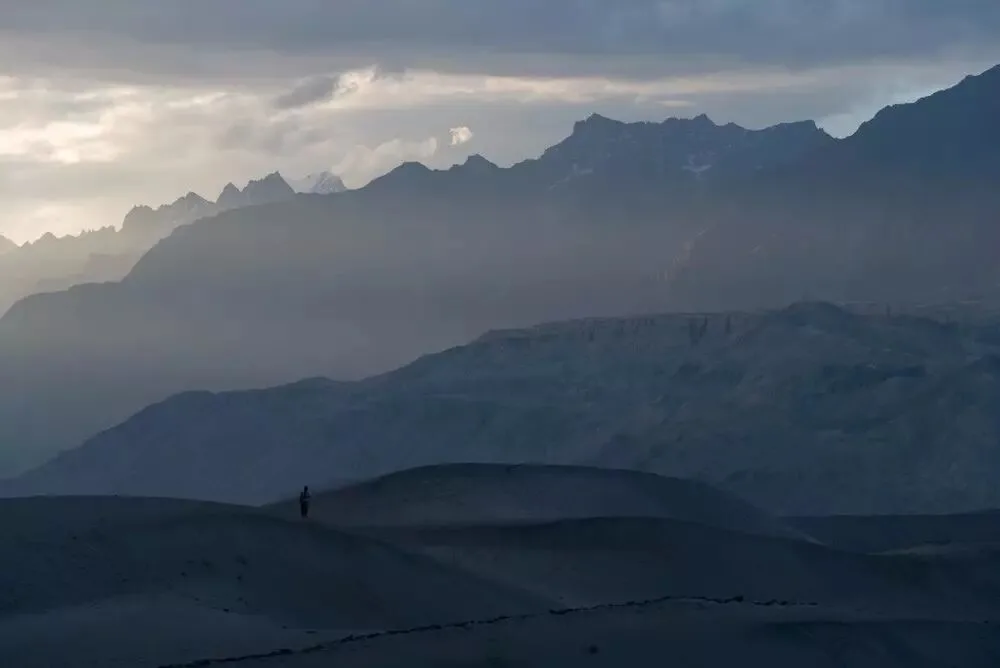
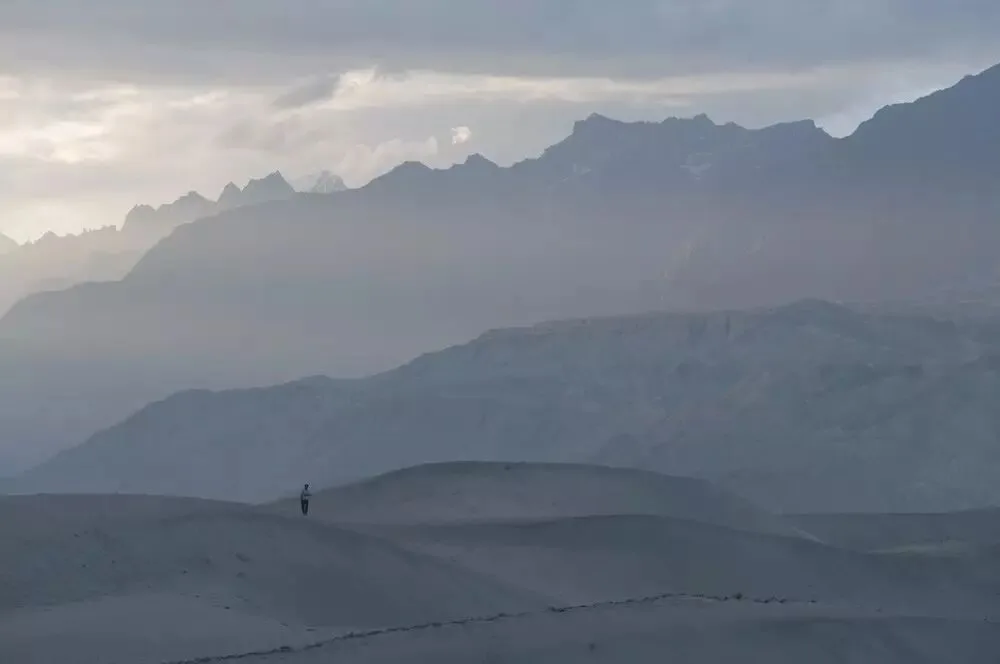
Next I'll demonstrate Levels in action on a photo I shot in Skardu, Pakistan.
Looking at the original: the photo is overall too bright and hazy — it lacks crispness.
Create a Levels adjustment layer. The histogram shows empty margins on both sides: the brightest point only reaches 250, and the darkest is a grey around 25 — hence the weak overall contrast.
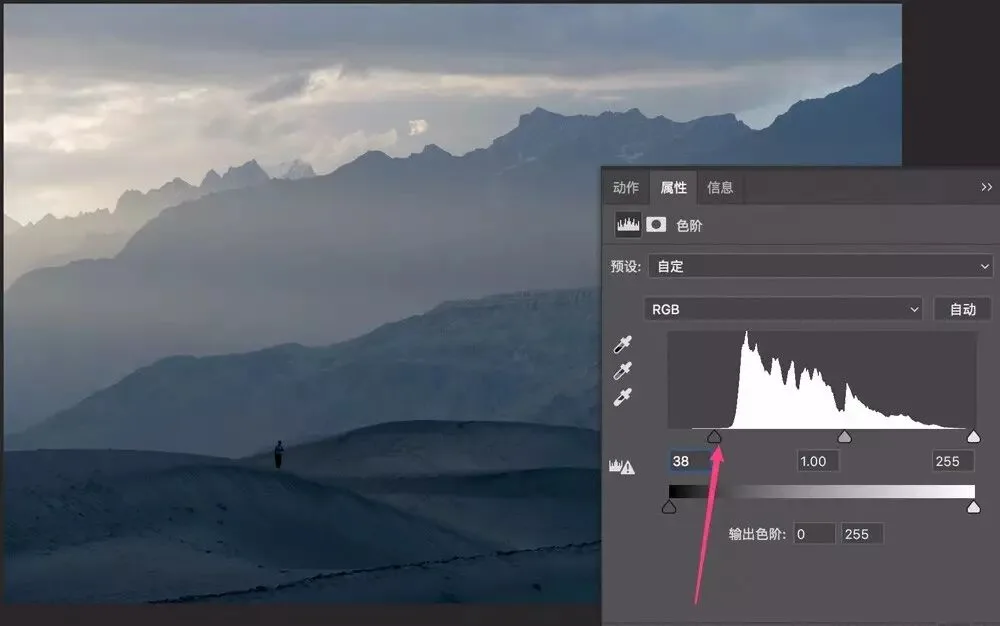
First, move the black slider right to expand the black areas — contrast jumps dramatically.
Then move the white slider left so the brightest parts turn pure white.
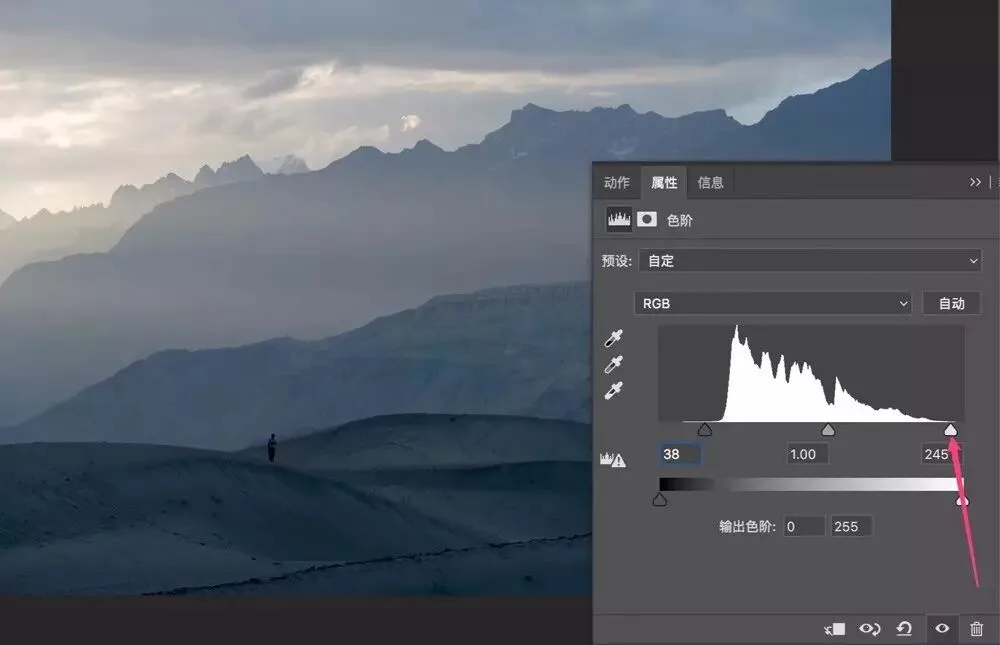
Contrast is now sufficient, but the image is still too bright overall — so move the mid-grey slider right to darken the whole photo.
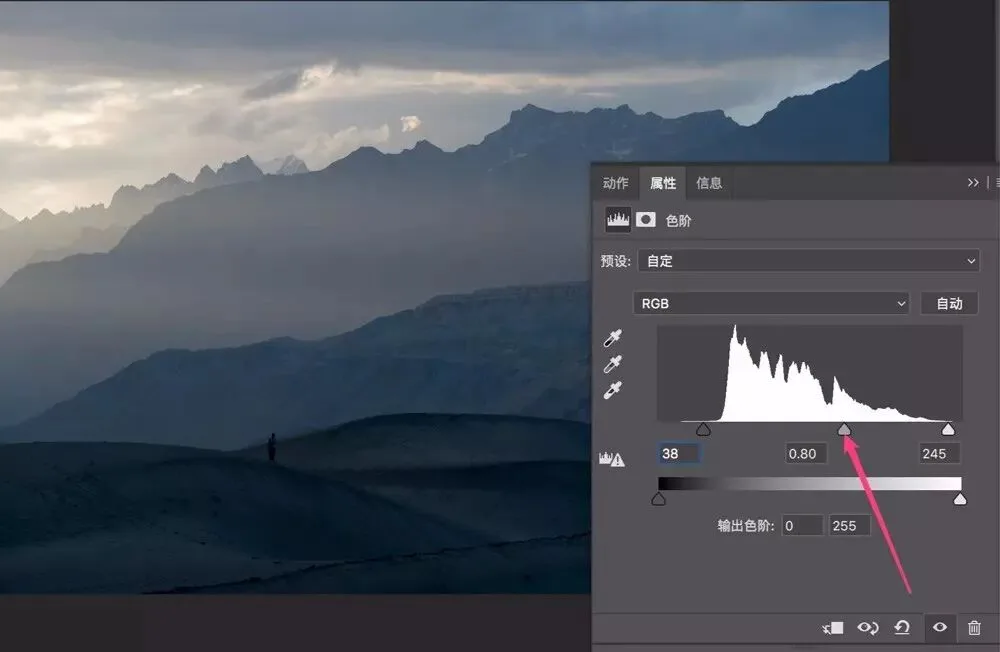
The previous steps created a lot of pure black, and pure black looks "especially dirty" in a desert — so I raised the output floor to 7.
Now the darkest parts are no longer pure black but a deep grey of 7, making the photo look much cleaner.
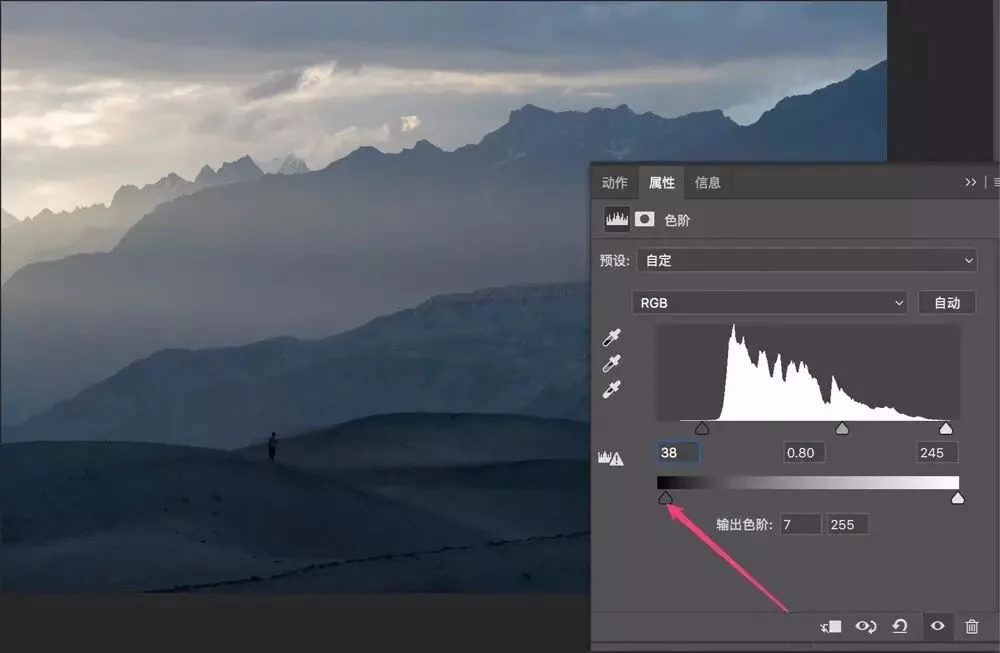
With a few simple Levels adjustments, doesn't the photo feel transformed?