Photography Tutorial · 2018-10-21
Exposure Blending Plus Panorama in One Click? This New PS Feature Is That Good
Thomas Chu Photo
Photoshop was recently updated to CC 2019, and Camera Raw (ACR) to version 11.0.
For landscape photographers and enthusiasts, the biggest gain in this update is the new "Merge to HDR Panorama" feature.
Scenes that required both exposure bracketing and panoramic stitching no longer need to be blended step by step. Now it's one click, producing a huge raw composite file — absolutely delightful.
Video Tutorial
▶ Watch the video tutorial on Bilibili
This is the fully illustrated companion to the video above. After the Photoshop CC 2019 and Camera Raw 11.0 update, the new "Merge to HDR Panorama" command compresses the old eight-step routine — exposure blending first, panoramic stitching second — into a single click. Using a real shoot inside Copenhagen's Round Tower, Thomas walks through capture, merging and post, and the keyframes below let you skim the framework here before hearing the details in the video.
First, meet the star of this update: select all the source files in Camera Raw, right-click, and the new "Merge to HDR Panorama..." sits at the bottom of the context menu — one button that performs the exposure blend and the panorama stitch together (at 4:20 in the video). Everything in this article revolves around it.
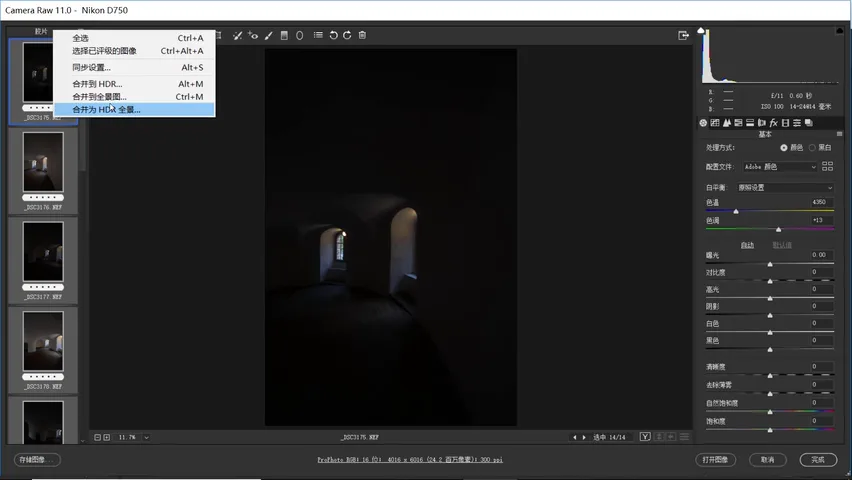
01 The Source: Bracketed Frames Across a Panorama
The example was shot inside the Round Tower in Copenhagen, Denmark. With bright sky outside the windows and dark walls inside, the contrast was extreme, so Thomas shot with bracketing: two frames per position — one slightly underexposed to hold the bright window detail, one normally exposed to record the tower's dim interior (at 1:00 in the video).
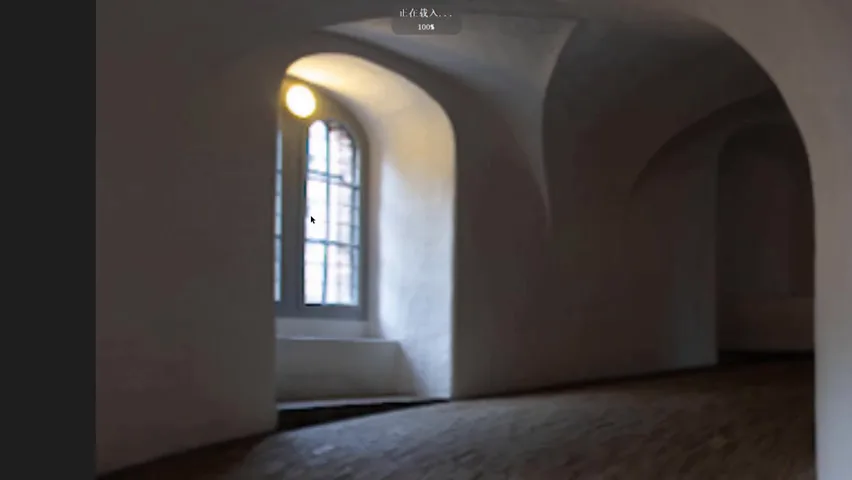
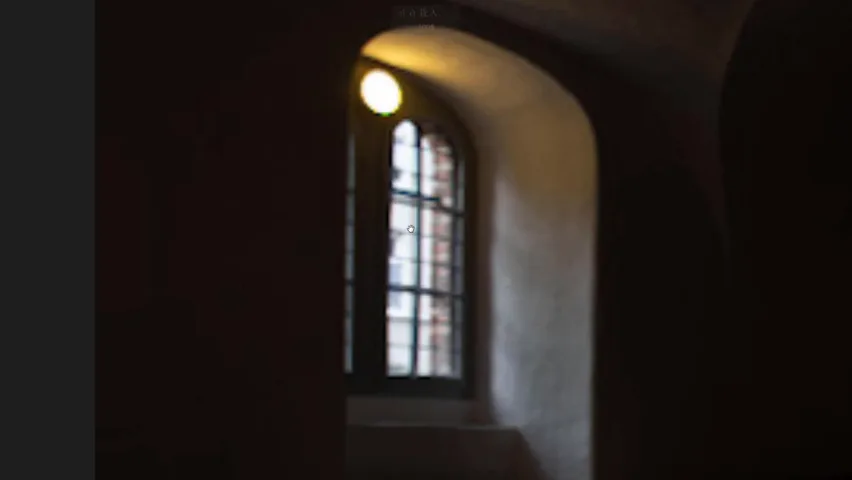
Meanwhile, a single ultra-wide frame captures only part of the tower — showing the full arc requires stitching several frames. The routine: set the Nikon D750 to a two-frame bracket (-2EV plus normal); after each pair, rotate the tripod head gently to the next angle and repeat. With an ultra-wide lens, adjacent frames need over 50% overlap (at 2:02 in the video).
The shoot produced 17 frames in total, of which 14 were keepers: 7 angles × 2 bracketed shots. Those 14 Raw files are the entire input for the merge that follows (at 2:39 in the video).
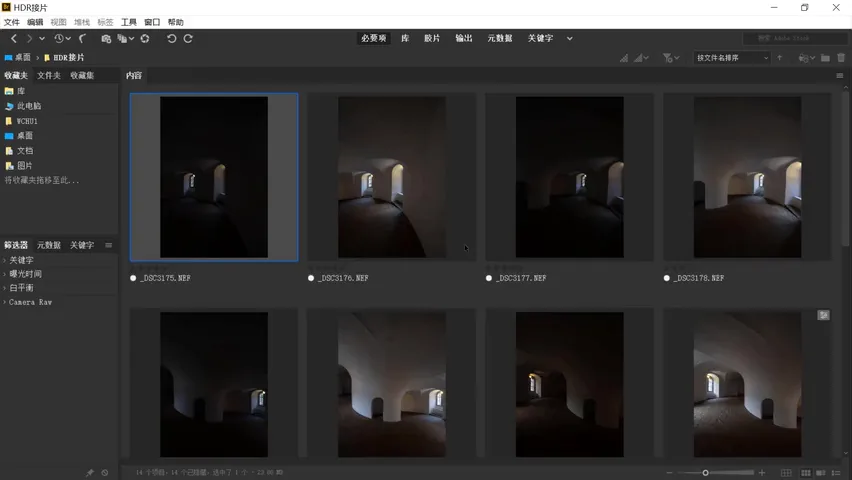
02 The Old Way: Eight Merges Deep
In earlier versions of Camera Raw, bracket-plus-panorama material was painful: select the first pair, right-click "Merge to HDR" to produce one DNG; repeat for the second, third… seven angles meant seven HDR merges; then all seven DNGs had to be selected again and merged into a panorama (at 3:18 in the video).
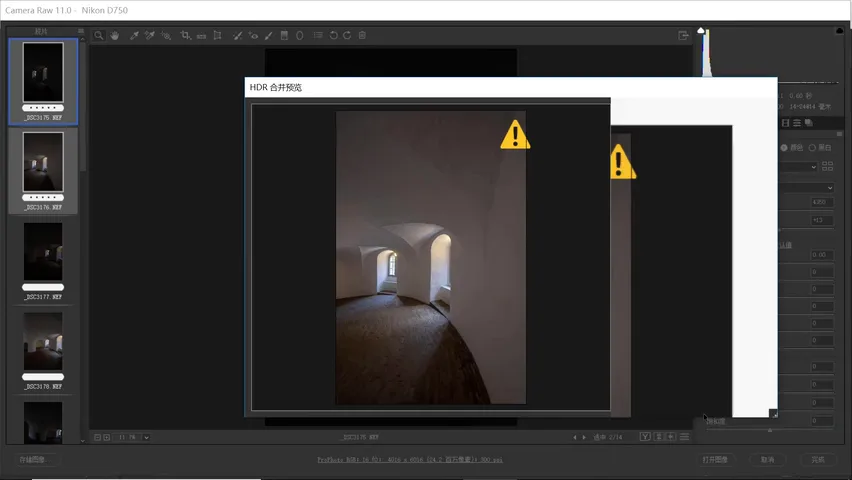
That is eight merge operations for 14 photos, with manual grouping, waiting and re-selection in between — error-prone and slow. The new feature's value is exactly here: eight merges become one (at 3:53 in the video).
03 The New Way: Merge to HDR Panorama
In Camera Raw 11.0, select all 14 Raw files and right-click "Merge to HDR Panorama..." Because it computes both the exposure blend and the stitching geometry of 14 Raws at once, the progress bar runs for about half a minute (at 4:44 in the video).
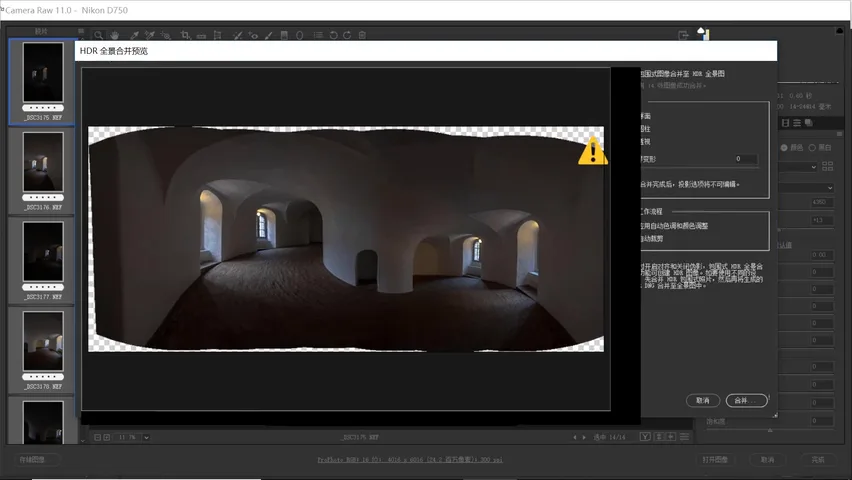
The preview window shows the stitched arc: the tower's arched windows line up in a row, shadows and highlights already expanded, with transparent blank areas along the edges. If it looks right, hit "Merge" (at 4:47 in the video).
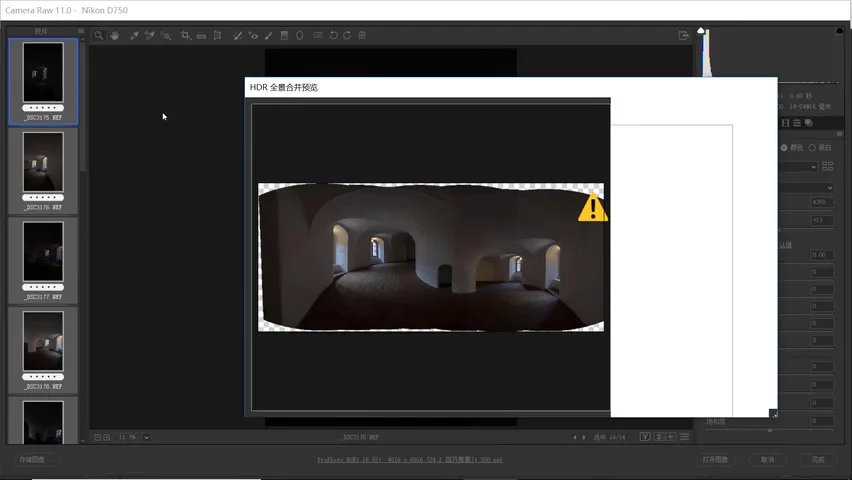
04 Setting the Three Key Options
Projection: just like a normal panorama, wide-angle stitches usually call for "Spherical" or "Cylindrical" — pick whichever looks better; here spherical was the more natural choice (at 5:09 in the video).
Boundary Warp: at 100% the software stretches the frame's edges to fill the blank pixels; but with architecture — anything full of straight lines — be careful, because those lines bend. Thomas therefore set it to 0 here, leaving the edge blanks to be filled or cropped later (at 5:31 in the video).
Workflow: keep "Apply Auto Tone and Color Adjustments" checked — after merging it automatically expands highlights and shadows so every detail is visible; unchecked, the contrast remains huge and some details stay hidden. The auto result may look slightly artificial, but it can be fully re-balanced in Camera Raw afterwards (at 6:27 in the video). "Auto Crop" is optional; Thomas generally leaves it off and crops the blanks himself for more control (at 6:53 in the video).
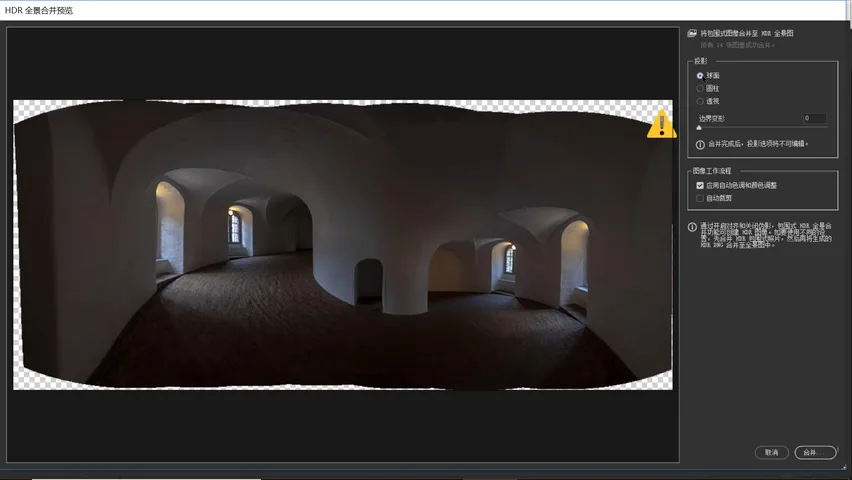
Final settings for this image: spherical projection, Boundary Warp 0, Auto Tone checked, Auto Crop unchecked — then hit "Merge" (at 7:12 in the video).
05 The Headroom of a Giant Raw File
The merge produces a Digital Negative (DNG) — still a genuine Raw file, carrying both the HDR blend and the panorama stitch, fully editable in Lightroom and Camera Raw like any other Raw (at 7:25 in the video).
Thanks to the HDR merge, the exposure latitude is enormous: pull the exposure down and every detail outside the windows comes back; lower the highlights further, lift shadows modestly, add a touch of contrast to restore the rhythm of light (at 8:00 in the video). Finish with a simple crop around the main subject, keeping it symmetric left to right (at 8:33 in the video).
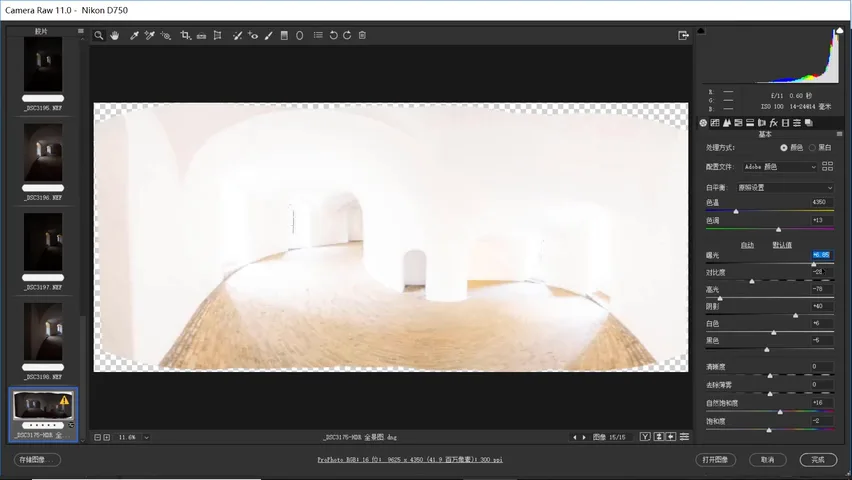
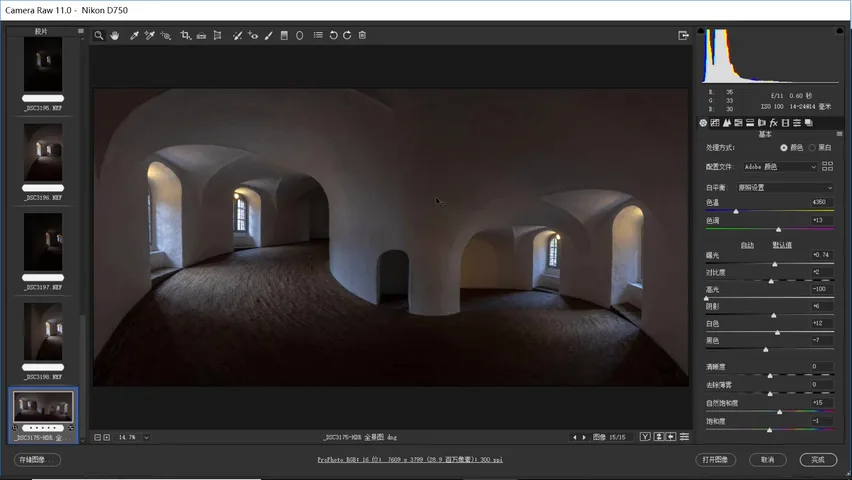
The headroom shows in file size too: a single Raw is about 20-odd MB, while the merged HDR panorama DNG reaches 124 MB — one file holding all the information of 14 Raws, leaving ample room for grading and local edits (at 9:04 in the video).
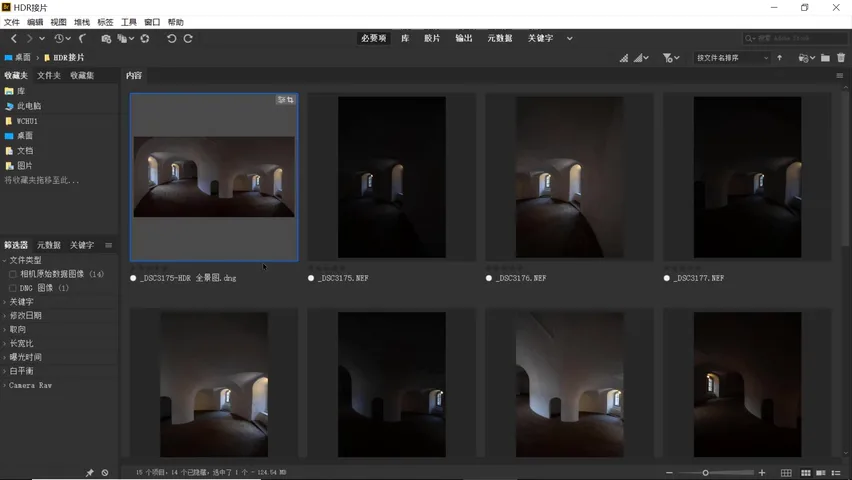
1. For bracketed panoramas: two frames per position (underexposed for highlights, normal for shadows) with 50%+ overlap between stitched frames; 2. The old way took eight merges — new Camera Raw does it in one click with "Merge to HDR Panorama"; 3. Settings: spherical or cylindrical projection for wide-angle stitches, Boundary Warp 0 for architecture, Auto Tone on, Auto Crop off; 4. The large DNG is still a Raw with huge exposure latitude — window details come back effortlessly, and the editing headroom is vast.