Photography Tutorial · 2023-03-26
Still Stitching in PS? A Better Panorama Workflow with PTGui
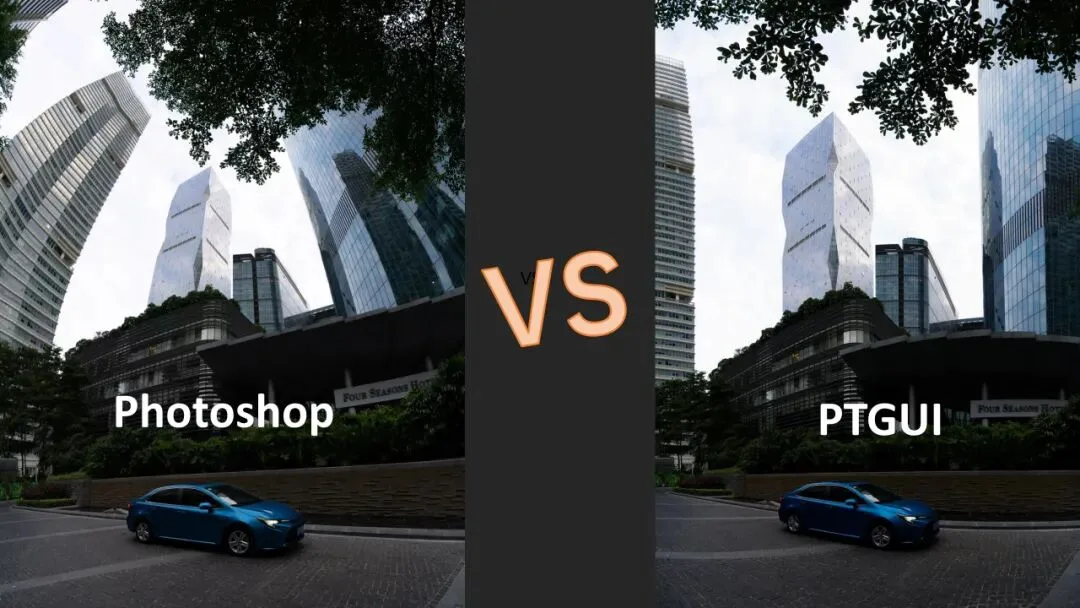
Students often come to me with photos where Photoshop's panorama stitching failed — the frames come out misaligned, or PS simply refuses to stitch them.
Whenever that happens, I tell them to try a much more powerful stitching tool — PTGui.
In today's video tutorial, Thomas demonstrates the basics of this software and how to rescue a panorama that PS failed to stitch.
Video
▶ Watch the video tutorial on Bilibili
This is the fully illustrated companion to the video above. Camera Raw's panorama merge is not almighty — for complex scenes like upward-shot high-rises it often returns heavy distortion and a skewed horizon. Thomas walks through the complete PTGui workflow — loading, aligning, adjusting the viewpoint, switching projections, cropping and exporting — with keyframe screenshots and timestamps.
Start with the comparison. Below is what Camera Raw's panorama merge does to the same set of upward-shot frames: the tower bends into a curve, the horizon skews, distortion runs wild — because Camera Raw offers few projections and little to edit (at 0:31 in the video). That is exactly why PTGui is needed.
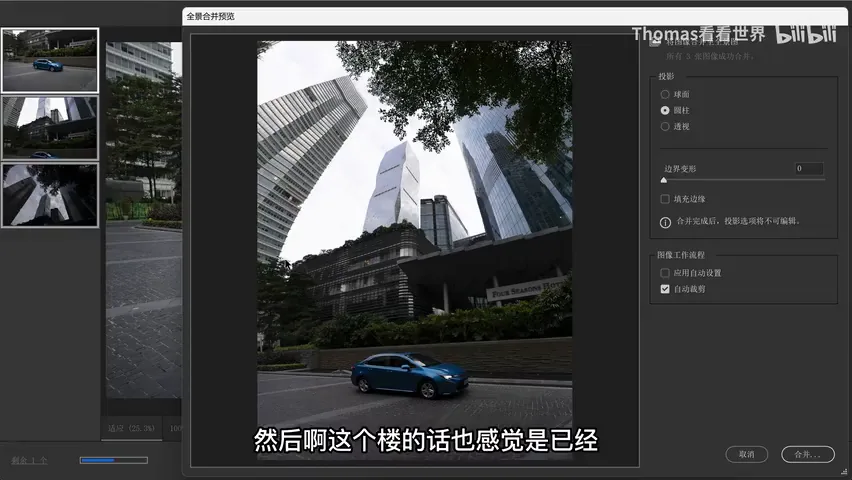
01 Camera Raw's Limits, PTGui's Role
The case is a city high-rise: Thomas shot the whole building from base to top by pointing the camera upward (at 0:19 in the video). This kind of steep upward panorama is exactly where Camera Raw's merge falls short — only three projections, no manual control, and results that rarely keep a building straight.
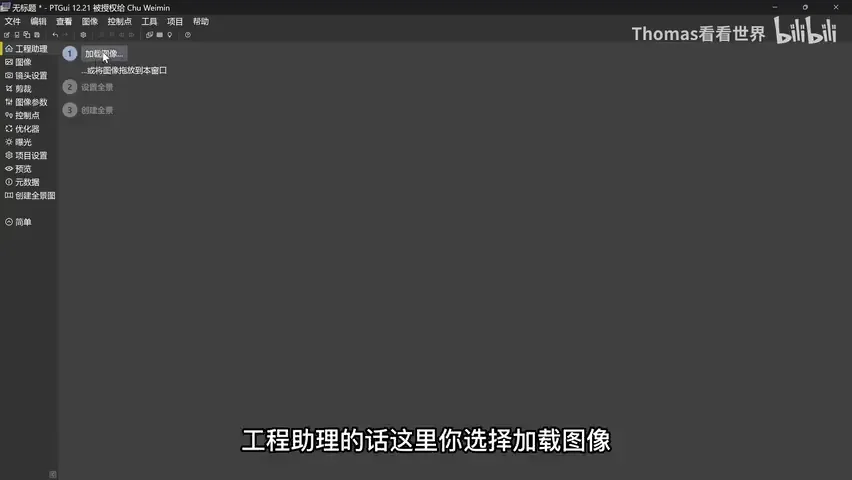
PTGui, by contrast, is dedicated stitching software with a simple interface: it opens straight into the Project Assistant — load images, align images, create panorama, three steps (at 1:04 in the video). The rest of the article follows the actual workflow.
02 Load and Align: Three Steps to the Editor
Step one: in the Project Assistant, click 'Load Images' to bring in the frames (at 1:15 in the video). Step two: click 'Align Images' (at 1:27 in the video).
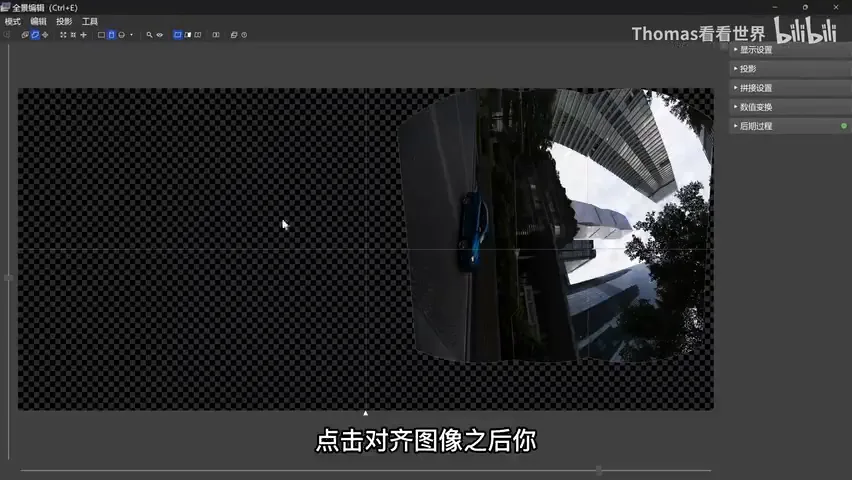
After aligning, PTGui's core window — the Panorama Editor — opens. By default the software has rotated the image a little over 90 degrees; hold the right mouse button to rotate it back to vertical, then pull it down with the left button (at 1:40 in the video).
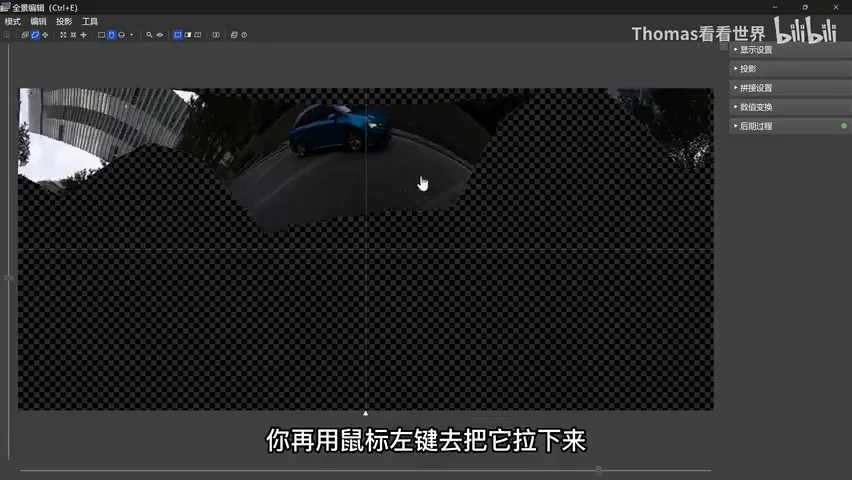
03 Panorama Editor: Viewpoints, Preview Exposure, Seams
Where PTGui crushes Photoshop is the freedom of viewpoint in its panorama editor (at 2:02 in the video): look straight up at 90 degrees, level, or downward. For this frame the goal is to bring the building back to a level, vertical view.
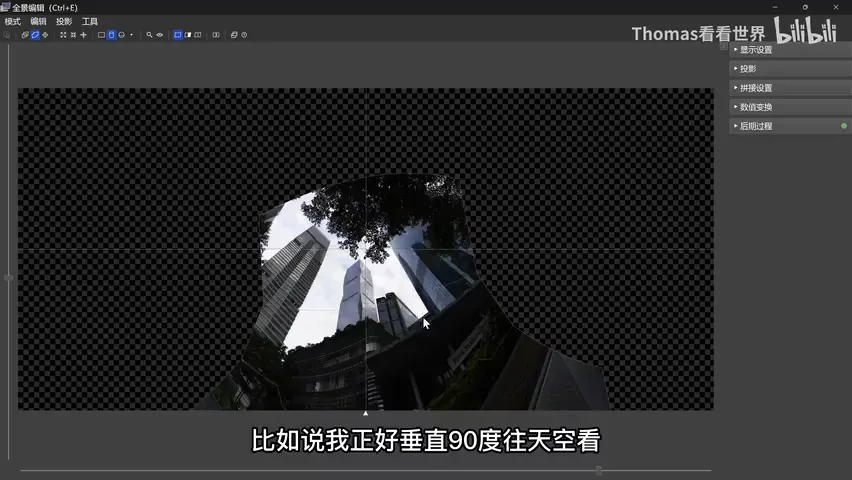
Two more thoughtful features. First, the preview exposure in the display settings — say +1.2 stops to see into the shadows — affects only the display, never the final stitch (at 2:30 in the video), letting you inspect how the cars and the tower are warping. Second, you can show the seams: exactly which areas each source frame covers, at a glance (at 2:44 in the video).
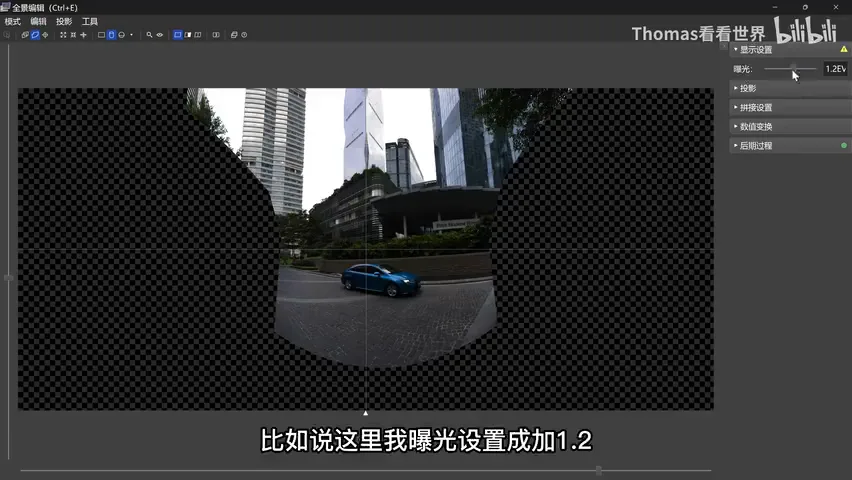
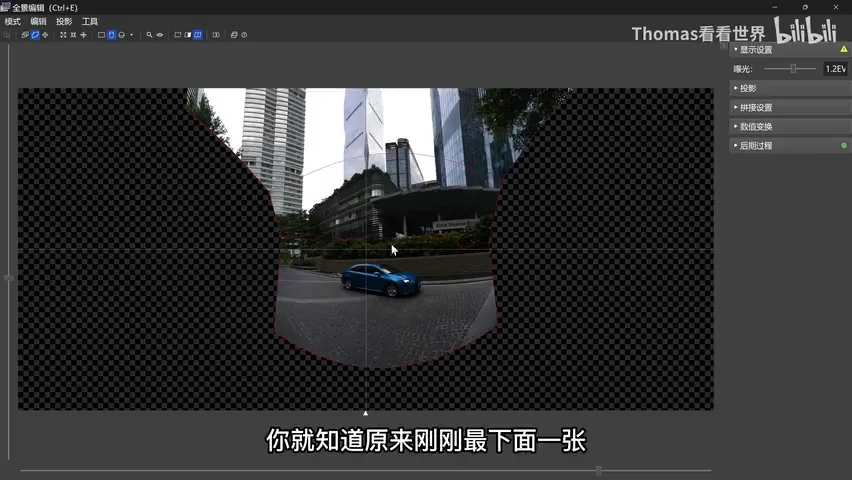
04 Projections and Canvas: Mercator to Straight Lines
PTGui's most powerful feature is its projections (at 2:57 in the video): where Photoshop offers three, here you get rectilinear, cylindrical, several fisheyes, stereographic, Mercator and more. Thomas's favorite is Mercator — the world-map projection — which nails both aspect ratio and look, often better than cylindrical (at 3:13 in the video).
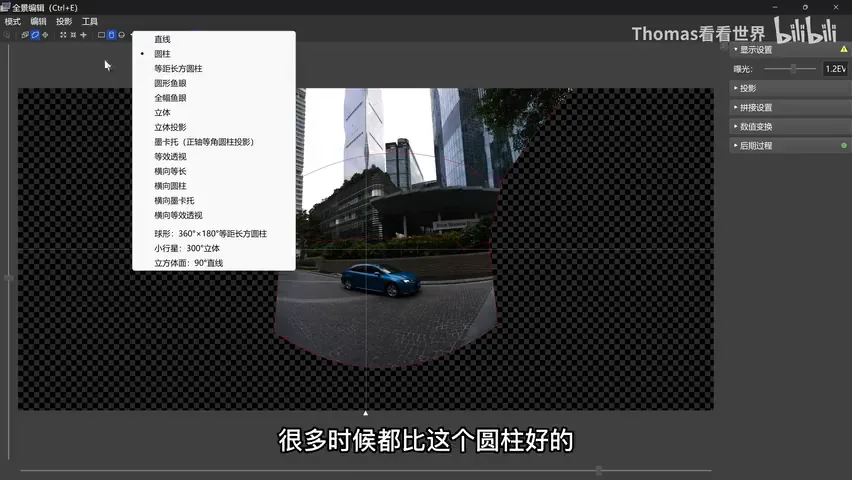
With the projection set, refine the viewpoint: nudge the frame with the left button, rotating with the right button when needed. If the top gets cut off, expand the canvas with the controls above and below until even the treetops at the frame's top show up (at 3:41 in the video). Adjust carefully here, watching for the point where the building sits straight and level (at 4:16 in the video).
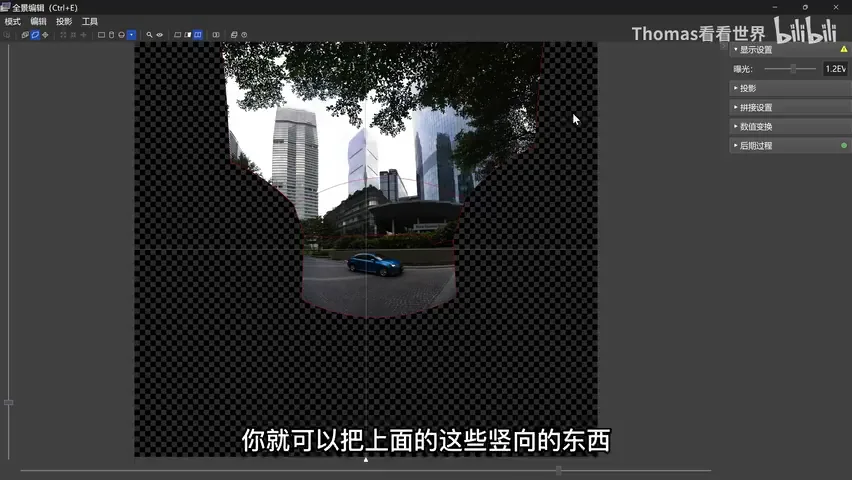
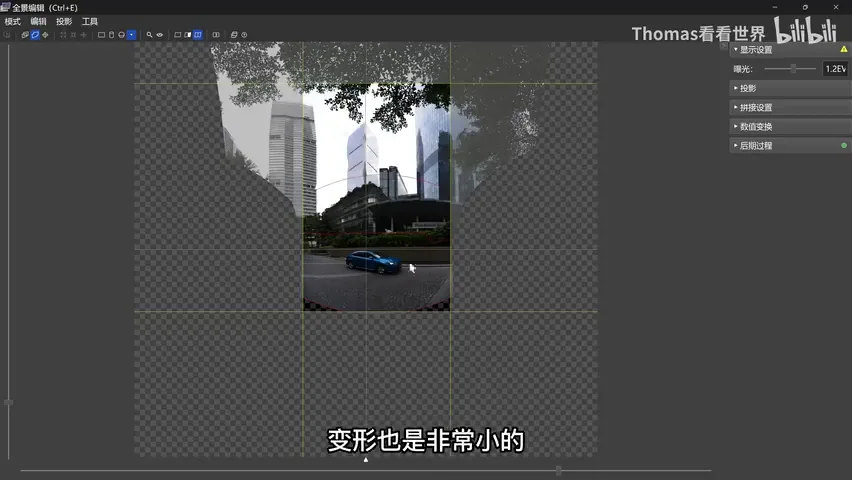
When it comes together, PTGui's strength is on full display: the building sits dead straight, and the cars and everything else warp only slightly (at 5:07 in the video) — the freedom that an adjustable viewpoint plus rich projections buys you.
05 Cropping, Control Points, and Export
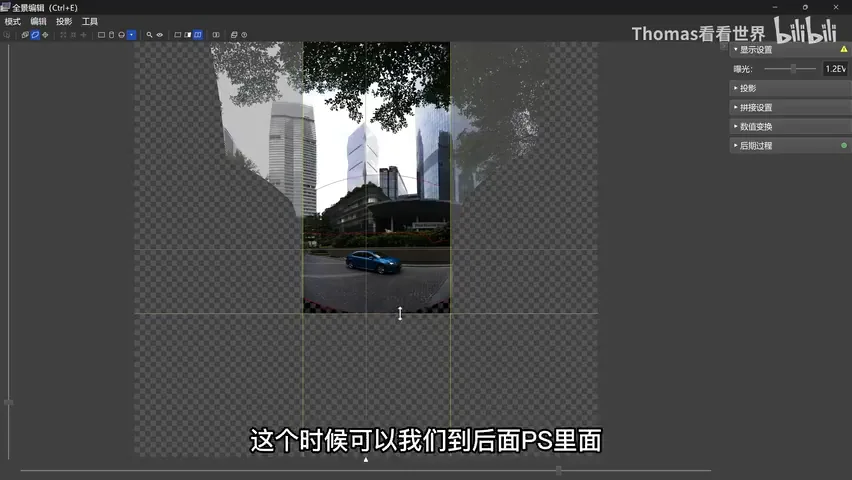
Next, cropping: move the cursor to the canvas edge until a double arrow appears, then drag inward (at 4:29 in the video). Keeping more ground is fine — you can warp that strip later in Photoshop; a sliver of trees at the top makes a pleasing frame (at 4:48 in the video).
PTGui's other core feature is control points (at 5:26 in the video): some starry-sky panoramas make Photoshop give up entirely with 'could not stitch'; PTGui handles them, and when automatic alignment fails you can stitch manually with control points. Control points also correct horizons and vertical lines — an advanced topic saved for a future tutorial.
Finally, export (at 6:26 in the video): for direct delivery choose JPEG or TIFF; for further editing in Photoshop choose PSB or PSD. Panoramas get huge, so Thomas goes straight to Photoshop's PSB format: 16-bit channels, compression 'None', layers preserved, and the output color space set to Photoshop's working space — Adobe RGB or ProPhoto RGB — then hit 'Create Panorama' (at 6:40 in the video).
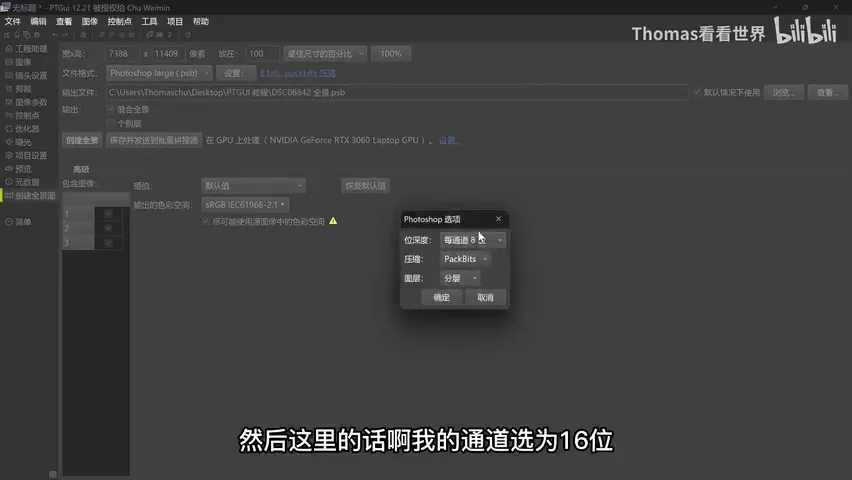
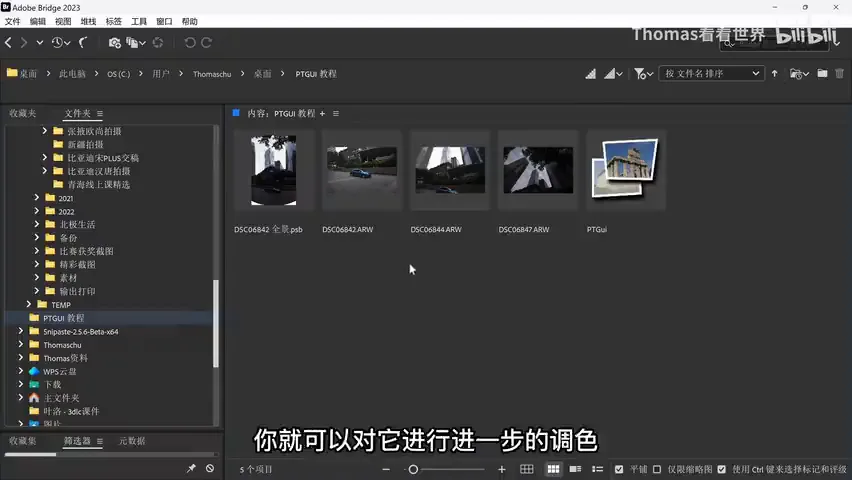
Once created, open the PSB in Photoshop for further color grading (at 7:06 in the video). You can find PTGui by searching the five letters online and buying a license from its official site (at 7:19 in the video). That is the whole workflow — from the tower Camera Raw could not stitch straight to a finished panorama with true verticals, the Panorama Editor proves why it is PTGui's core.
1. Camera Raw's merge buckles on upward-shot buildings: three projections, no control, curved towers and skewed horizons; 2. PTGui in three steps — Load Images and Align Images in the Project Assistant, rotate back to vertical with the right button, and the Panorama Editor opens; 3. The editor's three moves: set any viewpoint from 90-degrees-up to looking down, preview exposure that only affects the display, and show seams to see each frame's territory; 4. Mercator often beats cylindrical; expand the canvas and fine-tune until verticals are true; export PSB (16-bit, no compression, layers kept, Adobe RGB/ProPhoto) and keep grading in Photoshop.