Photography Tutorial · 2019-07-07
How to Create Dynamic Skies in Post: PS Blur Tools and Edge Artifact Fixes
Thomas Chu Photo
"Photo Editing Contest No.9" is in full swing.
Among the many submissions, many friends used blur to make their skies look cleaner and more dynamic.
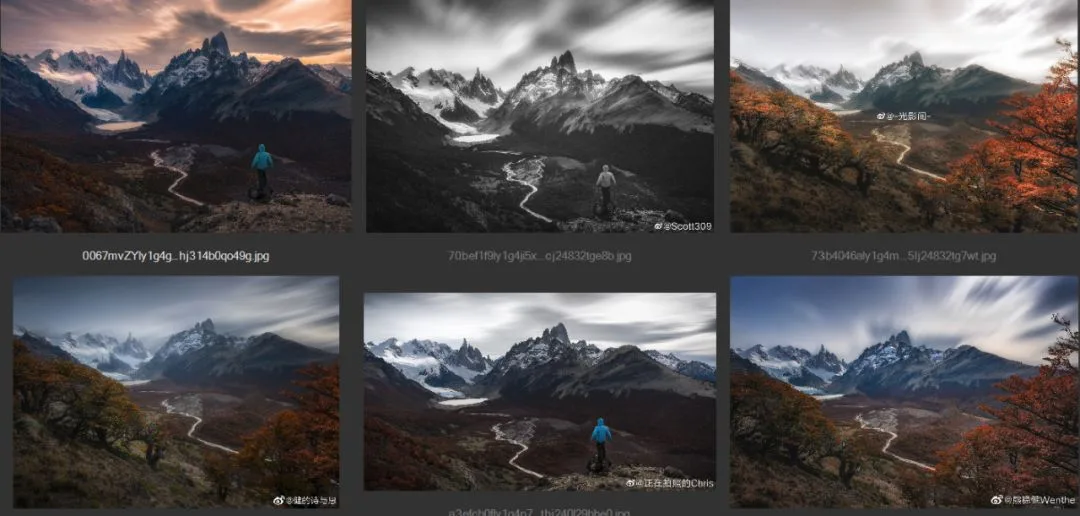
In today's video tutorial, Thomas teaches you how to use Photoshop's Radial Blur, Motion Blur, and Path Blur tools to create beautiful dynamic cloud effects.
Thomas also offers 2 solutions for the edge artifacts that blurring can cause.
Video Tutorial
▶ Watch the video tutorial on Bilibili
This is the fully illustrated companion to the video above. The source is the same raw file from Photo Editing Contest No.9 — the Fitz Roy massif in Patagonia, whose flat, dull sky Thomas turns into radiating, dynamic clouds with Photoshop's Radial Blur, plus two clean fixes for the 'mountain shadow' edge artifact the blur introduces. The 9-minute walkthrough is broken into four steps below with keyframe screenshots — skim here for the framework, then dive into the video for the details.
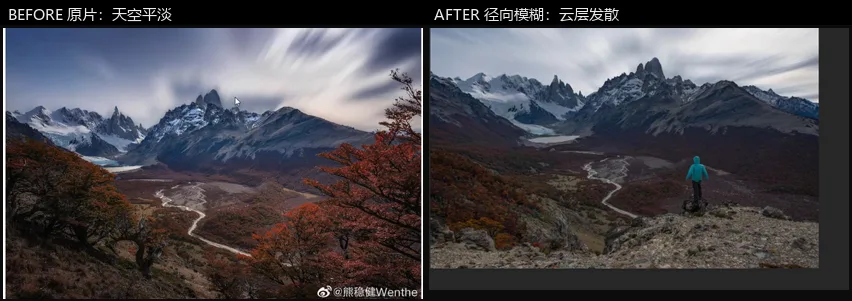
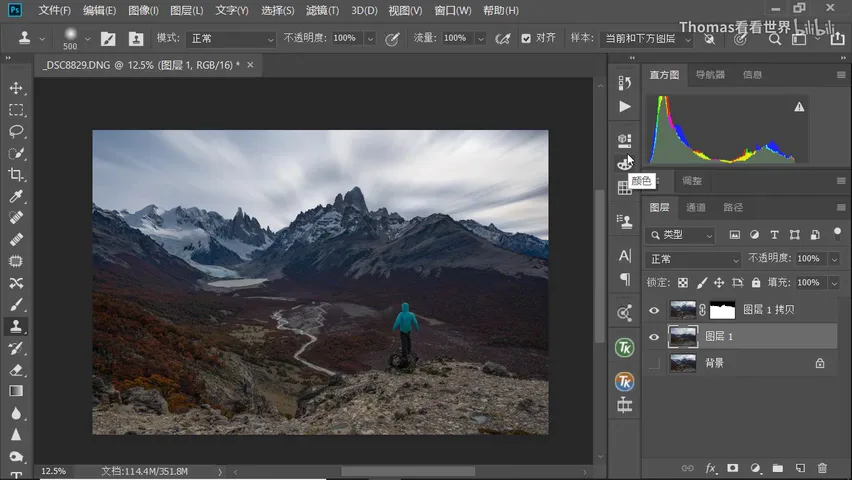
Start with the overview: a before/after of the edit — the original sky is flat and grey; after processing, the clouds radiate outward from a point above the frame while the peaks and autumn foreground stay razor sharp. The long-exposure look, achieved entirely in post.
01 Why Blur: Motion, and Hiding the Flaws
Contest No.9 gave everyone the same raw file, and its weakness was obvious: a flat sky under mediocre light. In the submissions, many entrants independently blurred the sky — some with a radial burst, some with horizontal motion blur, some simply smearing the clouds apart (at 0:29 in the video).
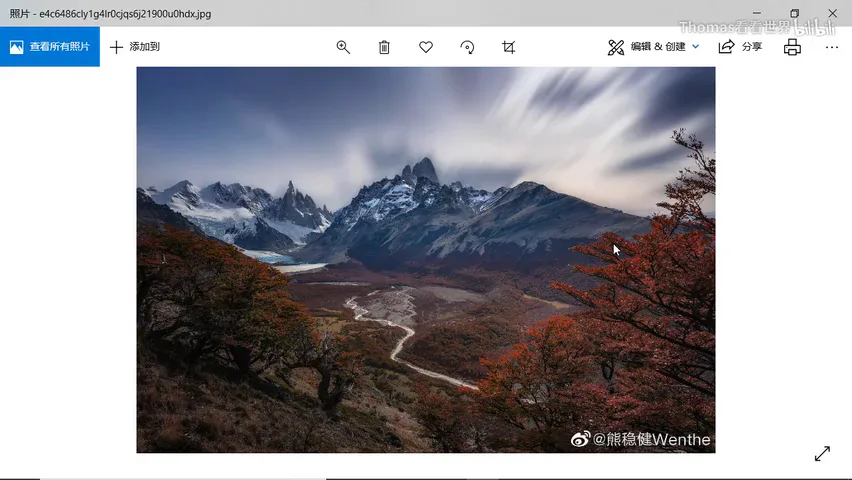
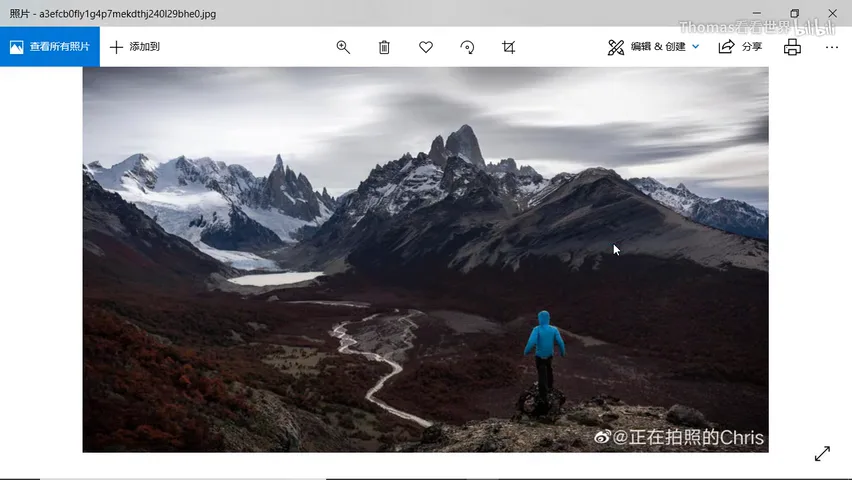
Blurring earns its keep twice over: it makes the clouds feel alive, and it simply hides ugly cloud detail — remove the detail and the clutter goes with it. Three Photoshop tools can do this job: Motion Blur, Radial Blur, and Path Blur in the Blur Gallery (at 1:21 in the video). Path and Motion Blur are saved for future tutorials; this one focuses on Radial Blur.
02 The Radial Blur Panel: Amount, Spin and Zoom
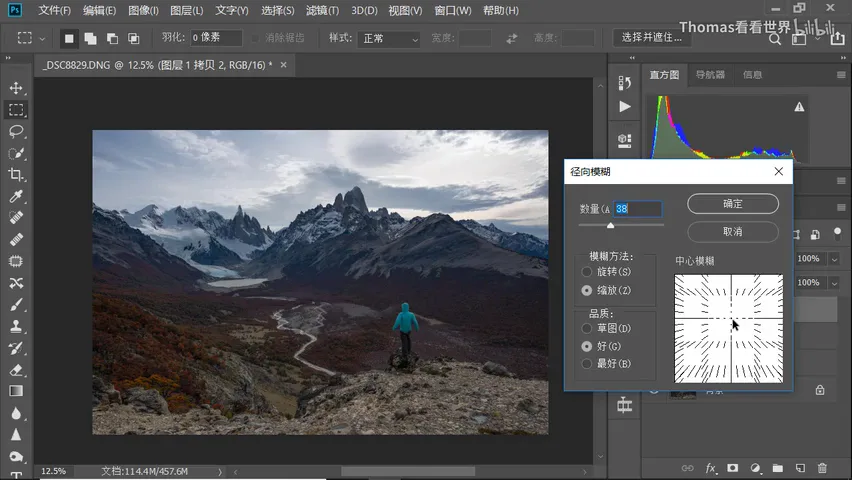
Before anything else, duplicate the layer several times so mistakes are always recoverable (at 1:07 in the video). Then open Filter → Blur → Radial Blur. The first parameter is Amount, which directly controls blur strength (at 1:44); Blur Method offers Spin and Zoom; Quality has Draft, Good and Best — Best is slow with little visible gain, so Good is the sensible default (at 2:30).
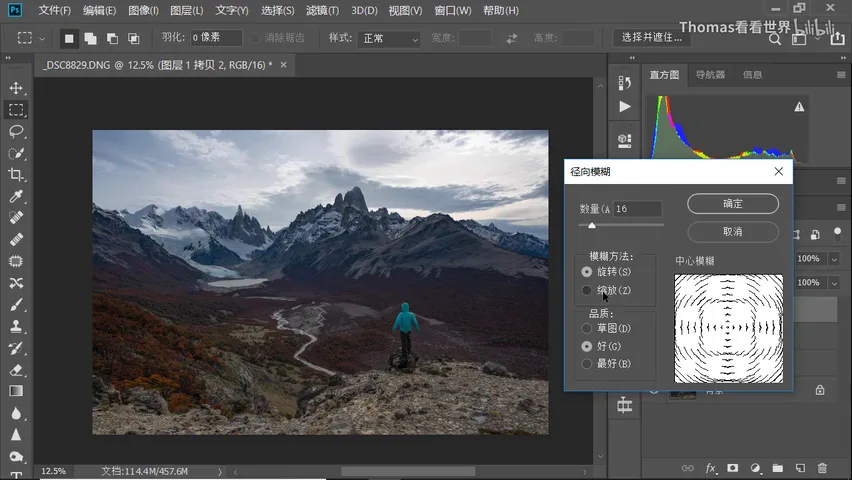
The two methods have clear divisions of labour: Spin smears the image in circles around a center point — useful almost only for things like spinning wheels (at 2:12); for clouds like these you want Zoom, which radiates the image outward from a point. Thomas demos Spin first so you can see the difference, then switches back to Zoom (at 1:56 in the video).
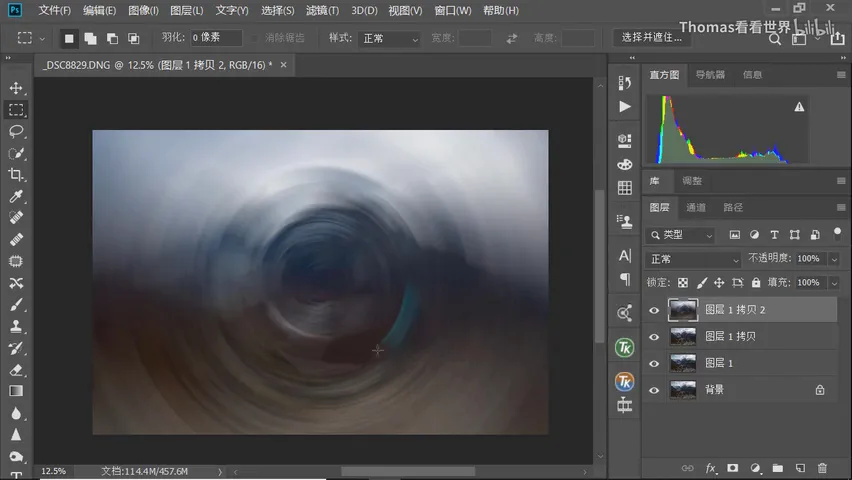
Leaving the center at the frame's default middle and clicking OK, the whole photo bursts outward — a first draft of the radiating cloud effect we are after (at 2:58 in the video).
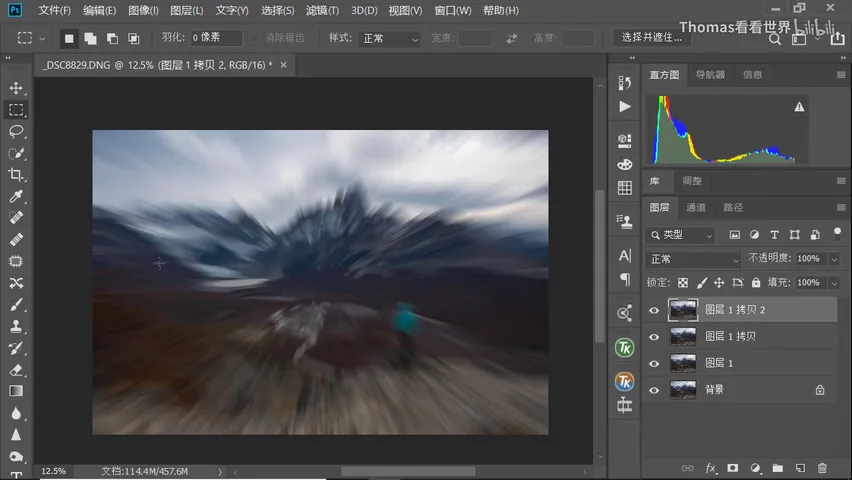
03 The Blur Center: Where the Clouds Radiate From
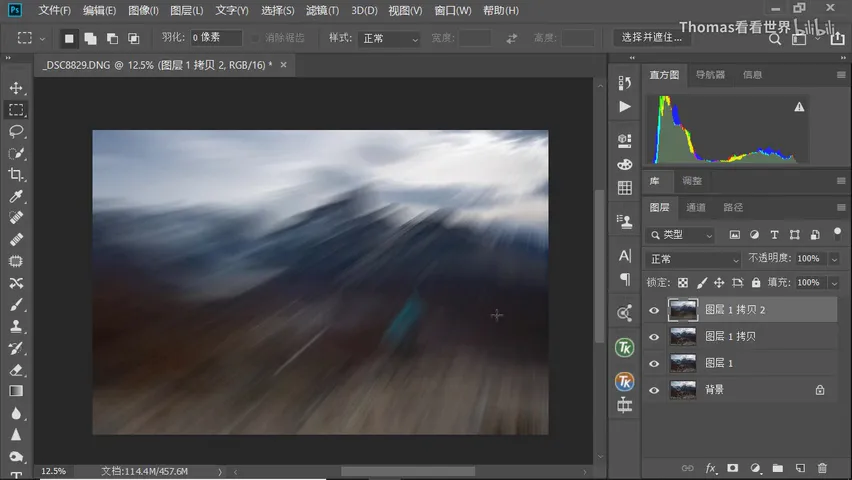
The default center works, but it is not the best-looking option. The 'Blur Center' box in the dialog can be dragged with the left mouse button — wherever you put it becomes the origin of the radiation (at 3:19 in the video). The preview will not refresh live since the blur needs real computation; you only see the result after clicking OK.
Drag the center to the top-right corner, for example, and after clicking OK the whole photo radiates from that corner (at 3:47 in the video). For this image the best spot is slightly above middle: the clouds then burst diagonally upward, which matches how the light actually behaves — put the origin below the clouds and they spray straight up, clearly violating perspective (at 4:08 in the video).
04 Blur Only the Sky: Masks and Edge Repair
Radial Blur hits the whole layer, but we only want the clouds blurred, not the foreground. The fix: roughly select the sky with the Quick Selection tool (kept crude here for speed), run Select → Inverse to grab the ground, and add a layer mask — the blurred layer now shows only the ground. Drag it to the top of the stack, and the blurred sky sits below while the landscape stays perfectly sharp (at 4:31 in the video).
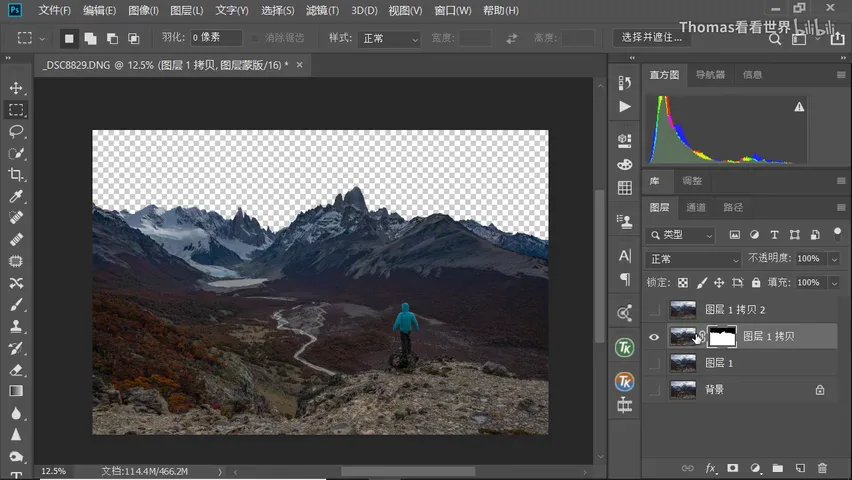
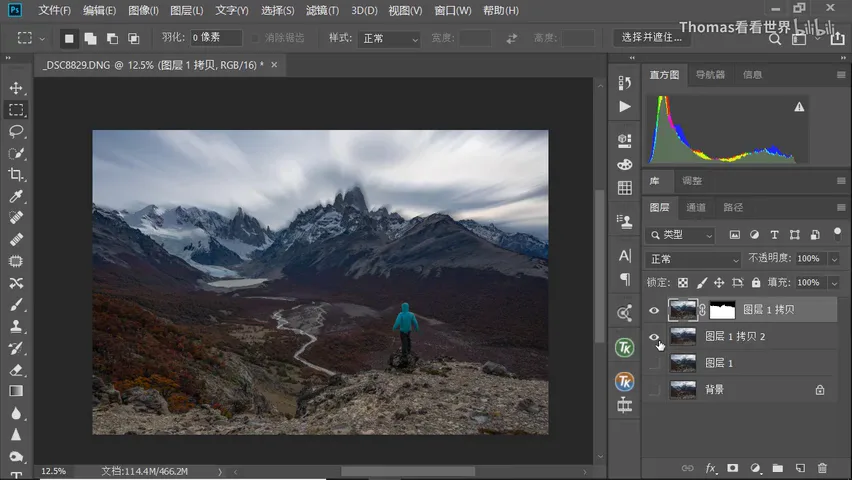
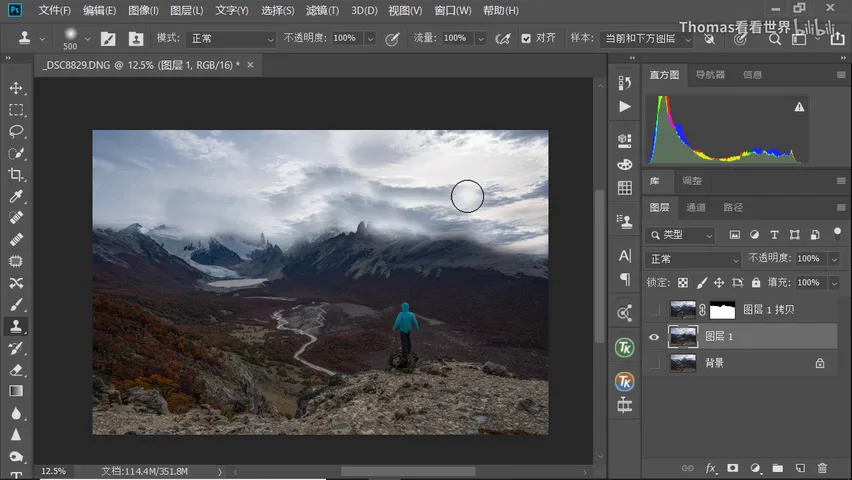
Here comes the problem almost every radial blur runs into: at the edges, the radiating smear drags the lower part — the silhouette of the mountain — up into the sky, leaving a ghostly halo of pulled-up terrain along the ridgeline (at 5:11 in the video). Two fixes follow.
Fix one is dead simple: tuck the blurred sky layer back behind the landscape. Select the blur layer, run Edit → Transform → Warp, and drag the part showing the mountain shadow downward until it hides behind the mountain; dragging down opens gaps at the top, so pull the upper part down as well to fill them (at 5:45 in the video). Once confirmed, only the sky is blurred, the ground stays sharp, and the edge is spotless.
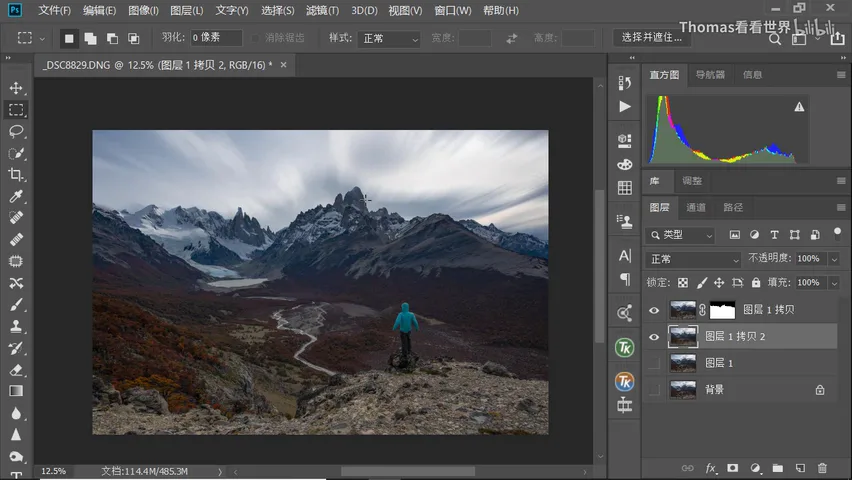
Fix two strikes before the blur: delete the layer, go back to the pre-blur copy, and with the Clone Stamp — Alt-click to sample from the clouds — paint cloud texture over the mountain flank near the ridgeline. The ground will be covered back by the layer above anyway, so these strokes can never show; and sloppy work is fine — it looks fake now, but after the blur smears the detail away it reads perfectly natural (at 6:42 in the video). Then run Radial Blur again with the same settings, nudging the Amount slightly higher (at 7:47), put the landscape layer back on top, and not a trace remains.
The final result: a sky full of radiating, flowing energy with crisp clean edges — the streaked-cloud look of a real long exposure with an ND filter, recreated entirely in post (at 8:19 in the video). Radial Blur alone can still leave something unnatural; Path Blur and Motion Blur can refine it further, and that is where the next tutorials will pick up.
1. When the sky is flat and the light is poor, Radial Blur in Zoom mode bursts the clouds outward — adding motion, hiding clutter, and faking an ND-filter long exposure; 2. Save Spin for circular subjects like wheels; Quality 'Good' is enough; drag the blur center slightly above middle so clouds radiate diagonally upward, matching perspective; 3. The blur hits the whole layer, so mask the landscape back on top with a quick selection, inverse, and layer mask; 4. Two fixes for the edge ghost: Warp the mountain shadow back behind the ridge, or clone cloud texture over the mountain foot before blurring — sloppy strokes are fine, the blur smooths them away.