Photography Tutorial · 2018-09-16
How to Edit Rainy-Day Photos: A Case Study in Common Ideas and Techniques
Thomas Chu Photo
One tutorial every week, making photography easy to learn
Different weather calls for different editing mindsets. Applying a sunny-day workflow wholesale to a rainy day only leaves the photo's atmosphere neither fish nor fowl.
This article analyzes the post-processing mindset and techniques for overcast, rainy landscapes through a submission to our photo critique column.
Submitted work by: 阳光灿烂379
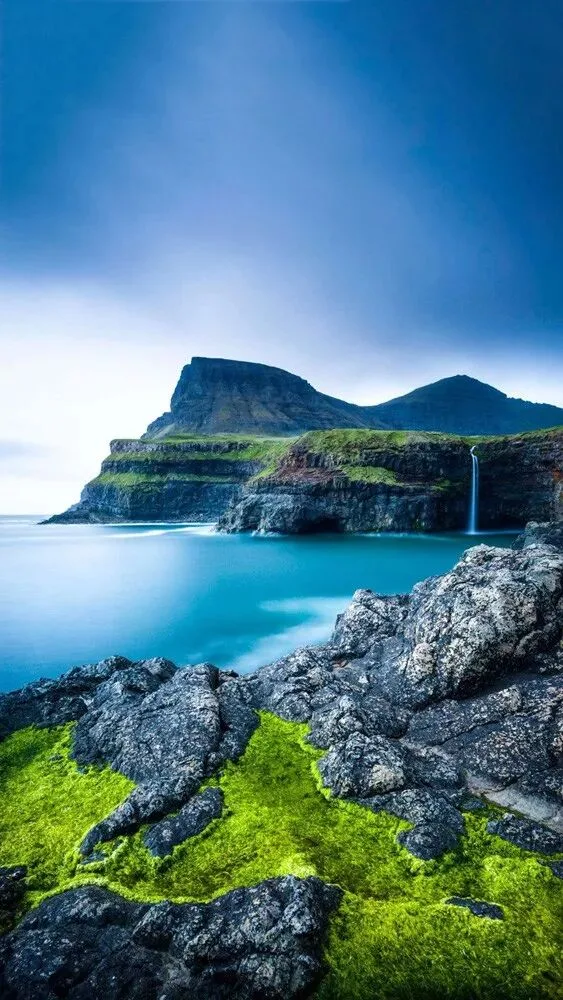
Thomas's critique:
In my view, this photo has two problems of expression:
First, the point of interest is unclear — the author tried to show too much. The frame takes in a vast sky to emphasize the calm of an overcast day, yet also includes extensive foreground rocks to show off the island's textures.
But too much sky weakens the land's pull, and too much foreground detail breaks the overall quiet mood. Of these two conflicting elements, we can only choose one.
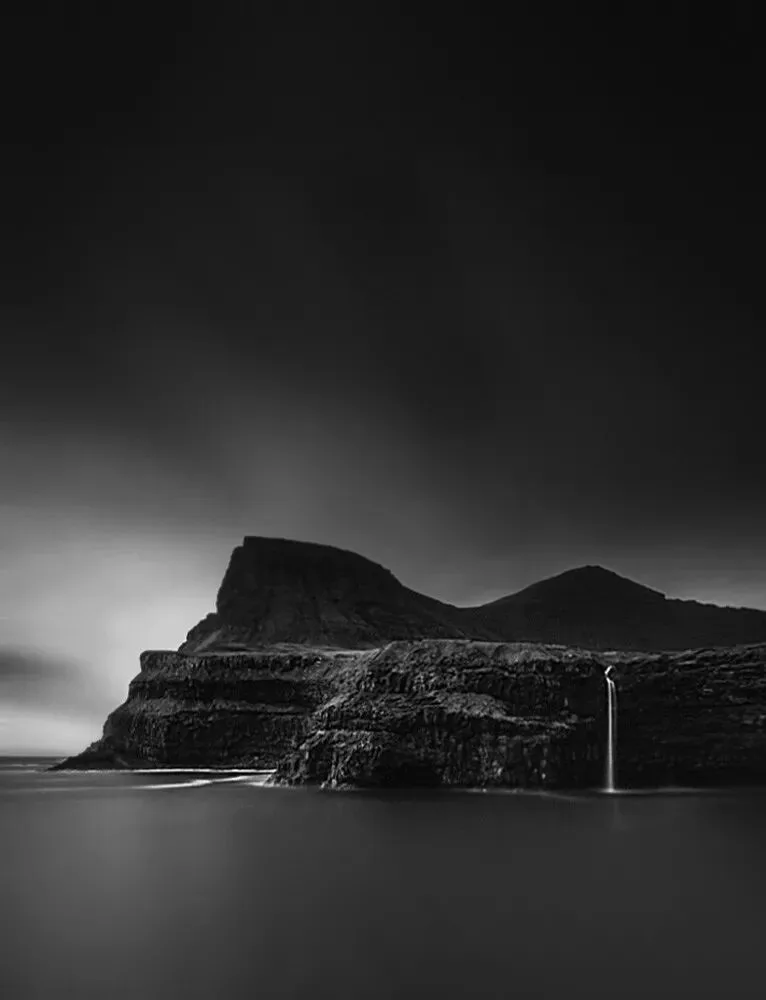
The image below is an edit I made: I cropped away and clone-stamped out the entire foreground, applied motion blur to strip detail from the sky and sea, and removed all color in post — only then does the overcast serenity emerge, instead of the original's mood-breaking detail.
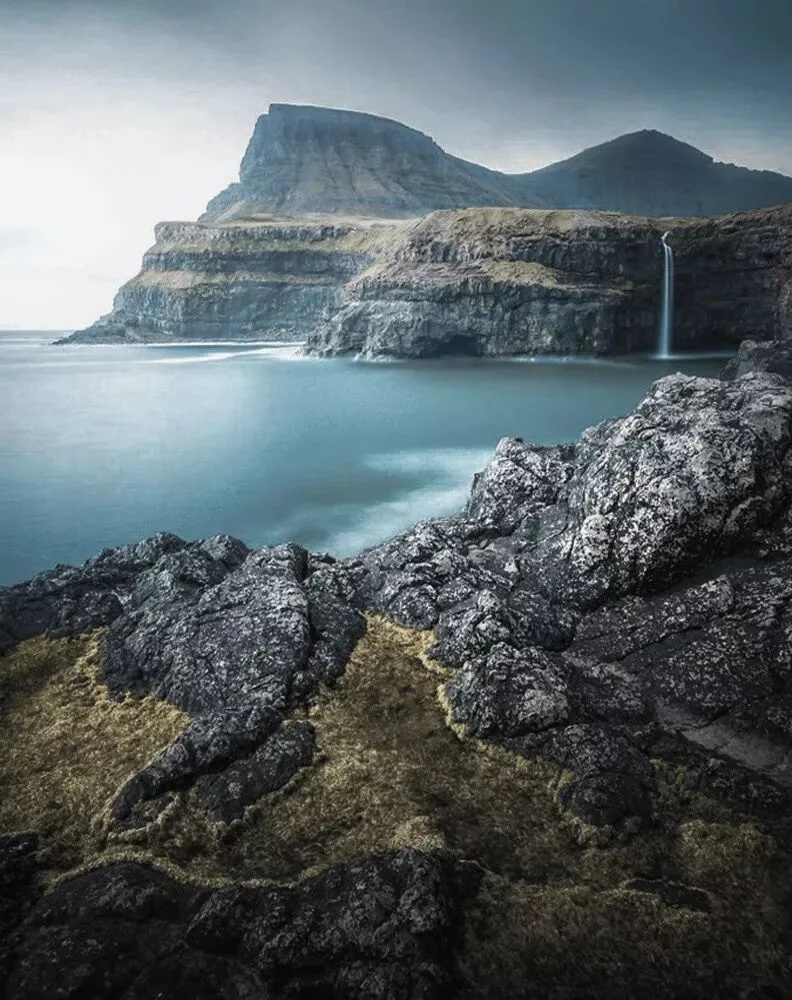
The image below is another version I made, aiming to express the Faroe Islands' character as islands — so I cropped away much of the sky and recomposed to emphasize the landscape.
As I wrote in "The Core Skill of Photographic Composition — It's Not the Rule of Thirds, Nor Subtraction": how we compose and what we include depend on what we want to express and emphasize. Never greedily cram everything in — trying to show too much ends up saying nothing clearly.
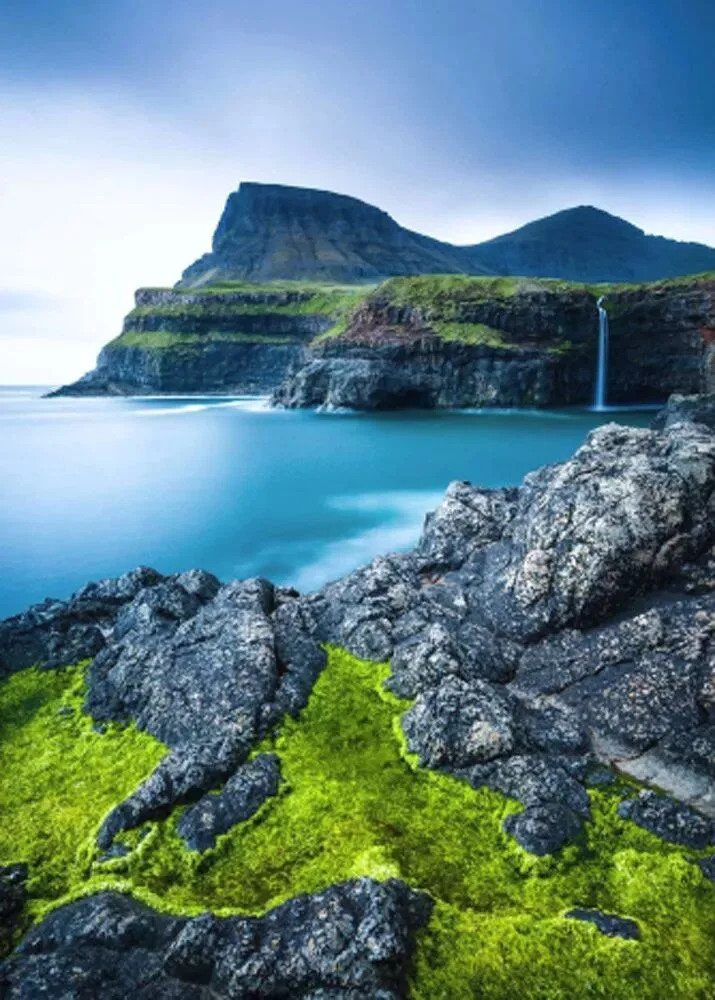
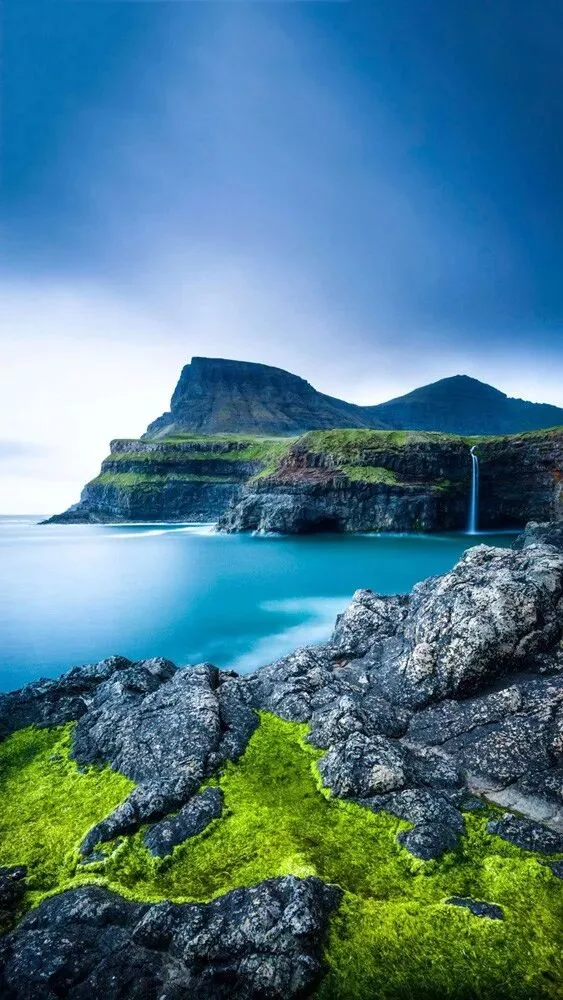
The author's second problem is a mismatch between the image's language and its elements. The original is an island shot in overcast rain; such a scene can feel lonely, tranquil, or somber — but hardly passionate.
Yet the author chose rather gaudy colors; the intense saturation clashes with the rainy mood and makes viewers uncomfortable. Below I'll do a quick edit of this photo to bring out the atmosphere of a rainy, lonely island.
Open the author's JPG in Photoshop and crop away the sky with the Crop tool.
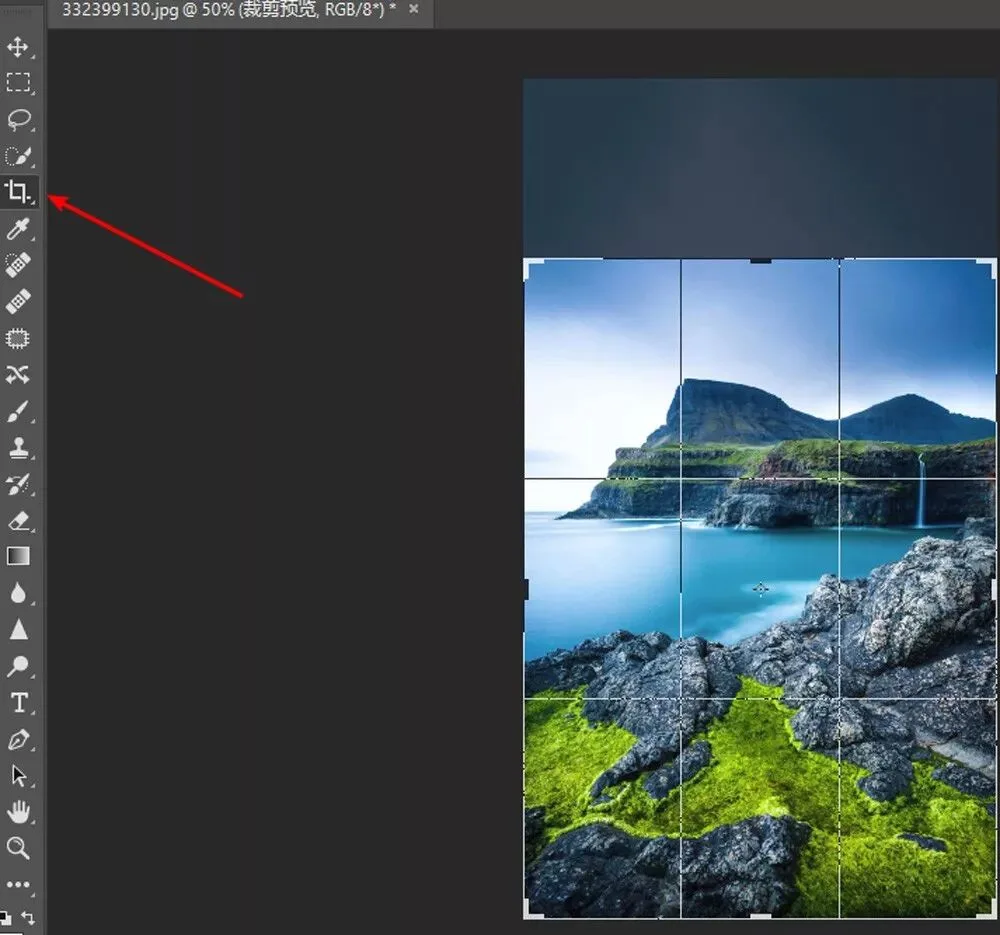
After cropping, the point of interest becomes much clearer.
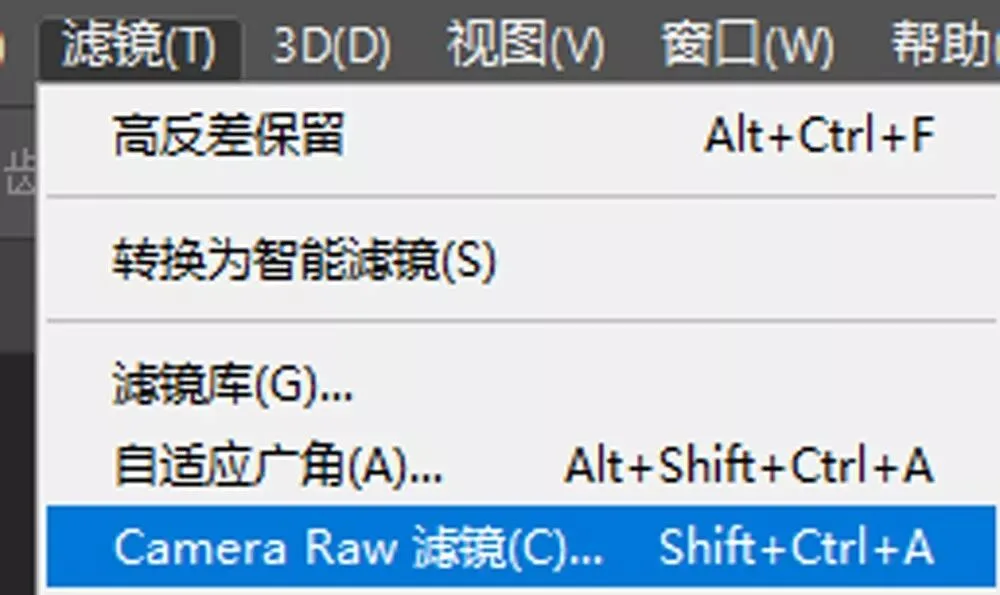
Next, open the Camera Raw filter. All my remaining steps happen inside the Camera Raw filter — no particularly complex techniques involved.
First, drop Vibrance by 80 right away: the rainy-day mood returns instantly, and the colors become easier on the eyes.
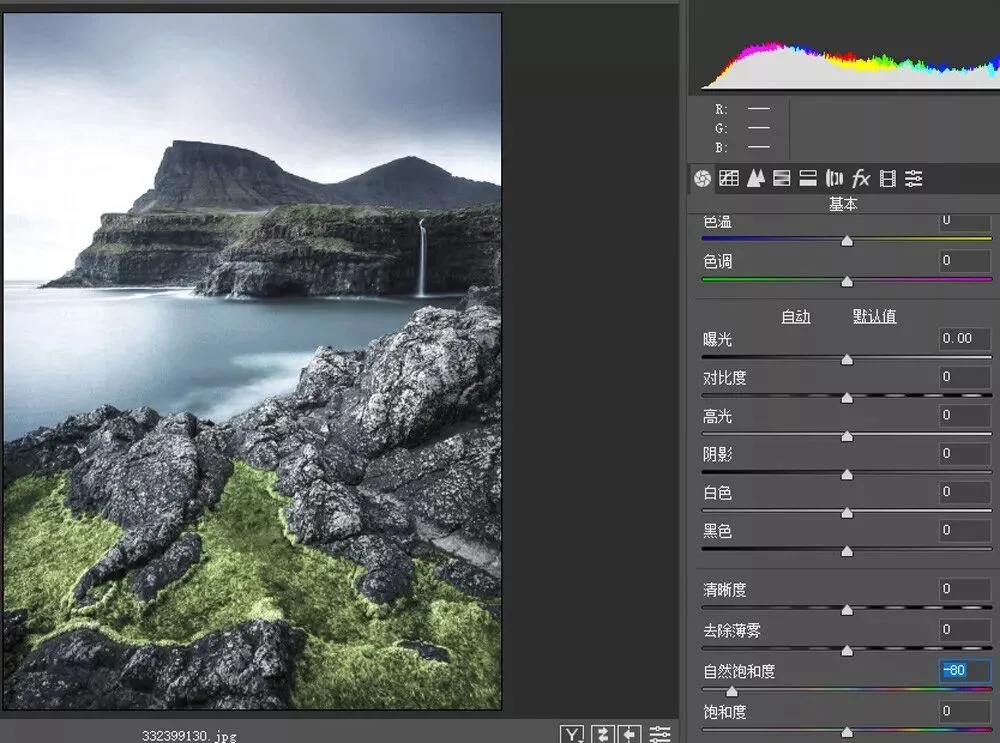
The palette is now a comfortable analogous pairing of cyan and green with no stray colors. But I want a warm-cool pairing of yellow and cyan.
Next I'll use the Blue Primary Hue slider in the Calibration panel. The panel's underlying mechanics are complex, but we only need to remember its overall effect:
Move Blue Primary Hue left, and the photo shifts toward cyan and orange.
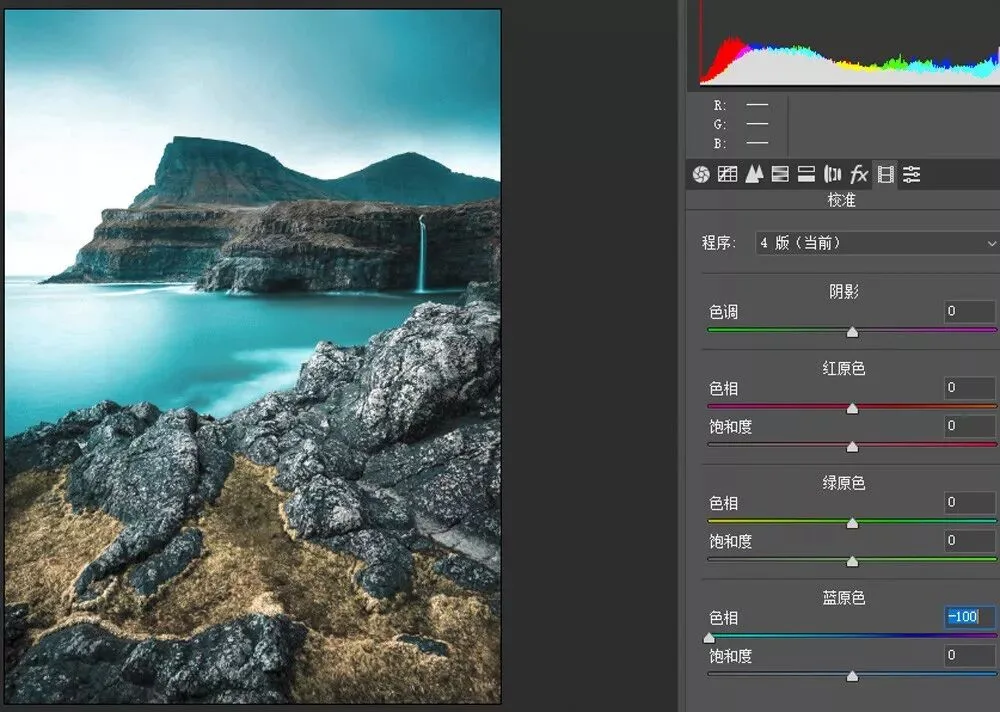
Move Blue Primary Hue right, and the photo shifts toward purple and green.
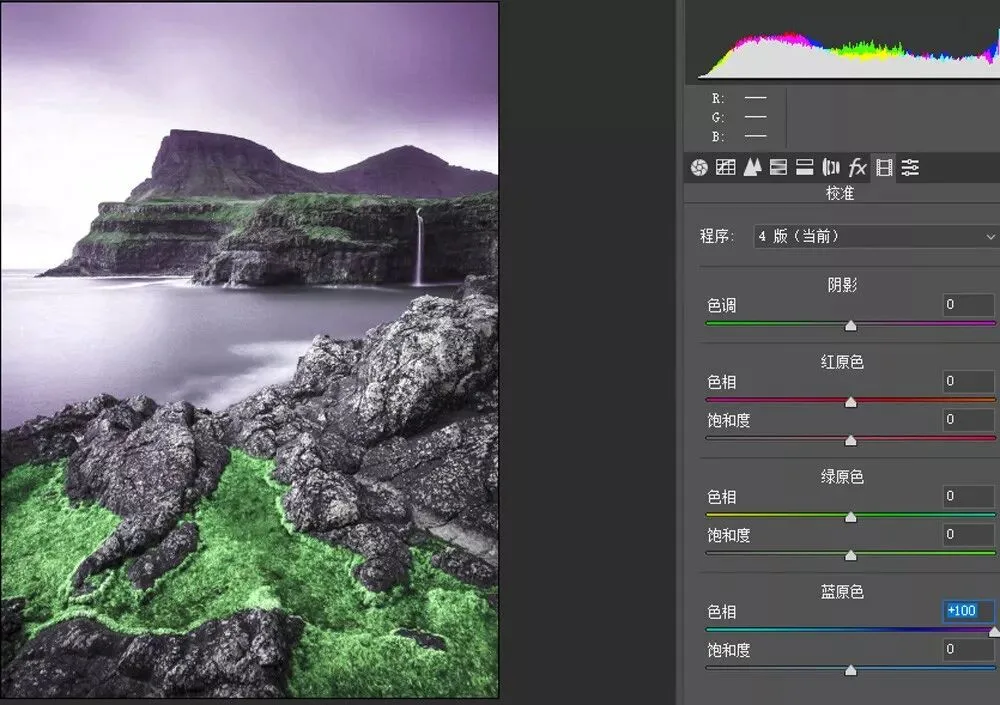
For this image, I moved the Blue Primary Hue slider left to -50, pushing the colors toward cyan and yellow.
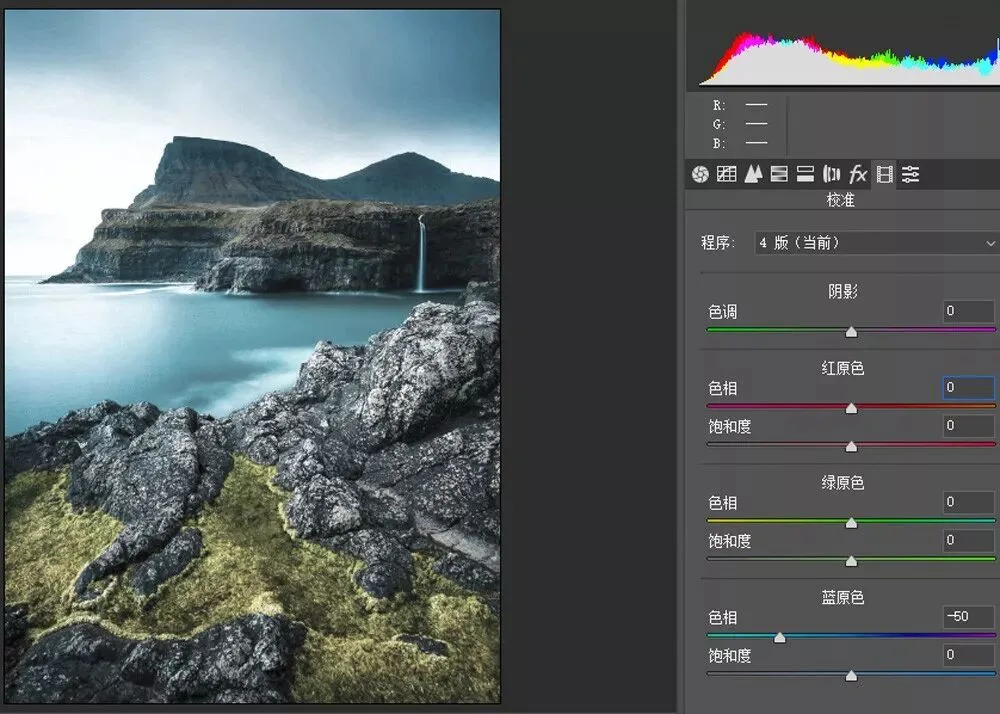
But the cyan now leans a bit too green, and the yellow isn't orange enough, so I'll fine-tune the hue pairing with the HSL panel's Hue sliders. If you're not familiar with the HSL panel yet, read the tutorial "Master Color Grading by Understanding the HSL Panel."
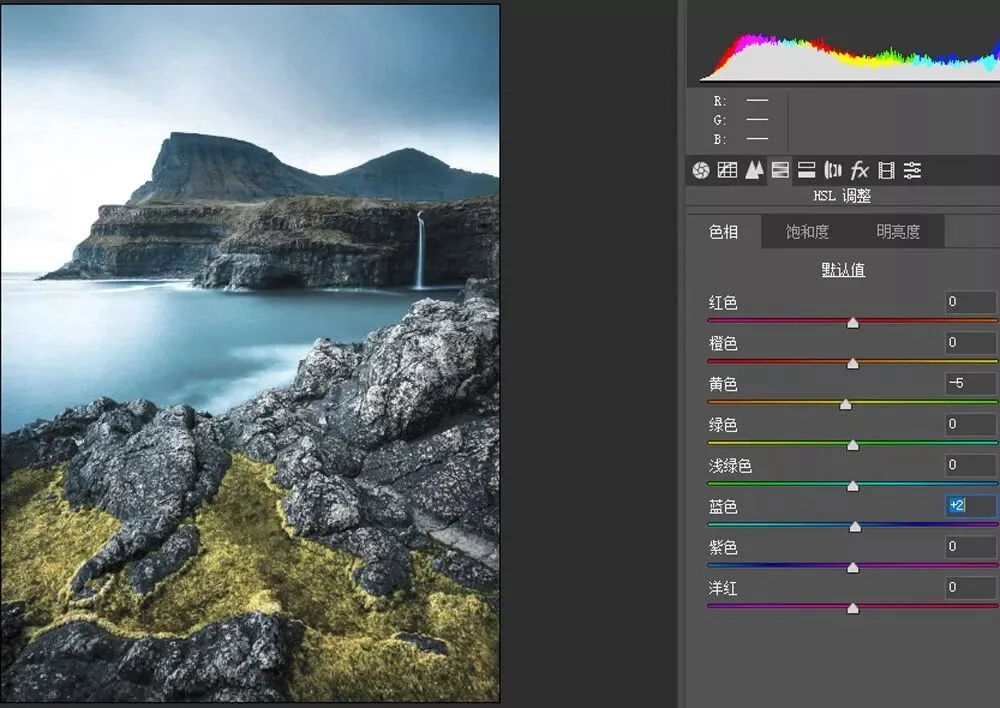
The overall saturation is still a touch high, so I'll keep lowering the saturation of yellow, blue, and aqua in the HSL panel.
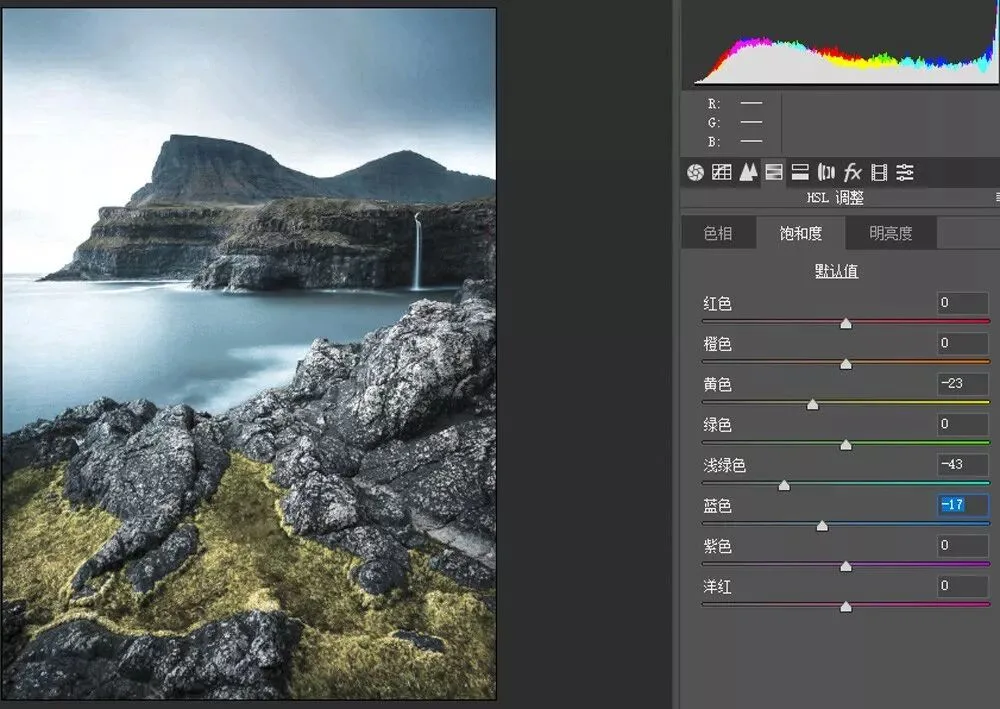
Finally, use HSL's Luminance sliders to darken the cool tones of sky and water while brightening the yellow vegetation.
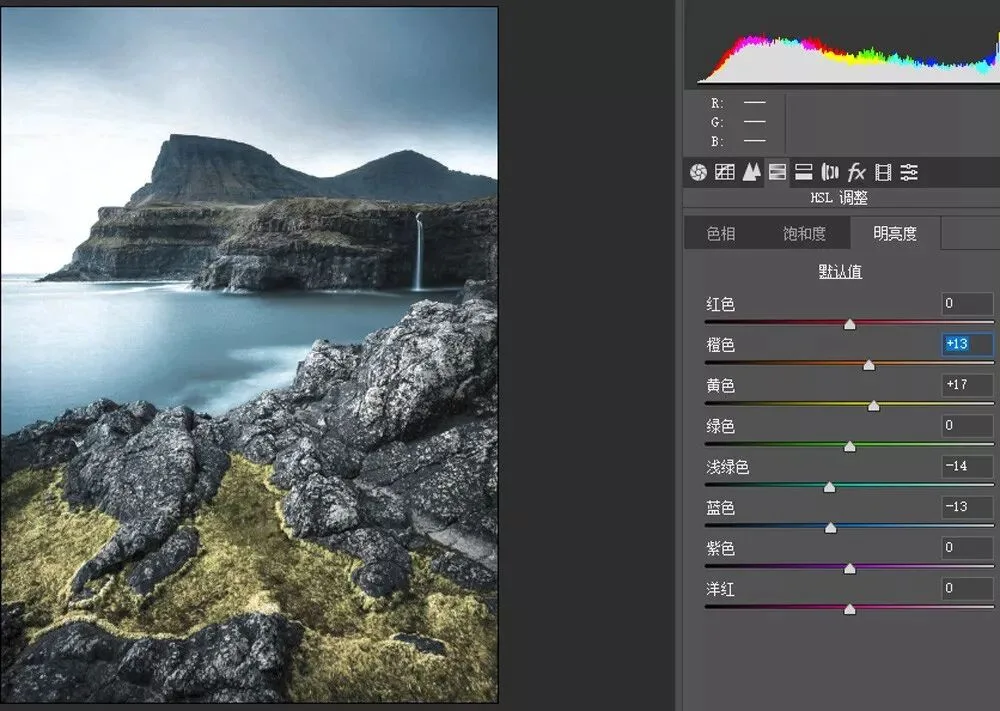
Next I'll use Camera Raw's local adjustment tools — the Radial and Graduated Filters — to further sculpt the light and add depth. If you haven't used these tools before, read the tutorial "How to Reshape Light and Shadow with Local Filters (video)."
First, create a Graduated Filter with Temp -3, Tint -1, Saturation -5 to add a faint cyan cast to the affected area; then Exposure -0.20 and Highlights -40 to darken it. Drag one across the sky to darken it.
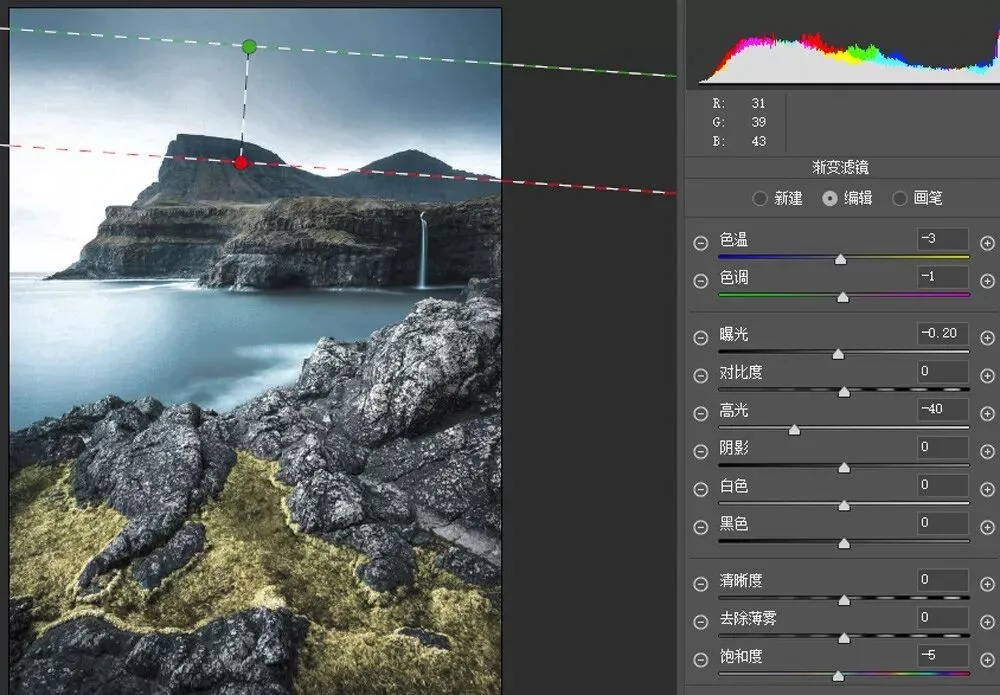
Then, with the same settings, build several more Graduated Filters over the ground to darken the foreground and add tonal depth.
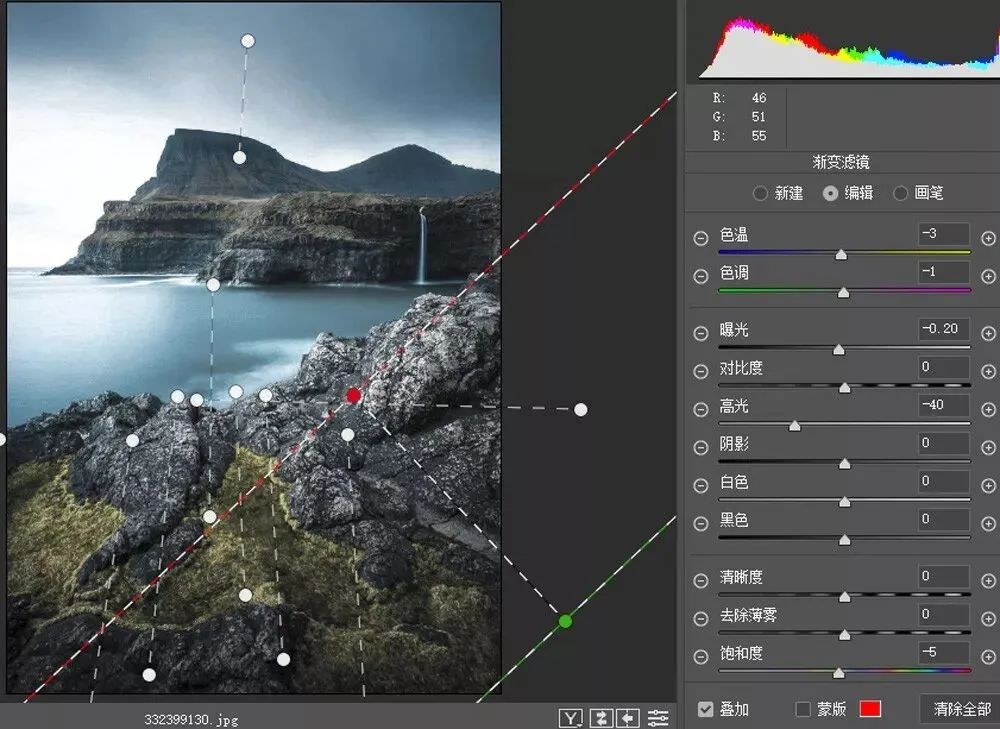
Later I'll brighten the sky, but first return to the Basic panel and set Highlights -75 to recover some sky detail.
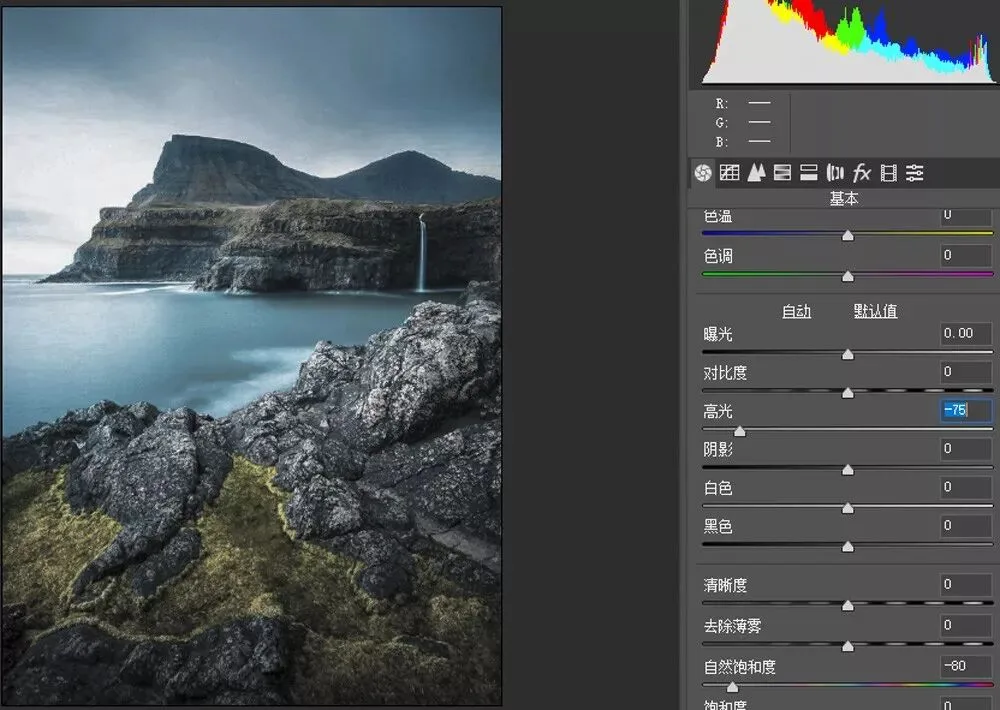
Next, create a Radial Filter with Exposure +0.15, Shadows +20, Clarity -11 to create a sense of distant light.
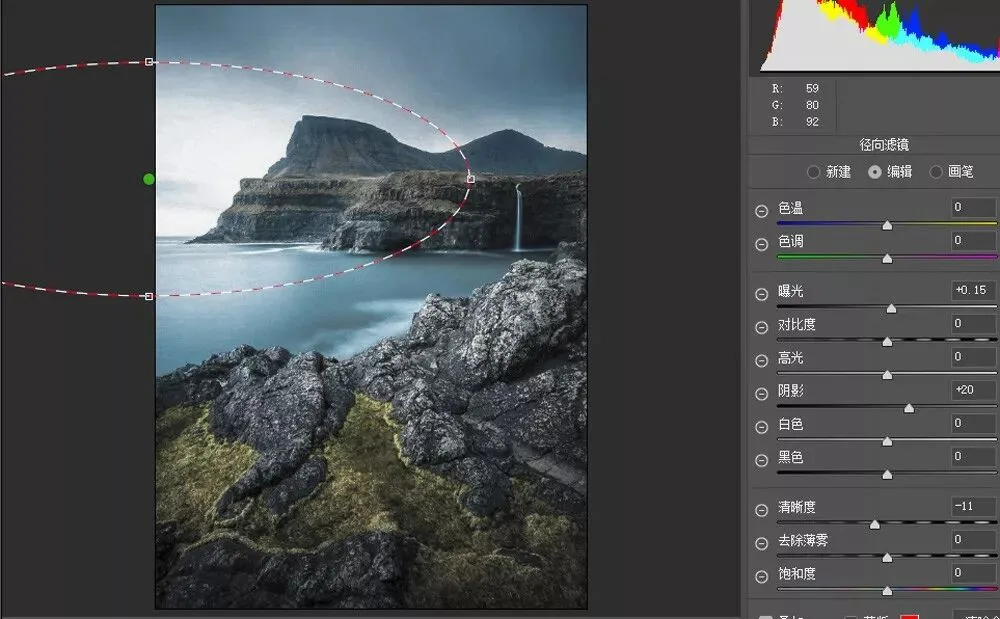
I dragged eight of these Radial Filters into the left side of the sky; now it looks as if intense sunlight is spilling through the clouds, illuminating the overcast scene.
The left side of the frame is actually blown out at this point — but that's not a problem. As I wrote in my book "Foundations of Landscape Photography Post-Processing": technique serves form, and form serves content.
More detail is not always better. If a touch of overexposure strengthens the atmosphere and depth of an image, then a little clipping is perfectly fine.
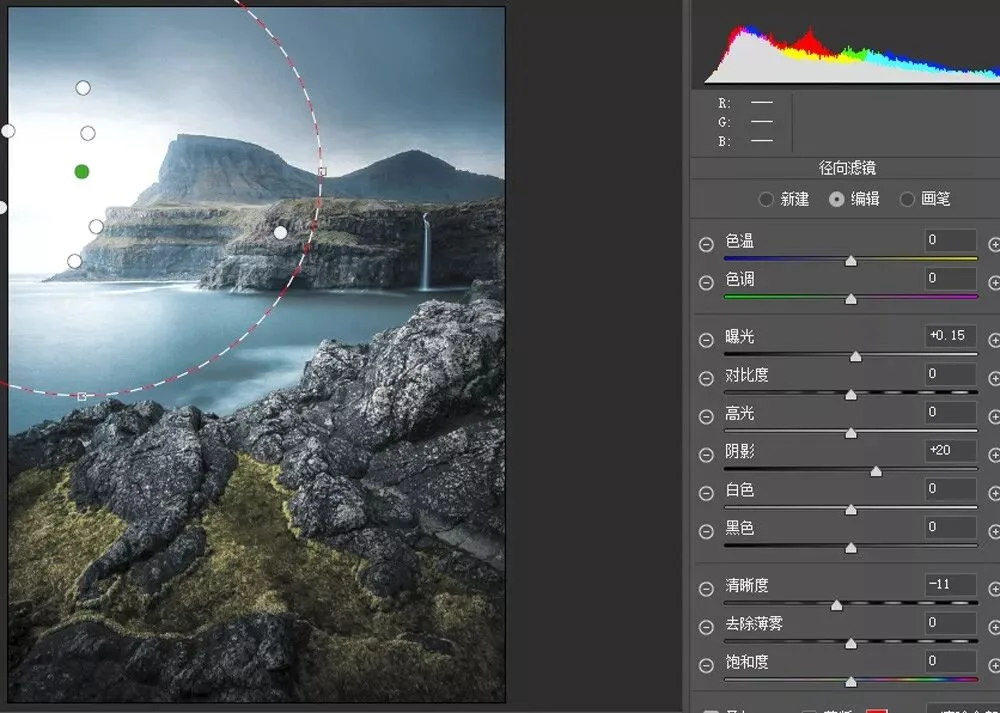
After that, I dragged three more Radial Filters onto the waterfall with Highlights +100, so only the waterfall's highlights are lifted while the surrounding rocks stay untouched.
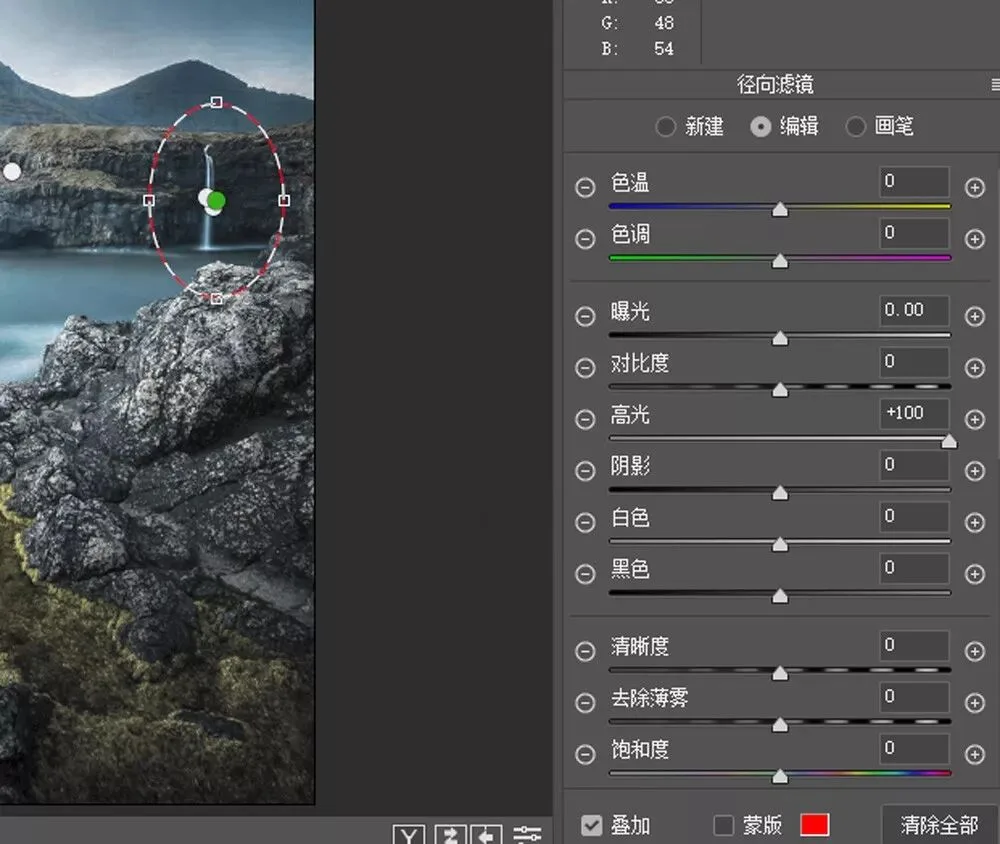
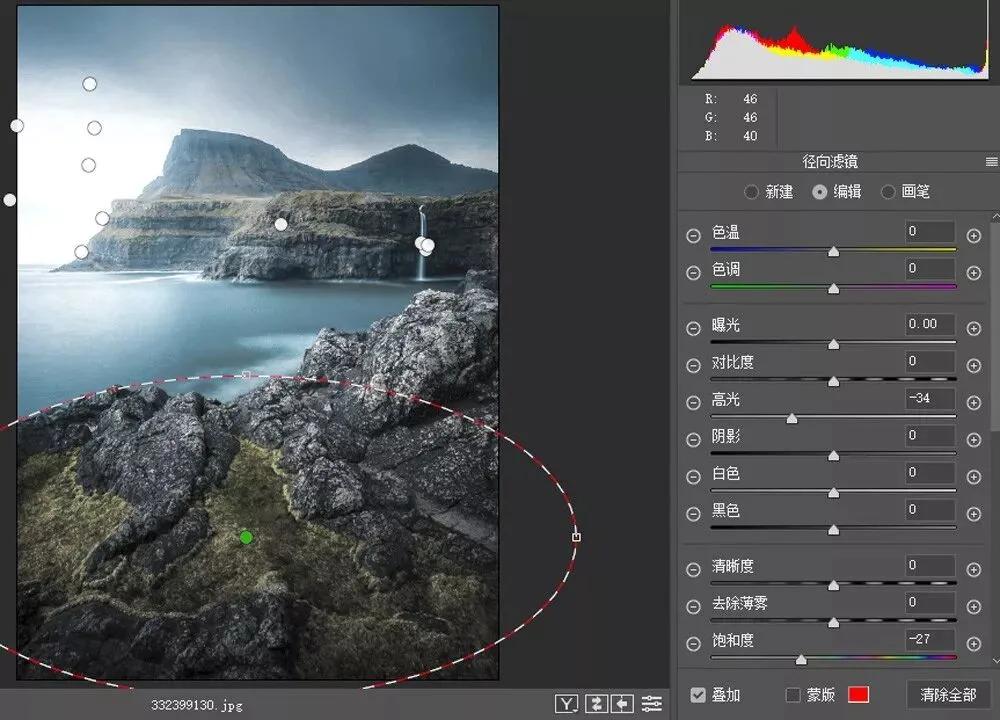
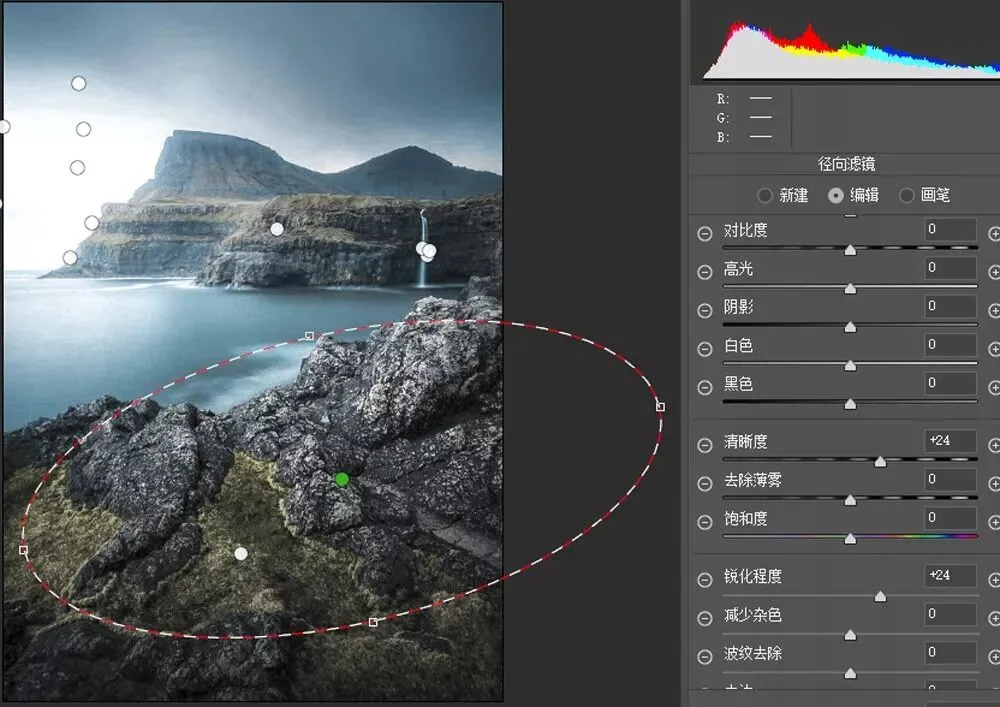
The foreground tundra still felt too eye-catching, so I covered it with another Radial Filter at Highlights -34, Saturation -27 to tone it down further.
The terrain character of the Faroe Islands is what I wanted to express in this photo, so I added one more Radial Filter with Clarity +24 and Sharpness +24 to enhance the texture of the foreground rocks and tundra.
Finally, I used the Curves tool to lift the black point and compress the white point, removing any dead blacks and dead whites. Overcast days feel soft, and harsh blacks and whites would break that feeling — hence this last step.
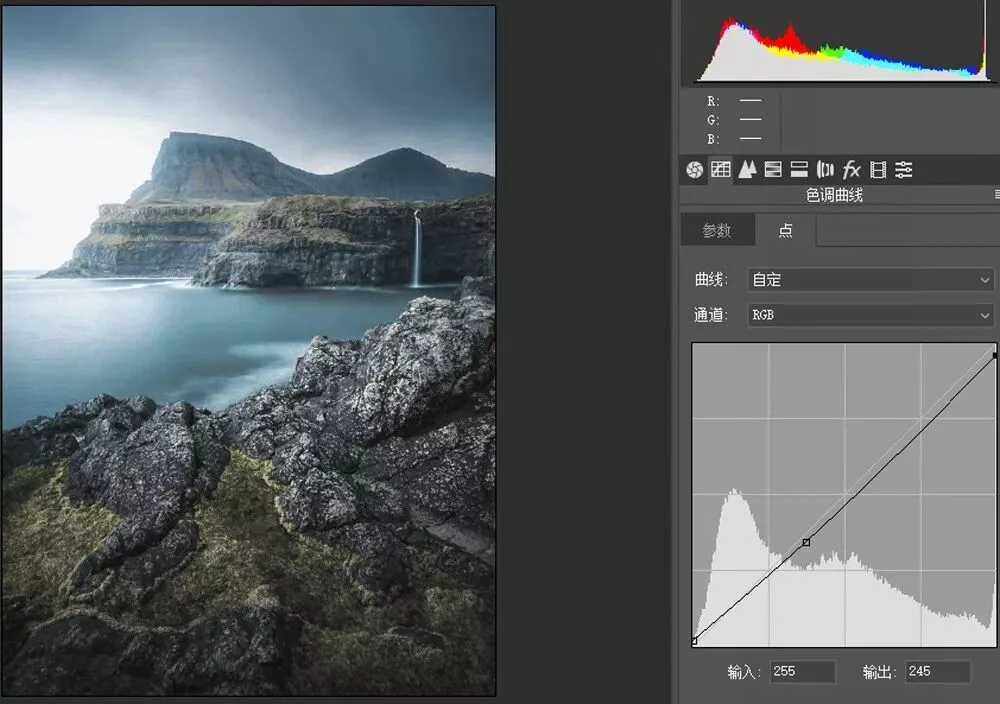
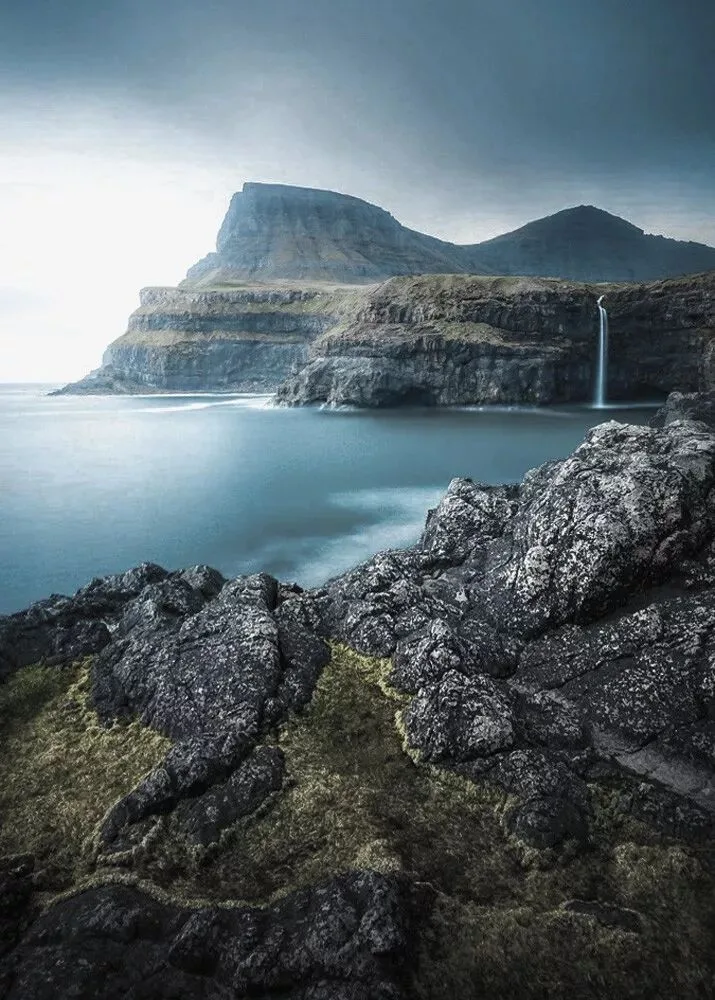
With a few simple steps, the edit is done. Different viewers will have different preferences, of course — compare the three styles below; which do you like best?
Feel free to follow me on Tuchong: Thomas Chu Photo
https://thomaskksj.tuchong.com
How to join the photo critique column:

Long-press the QR code above to join the critique event directly
Or visit the critique event page in the Activities section of the Tuchong homepage:
https://tuchong.com/events/559403/
Join the event. Subjects are limited to landscape photography, including natural scenery, cityscapes, and travel landscapes.