Photography Tutorial · 2020-05-02
How to Shoot on Rainy Days: 3 Tricks for Great Shots in Overcast Weather
Thomas Chu Photo
In daily travel and life, overcast and rainy weather is what we often encounter. The light and colors are rather flat in such weather, and many friends don't know how to shoot in it.
Especially when traveling, you may only get one chance, and you have to take some photos even in the rain. In fact, for many photographers, overcast and rainy days are their favorite — changing your mindset is the key!
Today Thomas will share three ideas to help you take good works even on overcast and rainy days.
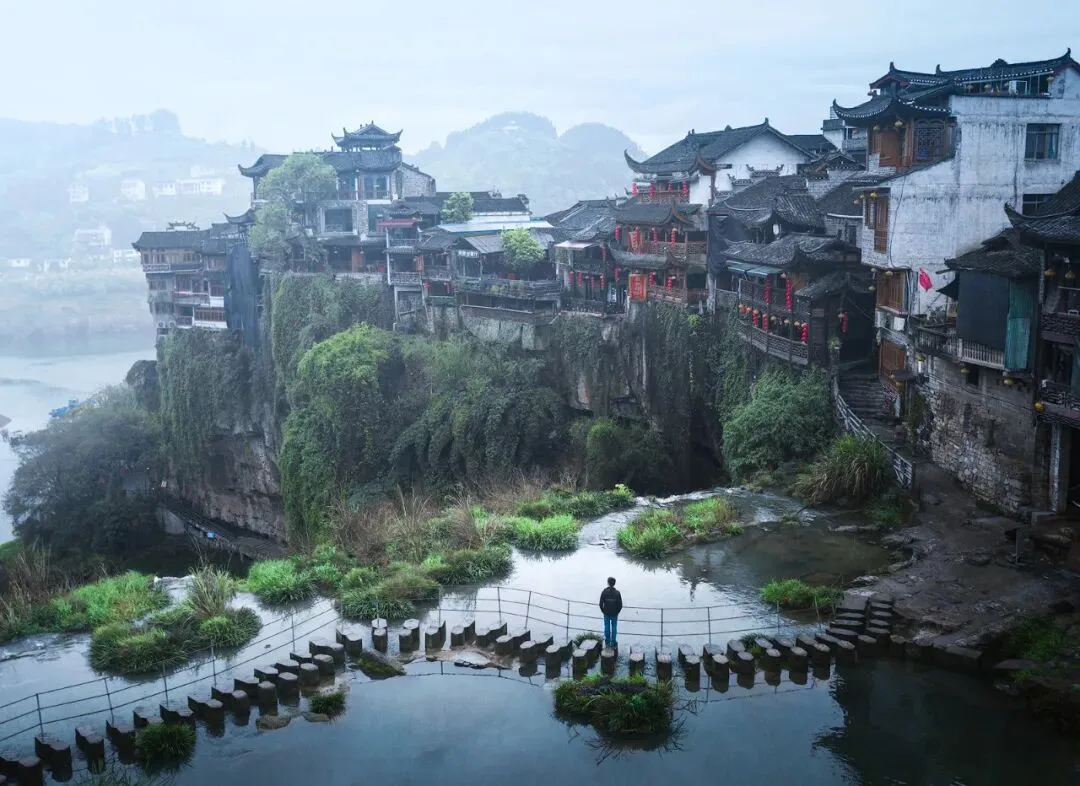
Video Tutorial
▶ Watch the video tutorial on Bilibili
This is the fully illustrated companion to the video above. Thomas was caught in days of relentless rain while shooting in Guizhou, so he turned the 'bad weather' into the topic itself: how do you actually shoot on overcast, rainy days? The video answers with three tricks — shoot small scenes, exploit the blue hour and night, and grade a cool color cast in post, ending with a live Camera Raw edit of a Guizhou terraced-field frame. The three tricks are unpacked below with the video's on-screen cards and keyframes.
Start with the overview. Overcast days have two unavoidable weaknesses: flat tone — none of the strong contrast of sunny light, just a washed-out grey wash; and flat color — especially in daytime, nothing stands out (see the summary card at 1:02 in the video). All three tricks play to the strengths instead: the first two dodge the weaknesses at capture, the third turns the flaw into mood in post.

01 Trick 1: Shoot Small Scenes for Structure and Story
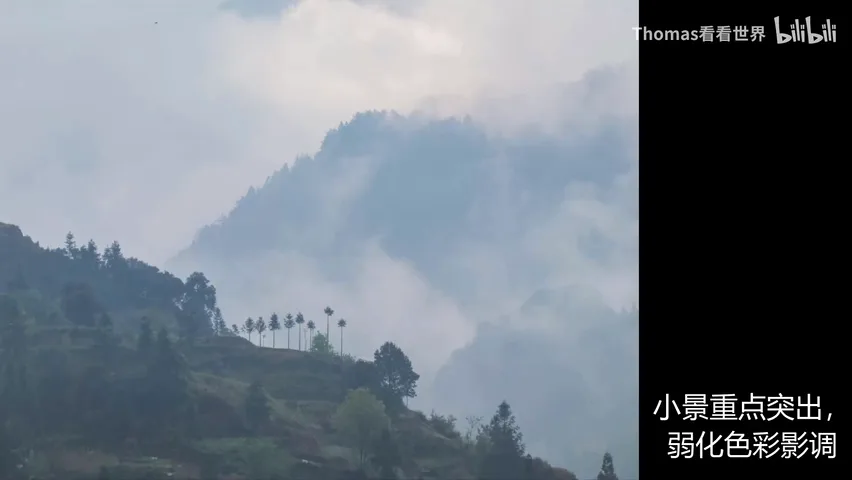
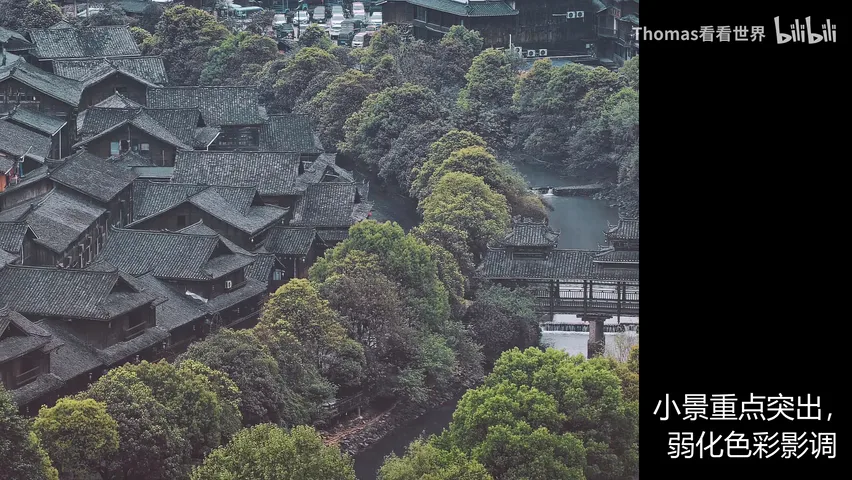
The first field trick is simple: frame tighter and go for small scenes. It is about where the viewer's attention lands — in a small scene they read its structure, order, texture, or a little story; in a wide view the eye wanders to the sky, the foreground, all the clutter, and what is left is that flat grey tonality (at 1:51 in the video).

The contrast in the video is immediate: the same overcast village, shot wide, looks cluttered and colorless (at 2:10); tighten the frame to a foggy hillside or layers of black-tiled wooden roofs, and the small scene highlights structure while the lack of color stops mattering (at 2:16 in the video).

02 Trick 2: Chase the Blue Hour and Night Lights
The second trick is to exploit special moments. Overcast daylight is indeed dull, but two moments stay colorful. The first is the blue hour — the half hour or so after sunset or before sunrise, when the sky turns blue no matter the weather (at 2:46 in the video). Better still, city lights come on: warm lamps against the cool sky, and the photo instantly gains rich color.

The video nails it with a sun-elevation curve and three frames from the same vantage: after sunset the sky brightness falls off a cliff, and from sunset to blue hour to night the light shifts from pale grey to deep blue to pitch black (at 2:48 and 3:24 in the video). The blue hour is the only 'color window' besides daytime.

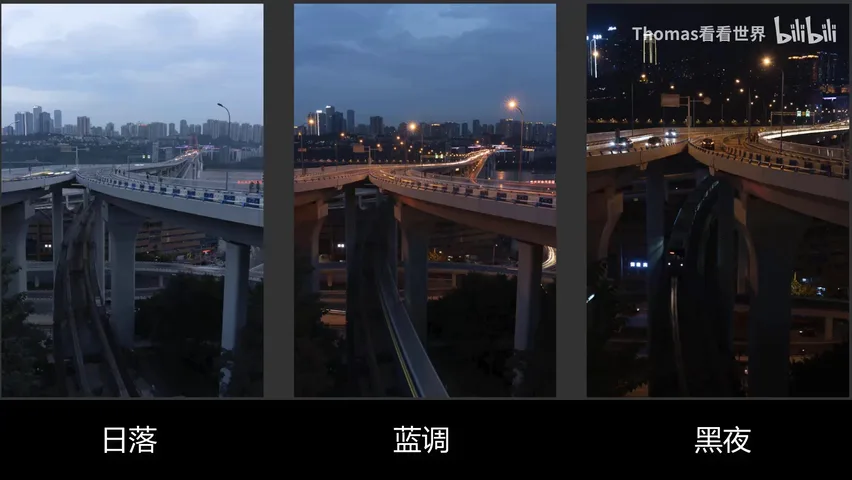
The second moment is night. After dark the sky is black in any weather — no difference at all; and once the ground lights come on, their colorful glow offsets exactly what overcast weather lacks (at 3:19 in the video). The blue hour and night are the two best windows for rainy-day shooting.
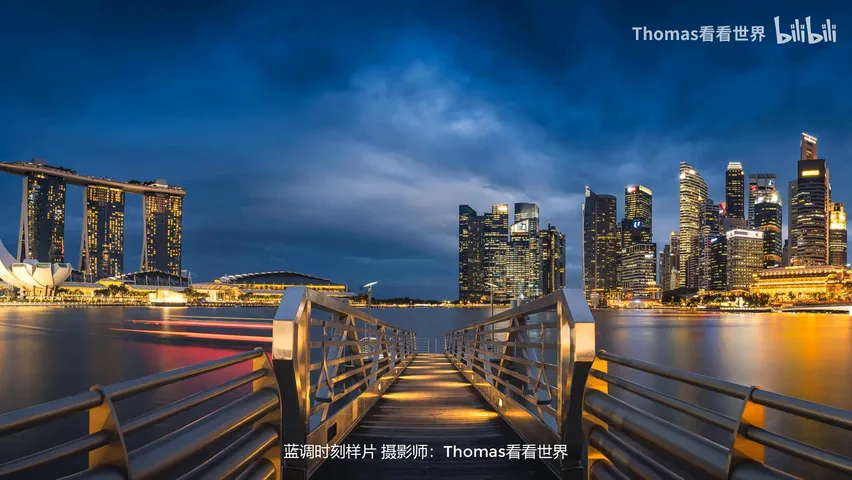
03 Trick 3: Grade a Cool Atmosphere in Post
The first two tricks happen at capture; the third returns to post. The flat tone and muted color of rainy days are actually perfect for quiet, calm, somber, melancholic moods — push a cool color cast in post and that mood emerges (at 3:39 in the video). The video opens the section with two before/afters: a grey castle lake and a village that gain an airy chill once the cool grade lands (at 3:47 in the video).

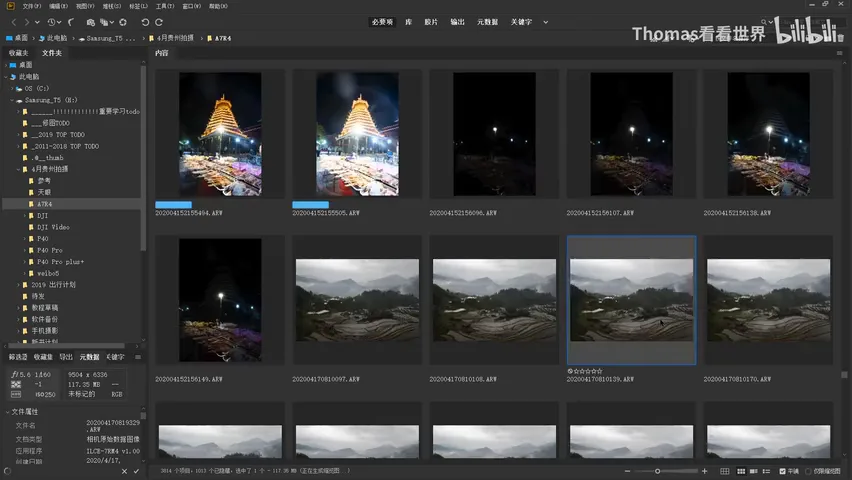
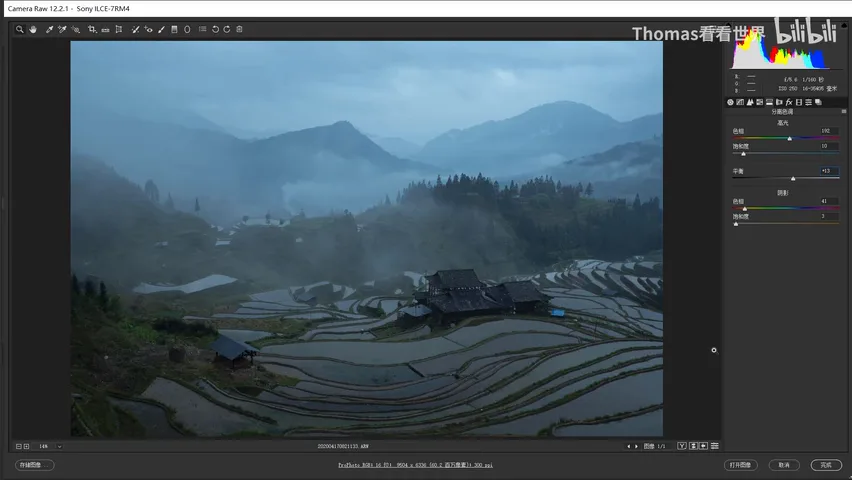
The live demo is a Guizhou terraced-field frame — a grand view that genuinely shines at wide angle, so Thomas decides to grade it cool in post to beat the colorless weather (at 4:52 in the video). Back at the hotel he imports the cards, culls the target file in the catalog (at 4:46), and opens the terraced-field RAW in Adobe Camera Raw (at 5:02 in the video).
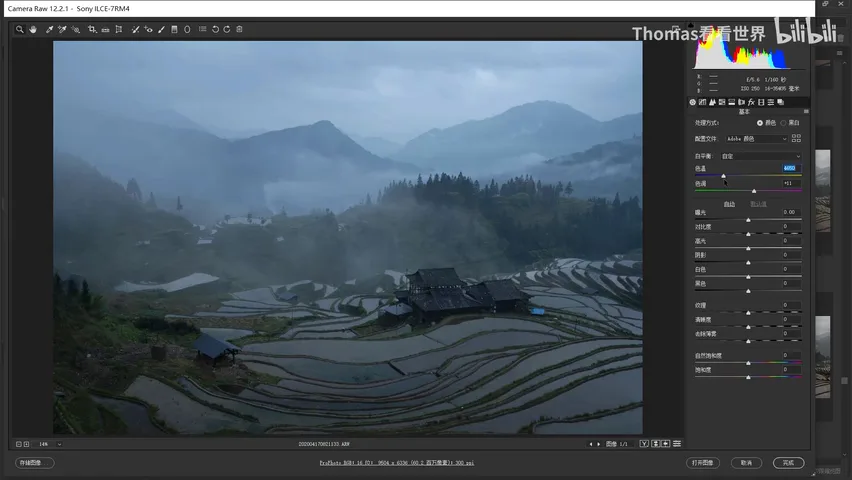
The simplest cool-grade tool is white balance: drag the Temp slider right for warmer, left for cooler. Setting it around 4600 gives the photo a decent cool base (at 6:01 in the video). But WB has an obvious flaw — it paints everything blue uniformly, shadows included, and the whole frame looks like a wrongly balanced photo behind a blue sheet of glass. Not comfortable.
The finer tool is Split Toning, which tints highlights and shadows separately (at 6:07 in the video). The recipe: add a cyan-leaning hue to the highlights — hold the Alt key while dragging the Hue slider to preview exactly which color you are adding; pick a hue around 190 and raise Saturation, and the highlights take on that lovely dreamy cyan that plays off the photo's blue base (at 6:43 in the video).
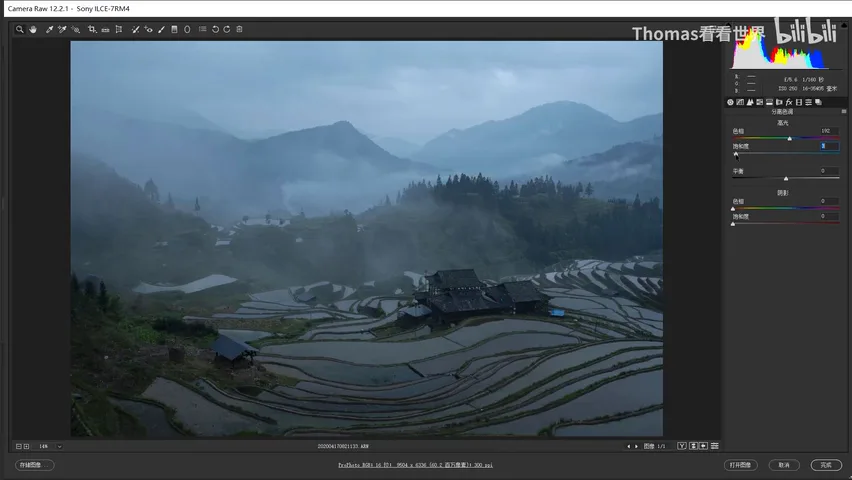
The shadows go the opposite way: that ugly blue WB cast is neutralized with its complementary color, yellow. Pick a yellow hue and keep Saturation low — too much and the photo turns yellow; just a touch, around 3, is enough to cancel the blue in the shadows (at 7:27 in the video).
Split Toning plus the white-balance step turn the grey raw file into a chilled blue scene — the before/after moods are worlds apart (at 7:38 in the video). On the OLED screen the tonal layers and detail hold up well; refine the mist's layering and local detail, unify the color atmosphere, and the final image is done (at 7:58 in the video).
1. Overcast days suffer two weaknesses — flat tone and flat color — and all three tricks play around them; 2. Frame tight on small scenes so the viewer reads structure, order, texture and story instead of a grey wide view; 3. Use the two color windows, blue hour and night — cool sky against warm lamps, city lights offsetting the missing color; 4. In post, set the base with a lower color temperature, then Split Tone the highlights cyan (Alt-drag to preview, hue about 190) and the shadows a whisper of yellow, turning the gloom into a calm, chilly atmosphere.