Photography Tutorial · 2021-04-18
How to Render a Sense of Light in Post: Just One ACR/Lightroom Tool
Thomas Chu Photo
A sense of light adds depth and dimension to an image while enhancing its atmosphere.
In today's post-processing tutorial, Thomas teaches you how to create a sense of light in post — quickly and easily. No complex techniques required: the Radial Filter in ACR or Lightroom is all you need!
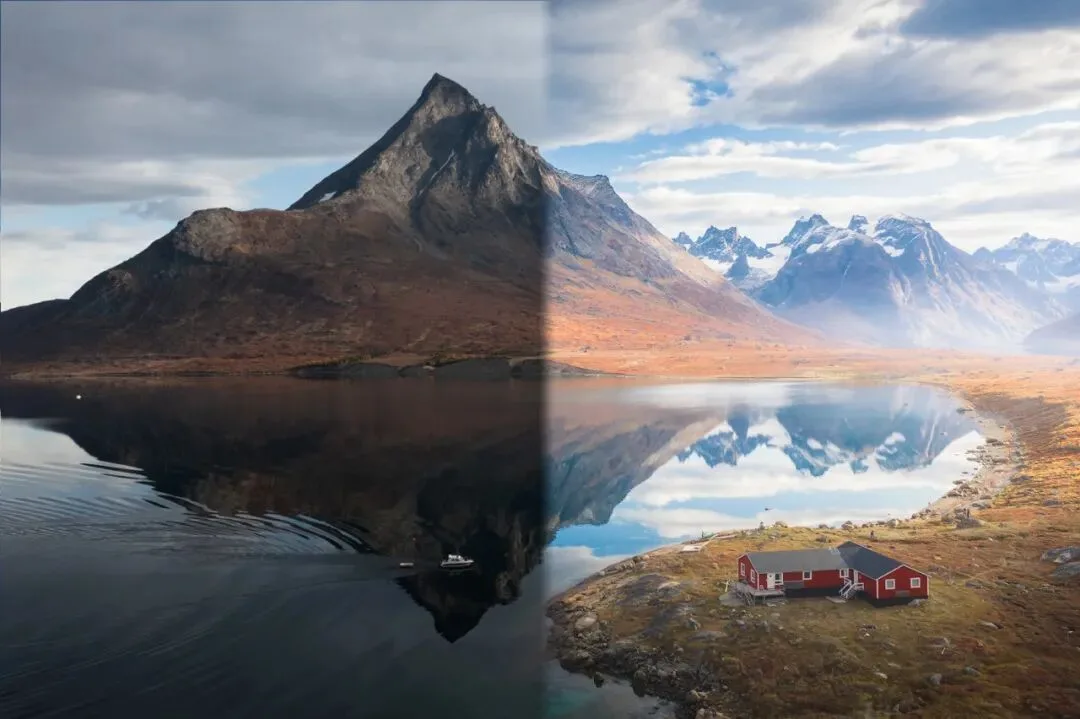
Simple as the method is, the "small amounts, multiple passes" approach and "recovering the shadows" mentioned in the video are the keys to rendering natural, believable light — pay close attention to both!
Video Tutorial
▶ Watch the video tutorial on Bilibili
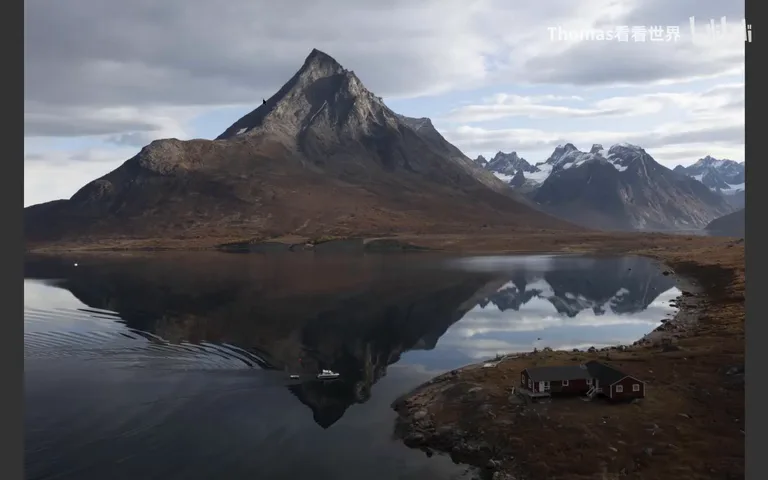
This is the fully illustrated companion to the video above. Starting from a flat, lightless fjord lake photo, Thomas shows how the Radial Filter alone in Camera Raw or Lightroom can render a natural sense of light, and distills the method into two key points: "small steps, many passes" and "restore the shadows". The walkthrough below follows the video in order with keyframe screenshots — skim it here for the framework, then dive into the video for the details.
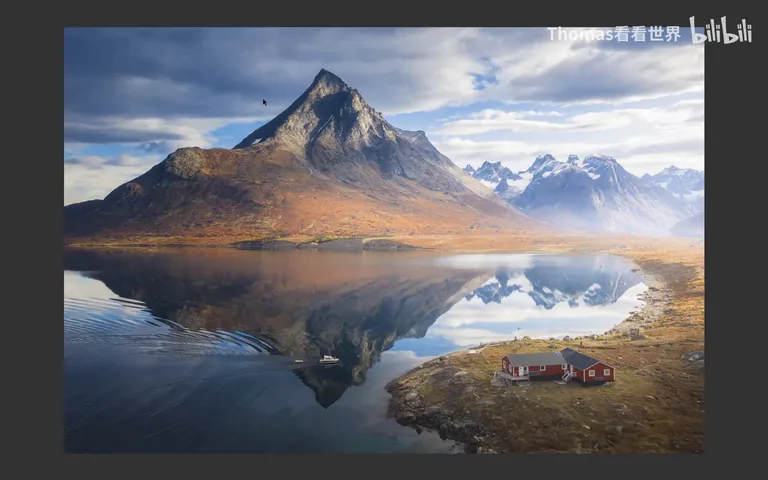
Start with the overview. The video flashes two summary cards, and the first one is the soul of the whole tutorial — "small steps, many passes, for a natural look". A before/after pair at 0:05 and 0:10 shows the gap between the original and the finished frame: the same photo, but with light added, the mood transforms instantly.
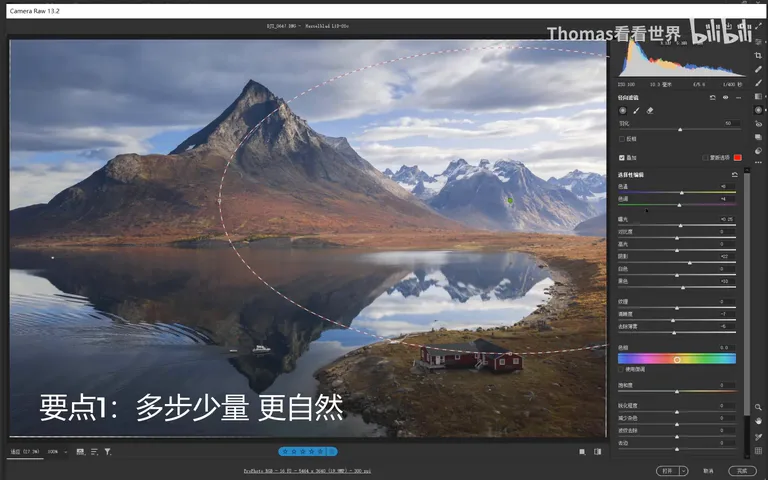
01 Meet the Radial Filter: Draw a Glowing Circle
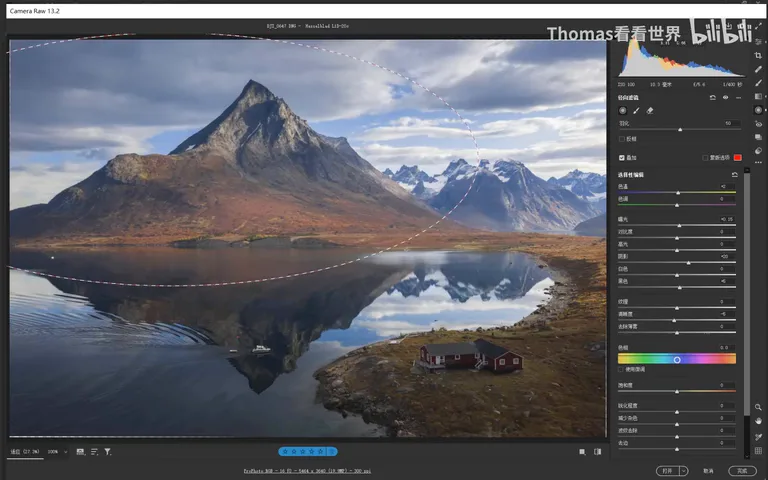
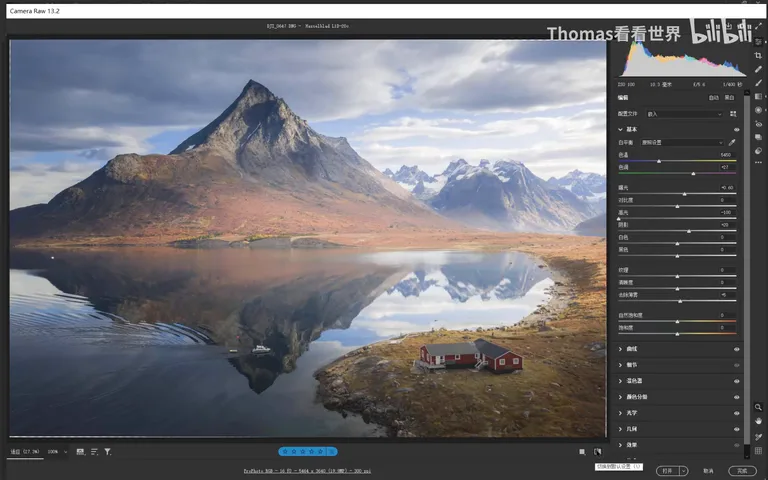
When opening Camera Raw, Thomas had already finished the basics — HSL plus exposure and color in the Basic panel — so he skips those. The core tool for rendering light is the Radial Filter in Lightroom or ACR (at 0:47 in the video): its range of effect is a circle (or ellipse), which conveniently mimics the bright pool a beam of light casts onto the scene — naturally suited for "making" light.
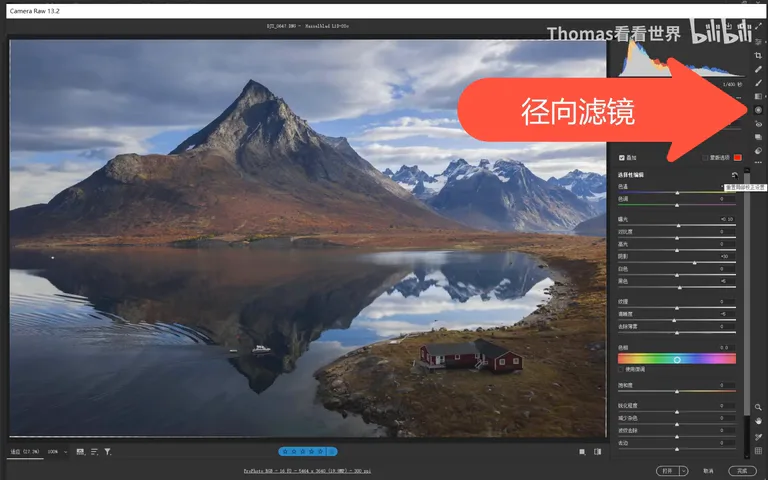
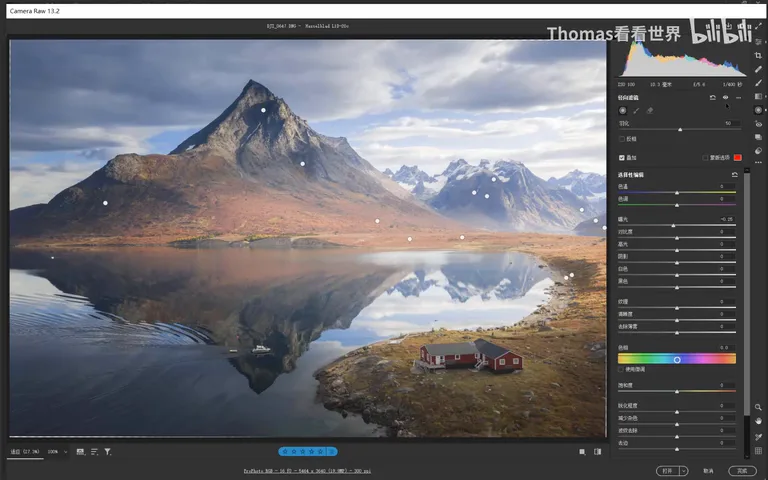
But manufactured light must obey the laws of nature. In this photo the shadows clearly fall toward the left, meaning the source sits upper right — so the radial filter belongs on the right side of the frame, over the sunlit peak. Get the direction right and the result looks natural and comfortable (at 1:48 in the video).
02 Four Sliders: Temperature, Exposure, Shadows, Clarity
Which sliders create the sense of light? The first pair is Temperature and Tint: pull temperature right and the painted light turns yellow, like a low warm sun; pull tint left and purple mixes into the yellow, blending into a reddish warmth (at 1:11 in the video). Combine them to taste for the exact color of light you want.
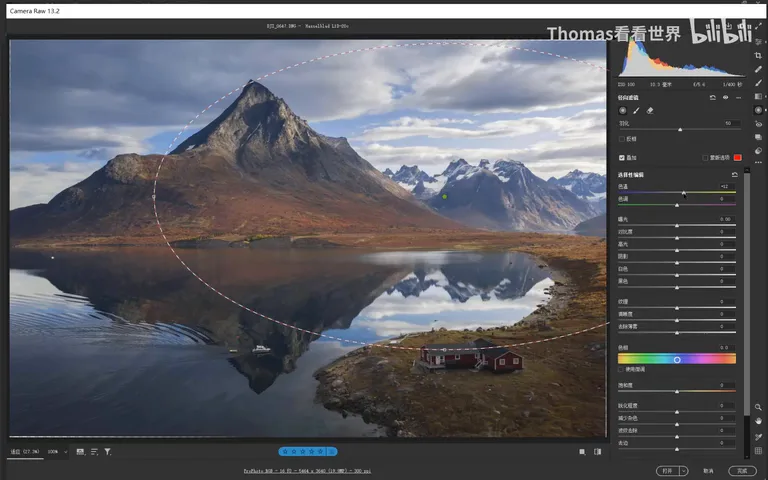
The second pair is Exposure — the direction the light comes from should be brighter, so exposure goes up. But keep the amount small: push exposure too far and the whole circle brightens together, easily blowing out (at 2:00 in the video). The smarter move is to raise Shadows and Blacks alongside: exposure lifts everything at once, while shadows and blacks target only the dark tones — lifting the gloom without blowing the highlights. Just don't overdo Blacks, or a heavy foggy haze sets in (at 2:11-2:41 in the video).
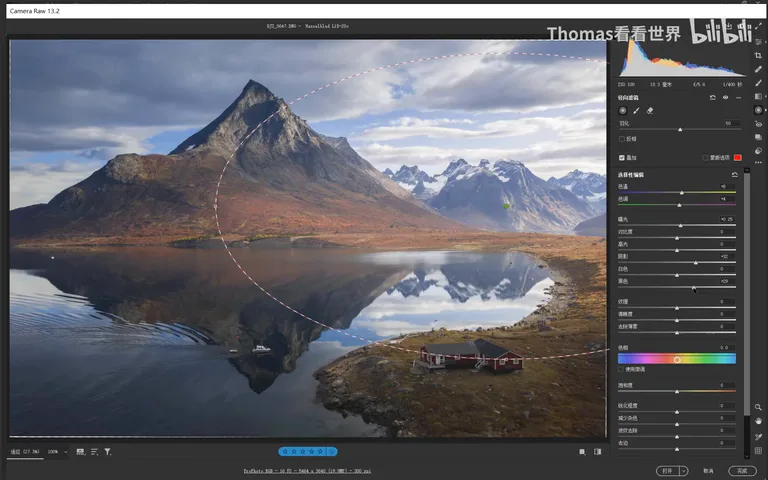
The last pair is Clarity: toward the direction of sunlight the air always carries a hazy glow, so easing off clarity lends the bright area that atmospheric feel; if needed, pull Dehaze down slightly to reinforce it (at 2:41 in the video).
03 Key Point One: Small Steps, Many Passes, Feathered Transitions
The tool and sliders are simple; the real key is how you use them. Thomas's habit: keep every single radial filter's adjustments tiny, then stack multiple filters to build the effect — only then do the transitions look natural. The counterexample is vivid: pump one filter's values to the max and the edge of the glow gives it away instantly — anyone can see a filter was dragged there (at 3:17-3:35 in the video).
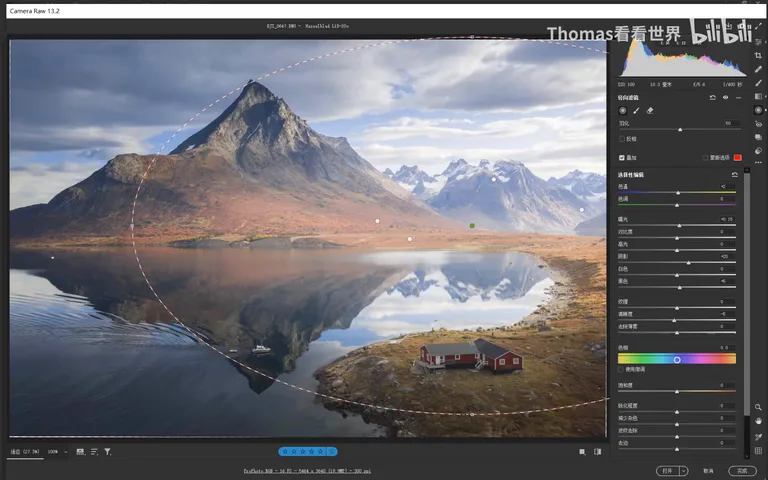
What does "small" mean concretely? At 3:38 in the video Thomas gives a reference set: temperature plus 2, exposure plus just 0.15, shadows around plus 20, blacks plus 5, clarity minus 5 — a filter like this brightens only a touch and leaves virtually no trace.
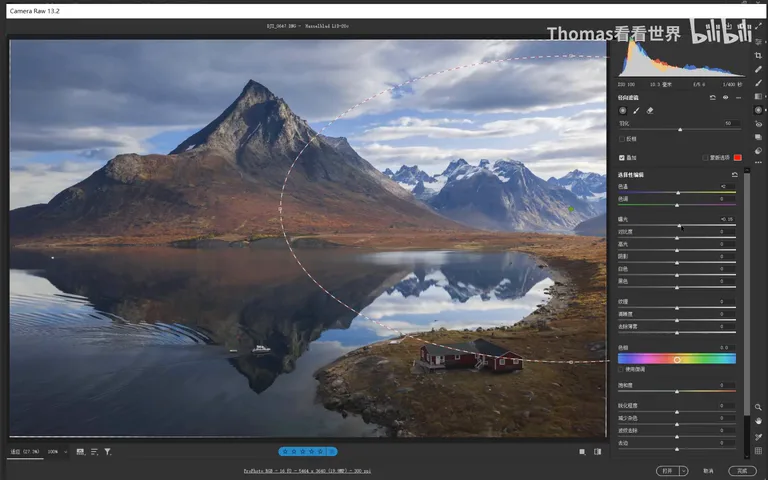
Then comes "many passes": draw a second, larger radial filter so the transition stretches out; add an even larger one; then, along the direction the light travels, place one over the upper-right corner specifically to mimic the incoming sun — even sweeping the little cabin into the glow; finally add one big, round filter to unify the whole region seamlessly (at 3:58-4:40 in the video). Many small filters layered into one large glow look far more natural than a single heavy-handed pass.
04 Key Point Two: Darken the Shaded Side, Restore True Shadows
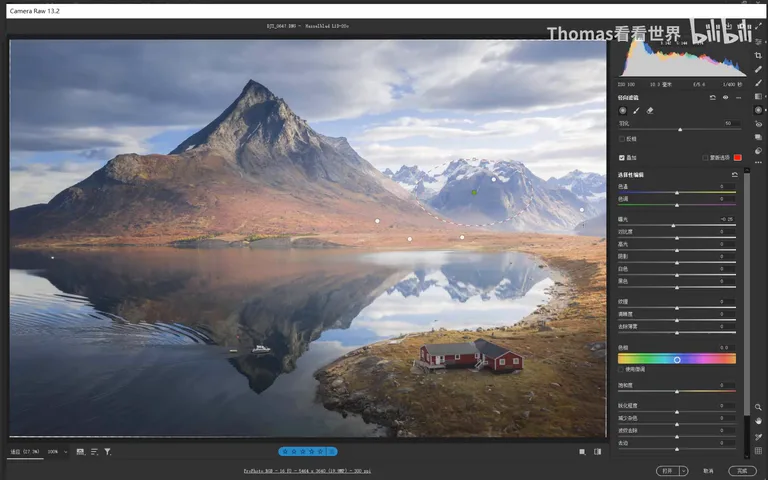
Brightening is only half the job. The second summary card — "restore normal shadows and darks" — is the reverse move: some places should never have been lit in the first place. The shaded faces of mountains and slopes turned away from the source get caught in the filters' feathered reach and end up too bright, breaking the logic of light (at 4:43 in the video).
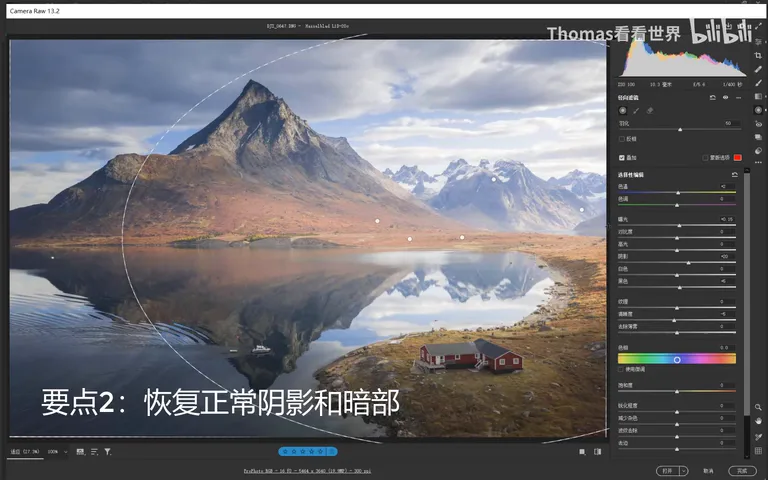
The fix: create a new radial filter with exposure at minus 0.25, and use the brush tool or the filter's range to paint the over-lit shaded faces back down — the shadowed bank, the dark side of the mountain, and so on. Restraint while brightening, and pressing back what should stay dark: only with this push and pull does the light read as real instead of floating on the picture (at 4:53-5:23 in the video).
05 Before and After, Two Takeaways
At 5:24 in the video comes the full comparison: switch off all the radial filters and the photo reverts to its flat original state; switch them back on and the sense of light returns instantly — warm light cascading from the upper right, the peak lit up, the shadows still grounded. The whole edit takes only minutes in Camera Raw, yet it completely transforms the photo's mood.
Finally, two takeaways (at 5:41 in the video): first, adjust a little at each step but take many steps, feathering generously and preserving transitions; second, restore the shadows by darkening, pressing back the shaded faces that should never have brightened. Do these two things and your rendered light will look thoroughly natural.
1. Build light with the ACR/Lightroom Radial Filter: warm the temperature, nudge tint toward purple, raise exposure only slightly, lift Shadows and Blacks to raise the gloom, and cut Clarity for a hazy atmospheric glow; 2. The light's direction must match the scene's logic — shadows fall left, so the light comes from upper right; 3. Key point one, "small steps, many passes": keep each filter gentle (e.g. temp +2, exposure +0.15) and layer several feathered filters from small to large; 4. Key point two, "restore the shadows": add a filter at exposure -0.25 or use the brush to press back shaded faces that should never have been lit.