Photography Tutorial · 2018-05-27
Photoshop's Best Selection Tool: Select and Mask
Thomas Chu Photo
One practical tutorial every week, making photography easy to learn
Local adjustment is the core technique of photo post-processing — and the key to local adjustment is building precise selections to edit objects individually.
In today's tutorial, Thomas introduces several common ways to build selections, with a deep dive into the best of them: the "Select and Mask" tool.
1
Common Ways to Build Selections
Landscape photographers now commonly use three methods to build precise selections in Photoshop.
80% of cases — especially subjects with well-defined edges — can be handled with the Quick Selection tool. Paired with "Select and Mask," even semi-transparent edges like flames and clouds, and intricate edges like hair, leaves, and branches, can be selected with ease.
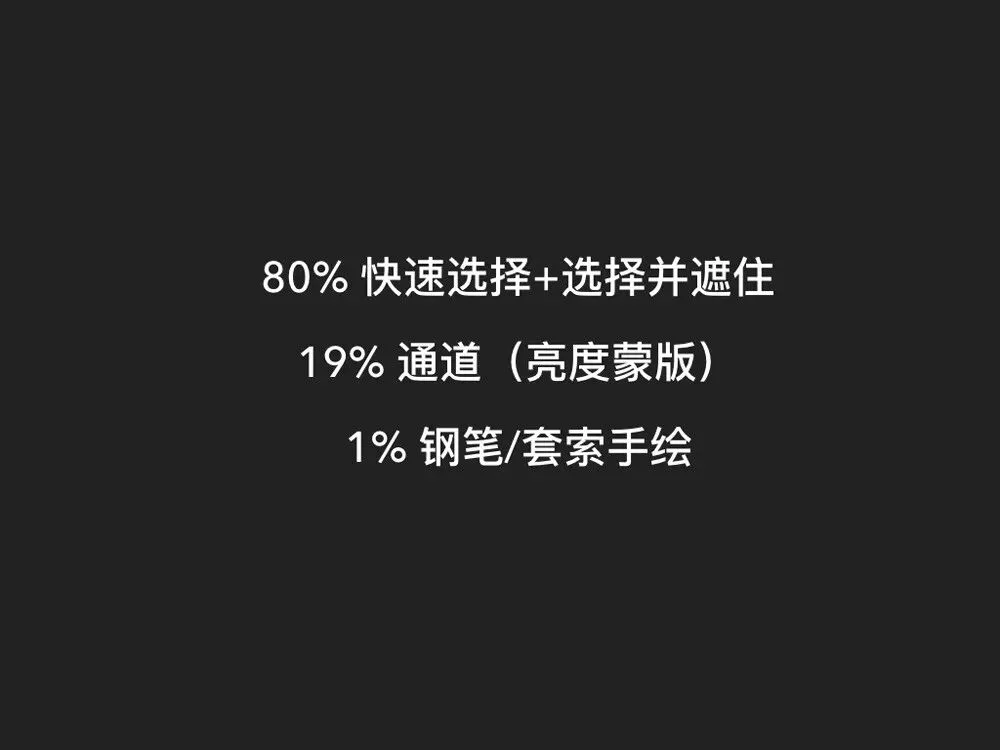
In the remaining 19% of cases we need luminance-based selection — selecting only the highlights or shadows of a subject — which calls for luminosity masks or channels.
And in the final 1% of special cases — extracting barely visible edges, like the fuzzy boundary between a black silhouette and a night background — only the Pen or Lasso tool works, tracing the edge by hand.
Here I'll introduce the Quick Selection + Select and Mask method, which solves 80% of selection problems.
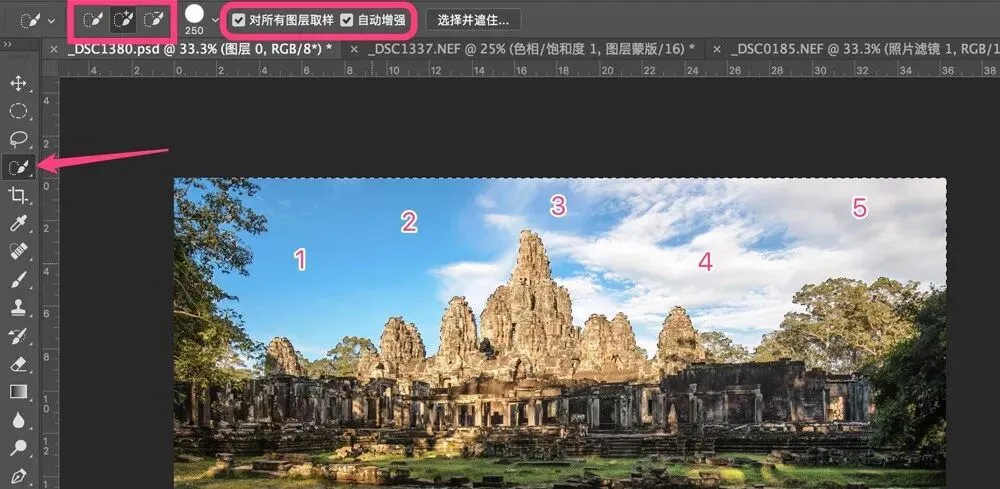
The Quick Selection tool is the fourth icon in the left toolbar. After selecting it, you generally want to check "Sample All Layers." Then click the spots you want to select — points 1, 2, 3, 4, and 5 in the sky below, for instance — and the tool automatically detects the sky-ground boundary, with only small local inaccuracies.
2
Getting Started with Select and Mask
To refine a selection made with Quick Selection, choose "Select and Mask" in the top menu bar.
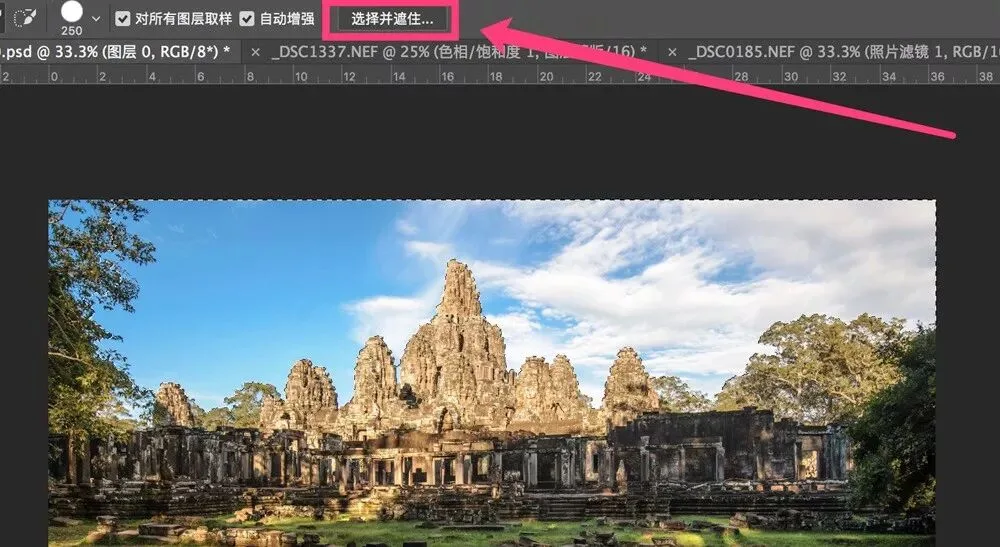
The Select and Mask panel: on the left are four adjustment tools (1-4), in the middle the image and selection preview, and on the right a set of sliders.
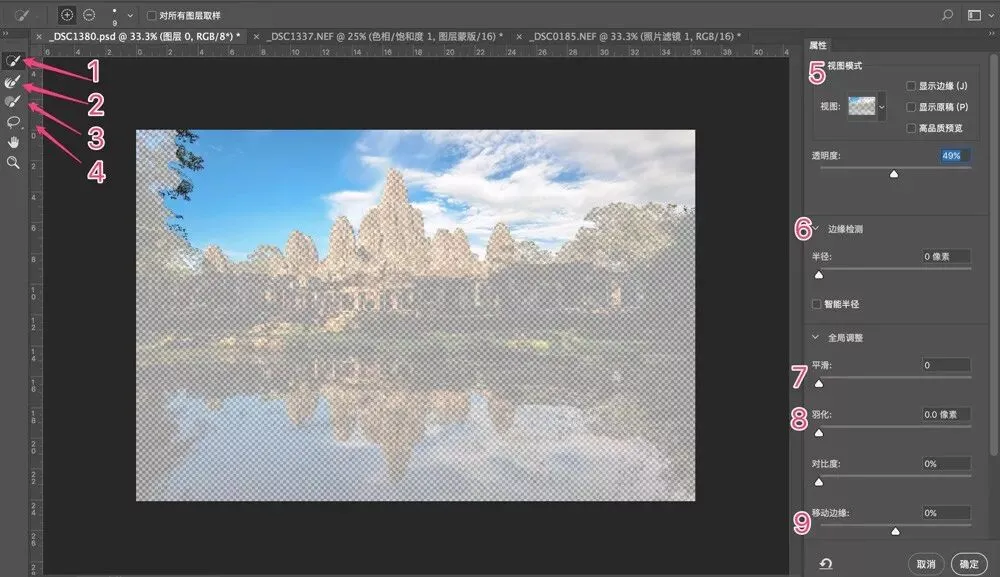
The first icon on the left is the Quick Selection brush, identical in function to the Quick Selection tool. Choose the + mode to add to the selection with it.
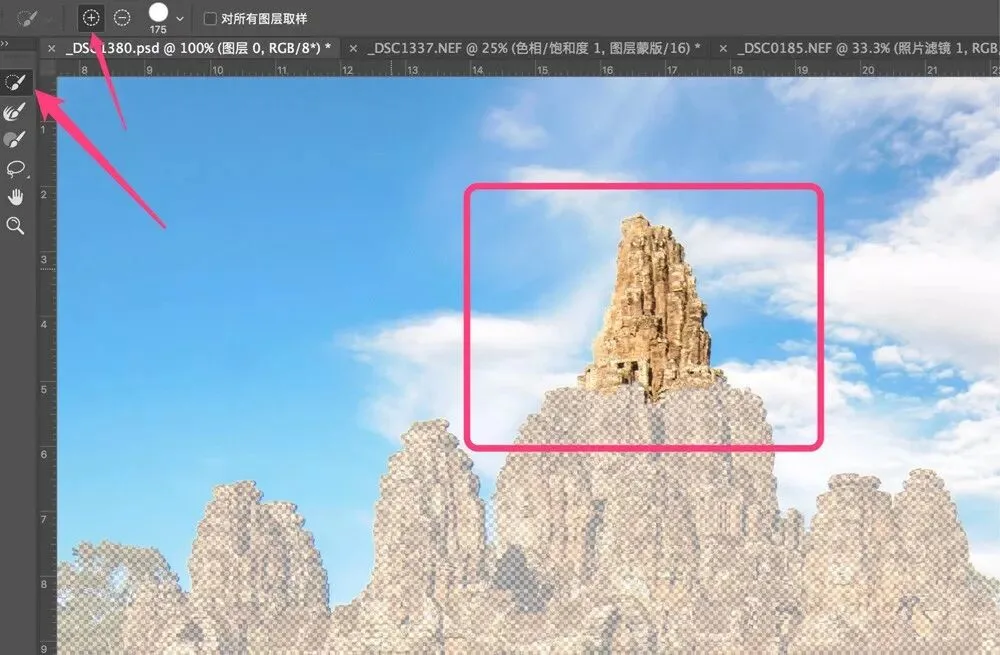
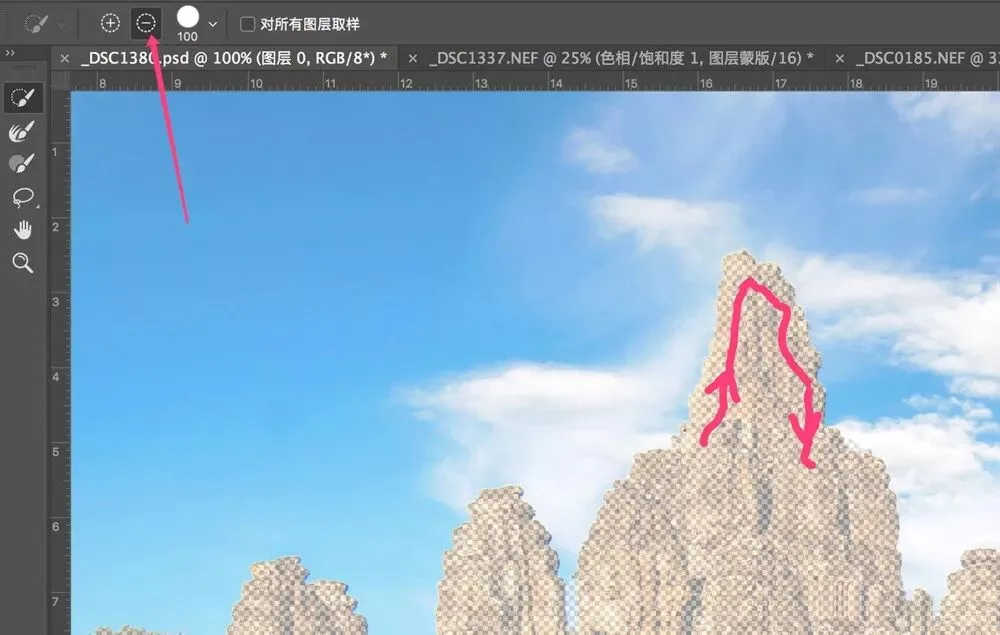
Or choose the - mode to subtract brushed areas from the current selection. In the original selection, the upper part of the pagoda was mistakenly included in the sky; a few strokes with the minus brush along the path shown below exclude the pagoda top from the sky selection.
The second icon below is the wonderfully useful Refine Edge brush, built for semi-transparent edges and extremely intricate ones.
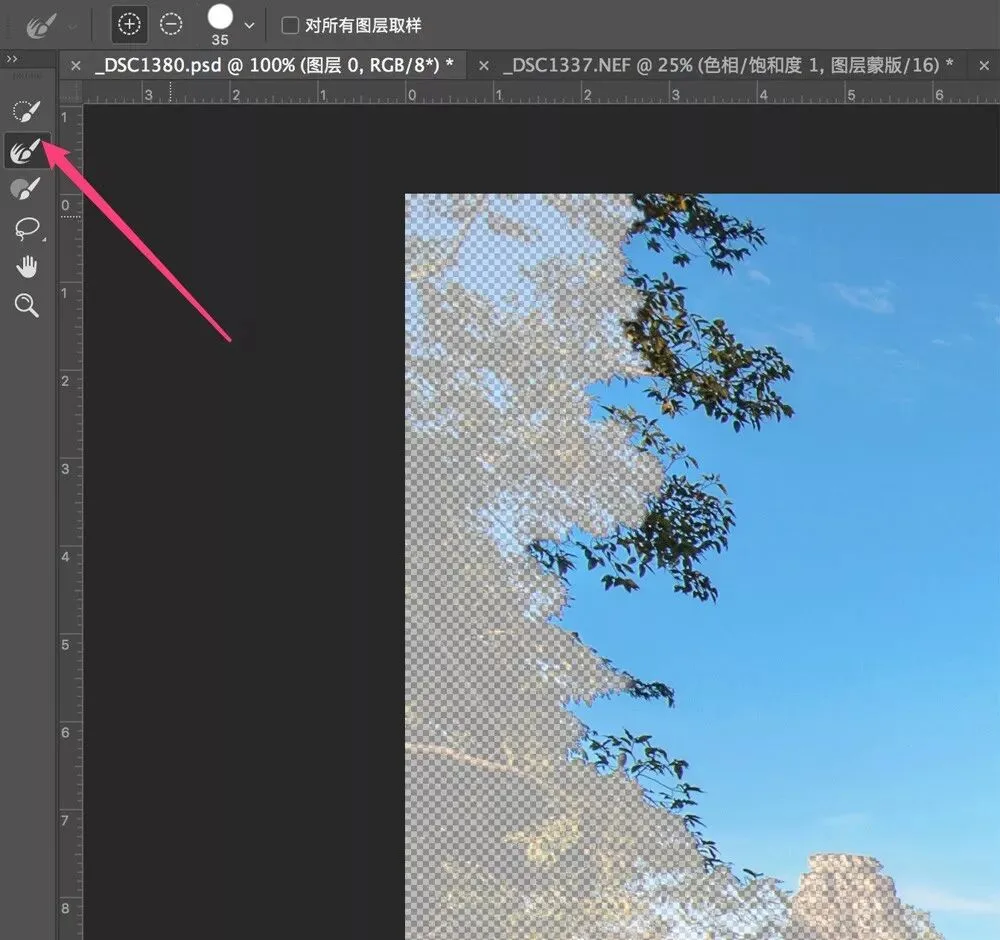
Where the trees meet the sky in this image, for example, the edges are especially complex — the original Quick Selection tool is helpless here.
The Refine Edge brush makes it simple: select it and paint over the complex edges — the branches in the frame. Wherever the brush passes, branches and sky separate as if by magic.
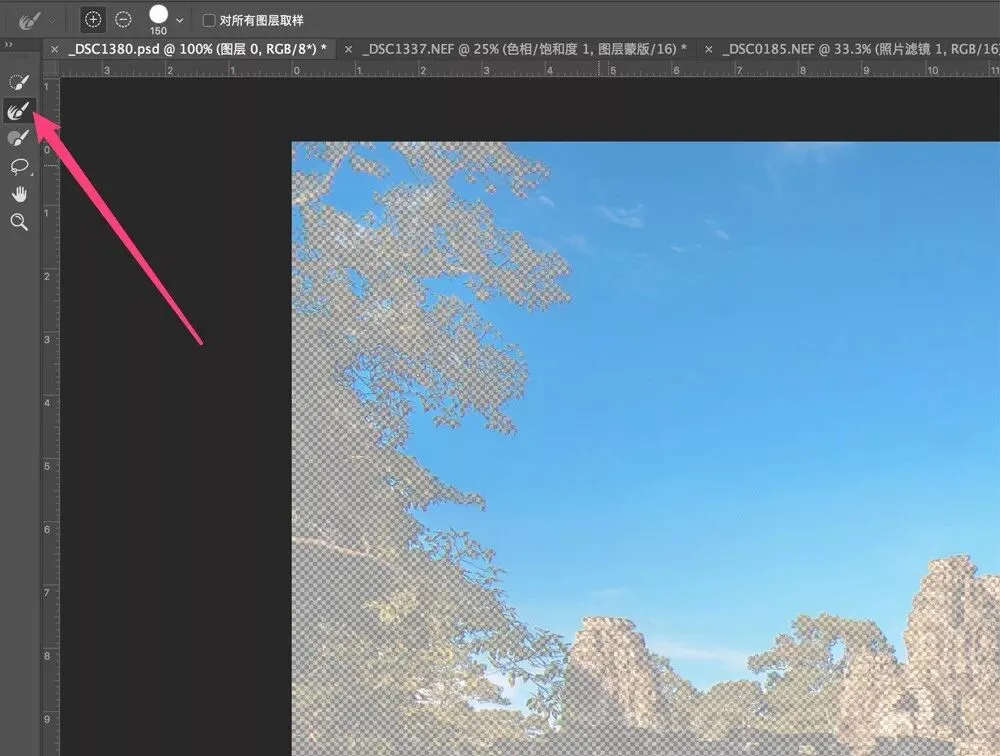
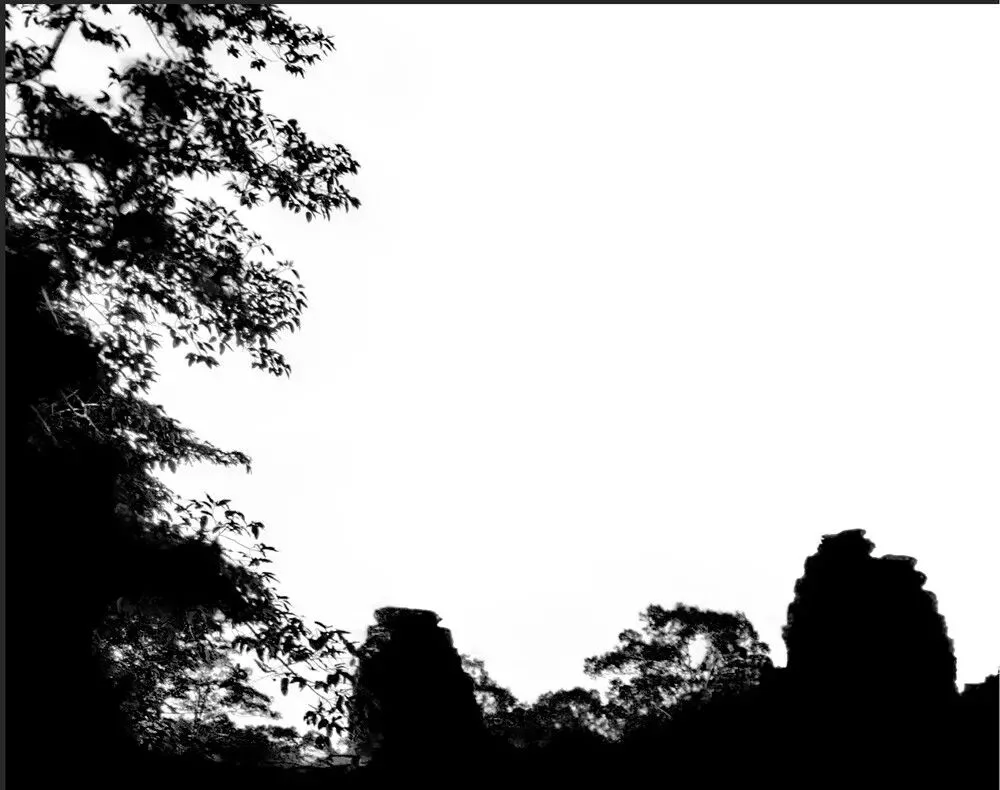
Previewing the selection edge in black-and-white mode, you can see the dense branches and leaves the brush passed over are all excluded from the sky selection.
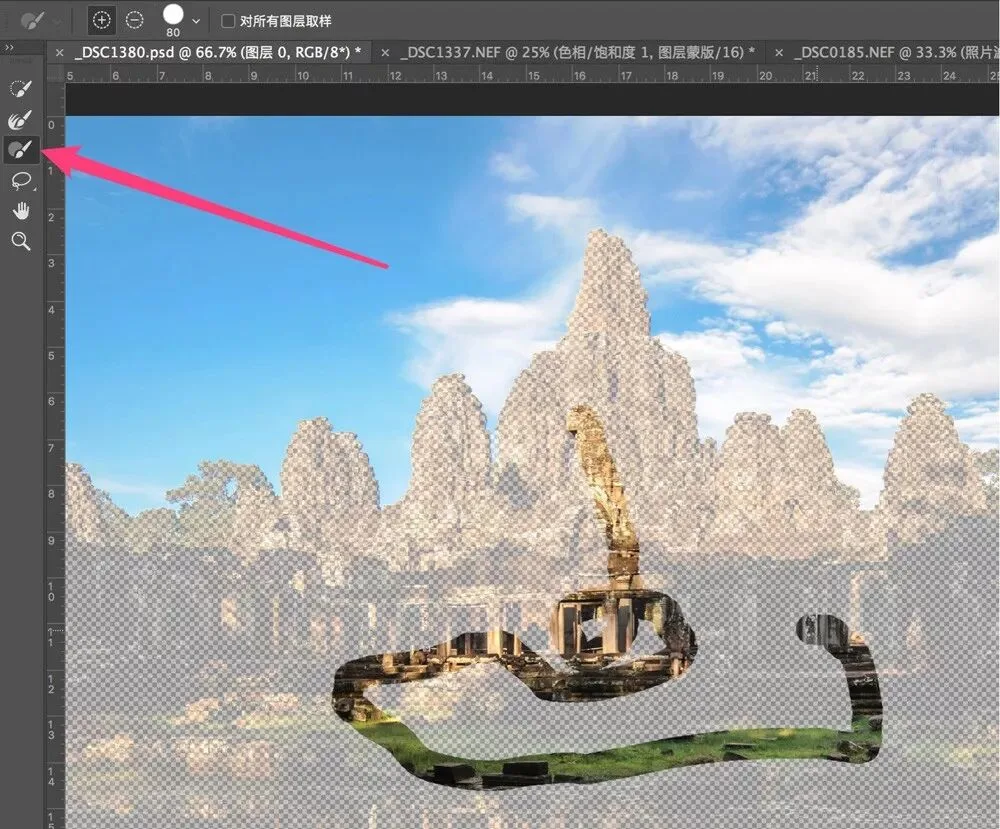
The third brush icon is the regular Brush, similar to painting directly on a mask. Areas painted with the + brush join the current selection; areas painted with the - brush are subtracted.
Finally, the fourth icon is the Lasso tool, for hand-drawing edges.
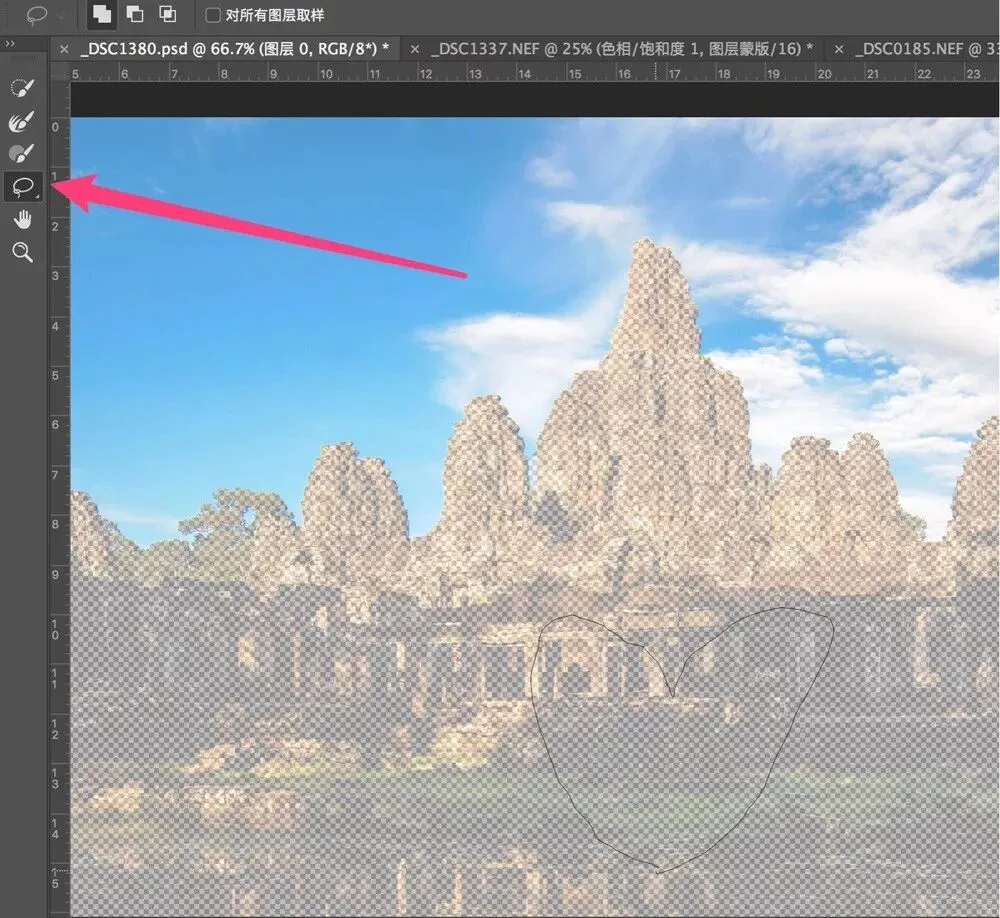
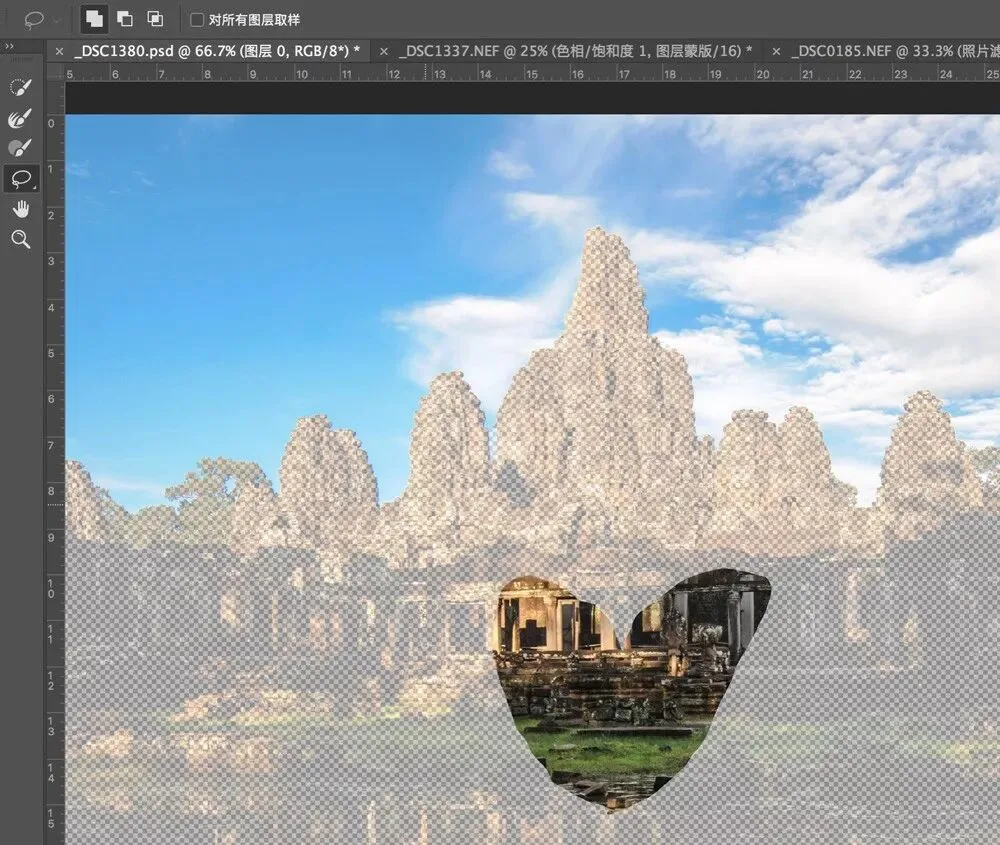
For example, I chose the Lasso in add mode and drew a heart shape on the ground — and that heart is now part of my selection.
3
Fine-Tuning Selection Edges
The first dropdown on the panel's right side selects the view mode — how the selected and unselected areas are previewed. The default is Onion Skin: the selection shows the original image, while unselected areas are covered by a checkered black-and-white "onion skin."
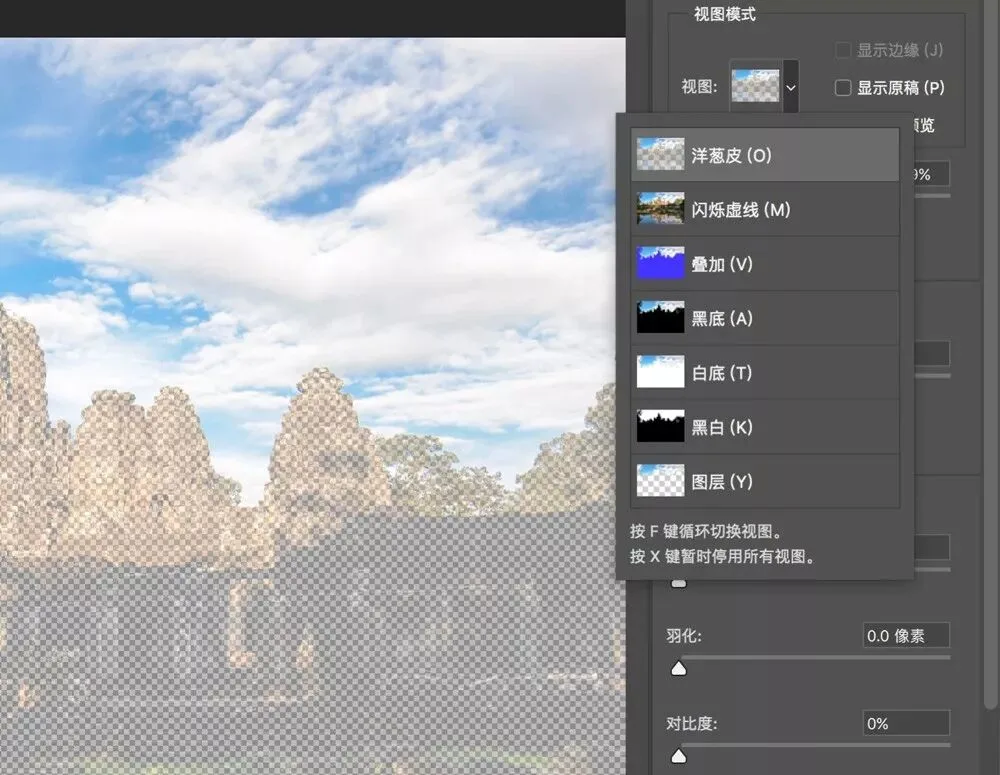
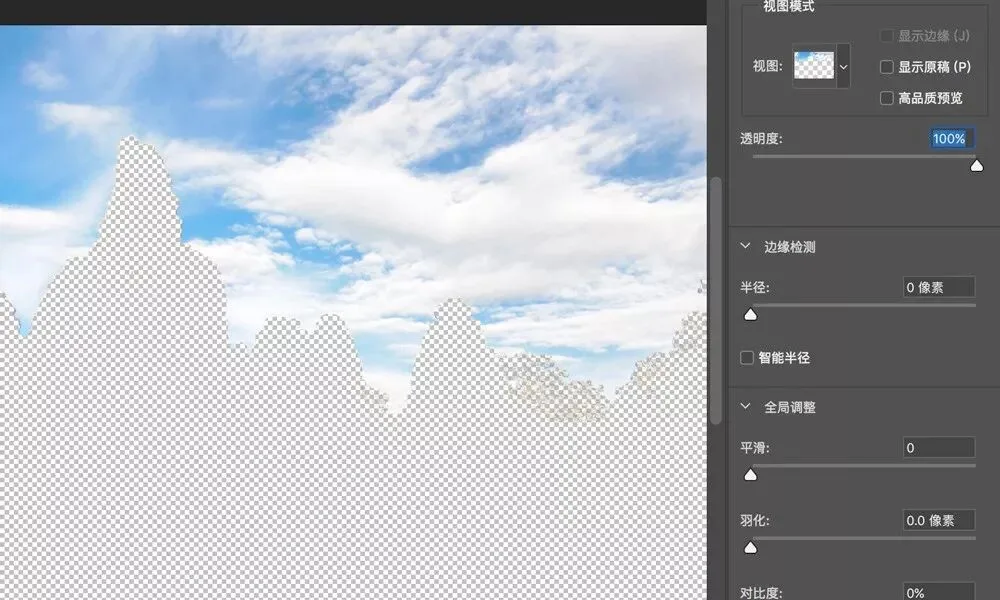
The onion skin's opacity is adjustable — at 100%, the unselected area in the preview is fully opaque checkerboard.
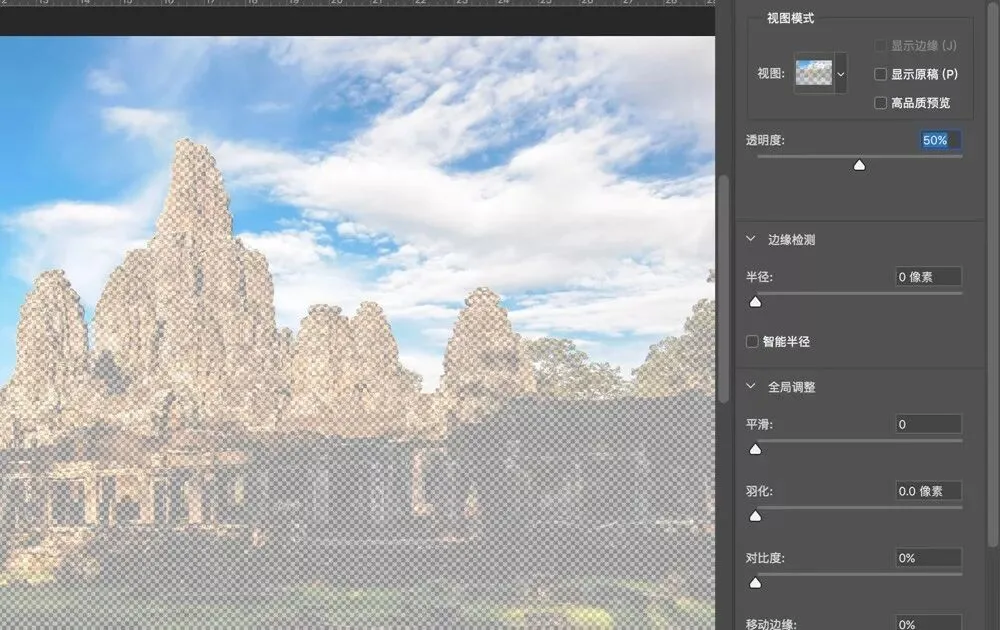
Lowering the onion-skin opacity to 50% lets some of the original image show through, making selection edits easier.
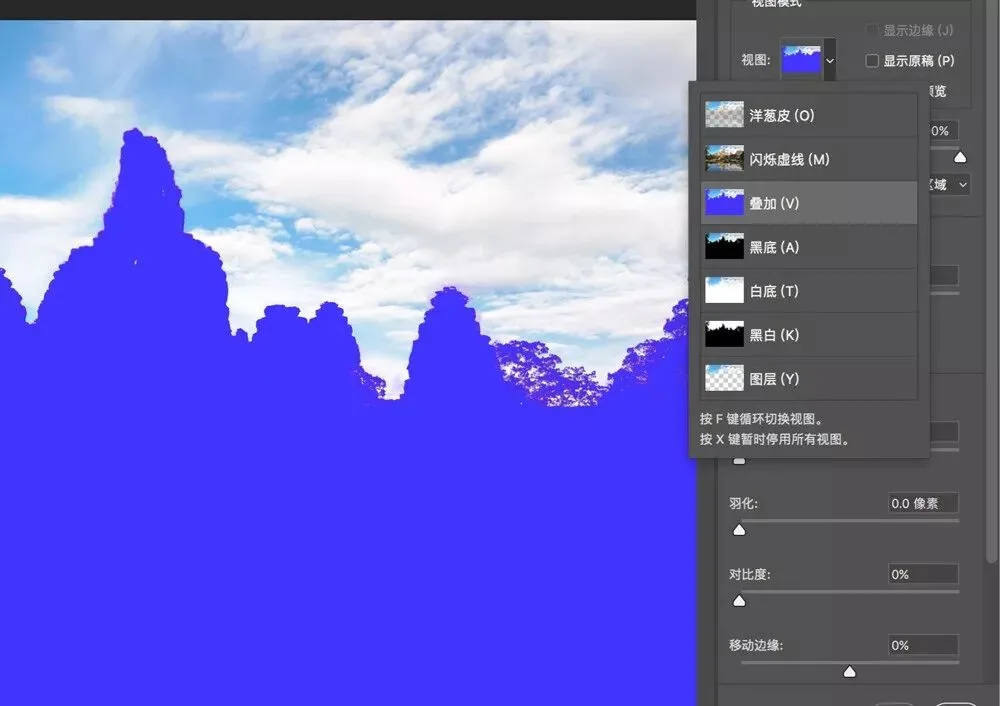
Another common view mode is Overlay, which coats the unselected area in a color — blue, for instance.
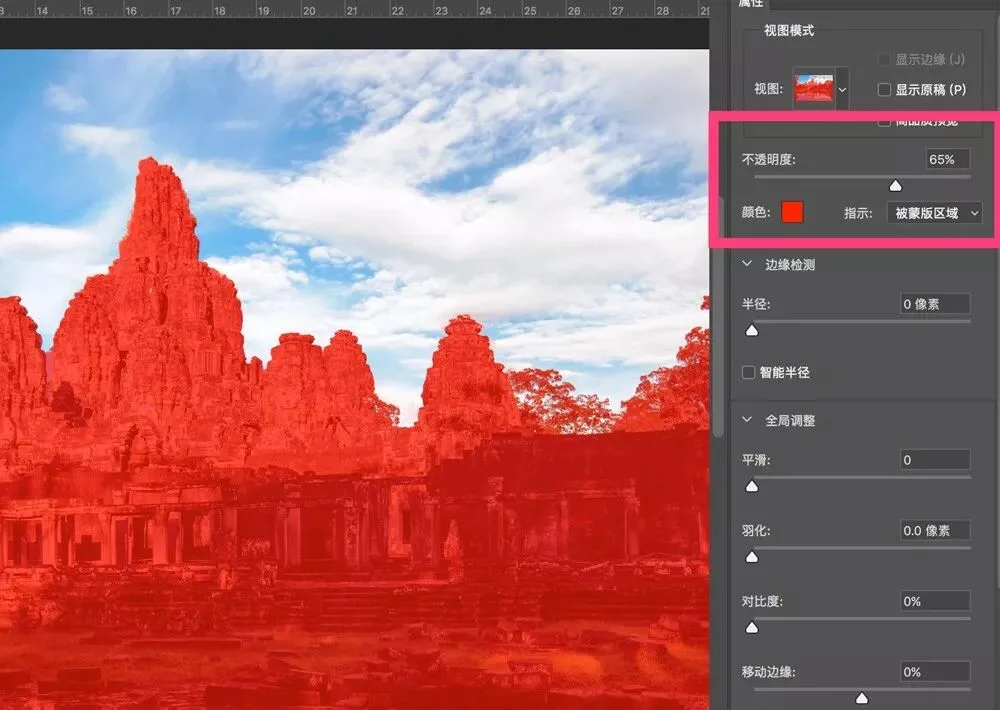
The overlay color's opacity is adjustable too: below, the unselected area wears a 65%-opacity red coat.
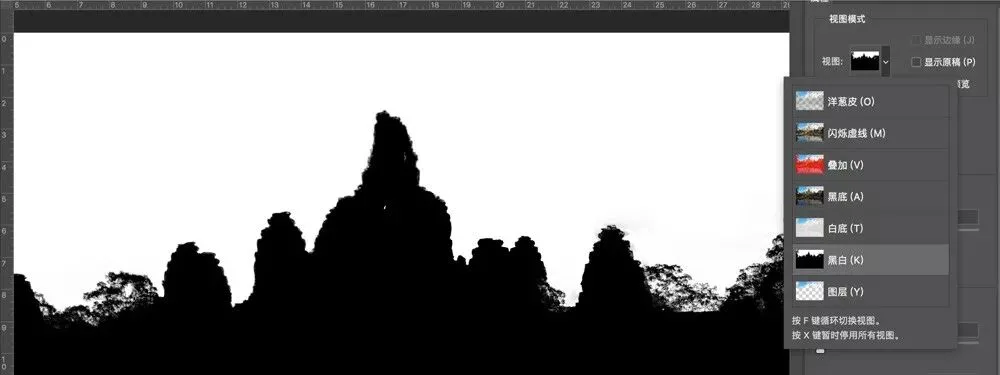
Of course, the most direct way to preview edges is the black-and-white view mode, where the selection displays exactly like its corresponding mask: white is 100% selected, black is unselected, grey is partially selected.
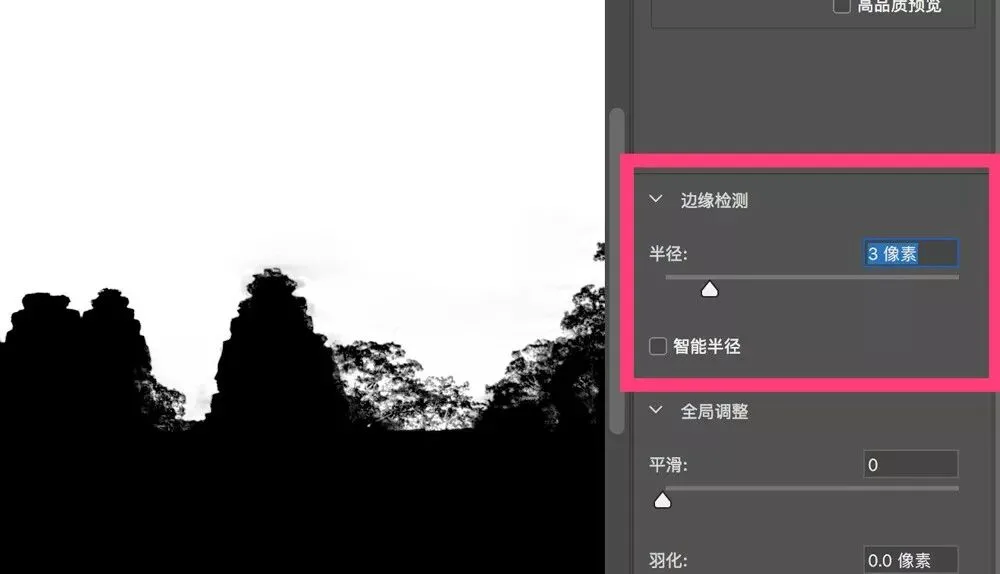
If the current selection isn't precise and the edges have decent contrast, try Edge Detection. Set a radius — say 3 pixels — and the tool examines a 3-pixel band around the selection boundary, snapping it to the line of greatest contrast within that range.
The Smooth slider effectively removes jagged, sawtooth edges from selections.
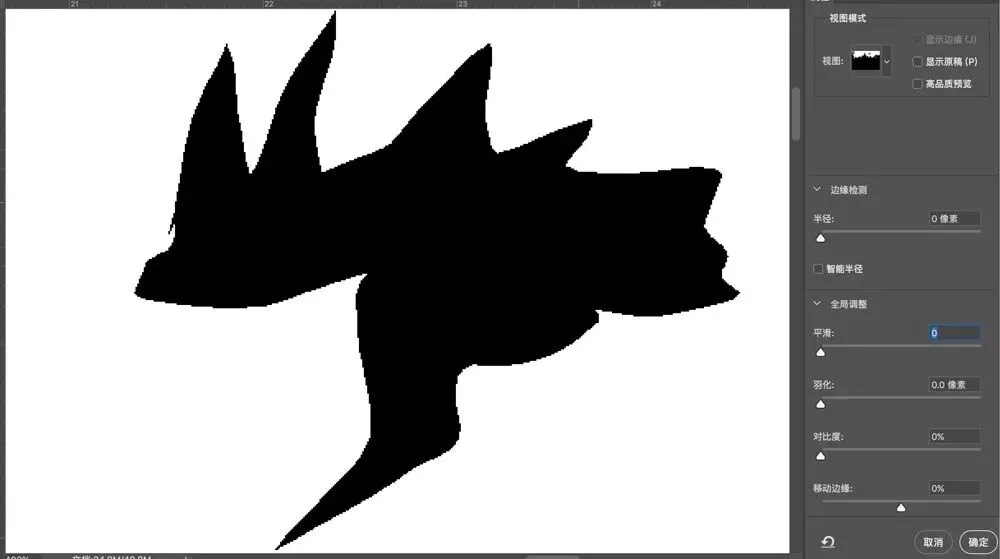
Increase Smooth and watch the rugged selection turn sleek and round.
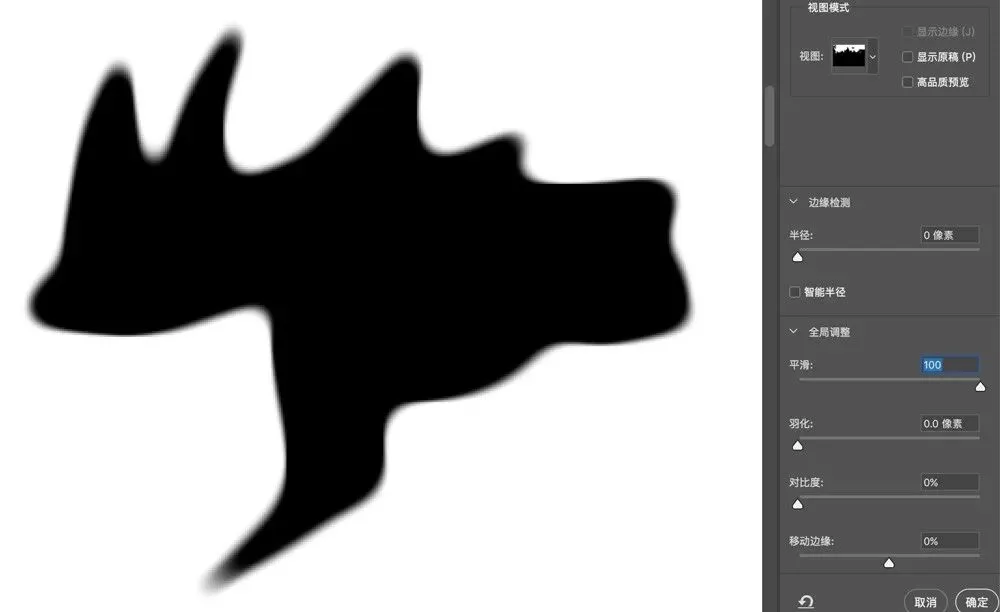
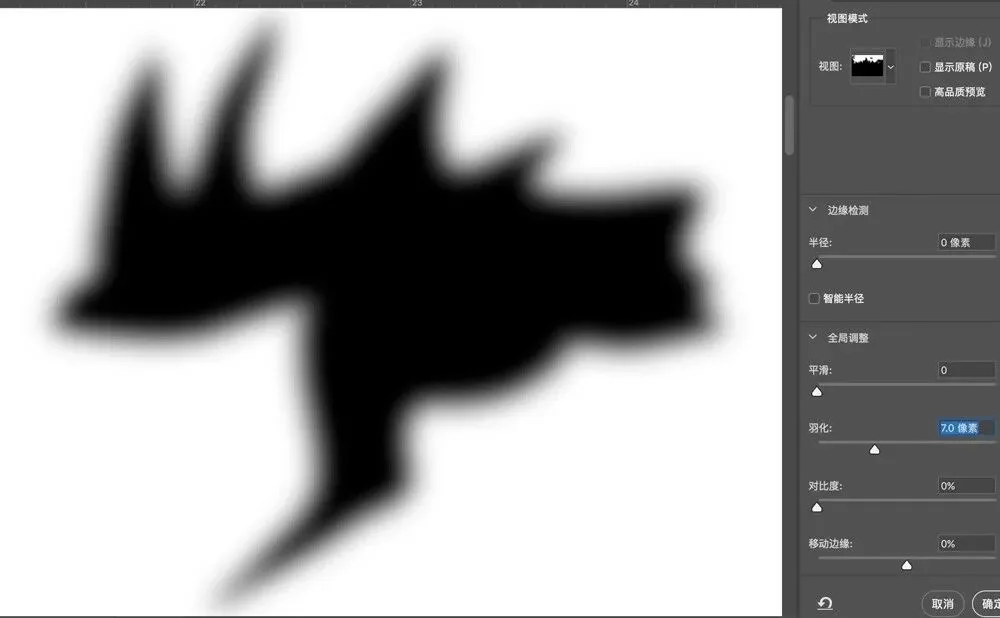
Feather determines whether the selection edge is a hard black-white boundary or a soft, gradually transitioning one.
The final slider, Shift Edge, intelligently scales the edge inward or outward to shrink or expand the selection.
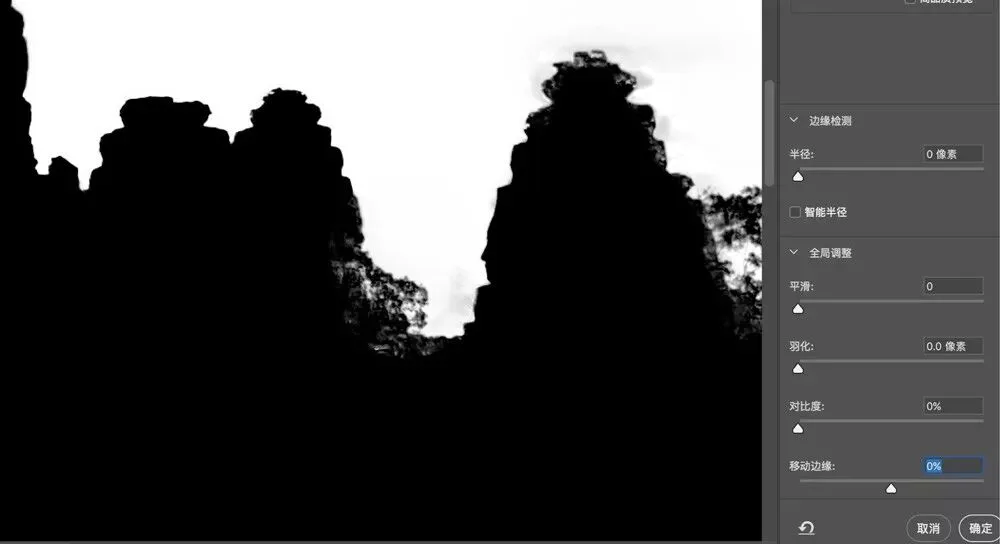
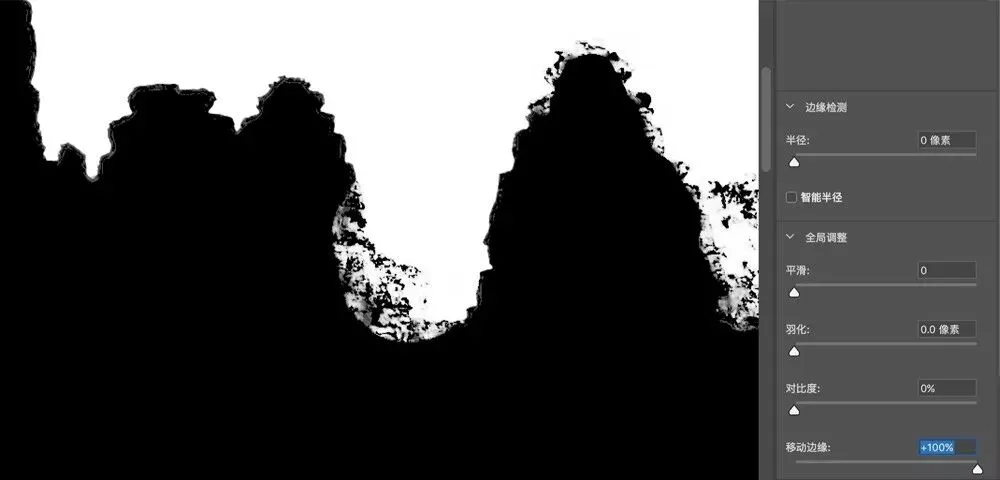
Once Select and Mask adjustments are complete, click OK to load the final refined selection.
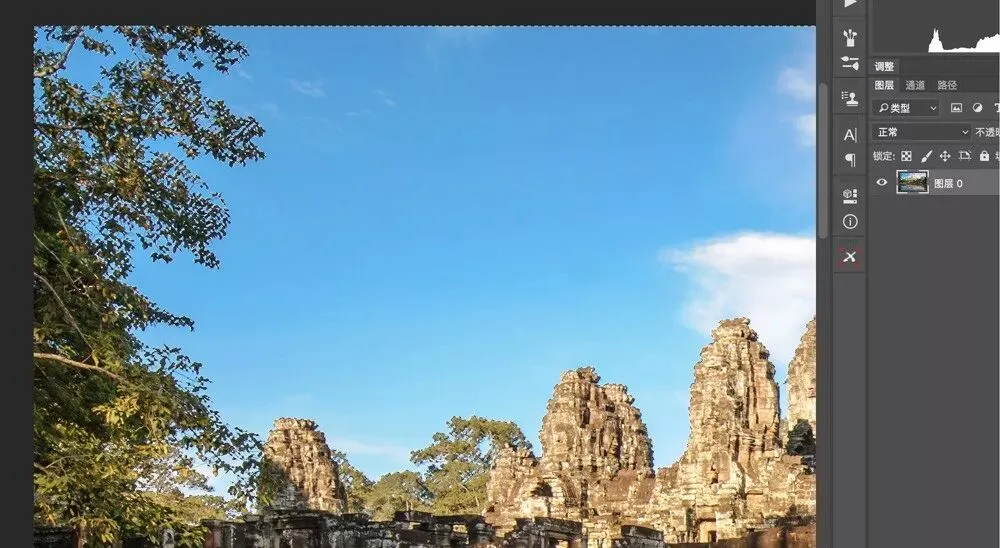
Create an adjustment layer with a selection loaded, and the selection automatically converts into the adjustment layer's mask.
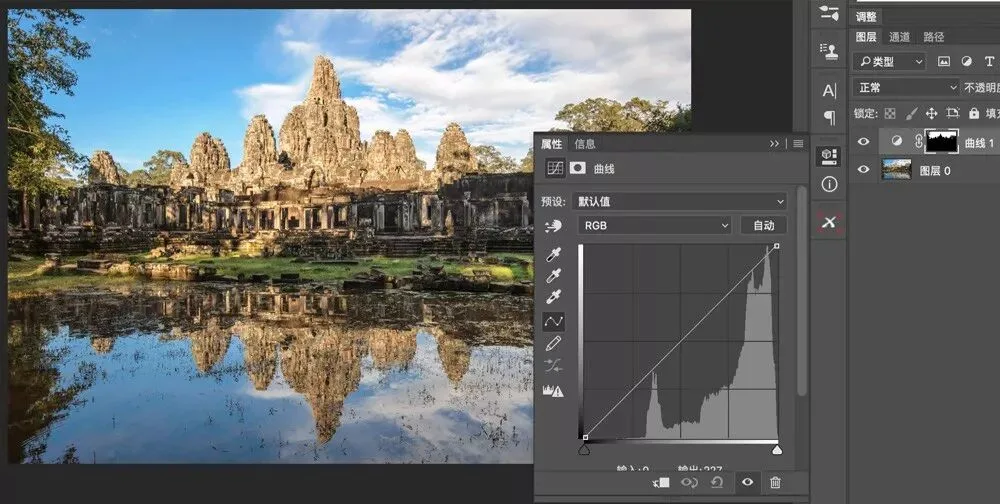
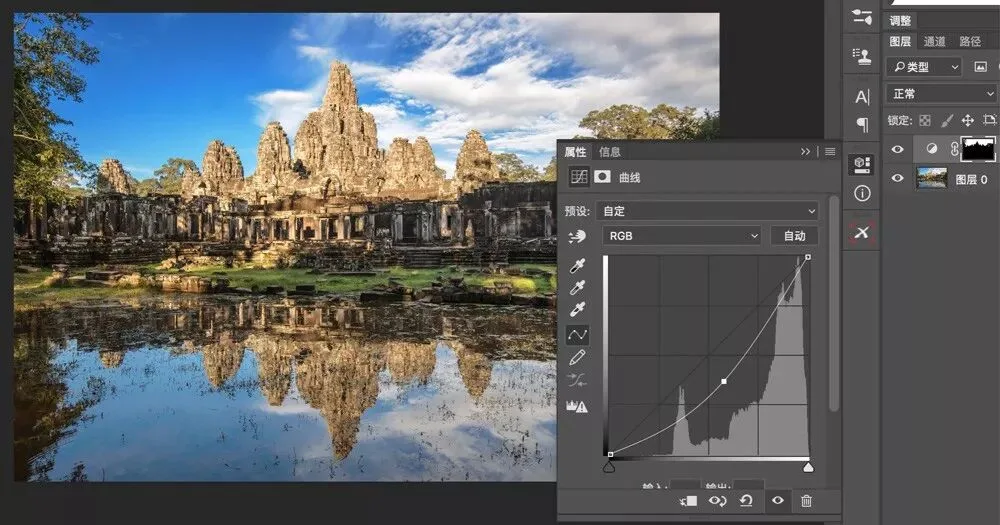
Here I created a Curves adjustment layer: the sky selection automatically became its mask, and I drew a darkening curve. Only the sky is darkened; the rest of the frame is untouched.
That's the Select and Mask tutorial. Share in the comments: which local adjustment tool do you use most?
This article is excerpted from Thomas's book "Foundations of Landscape Photography Post-Processing"