Photography Tutorial · 2017-11-12
All Sharpening and Softening Techniques, Summarized
I'm AdventureX photographer Miller姚明来
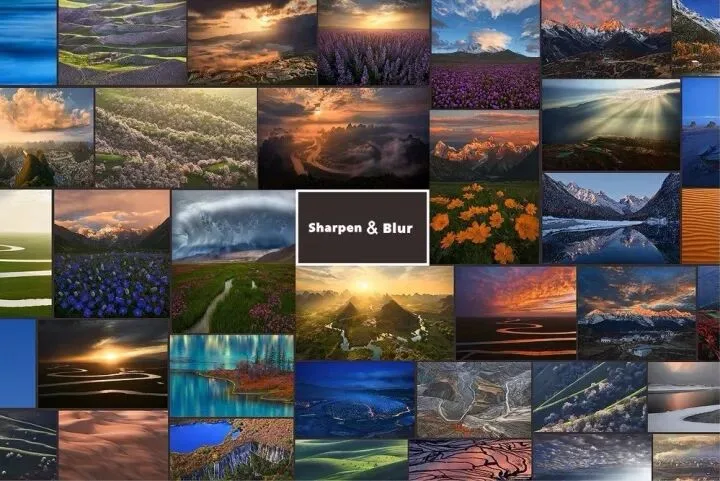
A great landscape photo contains not only harmony among its elements, but also various contrasts and tensions — commonly color contrast, light-dark contrast, and sharp-soft contrast.
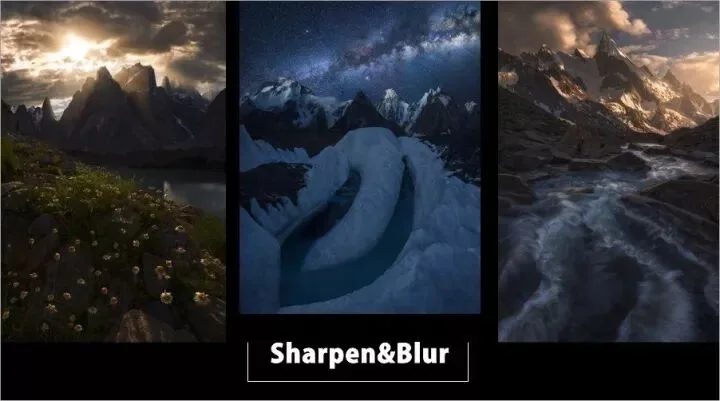
Following my article on light-dark contrast, "Every Way to Brighten and Darken," this piece rounds up all the sharpening and softening methods to teach you how to create sharp-soft contrast.


Sharpening

1. Basic Sharpening
Basic sharpening is applied to RAW files in Lightroom. Its purpose is to squeeze out more detail losslessly, laying a solid foundation for later work in Photoshop.
First, find the "Detail" panel on the right side of the Lightroom interface.
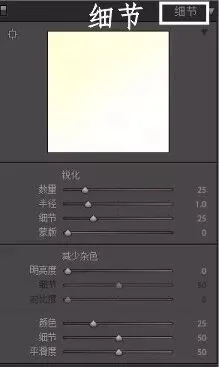
Lightroom automatically applies a base amount of sharpening to RAW files. My usual approach: set Radius to minimum (0.5), Detail to maximum (100), and adjust Amount according to the image — you can even keep Lightroom's default Amount unchanged.
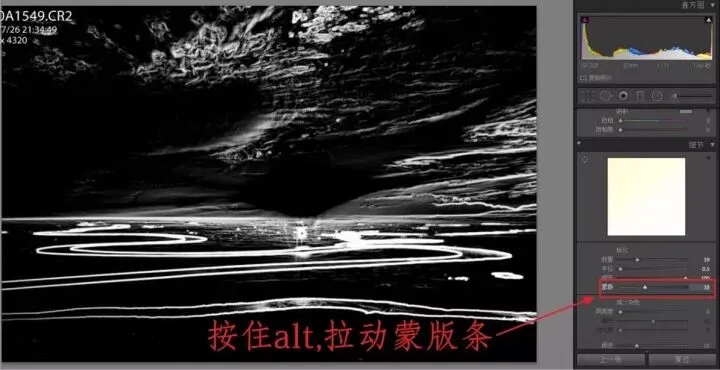
If the image has areas you don't want sharpened — calm water, a cloudless sky — hold Alt while dragging the Masking slider. The image turns into the grayscale view shown above: white areas get full sharpening, black areas get none. I drag the slider to control the threshold so sharpening doesn't over-apply to low-detail areas.
Summary: this basic sharpening is something I apply to every single photo.
2. Clarity Sharpening
Both Lightroom and Photoshop's Camera Raw have a "Clarity" feature.
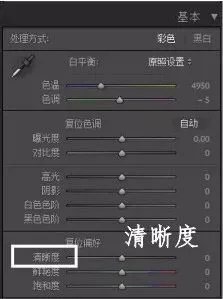
It mainly affects midtone contrast, with little impact on highlights and shadows — so it avoids sharpening bright skies or deep shade. But the higher the Clarity value, the harsher the image, the more obvious the noise, and the uglier the halos at light-dark boundaries.
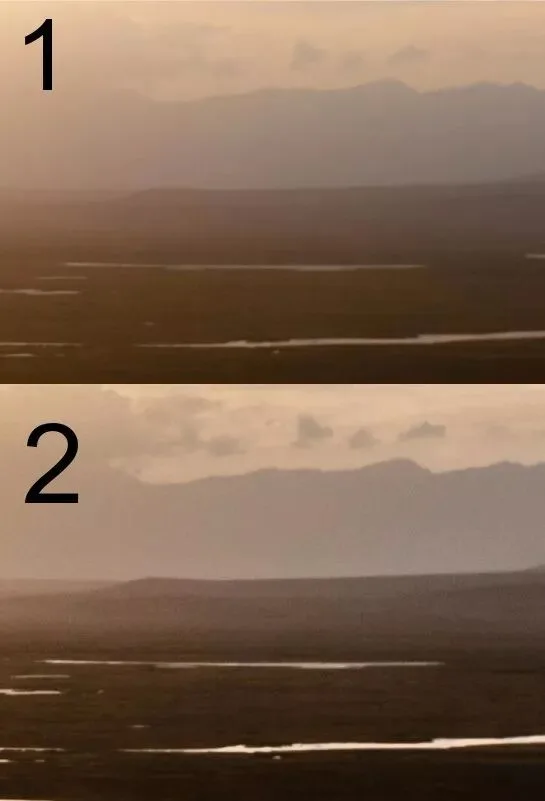
Figures 1 and 2 compare the original with Clarity maxed out — image quality degrades badly. So I usually cap Clarity at 30. It's often used to bring out cloud detail: it boosts midtone cloud contrast without affecting the bright sky.
Summary: the typical use is Lightroom's adjustment brush to add Clarity locally. Never apply it globally, and keep the value modest — overuse makes the image look dirty. Use with caution!
3. Dehaze Sharpening
This feature was added when Lightroom updated to the CC version.
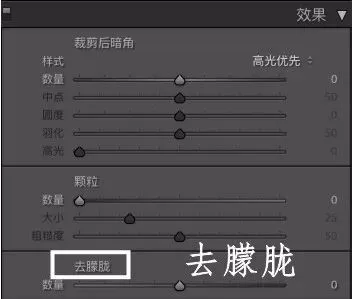
Dragging the slider right increases clarity, contrast, and saturation together — it's essentially a combined action of Clarity, Saturation, and Contrast. I used it on the image below.
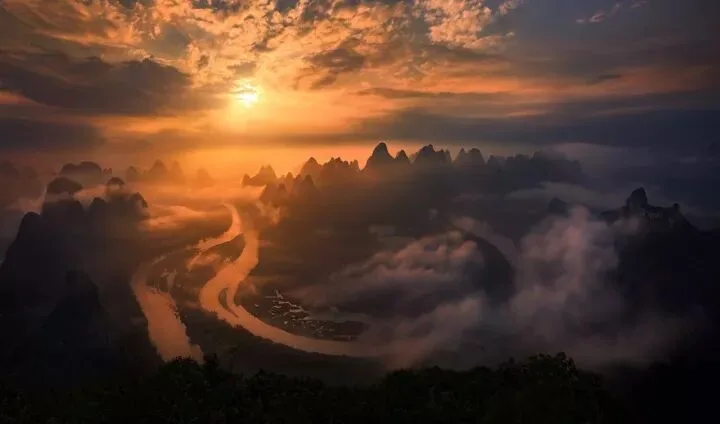
This sunrise shot on the Li River was taken after days of rain, with heavy fog and very poor transparency. In Lightroom I used Dehaze to strengthen contrast and detail.
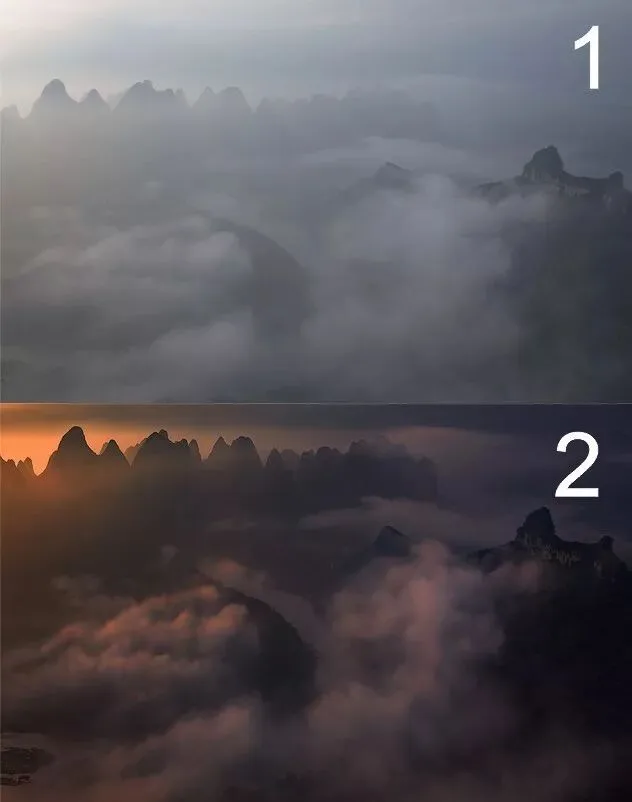
Figure 1 is the original; Figure 2 shows a cropped area of the final image for comparison. Although Figure 2 went through much refinement in Photoshop afterward, you can see Dehaze worked quite well.
Summary: use this only on very hazy photos — typically smoggy or foggy days — never on already-clear images. Note that stronger Dehaze also raises saturation, so you usually need to desaturate afterward.
4. High Pass
This is a Photoshop filter. High Pass keeps the boundaries where color or brightness contrast is strong; combined with different layer blend modes, it sharpens edges.
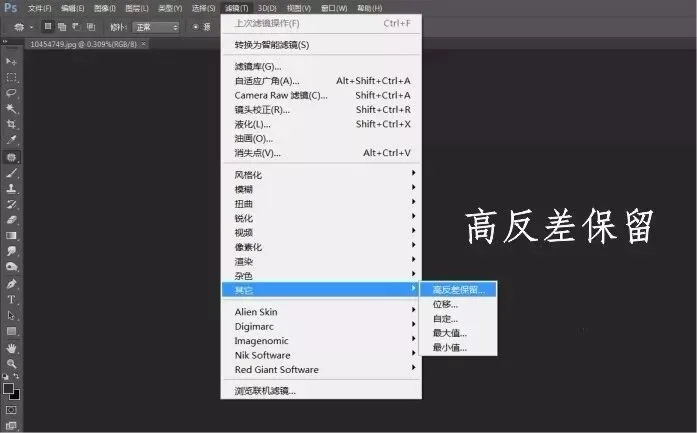
First duplicate the original layer, then apply Filter → Other → High Pass. The image turns grayscale — the white outlines are the details to be enhanced. The larger the radius, the brighter the outlines and the stronger the effect.
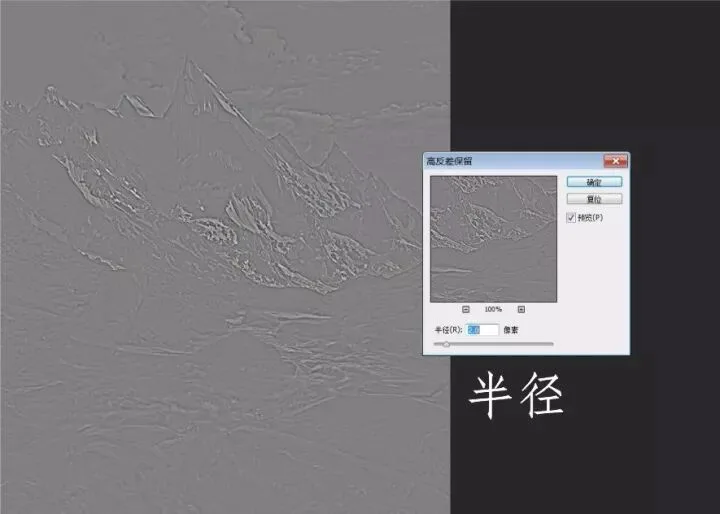
Set the High Pass radius between 1 and 3. Too large a radius creates halos around the edges.
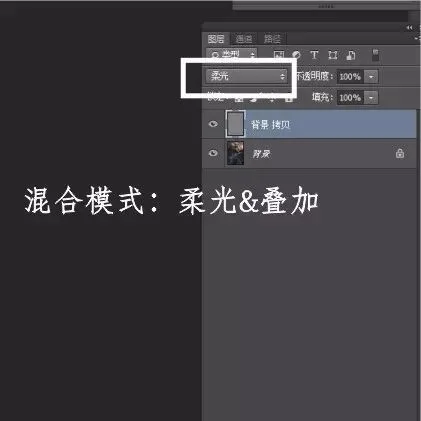
Then change the layer blend mode to Soft Light or Overlay. Overlay gives a stronger sharpening effect than Soft Light.
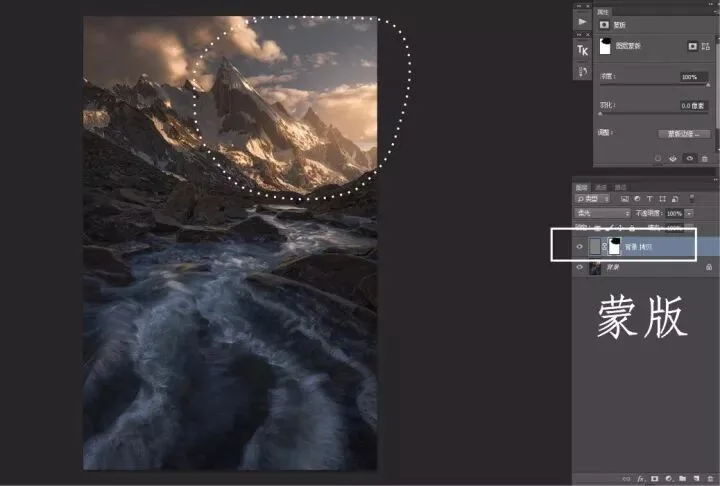
After sharpening, remember to add a mask and paint out areas that don't need it. For this image I wanted to keep the hazy feel of light streaming into the highlights, so I painted that area out with a black brush.
Summary: High Pass keeps only the outlines — the areas that usually need sharpening — while screening out low-frequency detail, so it amplifies less noise than general sharpening. Being grayscale, it also doesn't affect color. It's typically used to recover and strengthen edge detail after soft-focus blurring, keeping the image from looking too mushy.
5. Smart Sharpen & USM Sharpening
Both are found under Photoshop's Sharpen filters.
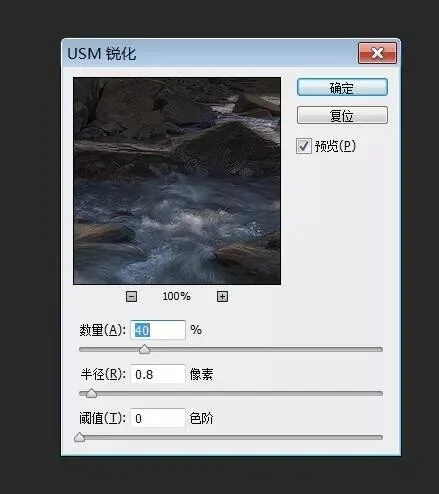
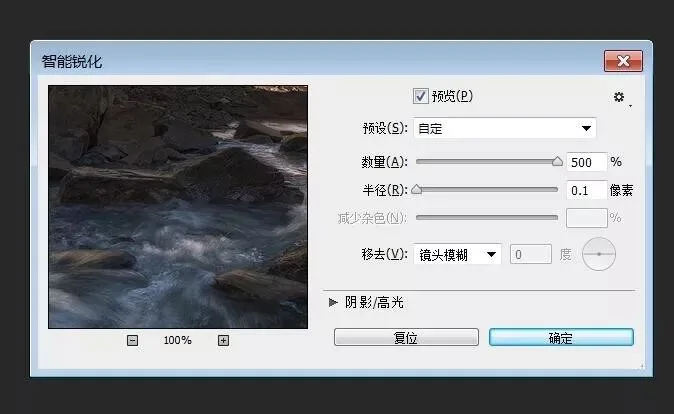
They share Amount and Radius options.

Typically, small radius + large amount enhances detail and texture — e.g., rocks, flowing water, foliage. Large radius + small amount enhances the edge definition of large objects, similar to High Pass. Large radius + large amount is absolutely forbidden — it creates halos at detail edges and makes the image look heavy-handed.
After sharpening, change the layer blend mode to "Luminosity" so sharpening doesn't affect color.
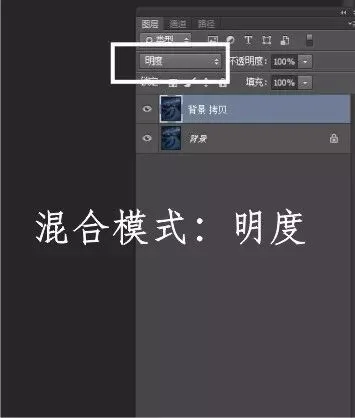
Summary: these two, plus High Pass above, are my frequent tools. In practice, USM and Smart Sharpen feel basically the same. The small-radius + large-amount combo is my go-to for detail and texture — often on jungle shots and images with flowing water lines.
6. Shake Reduction
This filter was newly added in Photoshop CC — it uses algorithms to sharpen shake-blurred images. My shots are never blurry (yes, I'm that good), so I've never needed it, but I hear its correction for camera shake is outstanding.
Unlike the other sharpening methods, this only works on shake-blurred images — not on out-of-focus or already-sharp ones.
7. Nik Detail Extractor Filter
This sharpening effect lives in the Nik plugin's Color Efex Pro 4 filter set.
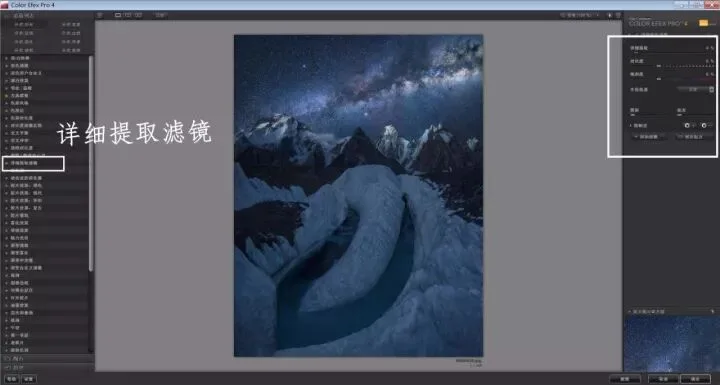
With the effect selected, the right panel offers Contrast, Saturation, Detail Extractor strength, and more.
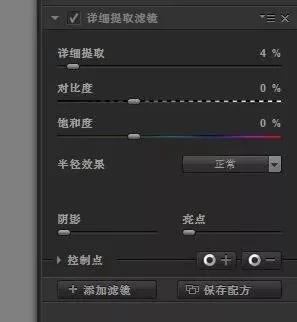
Tune the parameters for the best sharpening. I usually set Saturation to 0% so color isn't affected; Contrast usually stays at 0% too, unless strong backlight has made subjects hazy. The Shadows and Highlights sliders protect dark and bright areas from over-application.
Summary: I rarely use this sharpening, but it's excellent at brightening and extracting shadow detail — try it when the shadows are too dark to show detail.
8. Output Sharpening (Two-Step Resize Sharpening)
Photos uploaded for web sharing suffer from platforms' terrible compression algorithms, so you usually downsize before posting — and downsizing reduces sharpness, which calls for sharpening during the resize.
The optimal method, refined through repeated practice by many pros, is called Marc Adamus sharpening, invented by the renowned landscape photographer Marc Adamus.
The method: first resize to 2× the final dimensions + over-sharpen + resize again down to the final size.
For example, to publish an image with a 1000px long edge: first resize to 2000px, then over-sharpen — visible noise is acceptable, but no obvious halos — then resize again to the final 1000px.
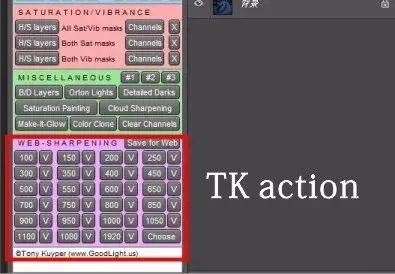
That's tedious, so I recommend the TKaction plugin's Web Sharpening feature — pick an output size and it's done in one click.
9. In-Camera Sharpening
Digital camera bodies usually have a picture-style menu where you can set sharpness.
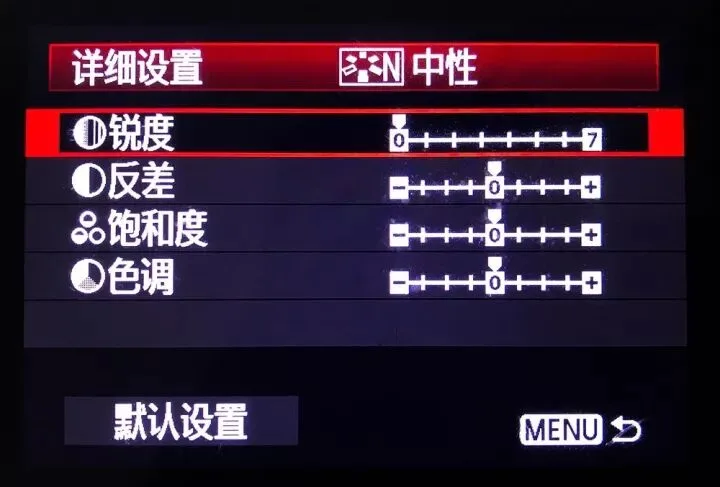
But this only affects JPEGs — it's useless for RAW, which already holds all the data and can be sharpened freely in Lightroom. If you're still shooting landscapes in JPEG, I'm truly impressed — and not in a good way!
For all sharpening effects, always pair them with a mask so the effect applies only locally. Never sharpen globally.

Softening

A great photo usually mixes sharp and soft: while sharpening some elements, you often soften others, creating a sharp-versus-soft contrast.
1. Gaussian Blur Method
First duplicate the layer, then apply Gaussian Blur on the new layer — I usually pick 37 pixels.
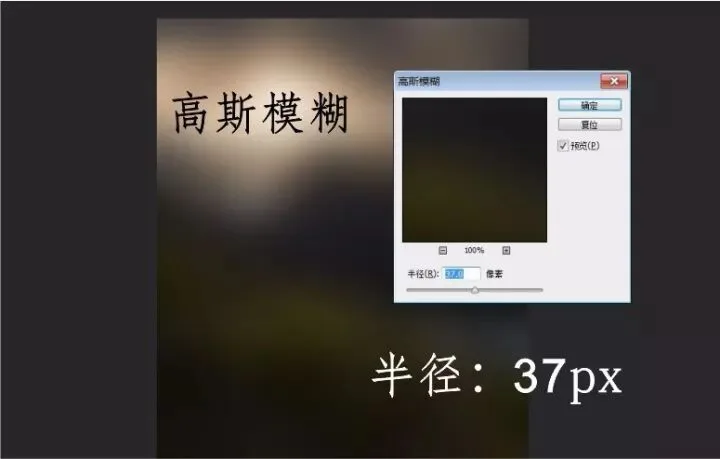
The image goes fully blurry; then drop the layer opacity to 15%.
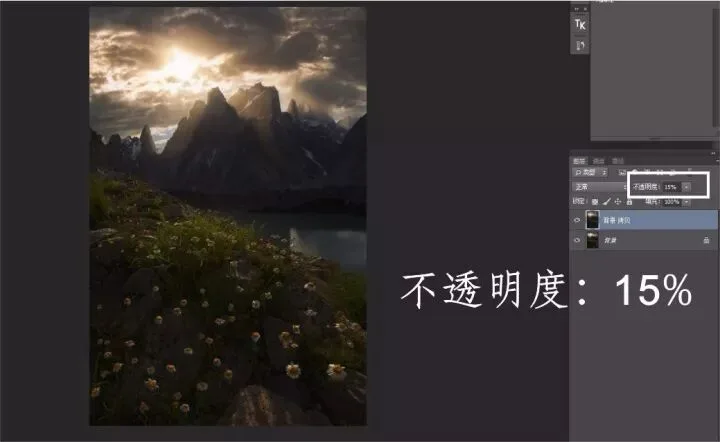
Then apply Image → Adjustments → Levels on that layer, moving the sliders to restore contrast lost to the blur. Finally add a mask and paint out areas that shouldn't be softened. This photo only needs softening in the distant highlights, so I masked out everything else with a black brush.
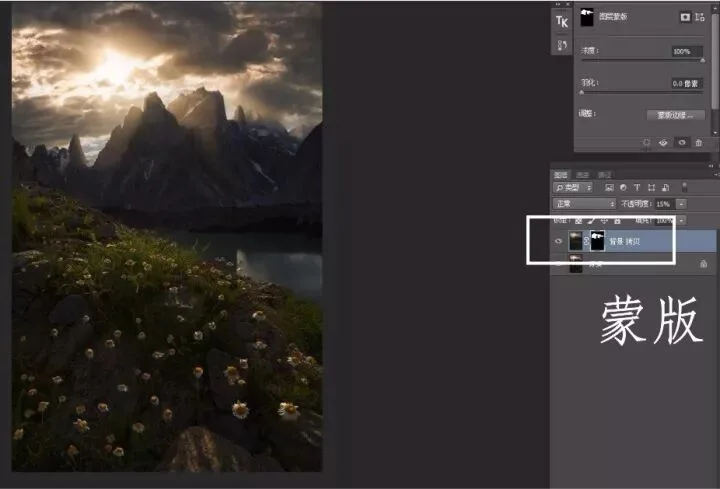
Summary: I list this first because it's my most-used softening trick — convenient and controllable.
2. High Pass Softening
First duplicate the layer, then Filter → Other → High Pass with a radius of 60.
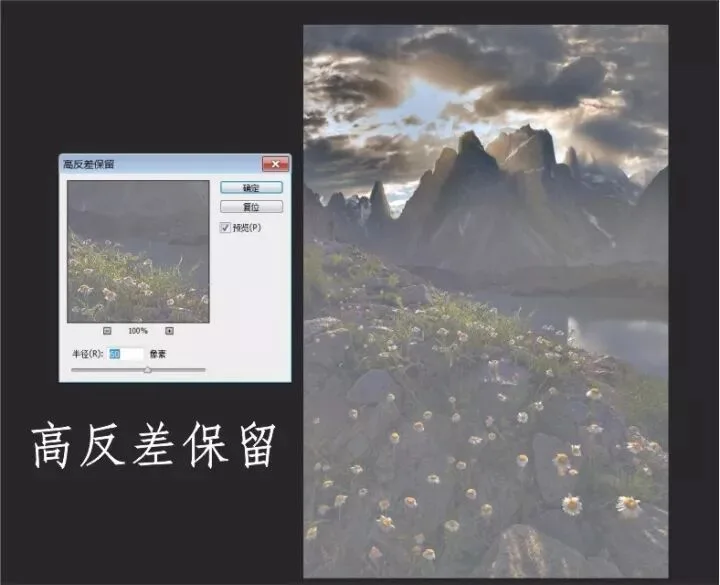
Then set the blend mode to Soft Light and press Command+I to invert. The image now shows a soft glow.
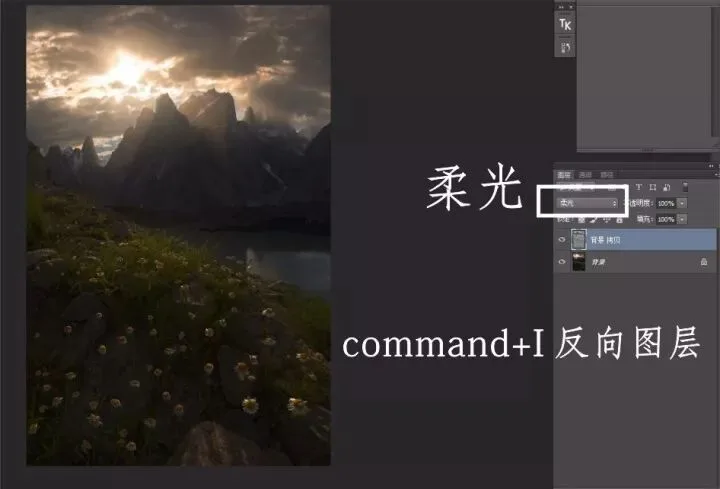
Finally, add a mask and brush in the areas you want.
3. Nik Soft Focus Method
Choose the Classical Soft Focus effect in Nik's Color Efex Pro 4.
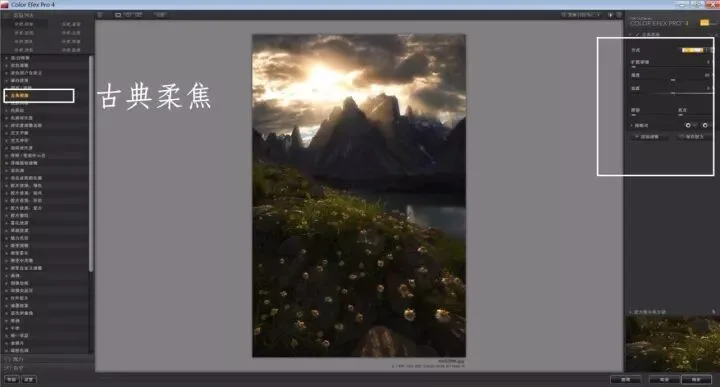
Control the softening strength via the parameters in the right panel.
4. Exposure 5 Softening Method
Duplicate the layer, apply Exposure 5's Glamour Lens effect, and control the strength with layer opacity.
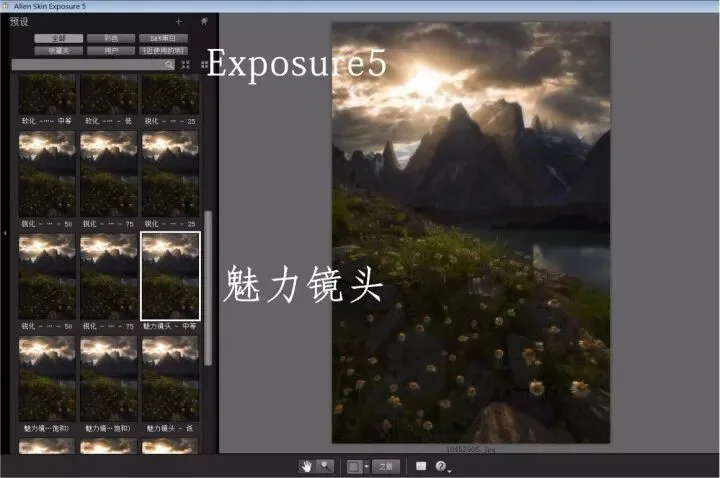
5. Camera Raw Softening Method
Duplicate the layer and find the Camera Raw filter under Filter.
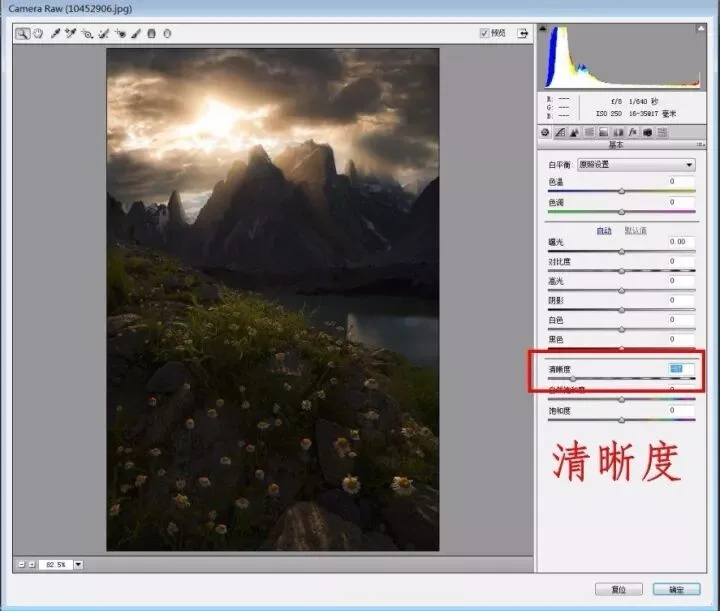
In the panel, lower Clarity to a suitable level. Confirm, then add a mask and brush in the target areas.
6. Action Plugin Softening Method
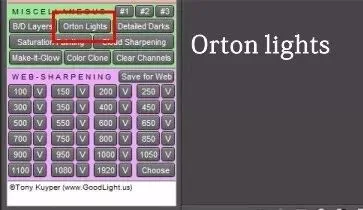
The Orton Lights effect in TKaction,
and the Global Soften effect in the domestic StarsTail (Snowman) plugin.
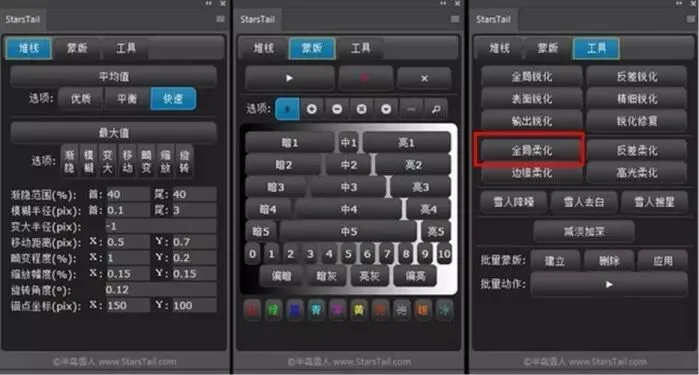
These plugins conveniently create soft, dreamy effects.
Same rule for all softening: only with a mask, never globally. Softening usually goes on the highlights to create a mysterious, dreamy glow — almost never on shadows or midtones. People who slather softening everywhere and then write tutorials about it really have no clue what they're doing.