Photography Tutorial · 2021-06-27
Shooting Straight into the Sun! 1000x Dynamic Range with 15 Raw Frames
Thomas Chu Photo
In today's video tutorial, Thomas shares a complex landscape capture and post-processing case.
Because the dazzling sun was photographed directly, with thin clouds interfering, the scene's light ratio between dark and bright areas exceeded 1000:1 — complex exposure bracketing was needed to record all the detail.
To make matters worse, there was flowing water in the frame, requiring multi-frame stacking to smooth the surface. How exactly should such a complex scene be captured and processed?
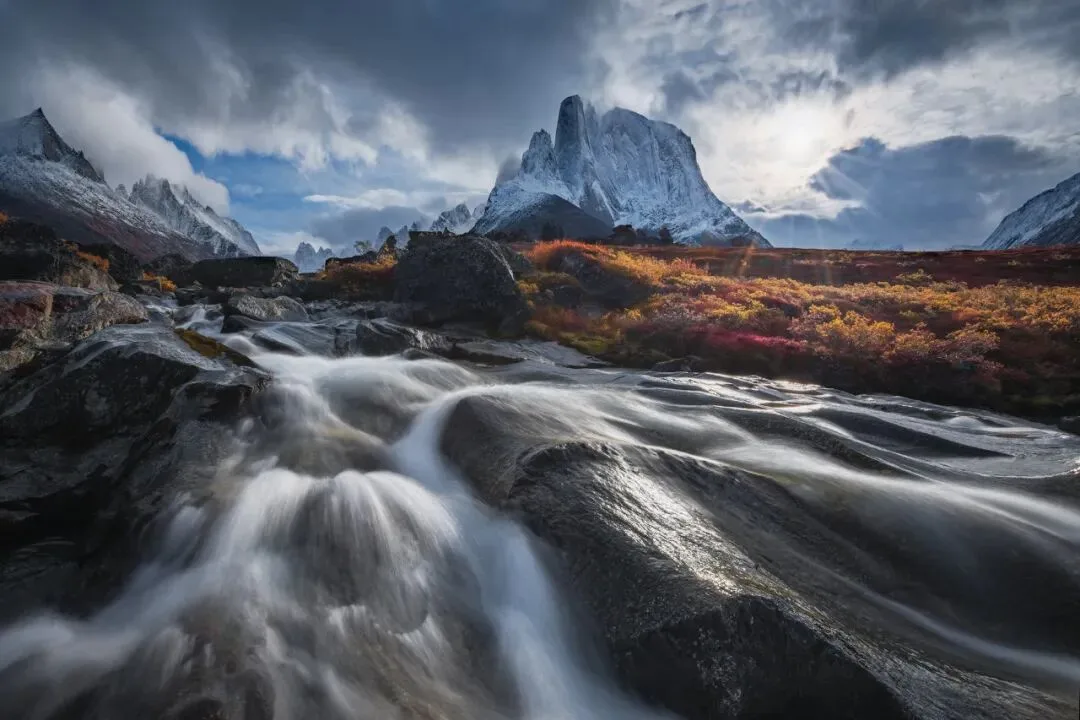
Video Tutorial
▶ Watch the video tutorial on Bilibili
This is the fully illustrated companion to the video above. Thomas picked a brutally complex field case: shooting straight into the sun shortly after sunrise, backlit, with thin clouds over the sun, a dynamic range beyond 1000:1 between lit clouds and shadowed rocks — plus flowing water that needs smoothing. How a set of exposure brackets plus a water-frame stack conquers this nightmare scene is broken down step by step below, with keyframe screenshots.
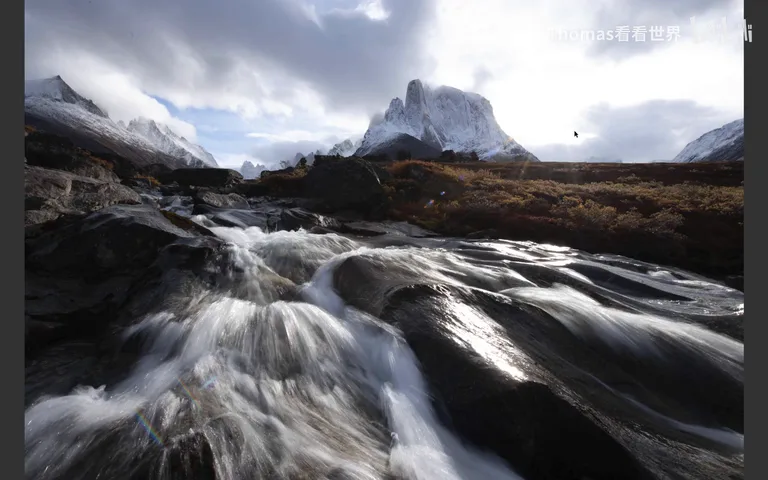
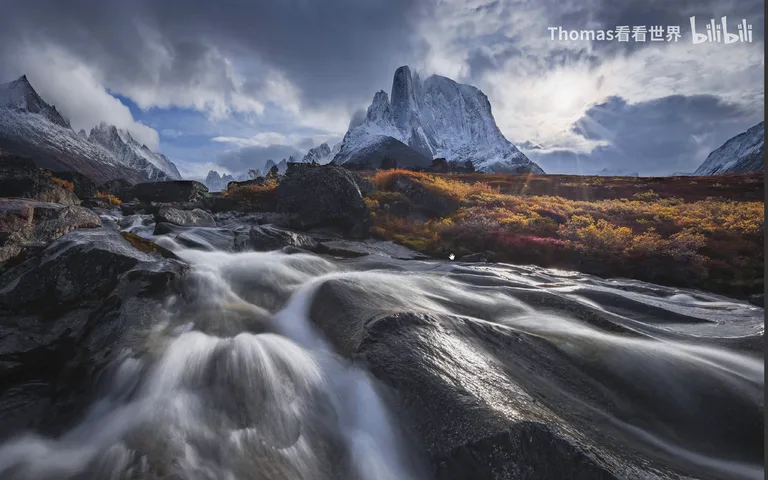
Start with the final image: clouds keep full detail right around the sun, the mountain and foreground rocks hold their layers, and the water flows as smooth silk. The photo merges two sets of material — a 5-frame, 8-stop exposure bracket for the sky and land, and a 9-frame burst stacked for the water.
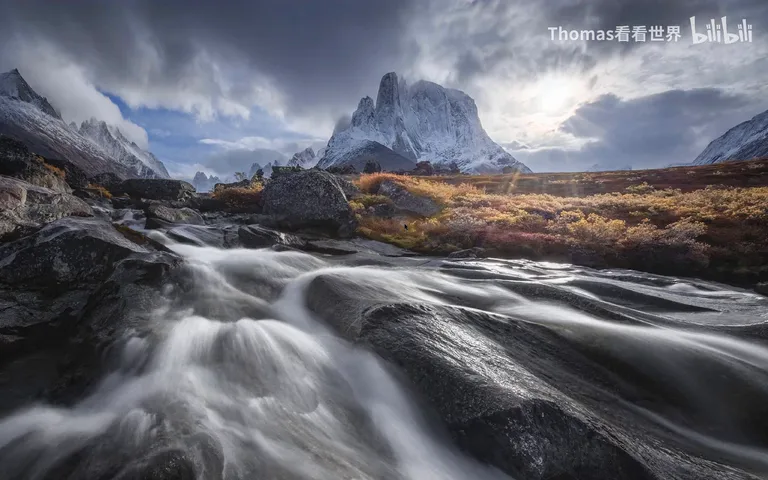
01 The Challenge: 1000:1 Dynamic Range, Head-On
What does a nightmare scene look like? Shooting backlit some time after sunrise — the sun already fierce, partly veiled by clouds. Those clouds carry real detail and blaze with light, while the rocks the sun doesn't reach fall into deep shadow. The result: a dynamic range beyond 1000:1 (at 0:07-0:37 in the video).
Before the breakdown, the conclusion: there is no single-frame answer here. Thomas runs two material sets in parallel — a 5-frame, 8-stop exposure bracket covering the dynamic range of sky, clouds and land, plus a 9-frame identical-settings burst stacked into silky water, blended together in post. Let us start from what makes the scene so hard.
02 Bracketing: from 3 Frames to 5 across 8 Stops
Thomas first shot a 3-frame bracket, but the playback said it wasn't enough: on the brightest frame the shadows were still crushed; on the darkest, the area around the sun still blown (at 0:44-0:59 in the video). So he switched to a 5-frame bracket with two stops between each frame (at 0:59-1:06 in the video).
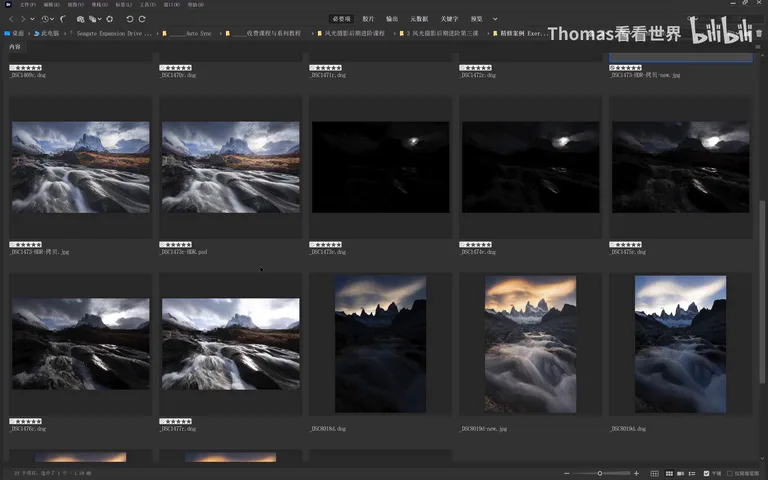
The settings go to the edge: the darkest frame sits at minus 8 stops of exposure compensation, ISO 50, f/22; the five frames run -8, -6, -4, -2, 0 — an eight-stop span, a true super bracket (at 1:06-1:23 in the video).
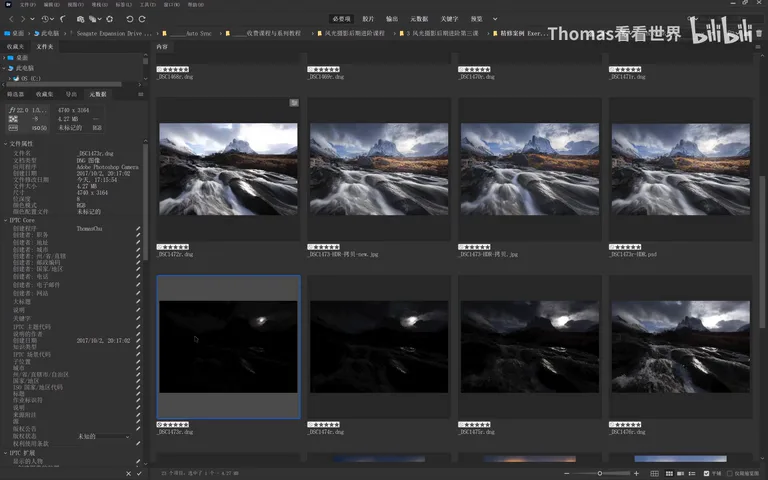
Each stop has its job: on the darkest frame the ground is pitch black, but the sun itself is recorded — nailing the solar disc is unrealistic anyway, so preserving all the cloud detail around it is the win (at 1:24-1:39 in the video); at -6 the clouds near the sun start to clip (at 1:40-1:45 in the video); then come -4 and -2 (at 1:46-1:48 in the video).
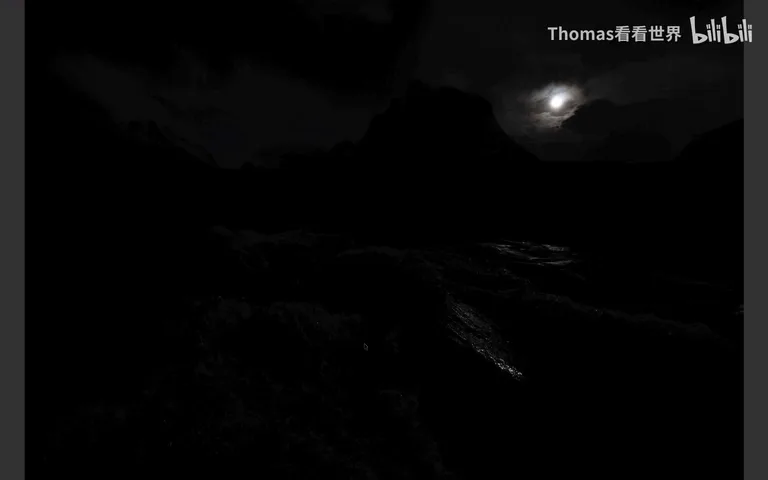
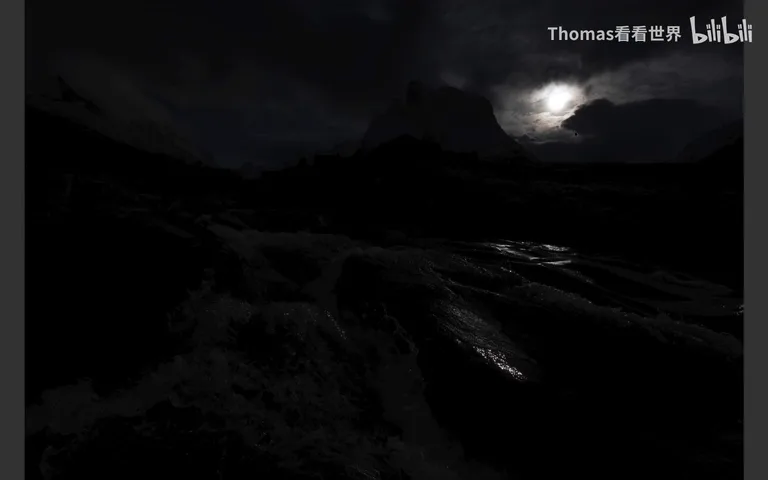
Even the 0-stop frame leaves the rocks very dark. But here's the key difference: lifting shadows from this frame brings far less noise than forcing exposure out of pitch black — exactly why the 0-stop frame matters (at 1:49-2:06 in the video). The bracket material is now complete.
03 The Water: a Stack Rescue without the ND Filter
Open the bracket set in Camera Raw and run Merge to HDR. The flowing water will merge inaccurately — that's fine, since this HDR targets the mountain frontage, the cloudy sky and the land; just hit Merge (at 2:07-2:30 in the video).
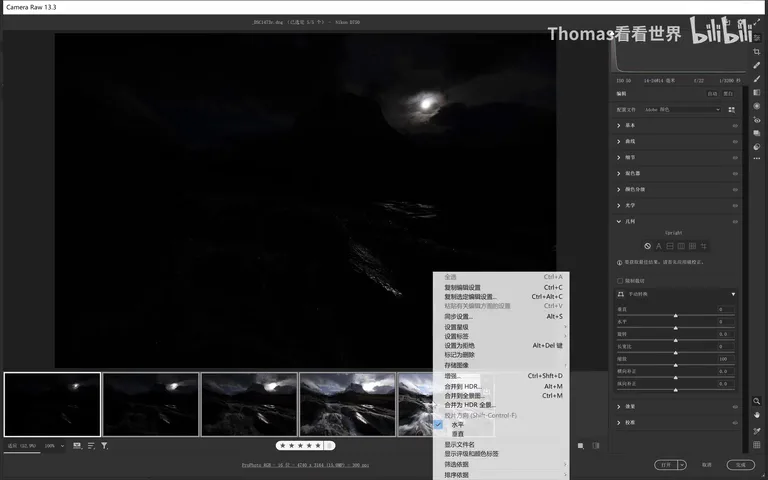
The water is another problem. With an ND64 filter on hand, a single frame could render silky flow — but the filter was left back at camp. Settings already bottomed out at ISO 50 and f/22, each frame is still just 1/10 s. No matter: ten frames of 1/10 s stacked together behave like one full second. So Thomas fired a 9-frame burst of the water (at 2:31-3:00 in the video).
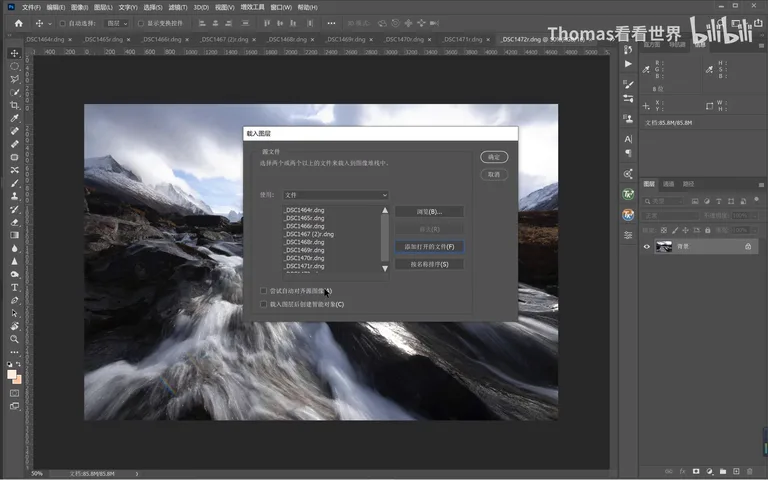
Open all nine frames in PS and run File → Scripts → Load Files into Stack, add the open files, check both "Attempt to Automatically Align Source Images" and "Create Smart Object after Loading Layers", and click OK (at 3:01-3:26 in the video). Then apply Layer → Smart Objects → Stack Mode → Mean, and the stack renders a silky, drawn-water effect (at 3:29-3:42 in the video).
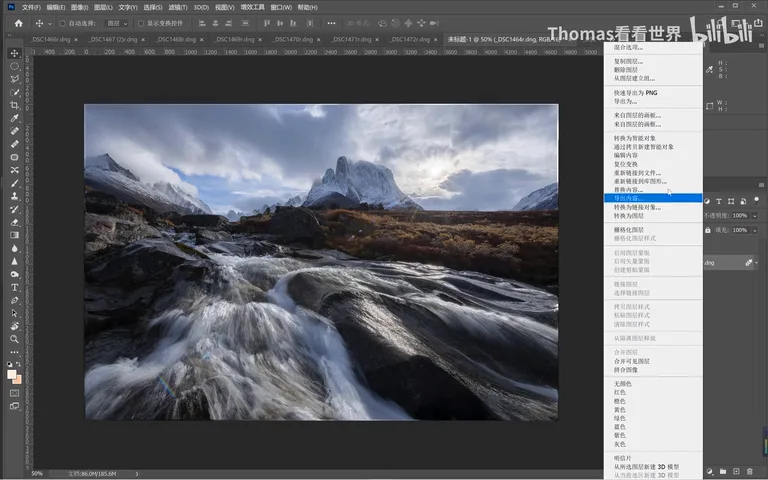
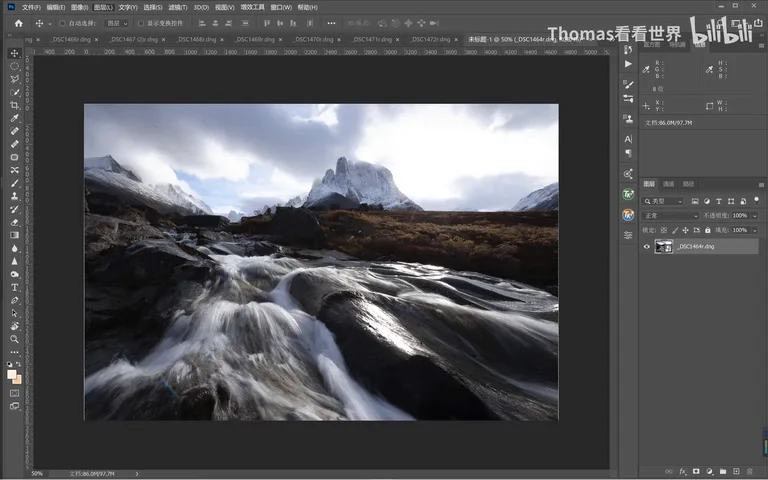
Granted, a stacked silk like this still isn't as comfortable and natural as a true ND1000 or ND64 long exposure in the field — but the feel is basically there (at 3:43-3:56 in the video). This is the most practical rescue for a forgotten filter.
04 Blending: Match the Light, Paint In the Water
Open the HDR file and first bring its exposure close to the stack image: raise overall exposure slightly, pull the highlights down, and don't lift the shadows too much — get the two frames looking alike before brushing, so the blend reads naturally (at 3:58-4:36 in the video).
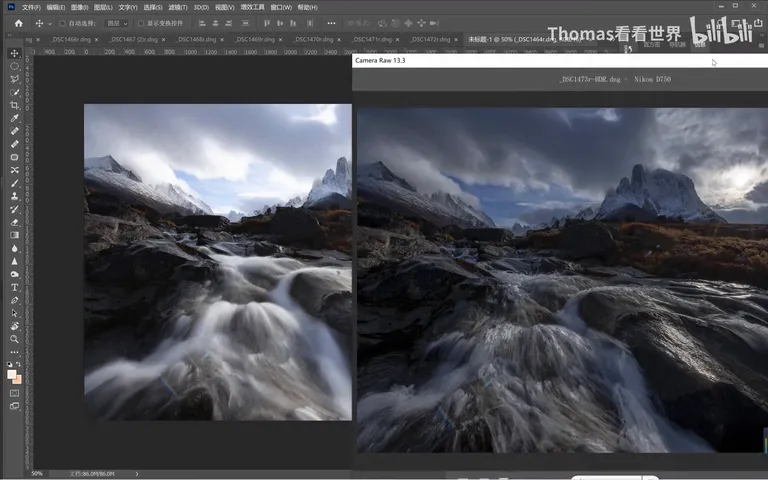
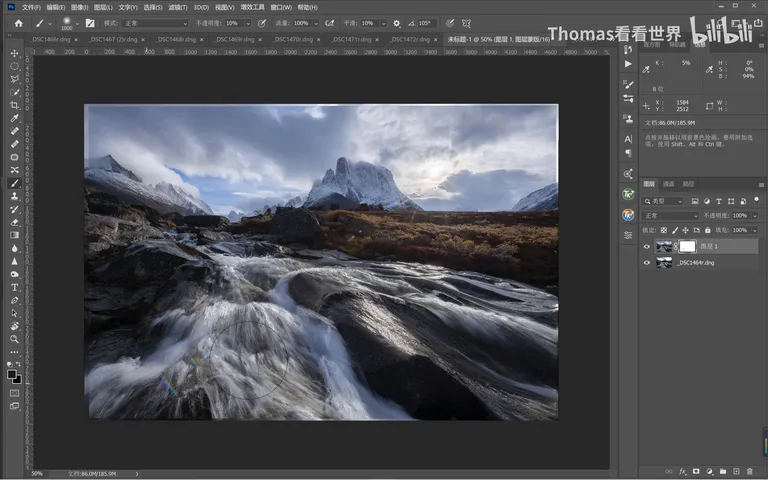
Drag the HDR into the stacked document; rasterize the smart object, select both layers, and run Edit → Auto-Align Layers (at 4:37-5:00 in the video). Then add a mask to the HDR layer: black as the foreground color at 100% opacity, and with the black brush paint over the water to reveal the silky flow of the stack below; refine tighter areas with a smaller brush (at 5:01-5:35 in the video).
05 The Takeaway: Every Frame Serves Only a Part
Everything after is simple — just basic color grading and transforms (at 5:36-5:47 in the video). The truly complex parts of this image are the shooting strategy up front and the initial merge of the two material sets.
Recap the division of labor: 5 frames build the 8-stop, ultra-high-dynamic-range exposure blend for the land, sky and clouds; 9 frames stack the water into silk (at 5:54-6:16 in the video). That's a core idea of modern landscape photography: any given shot may serve only one part of the frame — nail each part separately, combine them, and a truly striking photo emerges (at 6:17-6:47 in the video).
1. For extreme dynamic range, first ask "enough stops?": if 3 brackets fall short, shoot 5 at 2-stop spacing from -8 to 0 (ISO 50, f/22) — the darkest frame saves the cloud detail, the 0-stop frame lifts shadows with less noise; 2. Merge the bracket to HDR in ACR for sky and land only — inaccurate water doesn't matter; 3. No ND filter? Rescue with minimum settings plus a mean stack: 9 frames of 1/10 s at ISO 50, f/22 stack into roughly a 1-second silk — not as natural as real ND, but it works; 4. Before blending, match the two frames' exposure feel, rasterize, auto-align layers, then paint the stacked water back over the HDR through a mask with a black brush — every raw frame serves only one part of the picture.