Photography Tutorial · 2018-02-25
Six Major Blending Techniques in Modern Landscape Photography
Thomas Chu Photo
One piece of practical knowledge every week — making photography easy to learn
When people hear 'compositing', they always think of element compositing and creative compositing that conjure things out of thin air. But in modern landscape photography, compositing more often serves to make up for the limitations of in-camera gear.
Once you master these compositing techniques, you will no longer be troubled by not having an ultra-wide lens, forgetting your ND filter, or a contrast range beyond your camera's dynamic range.
The six major compositing techniques of modern landscape photography are exposure blending, panorama stitching, focus stacking, image stacking, focal-length blending and time blending.
The first four are widely accepted by landscape photography competitions — they make up for equipment limitations. Focal-length blending and time blending make up for shortcomings of the scene itself and alter the original scene, so they remain controversial and are mostly used in work published online.
1
Exposure Blending
Exposure blending is mainly used in high-contrast environments to overcome insufficient camera dynamic range — the regret of a photo being either overexposed or underexposed.
By shooting a bracketed series from dark to bright, we record all the brightness information of the scene, and later blend it into one evenly exposed photo.
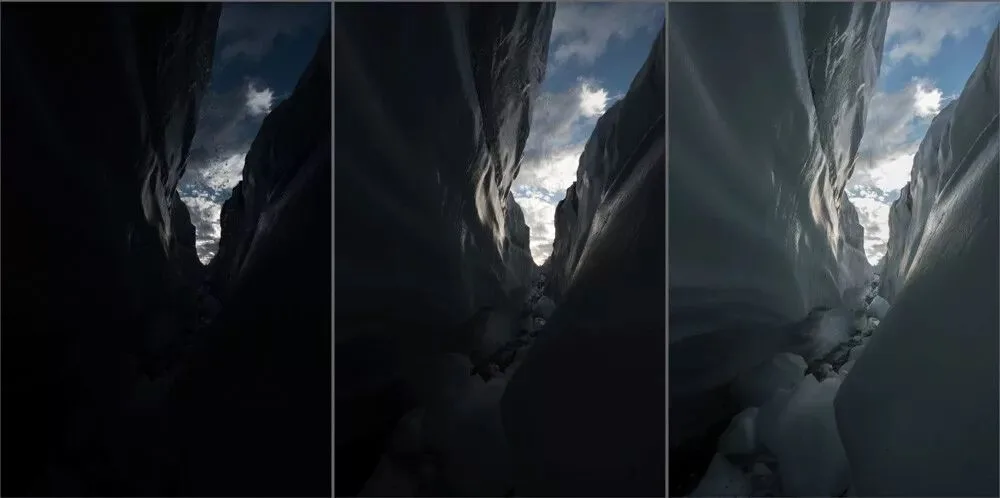
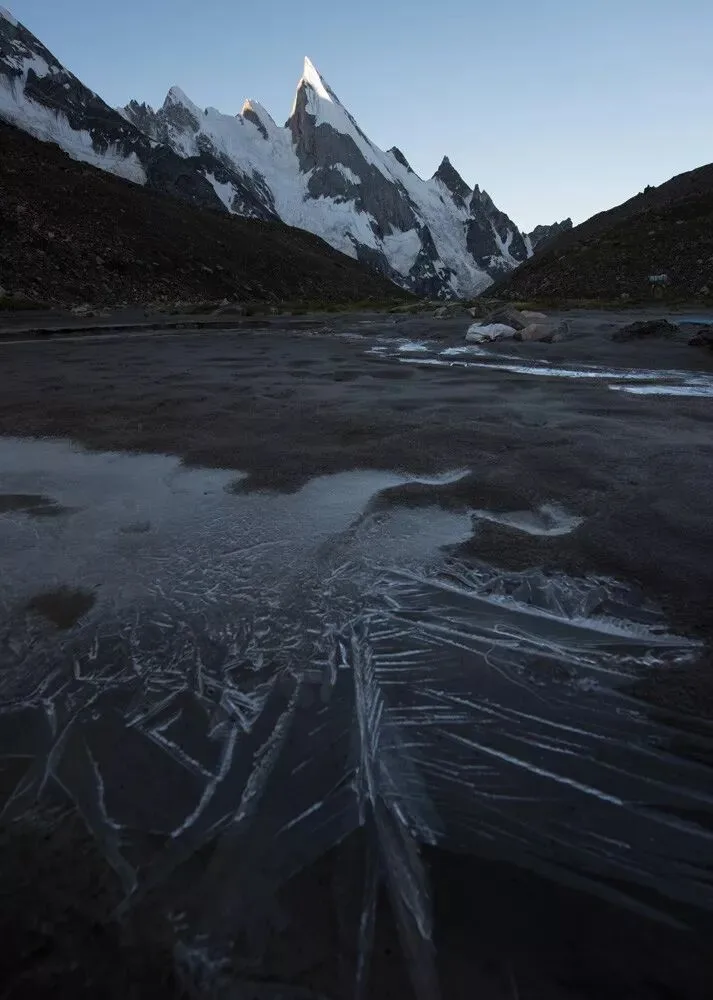
The three photos above were shot at -4 EV, -2 EV and normal exposure compensation. The normally exposed one records the dark detail of the ice, while the two underexposed ones record the detail of the bright clouds.
Blend the three photos with ACR's HDR merge or with luminosity masks, and you get a photo with complete detail throughout the scene.
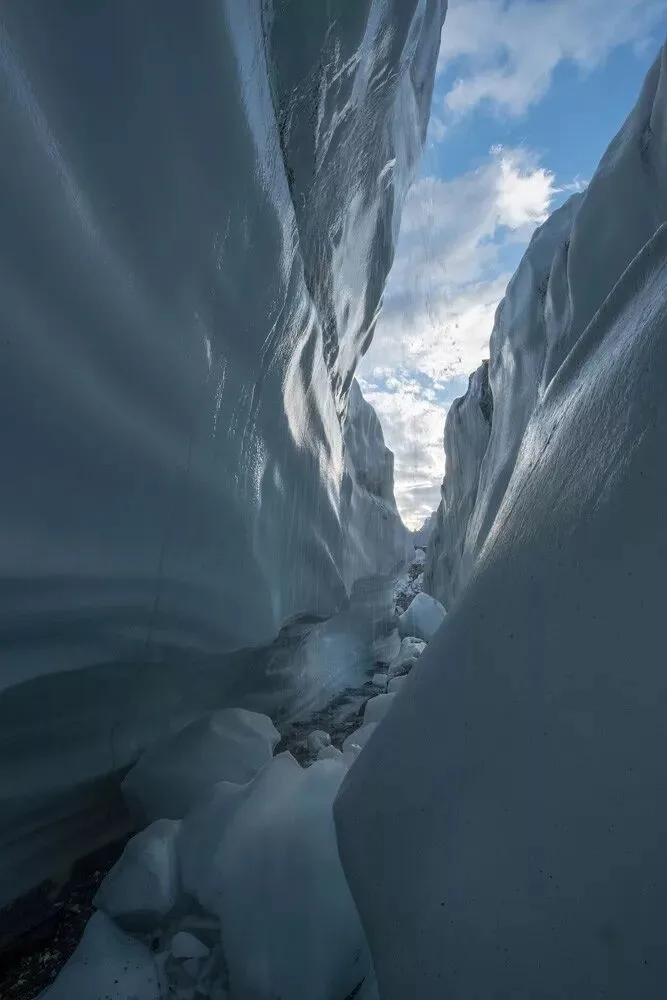
For more details on exposure blending, read the tutorials 'No Fear of High Contrast: Bracketing and Exposure Blending Explained' and 'HDR = Distorted Images? This Article Teaches You the Right Way to Use HDR'.
2
Panorama Stitching
Panorama stitching is mainly used to capture grand landscape scenes.
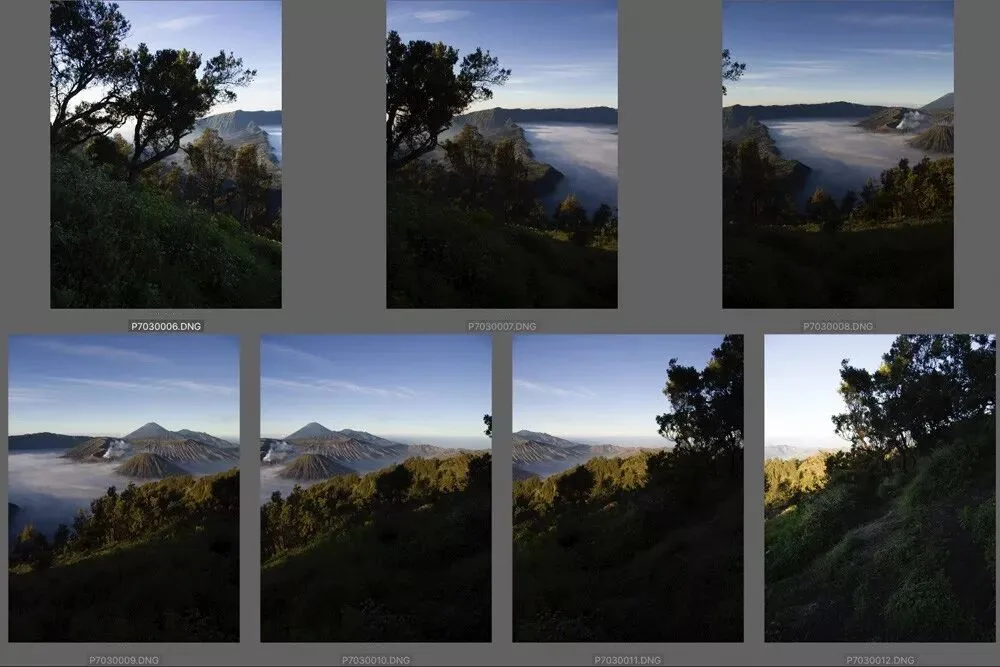
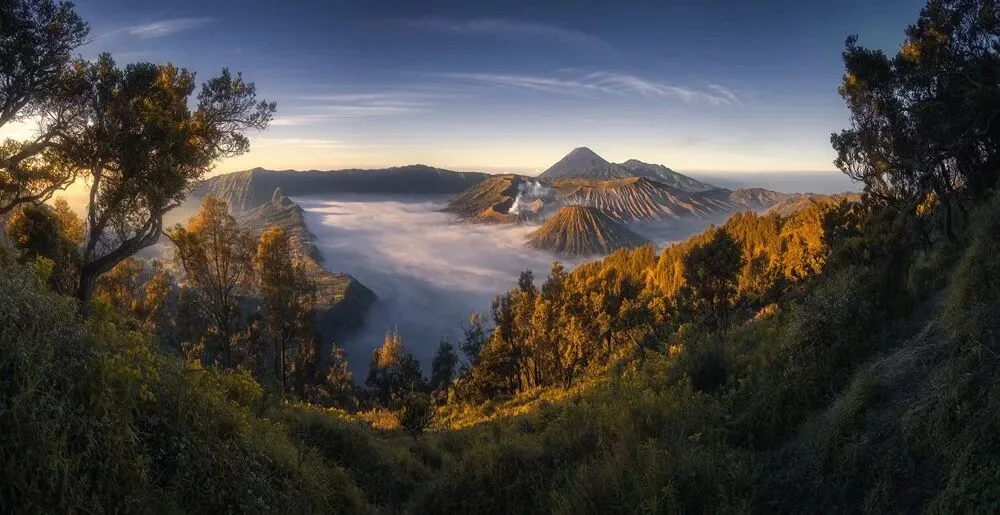
In the situation below, a single wide-angle shot falls short, and cropping top and bottom in post costs pixels. Shooting for a stitch not only records the entire volcanic landscape of nearly 180 degrees, but also yields a high-resolution large image.
This stitch uses vertical frames for higher resolution and less distortion, with about 40% overlap between frames.
Using ACR's built-in panorama feature and then color grading gives the stunning result below.
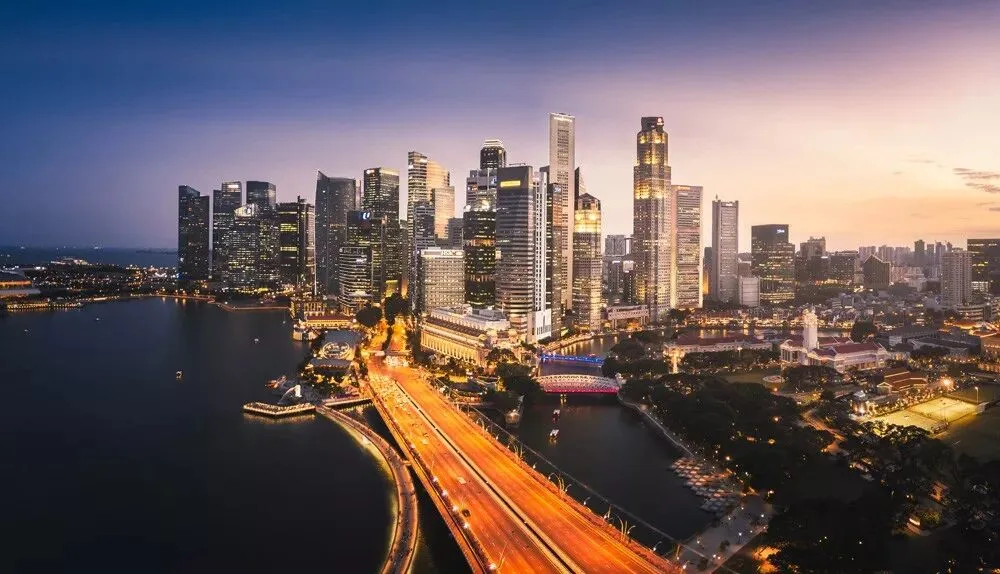
Stitching is not limited to a single row — you can shoot multiple rows and join them. In the drone shots below, after shooting the first row of four frames, I tilted the camera down and shot a second row of four, so my stitch covers both left-right and top-bottom.
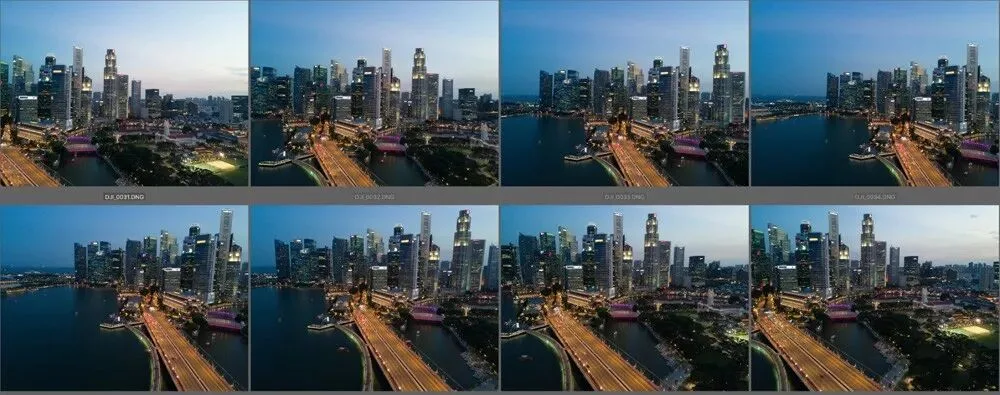
Whether single-row or multi-row, ACR's stitching tool does it automatically, and the operation is very simple.
For more detailed stitching operations, read 'Beyond Wide Angle: The Charm of Panorama Stitching', 'How to Shoot Stunning Panoramas with Stitching' and 'How to Stitch High-Quality Panoramas in PS/LR'.
3
Focus Stacking
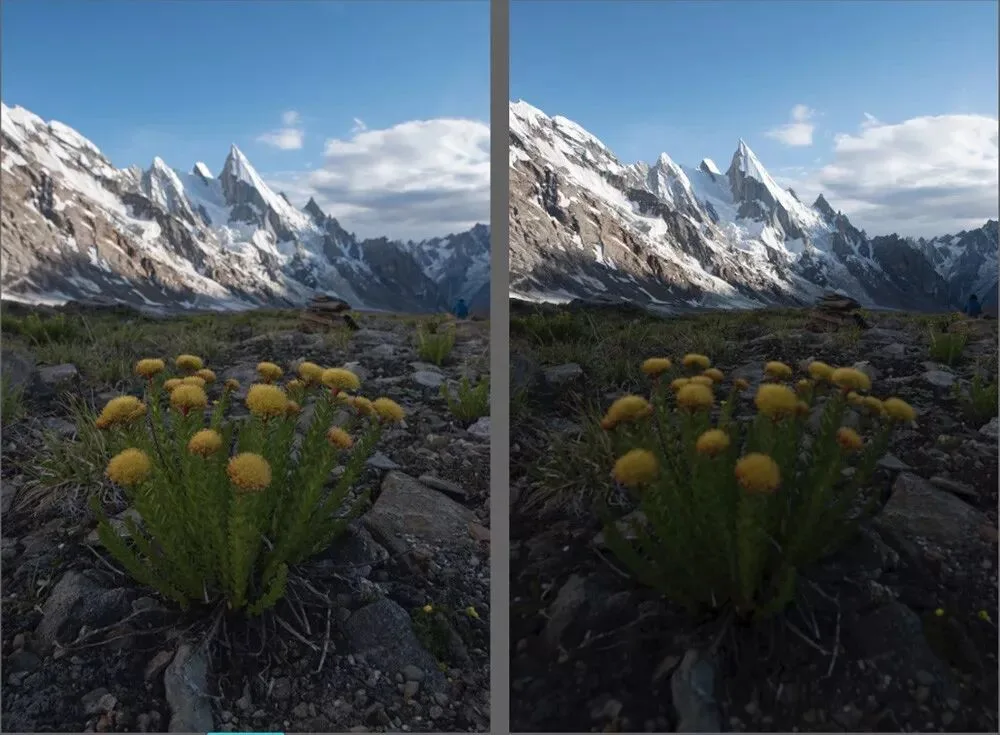
In landscape photography we often need foreground, midground and background in one frame. When the foreground is close, neither a small aperture nor hyperfocal focusing can keep everything sharp — that's when focus stacking is needed.
In the situation below, if I focus on the foreground flowers, the distant snow mountain blurs (left). If I focus on the distant mountain, the nearby flowers blur (right). Since a single frame can't achieve enough depth of field, I can only focus on foreground, midground and background separately and blend them in post.
The image below shows the result of multi-frame focus stacking, further cropped and graded — everything from the nearest flower to the distant snow-capped clouds is tack sharp.
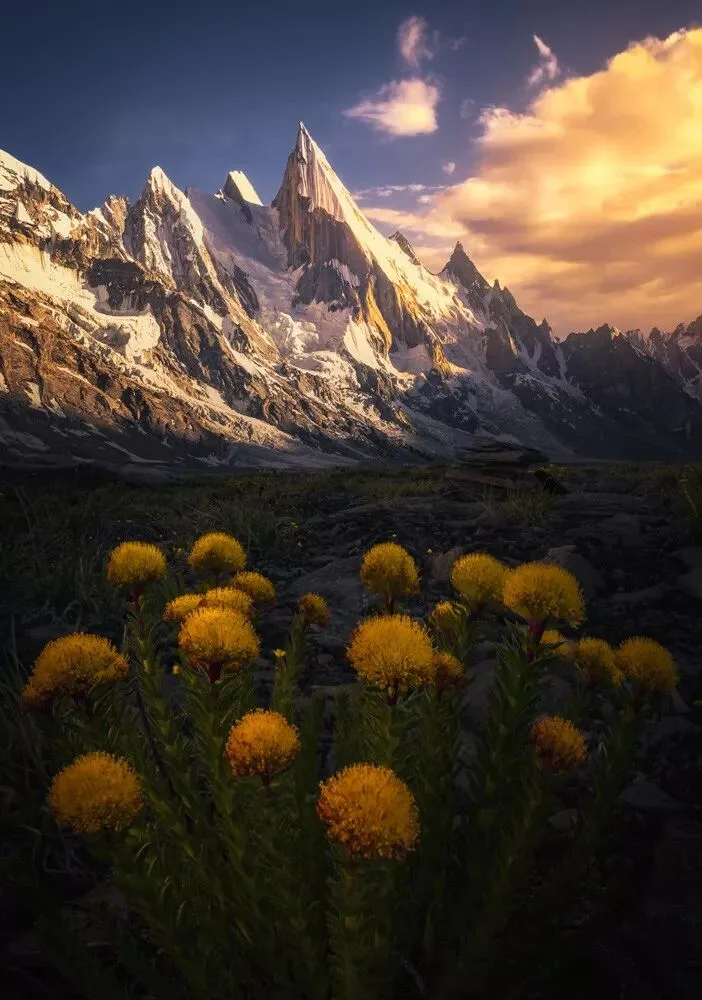
For more details on focus stacking, read 'Breaking Camera Limits: A Focus Stacking Tutorial'.
4
Image Stacking
Stacking means piling multiple photos together with a certain algorithm to reduce noise, remove moving clutter, simulate long exposure, and create light trails.
In landscape photography, common stacking methods include mean stacking, median stacking and maximum stacking. Below is a set of star-trail photos, each with rather short trails.
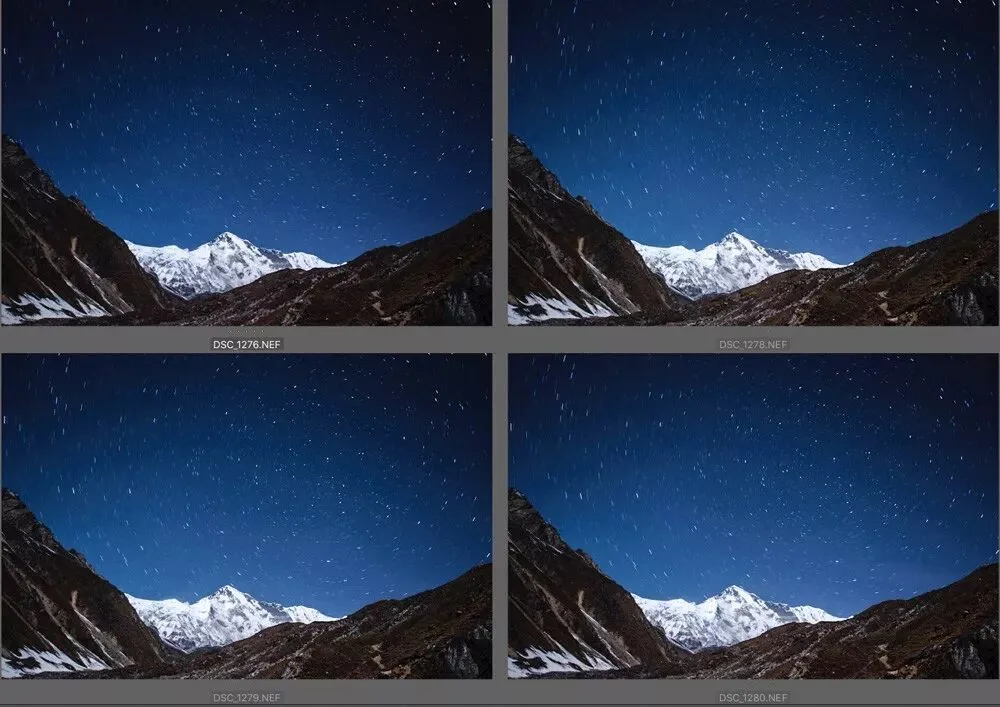
But with maximum stacking, combining many short trails gives me one long star trail.
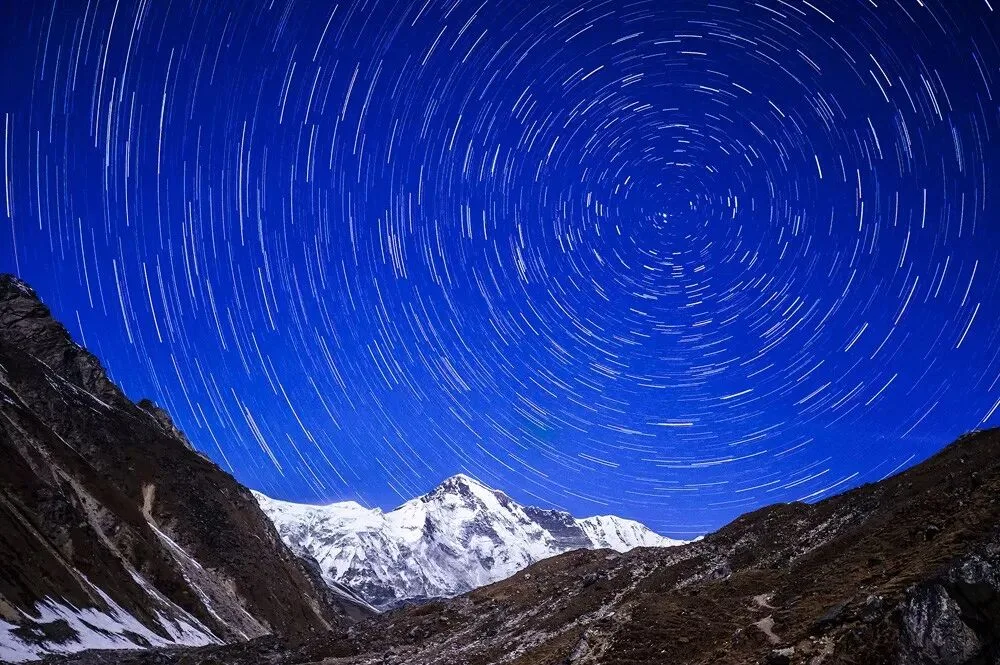
For stacking star trails and car trails, read 'How to Shoot Beautiful Night Car-Trail Photos'.
Besides maximum stacking, we can use mean stacking to simulate long exposure, and median stacking to remove noise and moving clutter.
5
Focal-Length Blending
When we are on location, distant mountains often feel stunning and the moon looks huge — but back home we find that, due to the wide-angle lens's perspective, the mountains look small and the moon is just a dot.
In such cases we can try focal-length blending, also called perspective blending: as the name suggests, shoot different elements of the frame with different focal lengths, then blend them into one photo in post.
In the scene below, I shot the foreground ice with a wide angle — and because of wide-angle perspective, the distant snow mountain looks tiny (left). So I shot the distant mountain again with a medium telephoto (right). The mountain from the medium focal length looks far more majestic, closer to how the human eye perceives it on site, though the foreground lacks perspective depth.
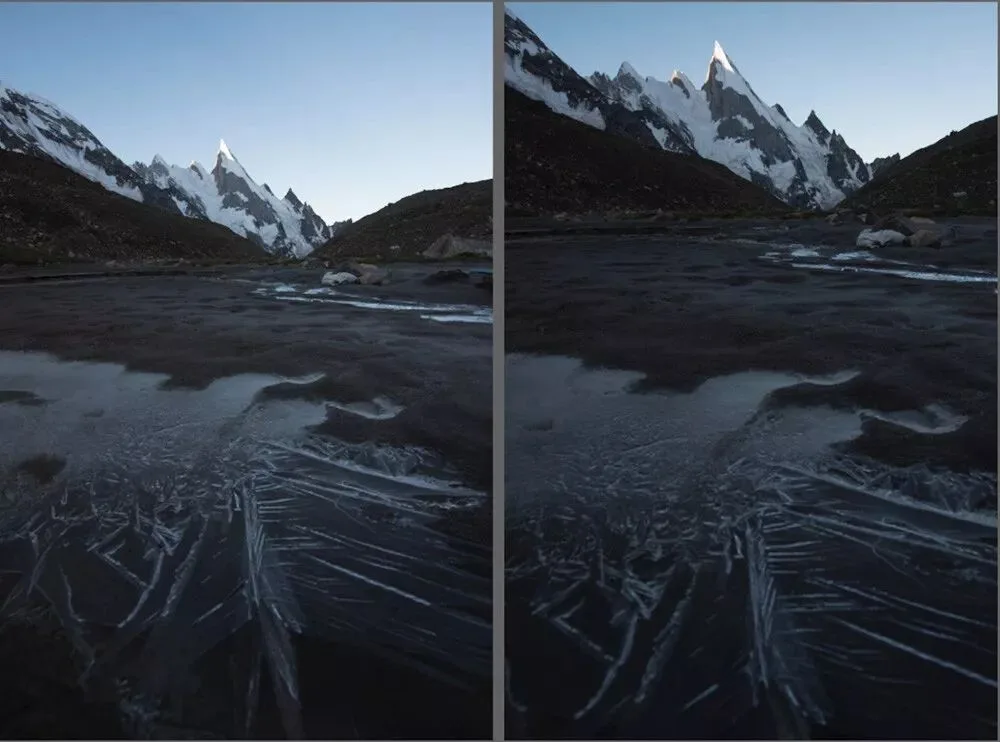
The image below was created by masking together the wide-angle foreground and the telephoto mountain — it has both the dramatically exaggerated foreground ice and the grand distant snow mountain. That is the magic of perspective blending.
Of course, perspective blending differs from the previous four techniques: it no longer merely compensates for gear, and it is easily abused — it counts as 'heavy' post-processing in landscape photography.
6
Time Blending
When shooting cities, we often face this frustration: when the sunset glow fills the sky, the streets haven't lit up yet — beautiful sky but a dull city. By the time all the lights come on at night, the sky has gone pitch black with no detail at all.
Time blending solves this. It means keeping the composition and camera position fixed (usually on a tripod), shooting multiple photos at different times, and then blending the best parts of each time together. Since the composition never changes, blending is relatively easy.
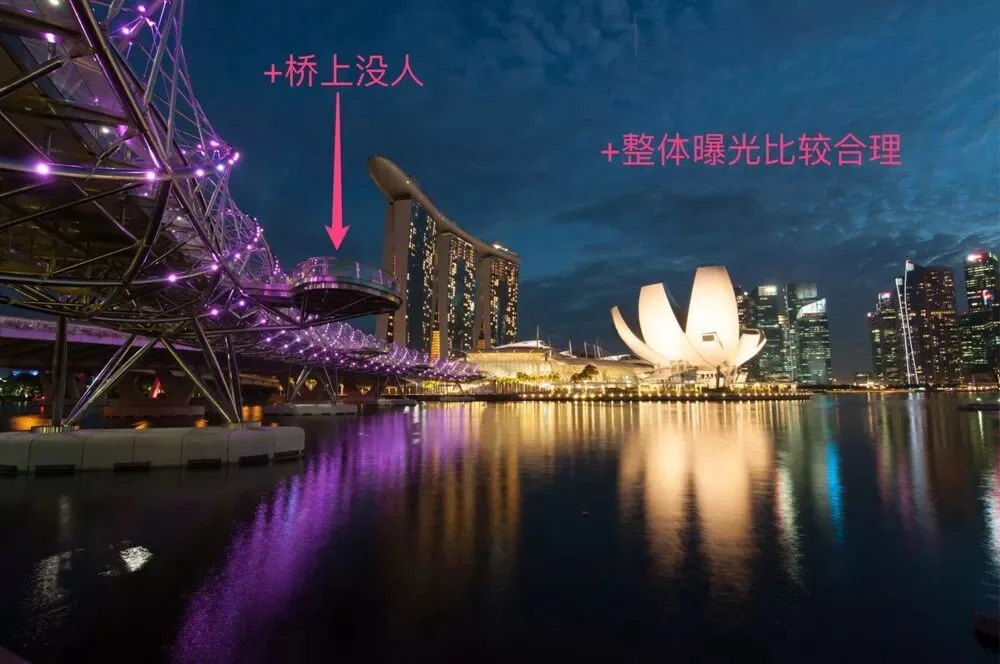
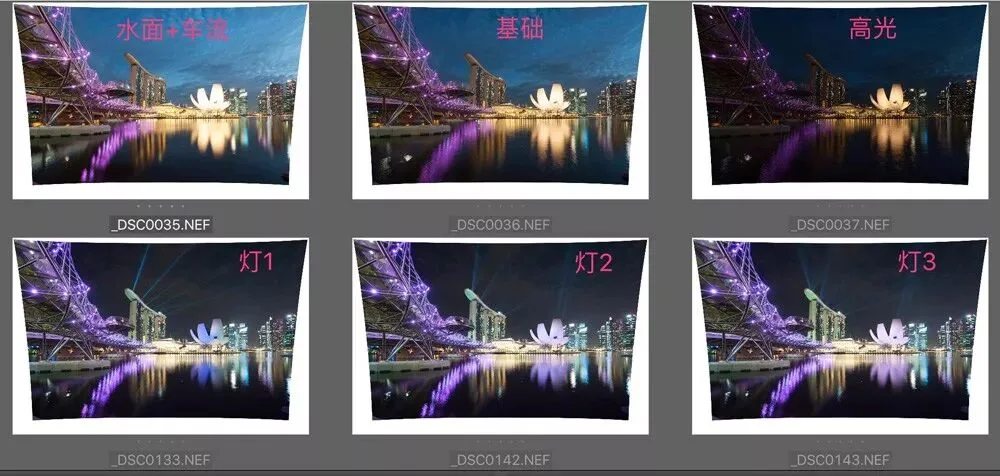
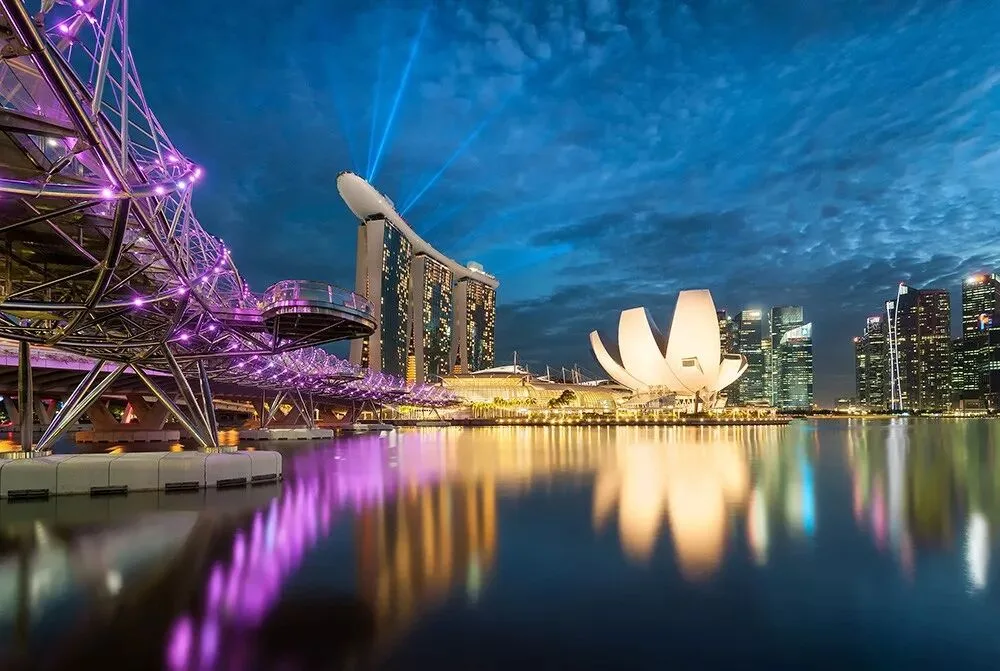
In the example below, I blended six photos taken from the same spot at different times into one splendid night scene.
The first photo was taken shortly after sunset, when the clouds in the sky looked great. Its overall exposure is reasonable and there are no pedestrians on the bridge — but the water surface is not calm enough.
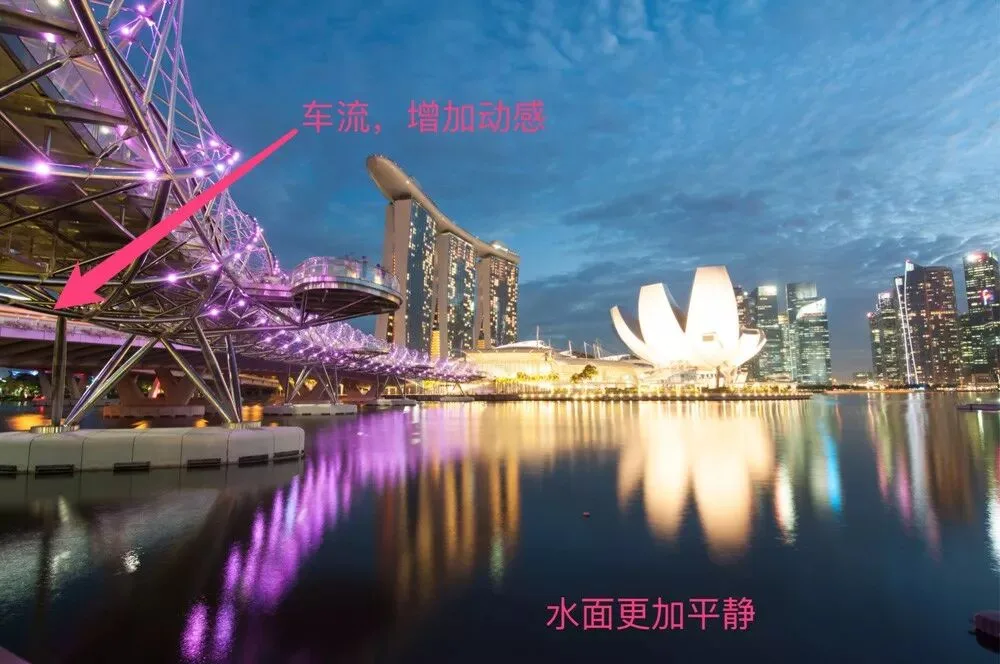
So I shot a second photo with a longer exposure to make the water dreamy and calm — and unexpectedly captured a stream of car lights on the bridge.
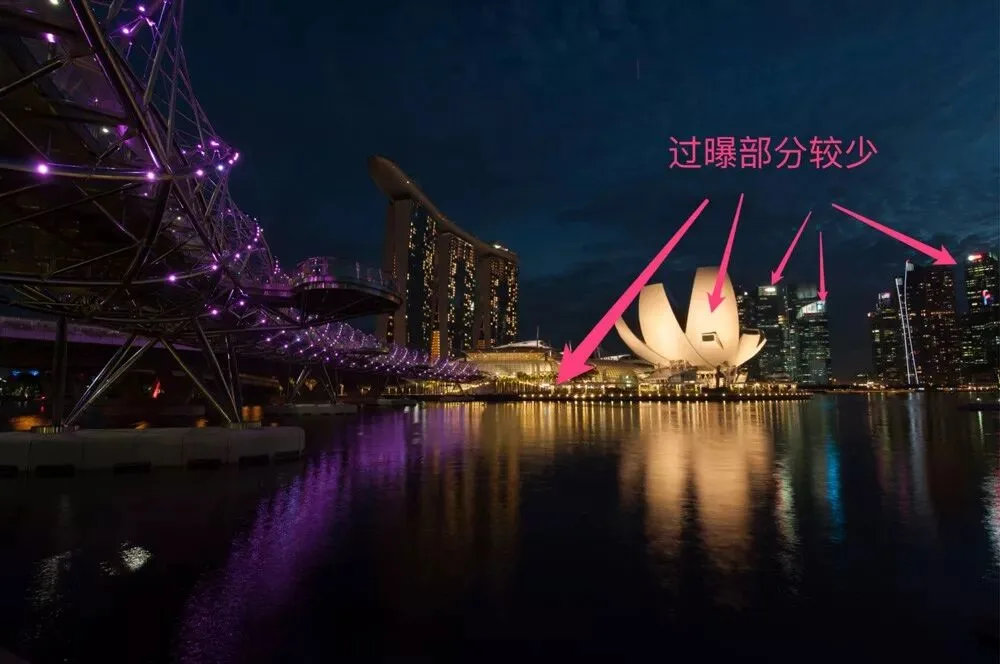
In the first two photos, some distant lights were overexposed, so I also shot an underexposed frame to capture the highlight detail.
Actually, the first three photos still belong to exposure blending. After that, I left the camera on the tripod and waited another hour.
Why keep waiting? Because after nightfall, tourists return to their hotels, and more rooms light up in the distant hotel.
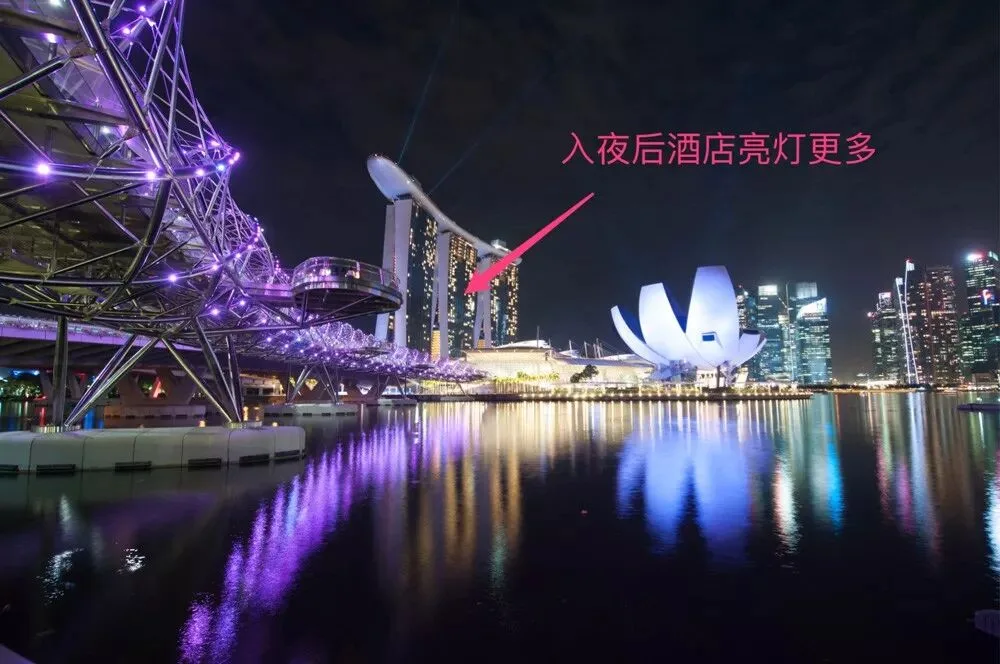
And every night after 8pm, a light show is held here. The sky and water are pitch black at that point — no problem, because I had already captured the pre-nightfall sky and water.
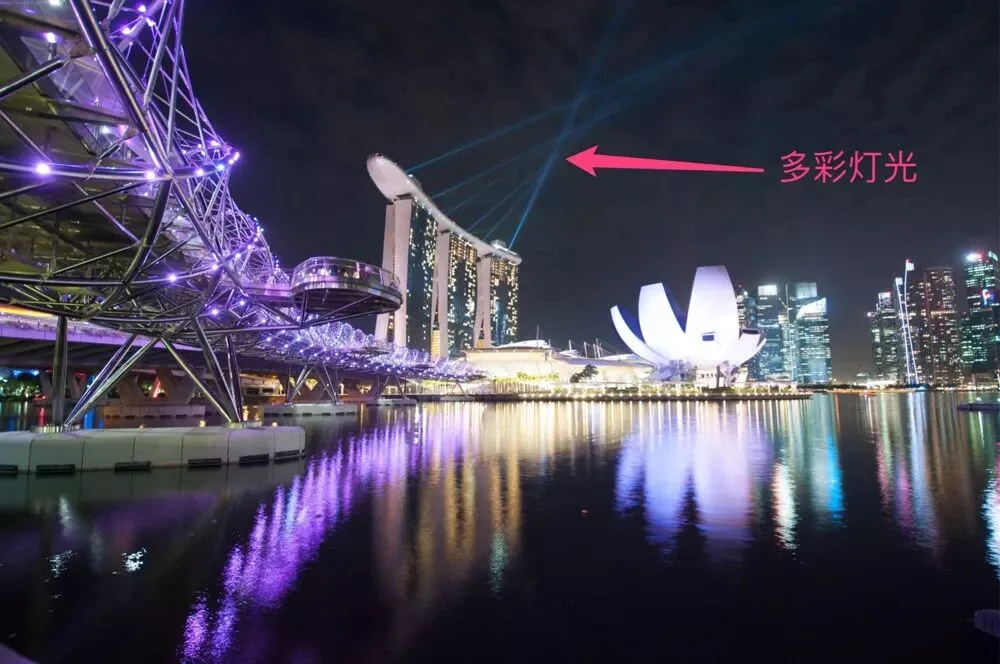
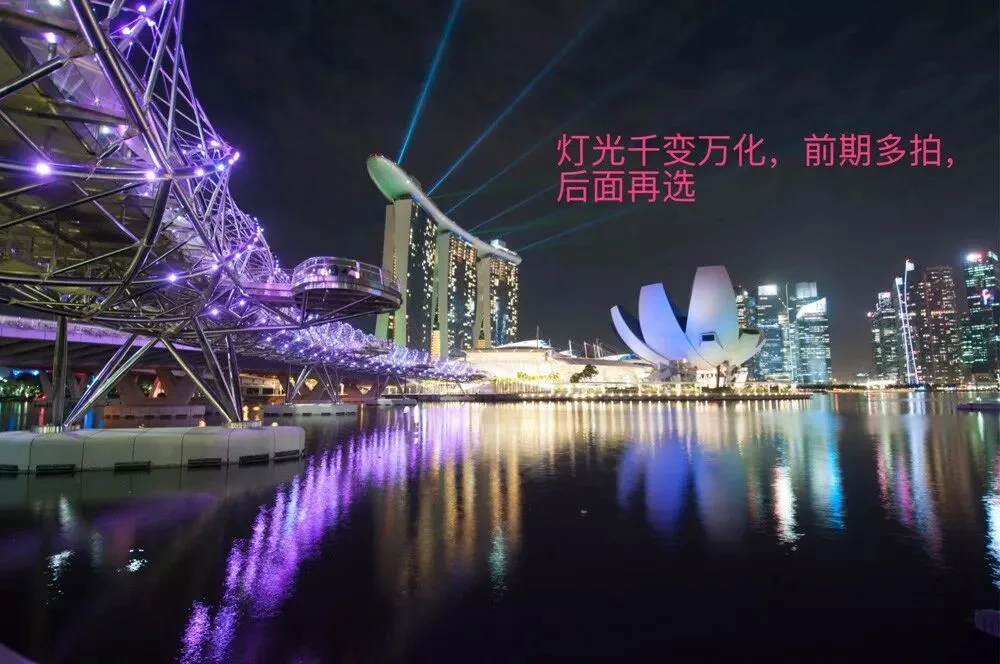
The light show changes constantly, so all I could do was shoot a lot and later select the lights I wanted to blend in.
Finally I loaded the six photos as layers and blended them with masks and blend modes, taking only the best part of each time period.
That is how the splendid night scene below was born: blue sky, calm water, gorgeous lights — a combination that cannot exist simultaneously in reality. But with the magic of time blending, I fused frames from different times into a truly distinctive photo.
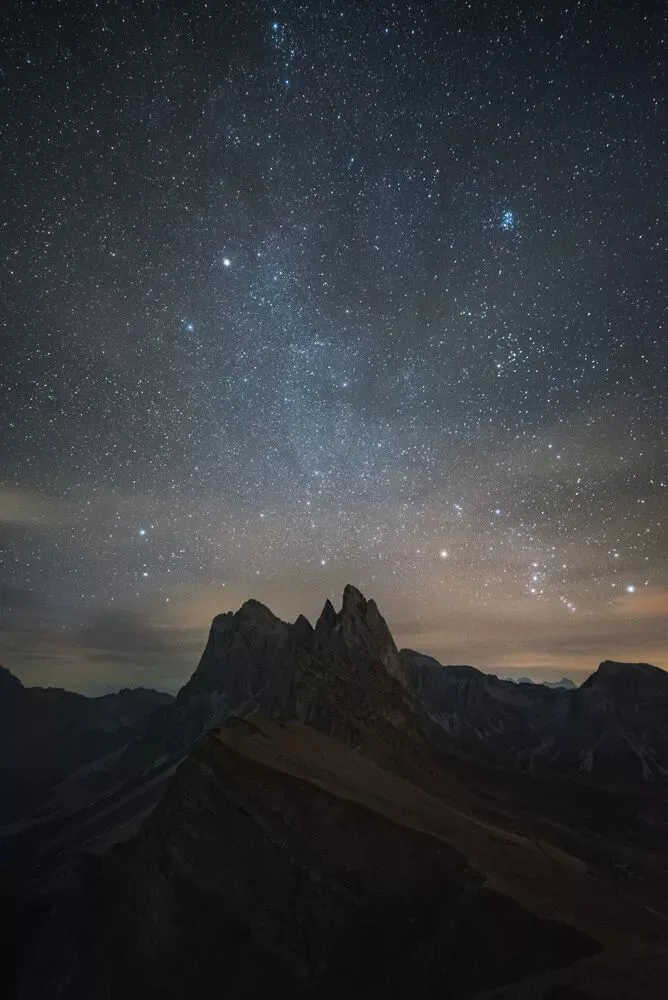
Time blending is also widely used in astrophotography. When we shoot the Milky Way, the ground is often pitch black.
If you shoot the foreground at blue hour (when the sun has set and the sky is blue but not yet fully dark), keep the camera position fixed, and shoot the Milky Way later at night,
then with time blending we can get a masterpiece with a clear foreground and a brilliant starry sky at the same time.
This article is excerpted from Thomas's upcoming book 'The Fundamentals of Landscape Photography Post-Processing' — stay tuned!