Photography Tutorial · 2022-09-04
Two Days Shooting, Five Hours Editing: How to Bring Out the Mood in a Snow Mountain Shot
An important role of photo post-processing is rendering the atmosphere of a photo.
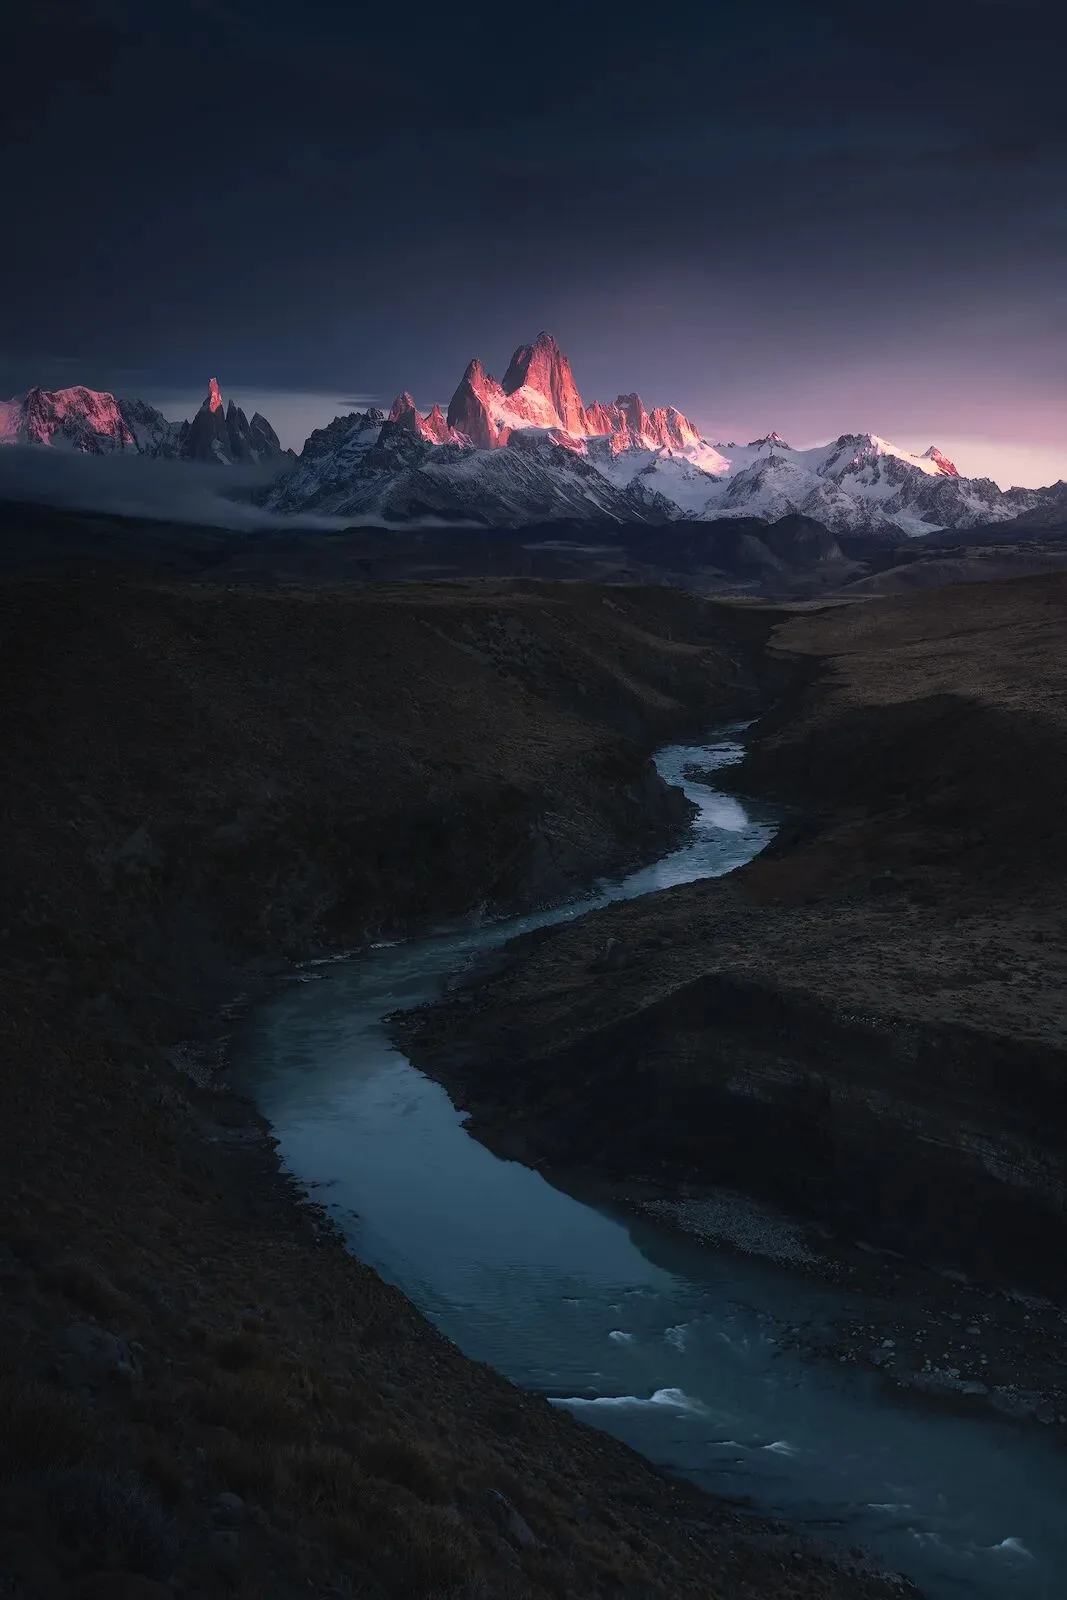
Today's post-processing case was shot in the Patagonian mountains of South America. After two days of scouting, the composition was already spectacular.
But after adjusting the composition, tonality and color in post, the feeling the photo conveys was greatly elevated!
Video
▶ Watch the video tutorial on Bilibili
This is the illustrated companion to the video above. Thomas uses one of his signature images, "High Mountains, Great Rivers" (shot in Patagonia, South America), to walk through the entire capture-to-edit pipeline: two days of scouting and shooting, setting the base in Camera Raw, then 30-40 layers and nearly five hours of fine-tuning in Photoshop. The atmosphere-building ideas demonstrated layer by layer in the video are unpacked here with keyframe screenshots.
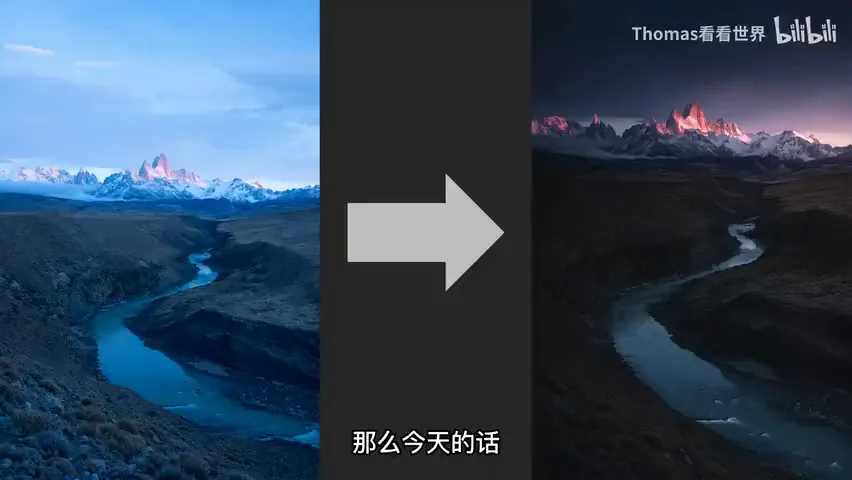
Start with the result: the before/after at 0:05 in the video — the camera's original capture on the left, the final image on the right. Same mountains, same river, utterly different atmosphere. The photo took two days to shoot and nearly five hours to edit; this article follows the order "scouting and intent → analyzing the RAW → setting the tone in Camera Raw → refining in Photoshop → the comparisons".
01 Pre-Production: Two Days of Scouting, One Grand Vision
The photo was shot in Patagonia, South America; the two central peaks are Fitz Roy and Cerro Torre. Framing them from nearby lakes and streams is spectacular enough, but Thomas wanted something grander: a real river as the midground. The satellite view at 0:46 in the video reveals the key — before it bends, the river flows straight toward those two peaks, and it switches direction five or six times in a row (at 1:02 in the video).
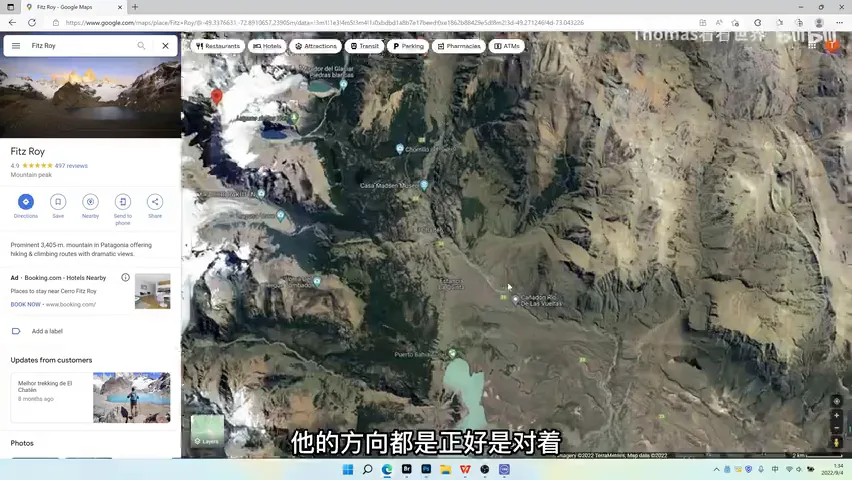
The execution was simple: drive to the area, hike and scout on day one, and only shoot on day two (at 1:08 in the video). Many frames came back from those mountains, but the river frame stood out — streams cannot deliver that "sense of the sublime", while a great river can (at 1:26-1:32 in the video).
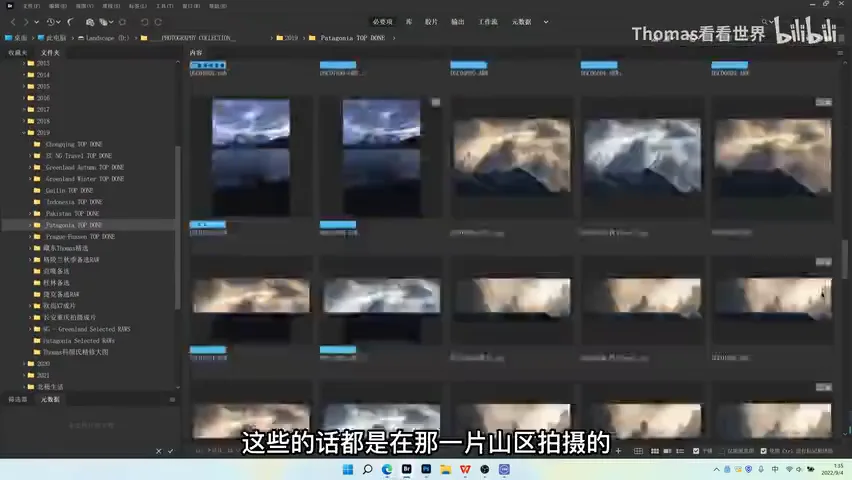
02 Reading the RAW: What Kept It from Feeling Sublime
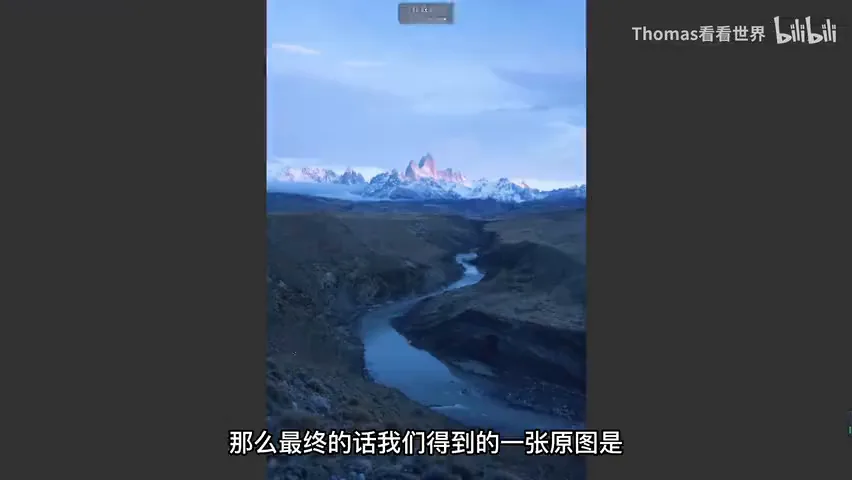
The final RAW is shown in the screenshot at 1:37. The camera's auto white balance was slightly off toward blue, and while the scenery itself is spectacular, three gaps kept it from the intended sense of the sublime and the power of nature (at 1:55-2:02 in the video): the sky was too bright, pinning the viewer's eye up there while the mountains and river sank into obscurity; the foreground was cluttered — really just bare random rocks with nothing to hold onto; and the fine detailing still had a long way to go.
03 Camera Raw: the Dark Base and Complementary Palette
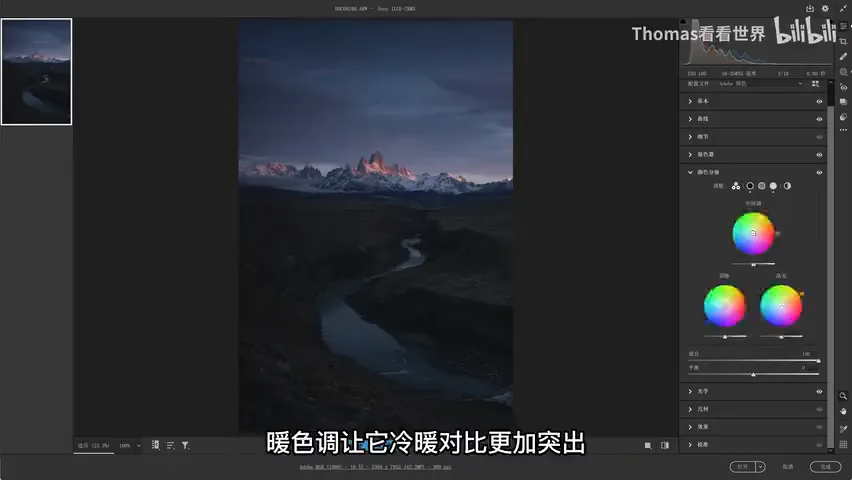
Once the Camera Raw adjustments were in, the atmosphere changed completely (at 2:30-2:38 in the video). In the Basic panel, step one was dropping exposure by a full -1.5 and lifting shadows and blacks back up to build a "dark tone" — the foundation of the mood (at 2:43-2:54 in the video). White balance was corrected in the same panel: from the bluish 3800K with +7 tint to a heavy dose of warmth plus some magenta, landing on a normal but slightly purple balance (at 2:55-3:09 in the video).
For the color system, the image is built on a red-purple versus teal-green complementary palette (at 3:19 in the video). The Color Mixer nudges blues toward purple to unify the palette (at 3:11-3:18 in the video), and Color Grading pushes extra warmth into the highlights to sharpen the warm-cool contrast (at 3:25-3:31 in the video) — the panel at 3:45 above captures exactly that step.
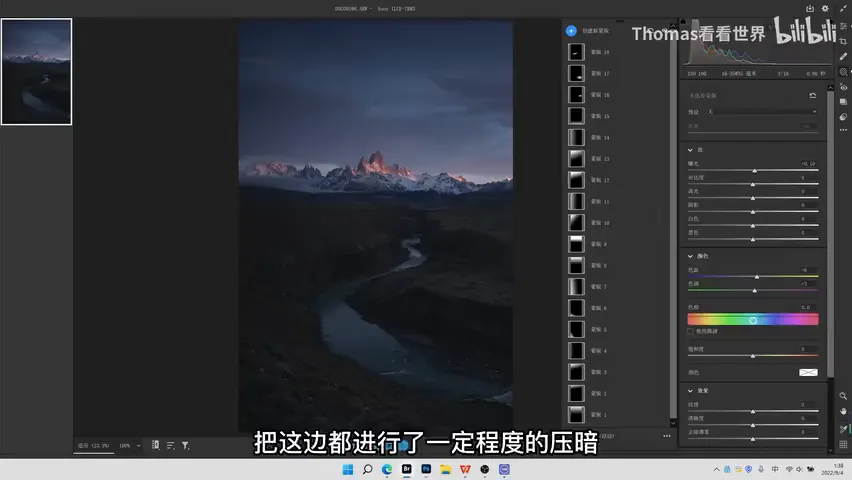
Many local filters were created, but they serve one core purpose: rebuilding the logic of light and dark (at 3:33-3:39 in the video). After the earlier darkening, the brightest area of the frame was actually on the left — yet the light clearly comes from the right, which contradicts how we read the scene. So a stack of local filters darkens the left side across the board (at 3:42-3:58 in the video), making the direction of light believable again.
04 Photoshop: Carving Out the Atmosphere
Entering Photoshop, the file is first converted to a Smart Object (at 4:01-4:06 in the video), then Color Efex Pro applies Polarizer and Skylight filters to deepen the purple cast and sharpen the tonal and warm-cool contrast (at 4:07-4:16 in the video). The sky, already darkened heavily in Camera Raw, is darkened further in PS; the river gets the opposite — a moderate brightening paired with masks to make it stand out (at 4:18-4:35 in the video). Saturation demands trade-offs too: if everything is saturated, nothing stands out — so red-purple goes most saturated, blue second, the teal river third, while the green grass stays desaturated and very dark (at 4:36-4:57 in the video).
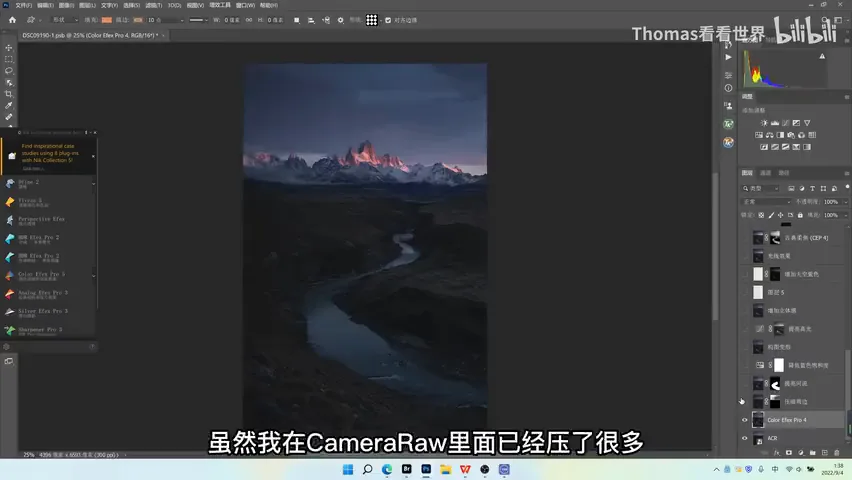
Then came the first composition reshape. The frame had already been cropped to keep roughly a third of sky by the rule of thirds, but the river simply flowed out of the side — lacking both openness and the punch of a diagonal (at 4:58-5:24 in the video). So the river area was selected on its own and stretched toward the frame's diagonal, instantly improving its sense of motion (at 5:25-5:35 in the video; the crop ratio is visible in the 5:25 screenshot above).
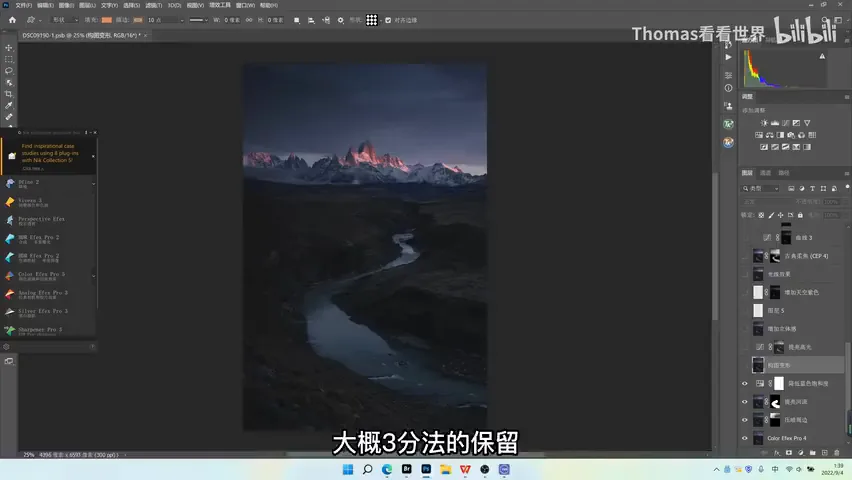
Next, highlights: paired with luminosity masks and Curves, the bright areas are lifted (at 5:37-5:43 in the video). The effect is immediate — your eye lands on the snowy peaks first, not the sky as it did in the earlier small preview, and the tonal contrast snaps into place (at 5:44-5:56 in the video). Then the modeling is brushed in gradually: the land around the river gains highlighted faces (at 5:57-6:12 in the video); sampled purple deepens the sky; and several Radial Filters in a Camera Raw filter brighten the light side — until the sunlight feels like it slants in from the right and lights up the two spectacular peaks, the feeling of sunshine finally entering the frame (at 6:13-6:38 in the video). A soft-focus style filter in Color Efex Pro smooths the overall look along the way (at 6:39-6:44 in the video).
Plenty of smaller moves followed: the sky was evened out with more darkening — so uniform that the cloud detail almost disappears if you are not looking for it, which is exactly the clean look he wanted (at 6:45-7:09 in the video; the before/after is visible in the 7:05 screenshot above); the black point was lifted slightly to avoid crushed blacks; and after stamping a merged layer, the highlights and the light on the peaks were rendered further (at 7:10-7:29 in the video). The visual sequence is deliberate: first glance to the peaks, second to the river, third to the sky and grass — so the river was brightened again, second only to the peaks and sunlight (at 7:30-7:48 in the video), and the clouds were given depth with dodge and burn (at 7:49-7:57 in the video).
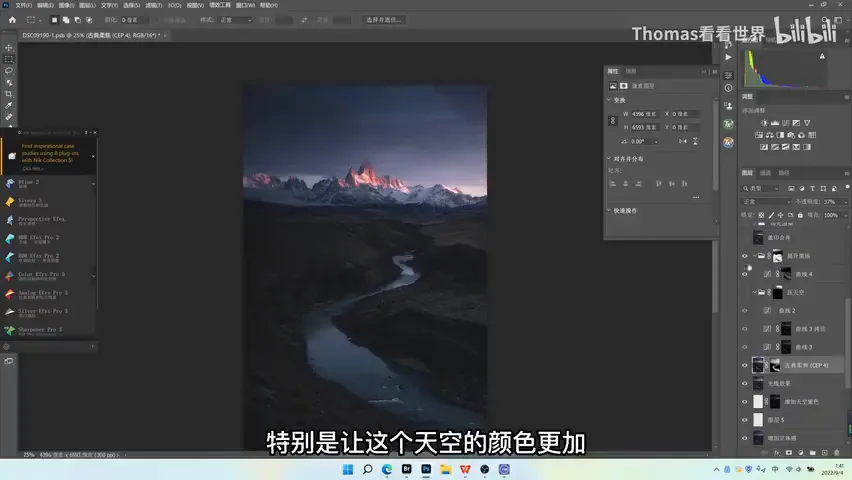
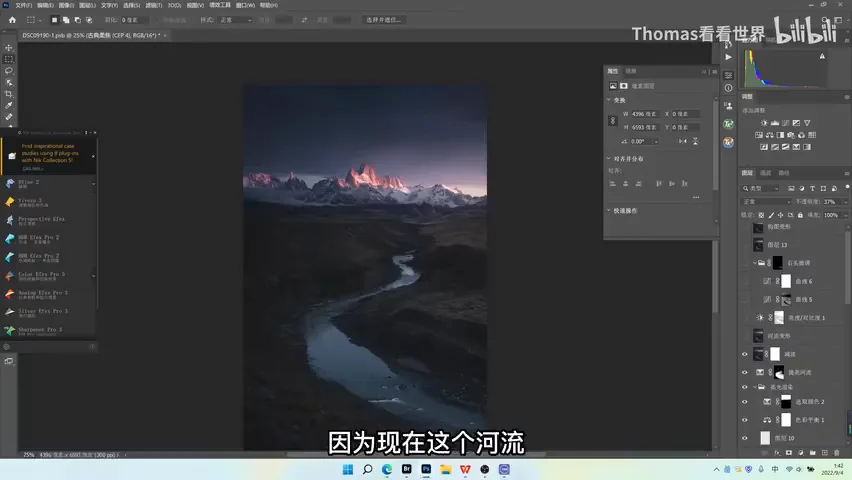
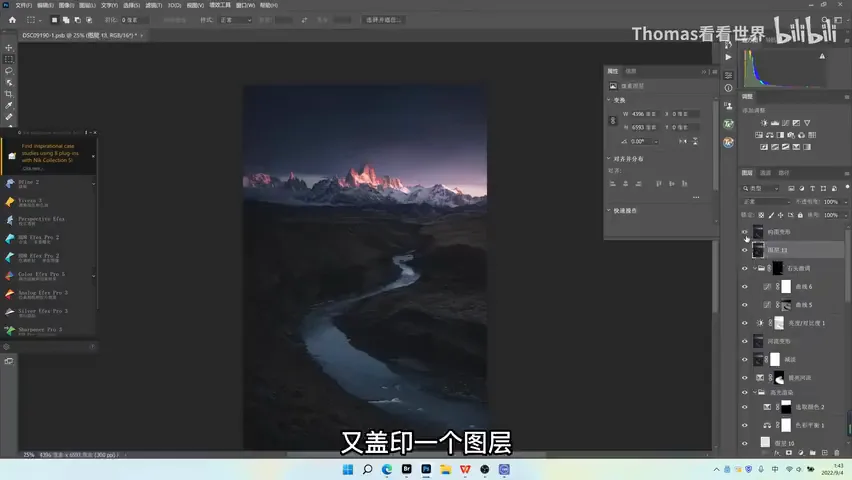
The river then went through two more reshapes. The second made it tidier: a large gap in the river broke its flowing line (at 7:58-8:13 in the video). There is an attitude worth noting here: if you want to document the terrain faithfully, you avoid warping it; but this image is about the sublimity of high mountains and great rivers, so the river's shape serves the feeling (at 8:14-8:33 in the video). Several mid-stream rocks that broke the flow line were removed outright; the rest were fine-tuned — contrast lowered, brightness raised — keeping a hint of texture without stealing attention (at 8:35-8:55 in the video). The third reshape pulled only the lower part downward, sending the river through the corner and out along the diagonal — the best motion and impact it could have (at 8:56-9:17 in the video; the two screenshots above show the reshape states at 8:20 and 9:10).
05 The Comparison: Capture Sets the Floor, Editing the Ceiling
The final image came together from roughly 30-40 layers and five hours of fine work (at 9:25-9:29 in the video). The three screenshots below show, in order, the RAW at 9:34, the Camera Raw result at 9:37, and the final image at 10:00 — Camera Raw alone is a transformation, and the Photoshop polish is what makes the sublime atmosphere truly stand.
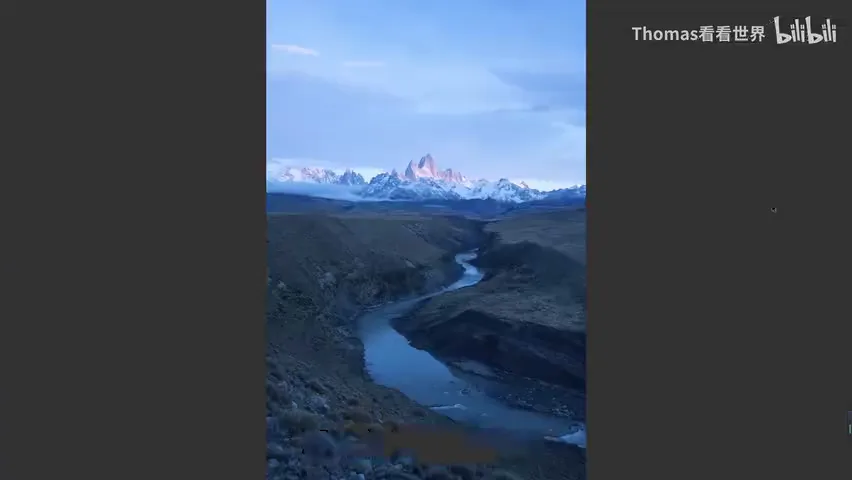
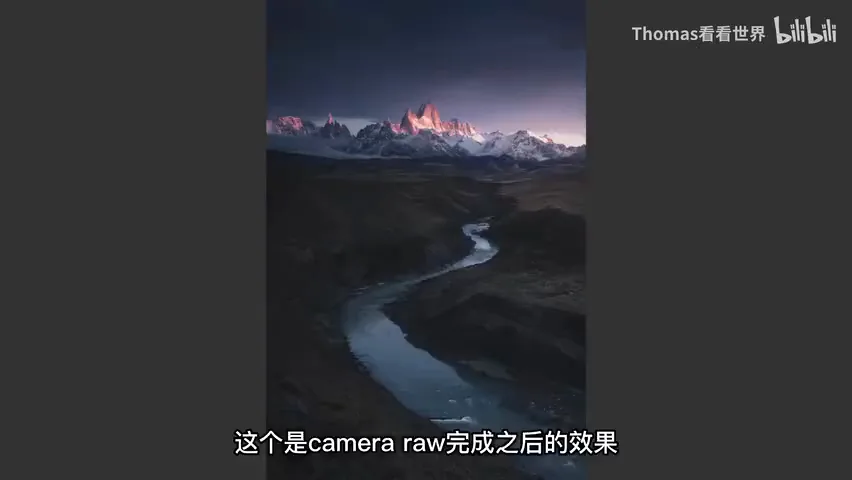
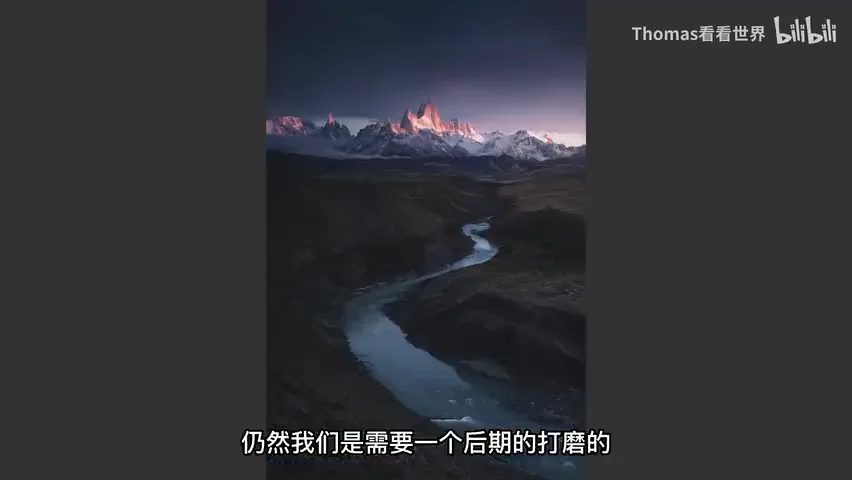
Thomas closes by stressing that even with two days of scouting and a strong base capture, the edit is still what reveals the true sublimity of "high mountains, great rivers" — spectacular peaks, the atmosphere of rising sunlight, and a sweeping, dynamic river (at 9:39-10:08 in the video). Every technique mentioned — choosing light, Camera Raw filters, Color Efex filters and more — is covered in depth across his 400+ earlier tutorials, searchable by keyword on his homepage (at 10:14-10:33 in the video).
1. Two days of scouting buy the concept: find the great river flowing straight toward Fitz Roy and Cerro Torre as the midground — hike and explore on day one, shoot on day two. 2. The RAW's three sins — a sky too bright, a cluttered foreground, unfinished detail; in Camera Raw, -1.5 exposure builds the dark base, white balance gains warmth and magenta, the Color Mixer unifies blues toward purple, and a red-purple × teal-green complementary palette takes shape. 3. The local filters exist to make light and dark obey "sunlight from the right"; in Photoshop, Color Efex, luminosity-masked highlight lifts, painted modeling, and three reshapes send the river flowing out along the diagonal. 4. Saturation needs hierarchy — red-purple first, blue second, teal third, with the grass darkened and desaturated; the visual order runs peaks, river, then sky and grass.