Photography Tutorial · 2022-05-08
How to Make Photos Feel Three-Dimensional: Spatial Depth Tricks
The world is three-dimensional, but our photos are two-dimensional.
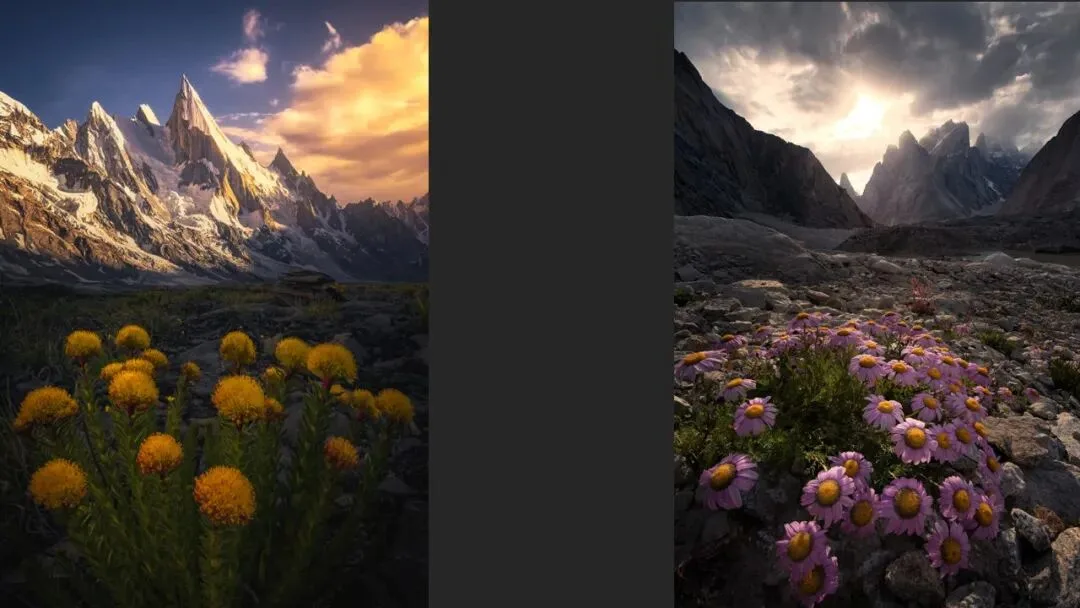
To recreate the solidity and spaciousness of the real world in a flat image, we need to mind angles and light when shooting, and manage brightness and layering in post-processing.
In today's video tutorial, Thomas shares how to make your photos feel more three-dimensional and spatial!
Video
▶ Watch the video tutorial on Bilibili
This is the fully illustrated companion to the video above: Thomas turned the 14-minute tutorial into text, paired with keyframe screenshots — an object's solidity comes from its lit and shadowed sides, while spatial depth is built from vertical overlap, perspective, aerial haze and bokeh. Skim it here for the framework, then dive into the video for the details.
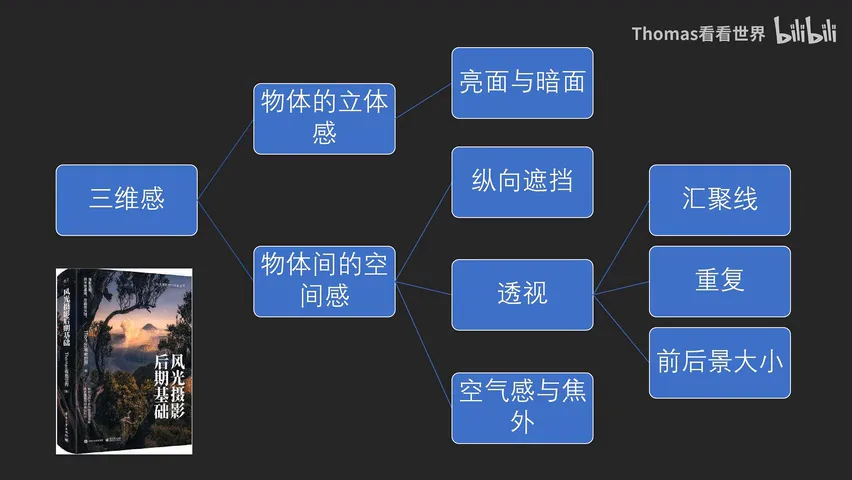
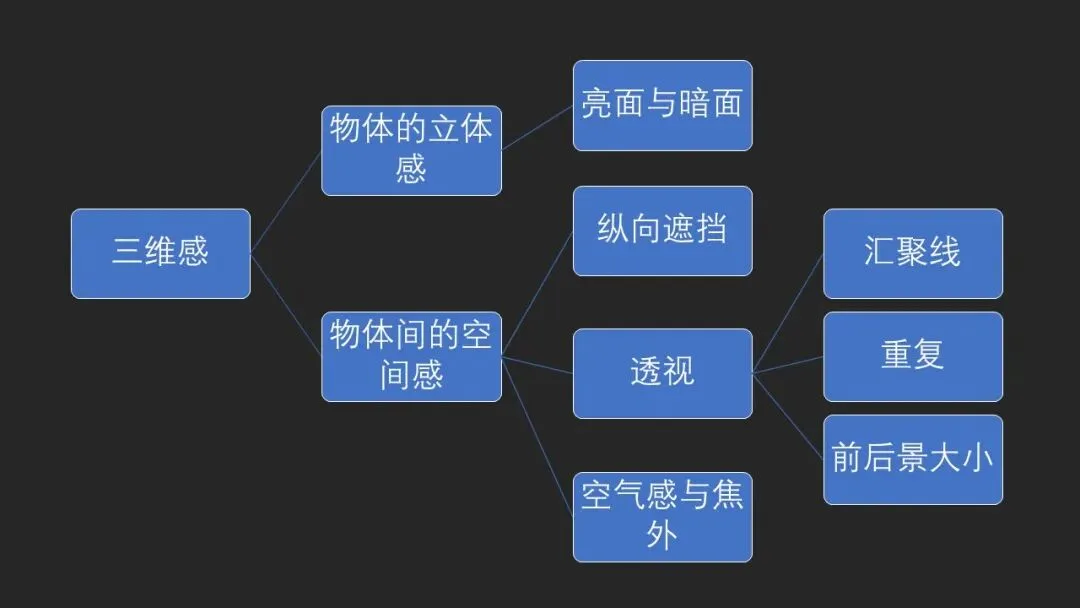
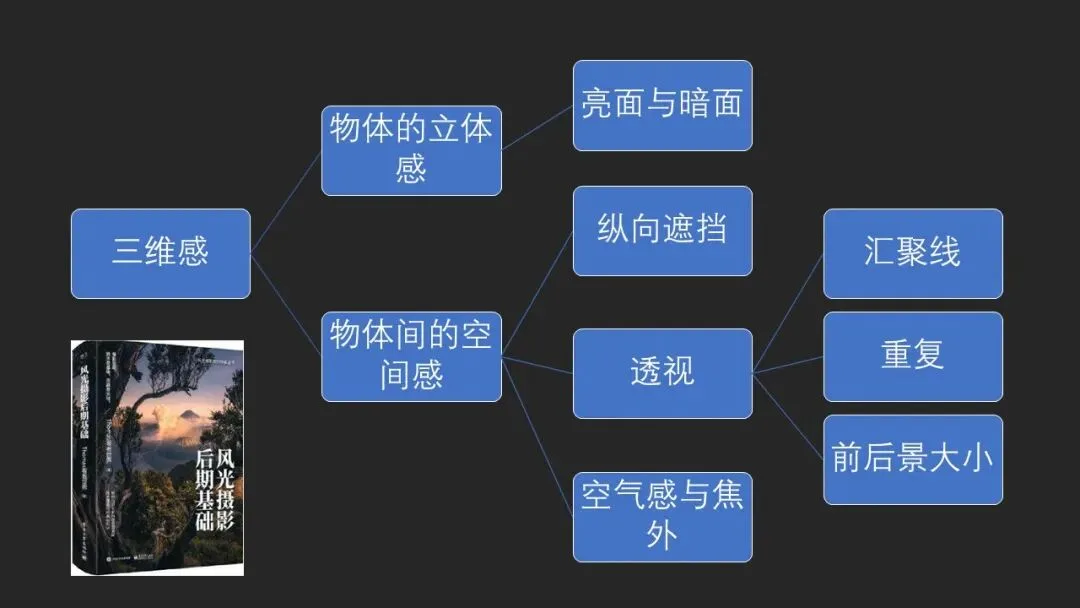
Start with the overview: this mind map, captured at 13:31 in the video, is the knowledge framework for the whole tutorial — the two threads of object solidity and spatial depth between objects, each unpacked below.
01 The Source of Solidity: Lit Sides and Shadowed Sides
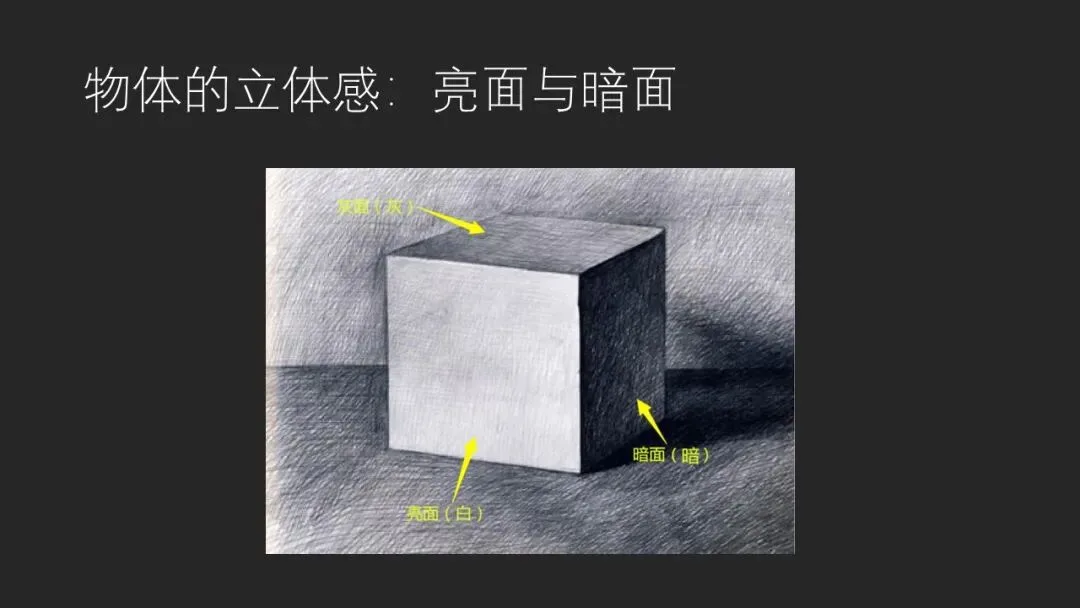
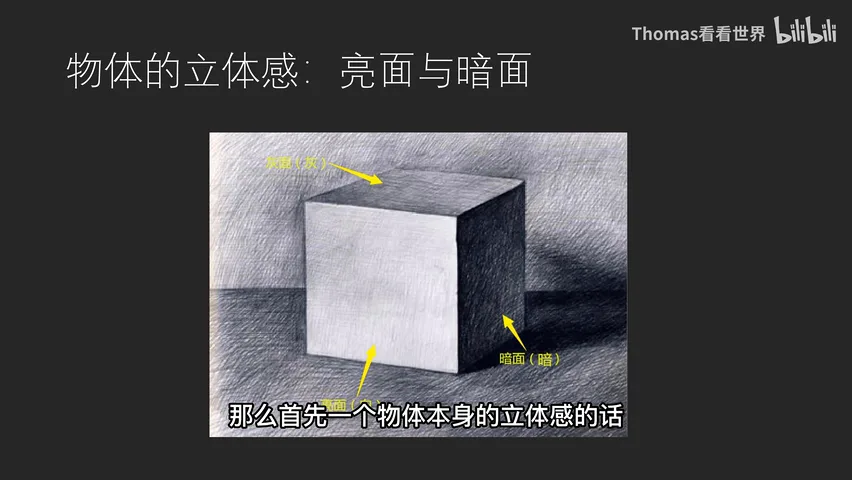
Solidity is not mystique — it follows the same logic as pencil sketching: to draw a three-dimensional object you give it a lit side, a shadowed side and a midtone. Real objects already carry lit and shadowed sides; the trick is how light strikes them. Three light directions do this best — side light, side backlight and high backlight (at 1:08 in the video).
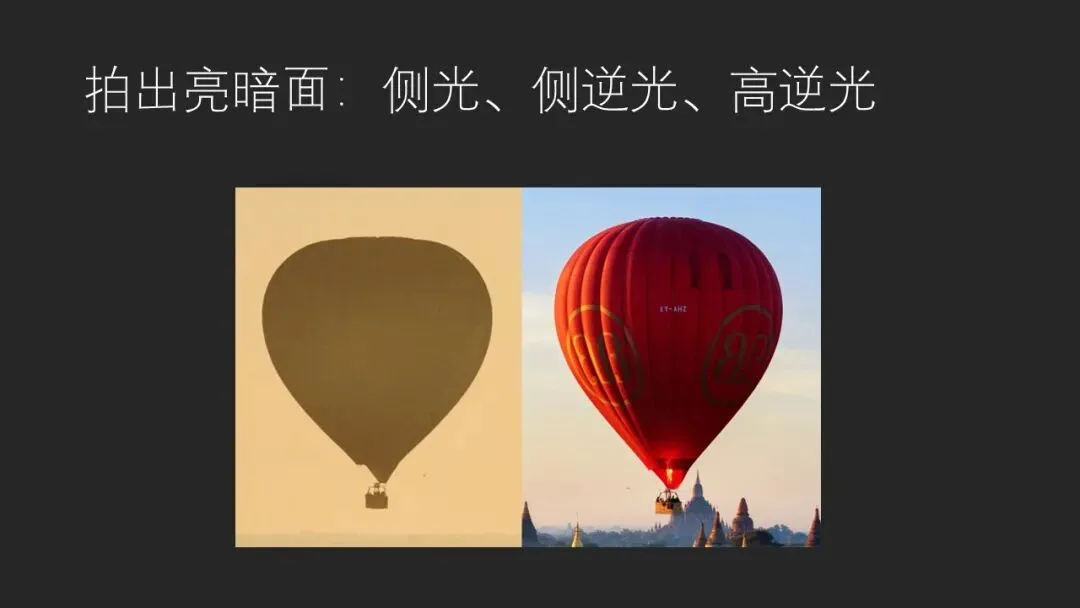
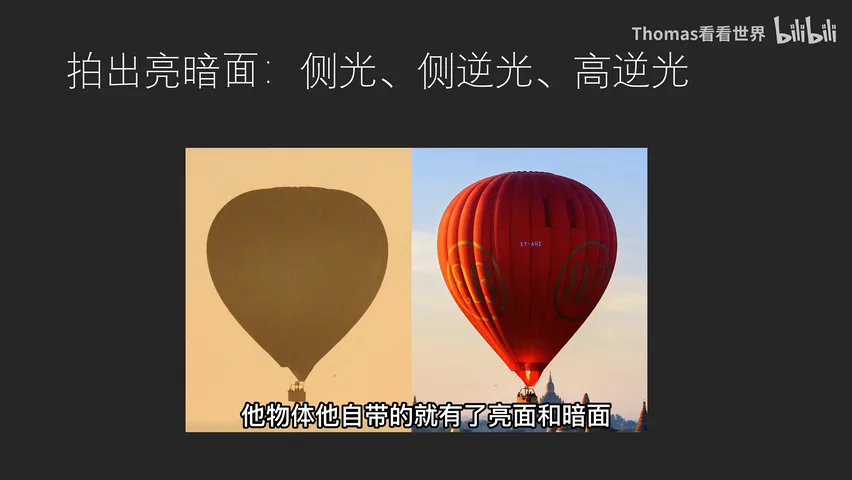
Under front light or pure backlight, a subject is either a blazing blob or a pitch-black silhouette with no solidity at all; when light comes from the side, lit and shadowed sides appear together and the object instantly gains volume. The two hot-air balloons compared at 1:25 in the video are the clearest example: the backlit balloon on the left is a flat dark silhouette, while the side-lit one on the right swells as if it might drift right out of the frame.
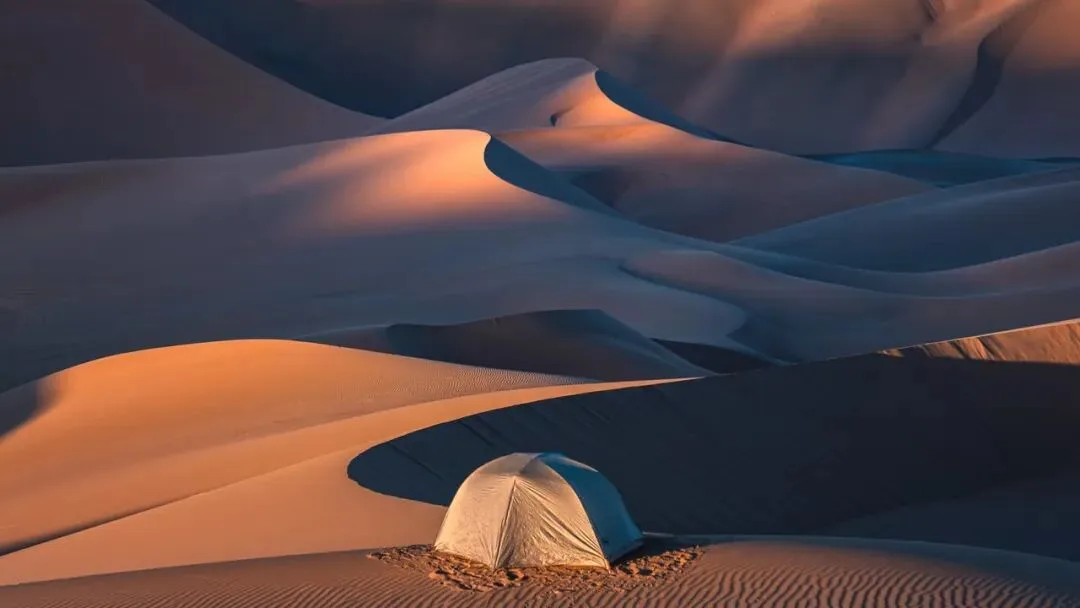
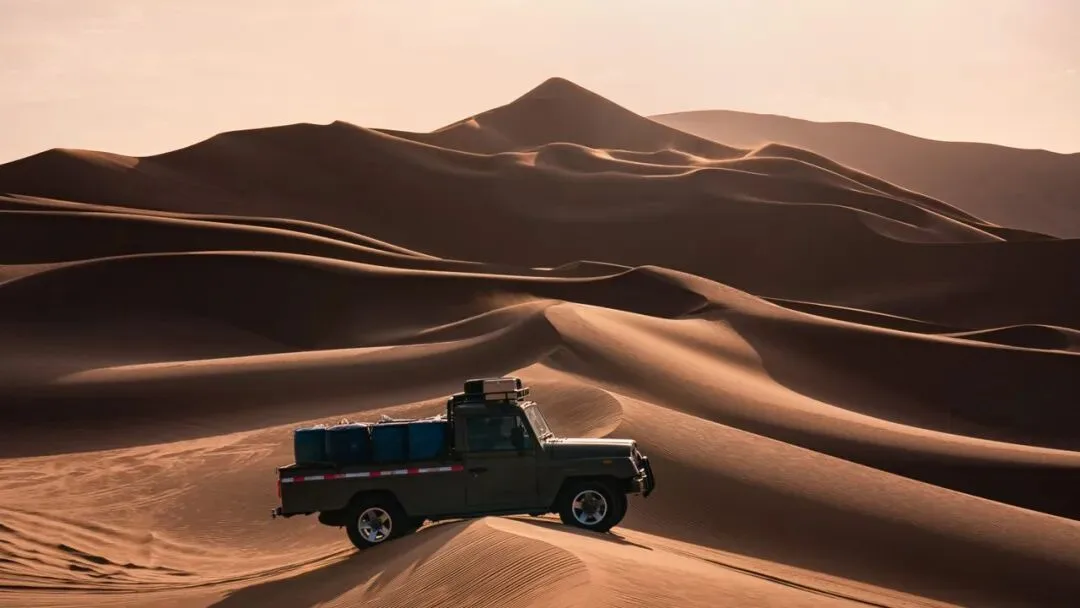
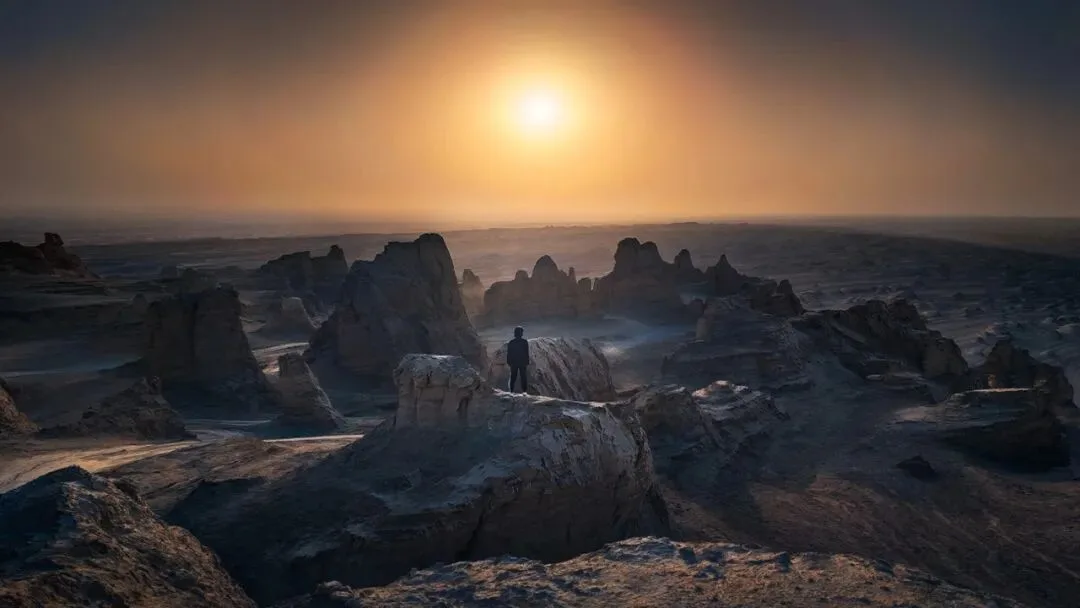
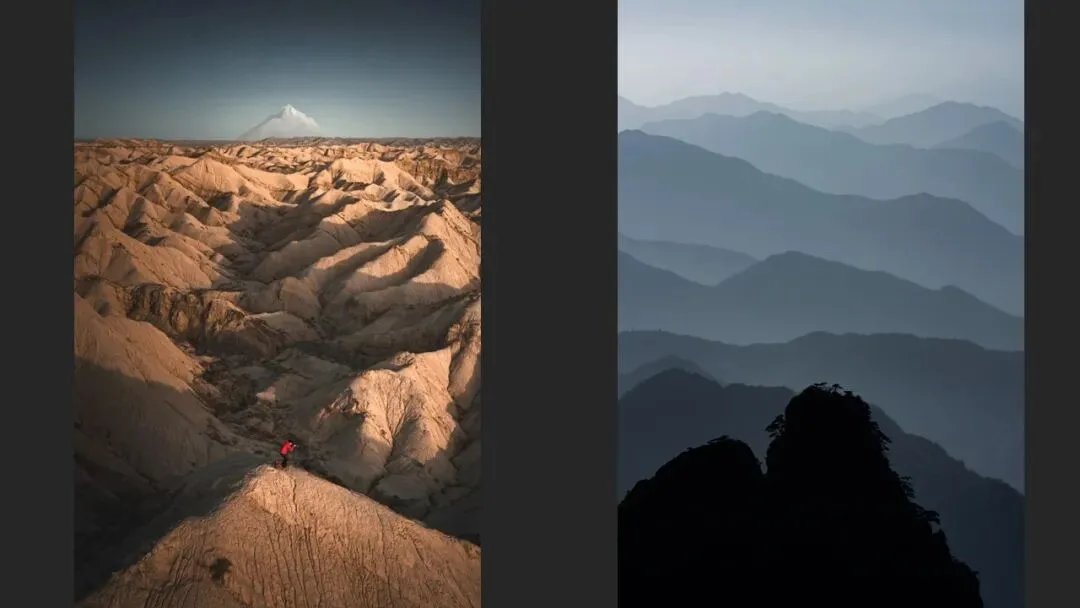
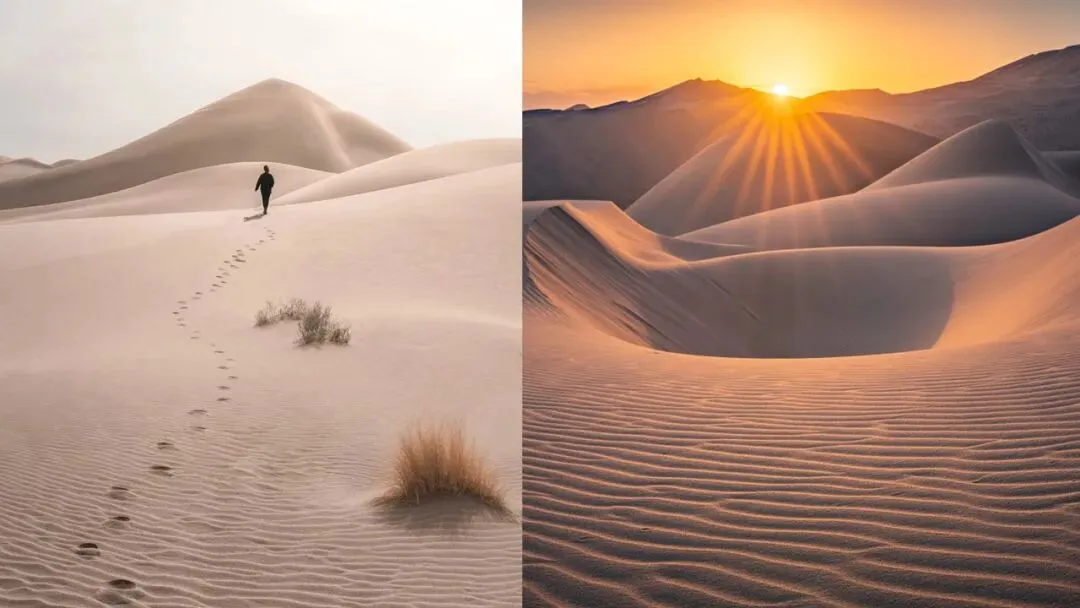
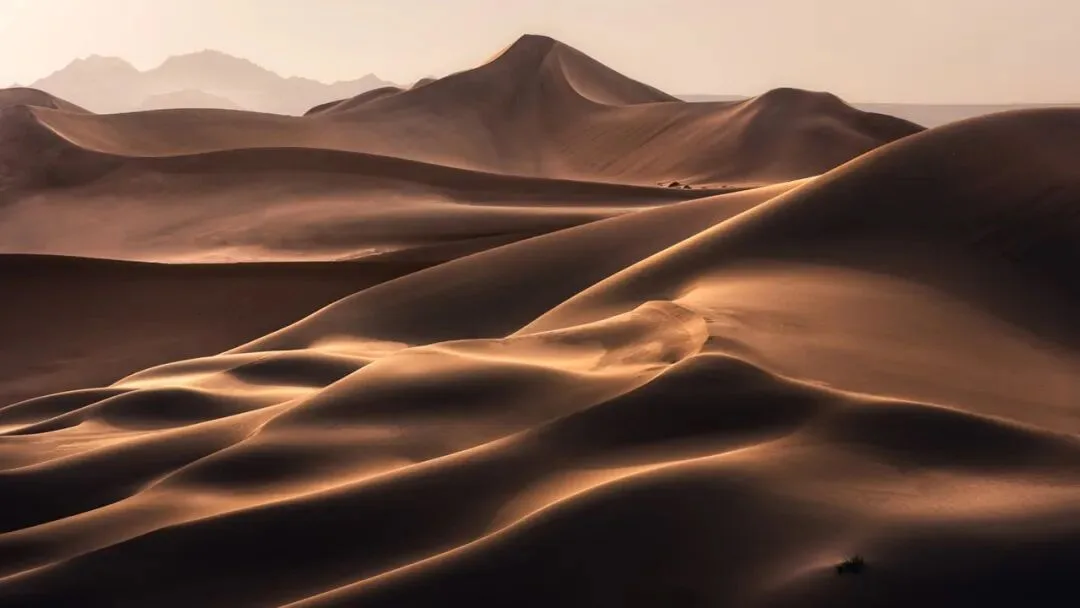
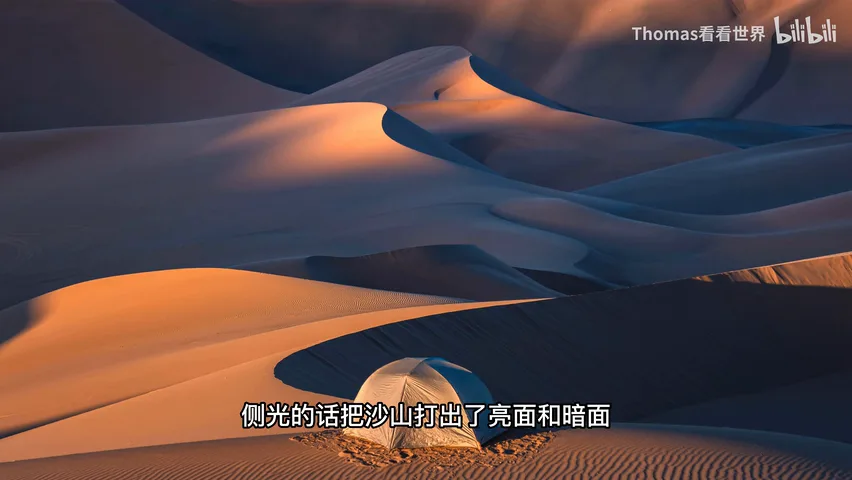
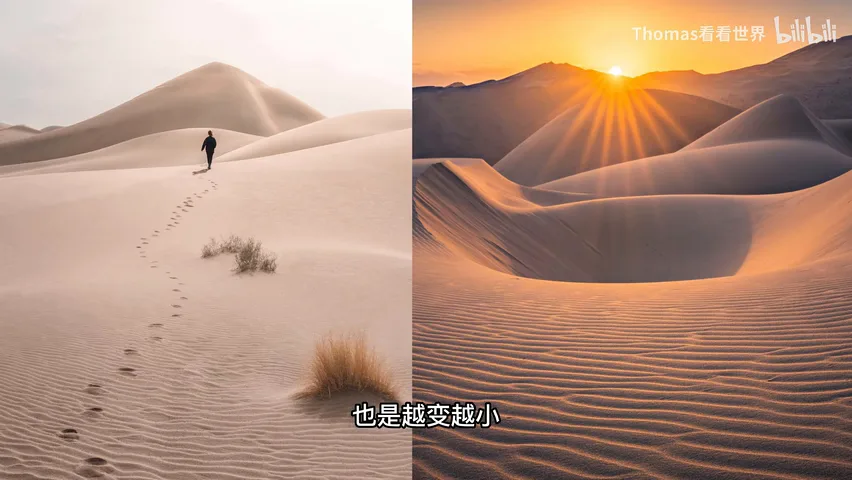
The desert is the easiest place to read these three light directions. At 2:03 in the video, side light carves the dunes with a sharp boundary between light and shadow; at 2:10, side backlight lights only a narrow ribbon along the crests, letting the shadow side dominate for even stronger relief; at 2:22, high backlight — the sun still somewhat elevated — brightens the upward-facing surfaces of rocks and rims their upper contours, which also reads as volume. Shot in front light, the whole desert would blaze flat and the layering would be gone.
02 Shaping Light and Shadow in Post: From Boosting to Inventing
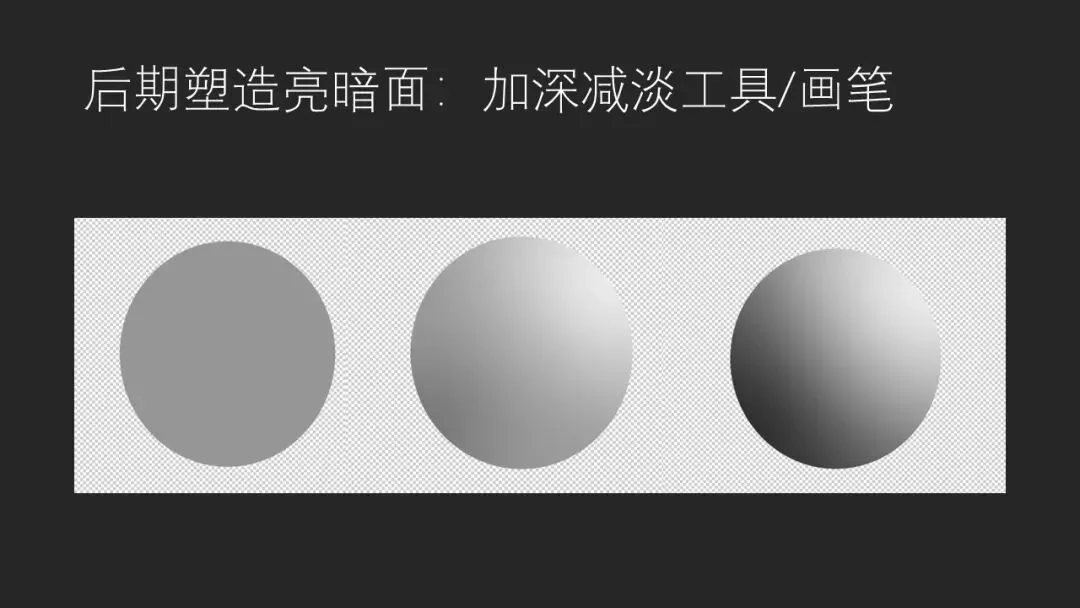
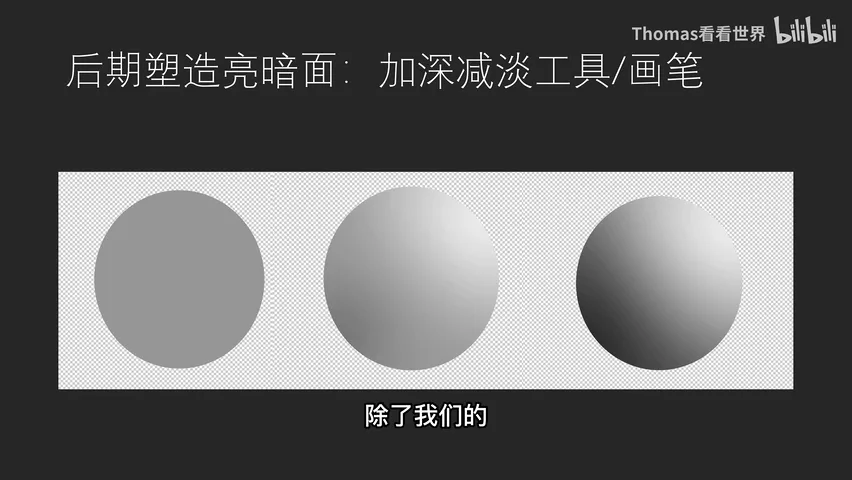
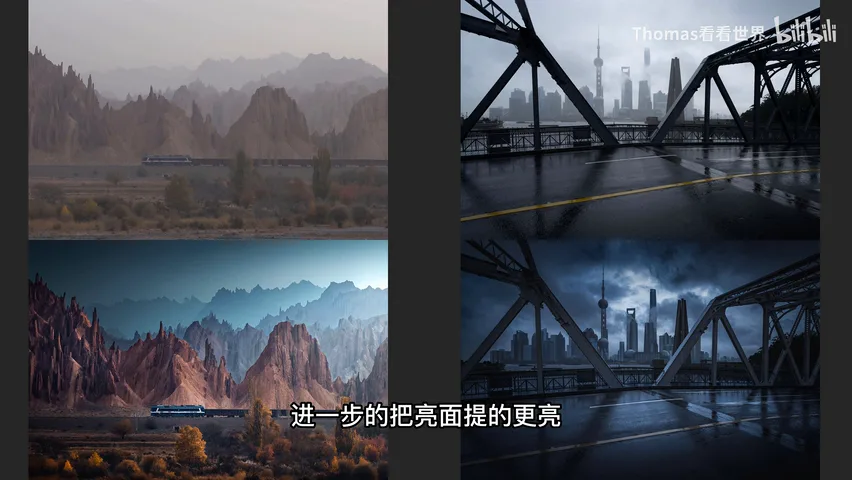
Once the light is right in the field, post-processing can push it further. At 2:47 in the video comes the most basic exercise: to turn a circle into a sphere, brighten its upper right with the Dodge tool or a white brush, then darken the lower left with the Burn tool or a black brush — once the lit and shadowed sides are painted in, the sphere reads instantly. On a real photo this means pushing the existing light further: brighten the lit side, deepen the shadow side, deliberately amplifying solidity (at 3:21 in the video).
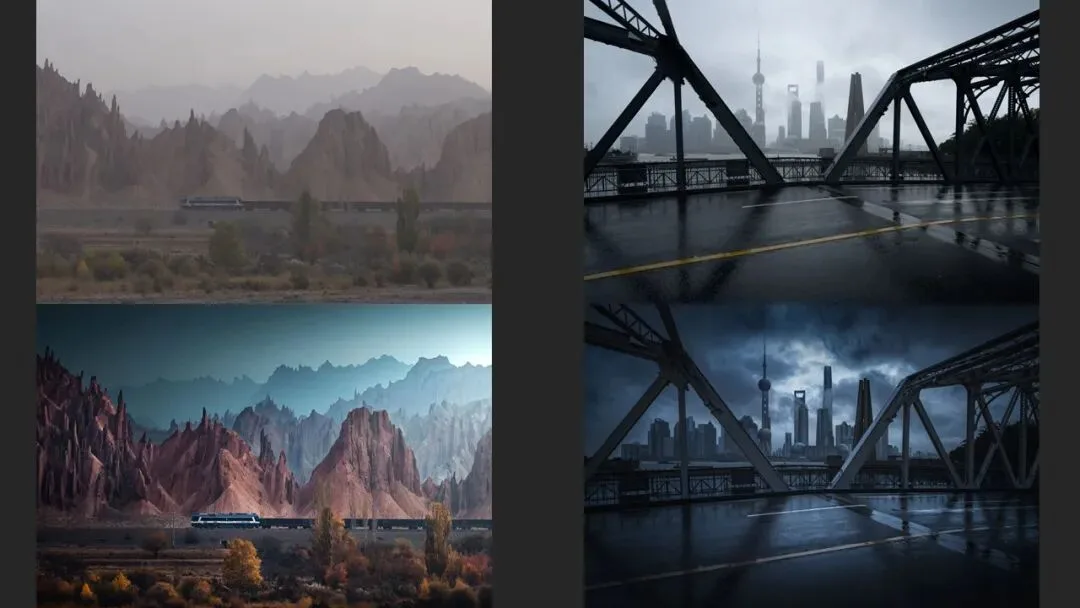
Post can even conjure volume out of nothing. In the example at 3:38, the Oriental Pearl Tower under flat overcast front light had no lit or shadowed sides at all; Thomas followed the shading logic of a cylinder — brighter in the middle, darker at the edges — and rendered solidity from thin air. But when inventing light from nothing, mind the amplitude: once you break the logic of real light, the image starts to look fake (at 4:13 in the video).
03 The King of Depth: Vertical Stacking Plus Overlap
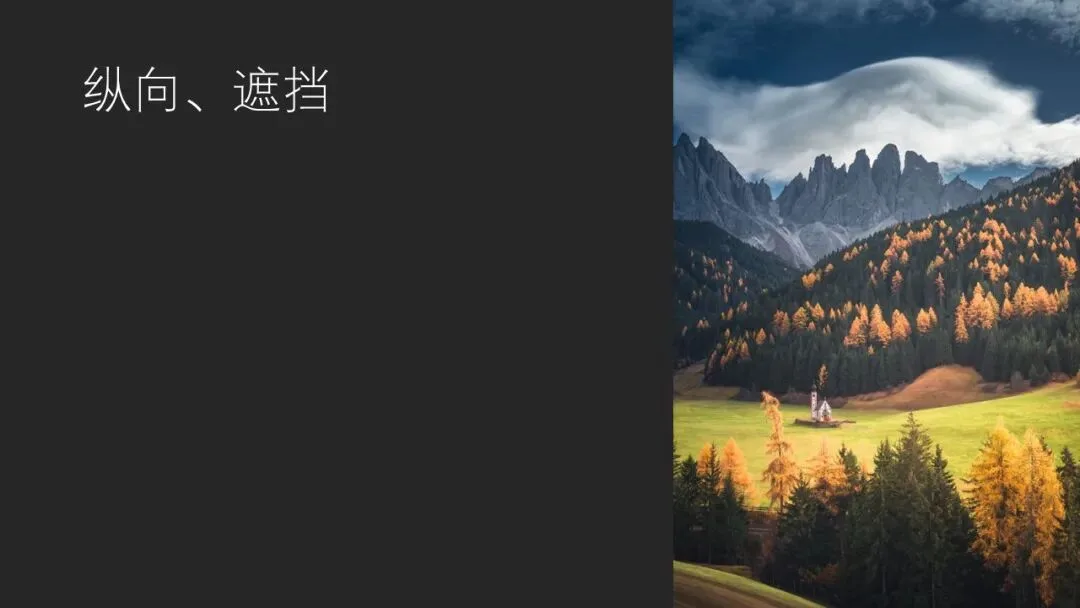
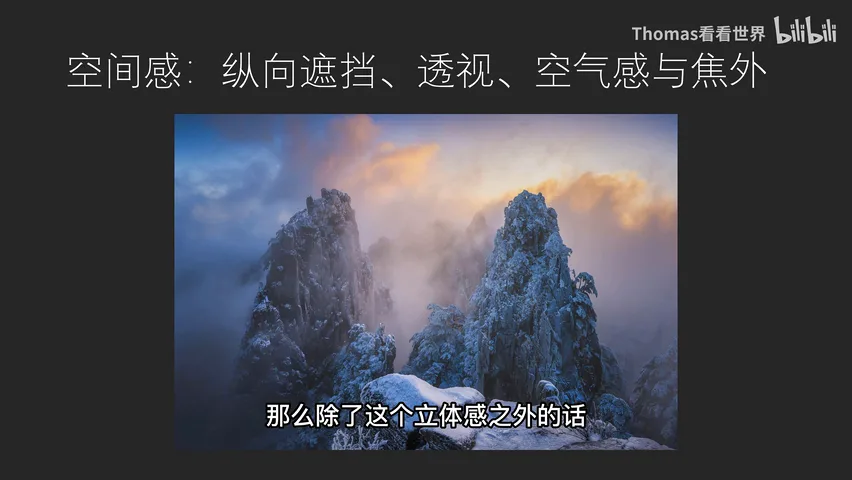
Depth between objects peaks under three conditions: vertical overlap, perspective, and aerial haze with bokeh (at 4:17 in the video). "Vertical" and "overlap" are really two words: vertical stacking alone creates depth, and so does mutual occlusion — but combined they are strongest, with near objects anchored at the bottom of the frame and far ones receding toward the top, layer upon layer, like the vertical perspective of traditional Chinese painting (at 4:51 in the video).
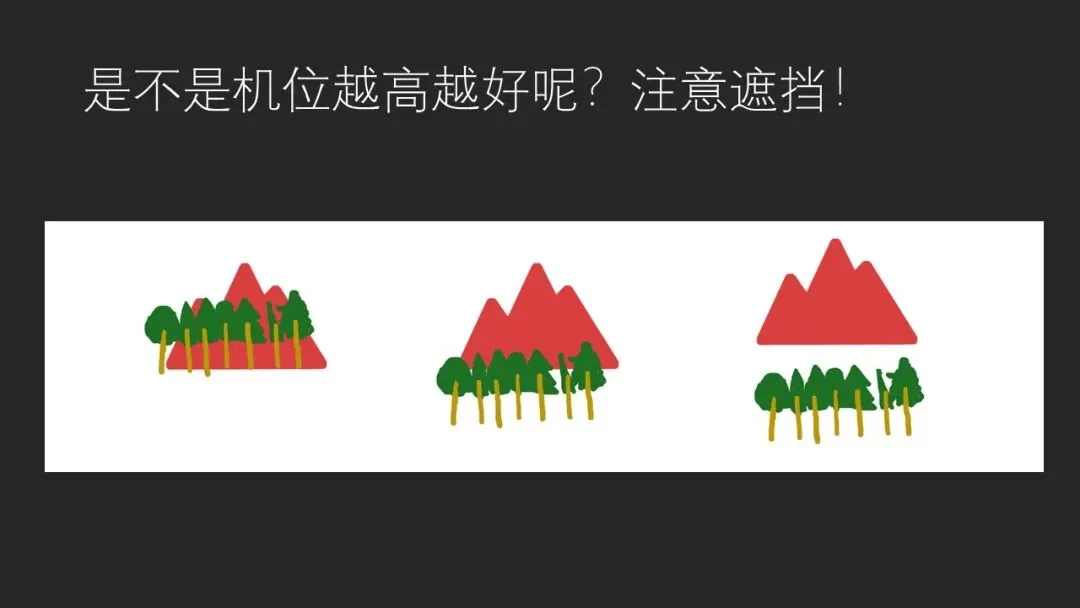
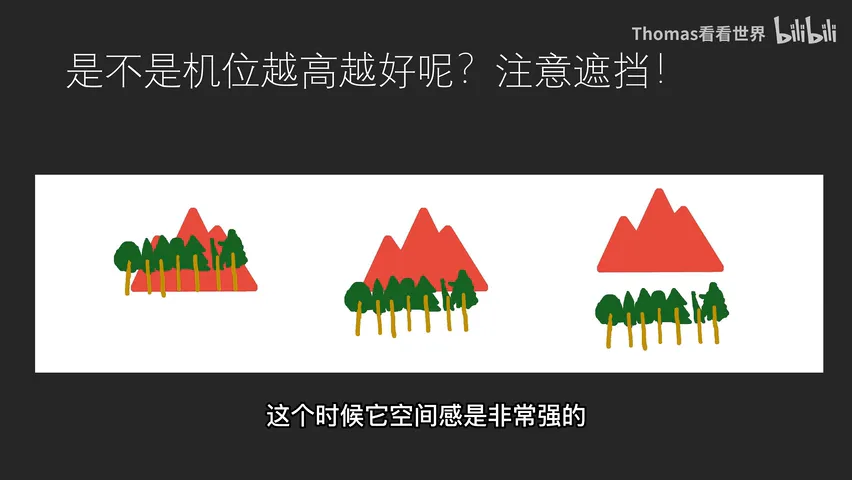
So is a higher camera always better? No. Three diagrams at 5:00 in the video make it clear: from the ground, trees and hills overlap but stack weakly; at a moderate height, vertical stacking and overlap combine for maximum depth; fly higher still and hills and trees separate completely — still arranged vertically, but with no occlusion, and the depth actually weakens.

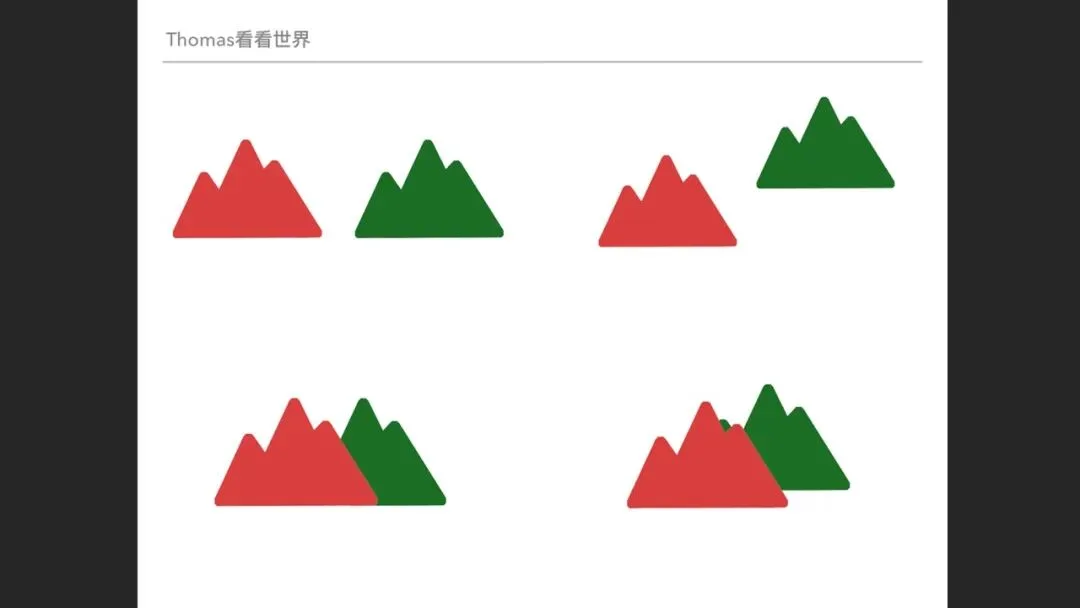
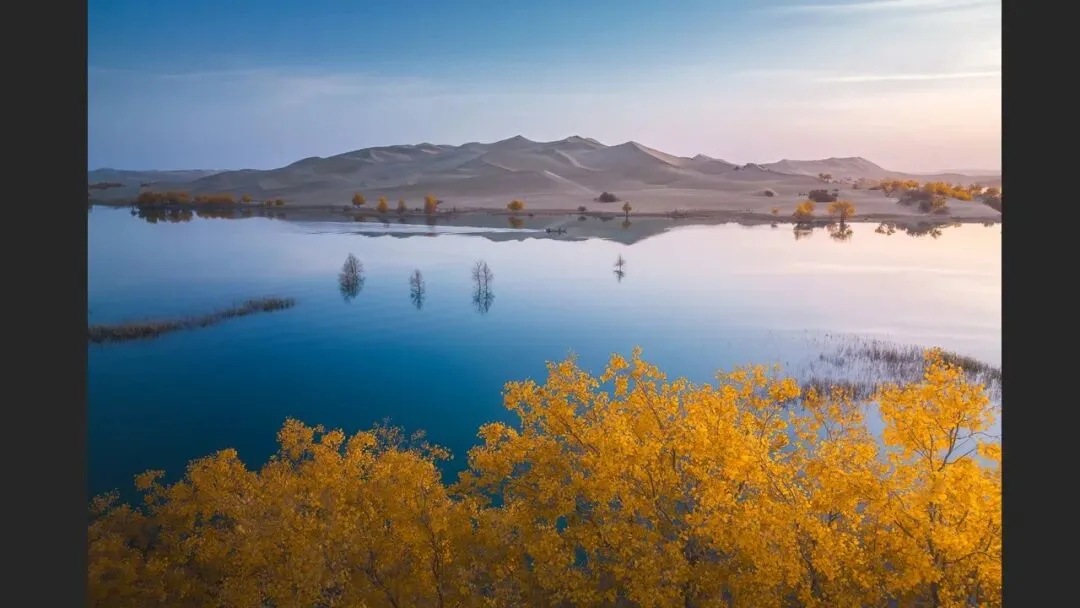
This explains Thomas's habit in the field: he never flies the drone especially high, never shrinks the near trees into little dots, but lets them overlap the lake and ground behind — vertical stacking plus occlusion producing strong depth naturally (at 6:24 in the video). Two mountains make it even clearer: side by side there is no depth; stacked vertically there is; occluding each other horizontally there is too — and stacking plus overlap is strongest of all (at 5:58 in the video).
04 Three Perspective Tools: Converging Lines, Repetition, Foreground
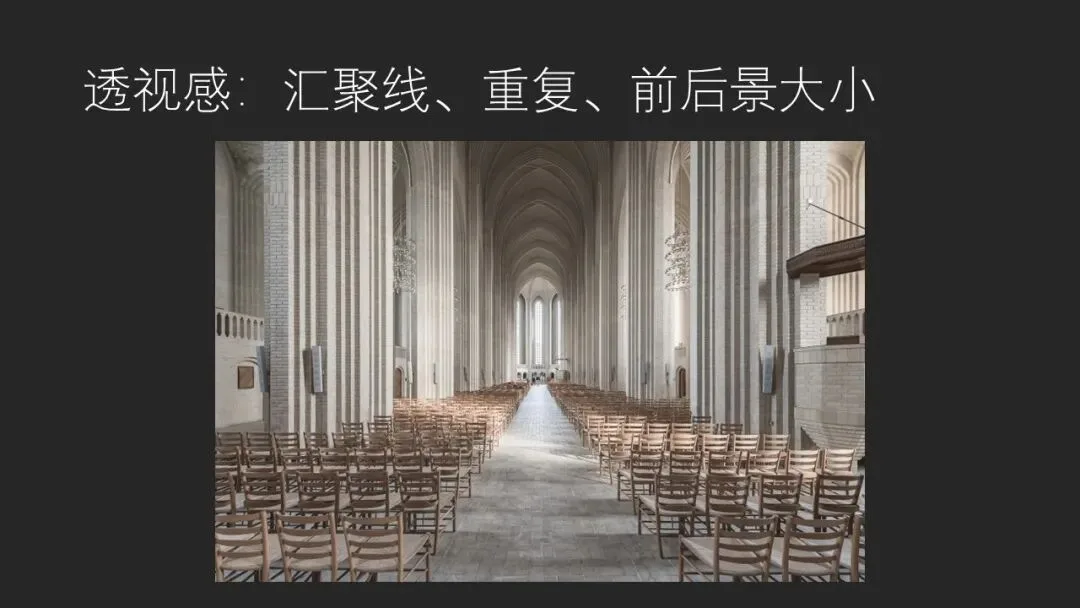
Perspective exists everywhere in the real world, but three situations make it obvious at a glance (at 6:59 in the video). The first is converging lines: parallel lines shot straight down never change, but viewed from an angle they keep converging and shrinking — true of roads, of highways, and of rivers that stretch away and narrow under a tilted-down view (at 7:16 in the video).
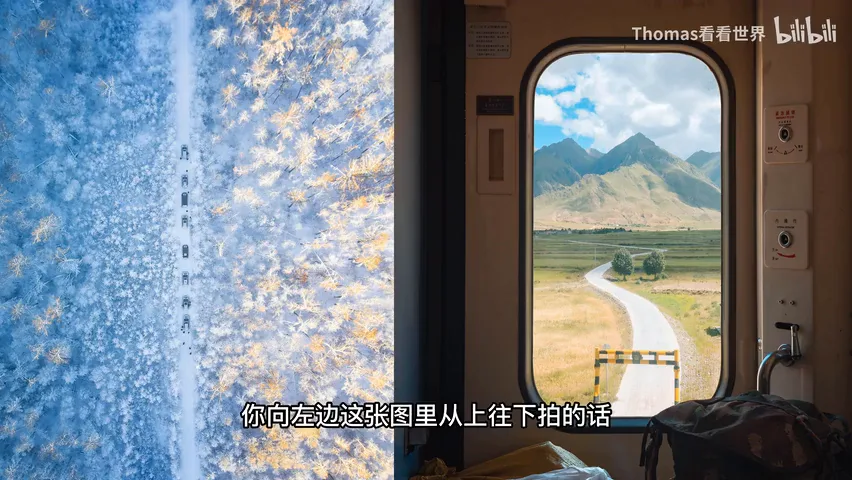
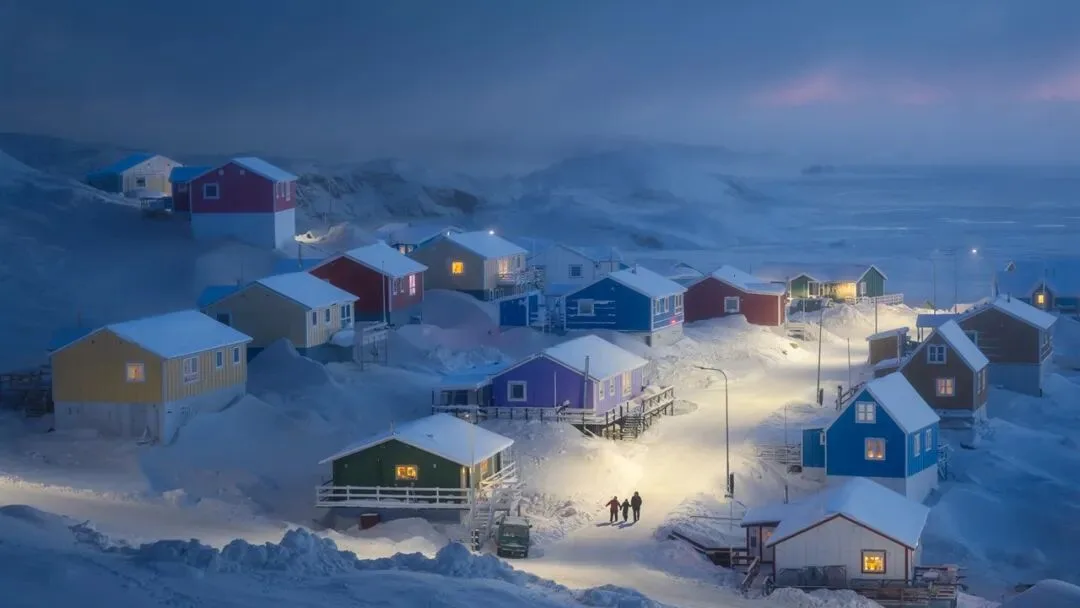
The second is repetition: repeats bring rhythm and impact, and they bring depth too — rows of houses shrinking smaller and smaller, foreground flowers quickly diminished by a close wide-angle lens, trees tapering away through a telephoto, desert ripples and footprints receding across the snow; even ordinary objects like net cages on the water or street lamps can be shot for this shrinking perspective (at 8:34 in the video).
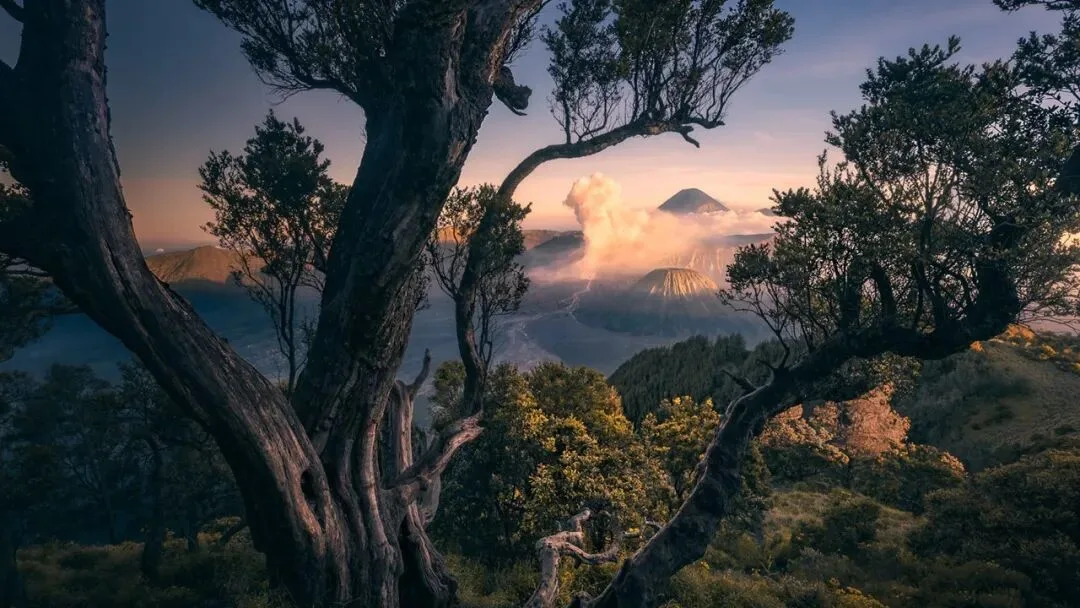
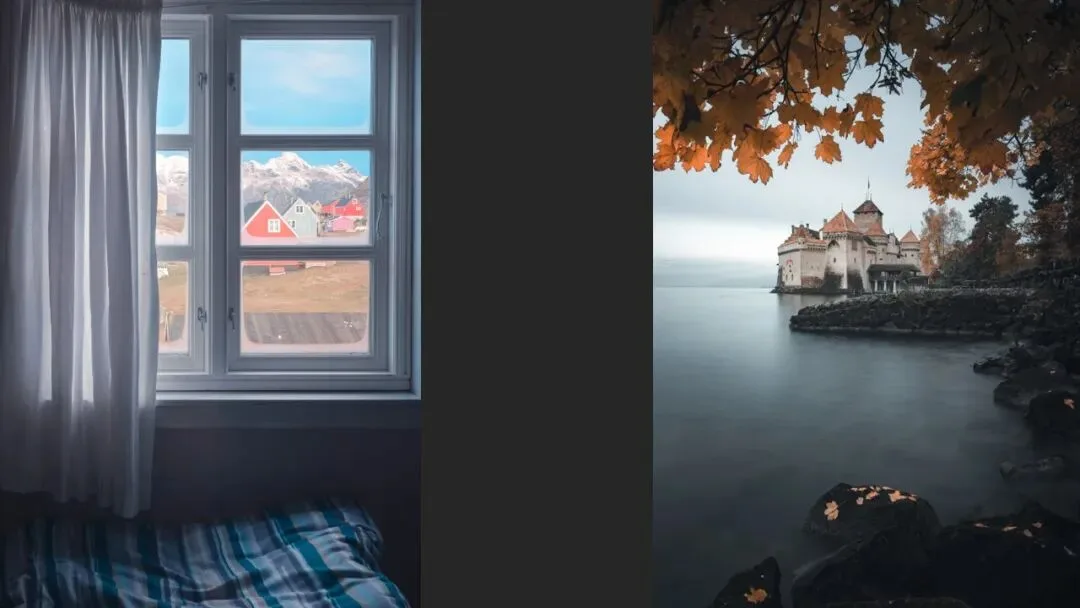
The third is the foreground. We love foregrounds precisely because the size mismatch between near and far creates depth: when a tree in the frame looms larger than the distant peak, we instantly understand it as "near big, far small" — the tree is close, the mountain far (at 9:50 in the video); a window larger than the house behind it, leaves playing off a distant castle — same principle.
05 Aerial Haze and Bokeh: A Spatial Language Unique to Photos
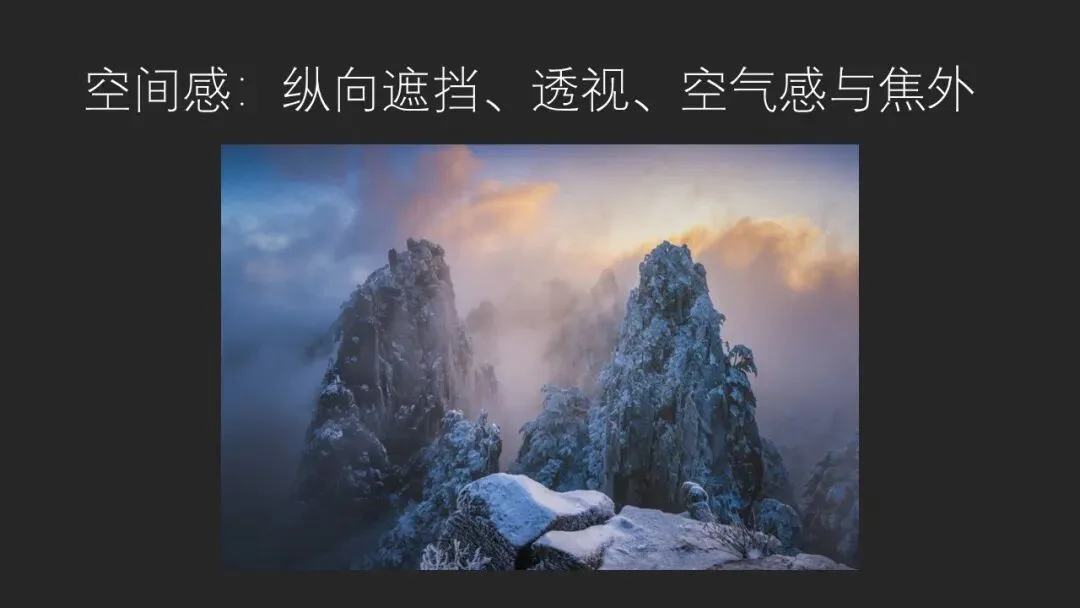
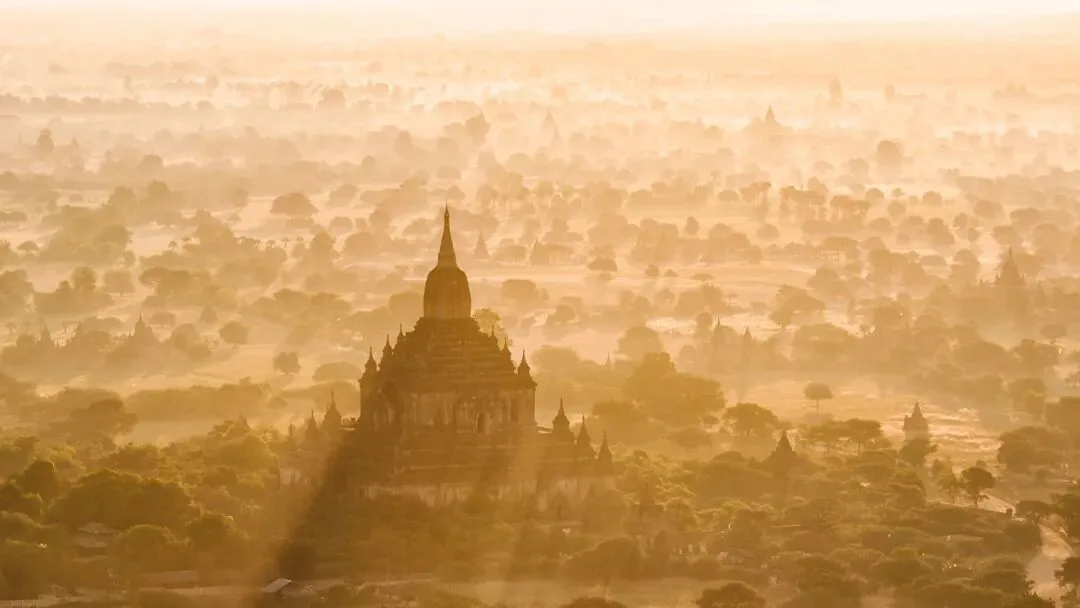
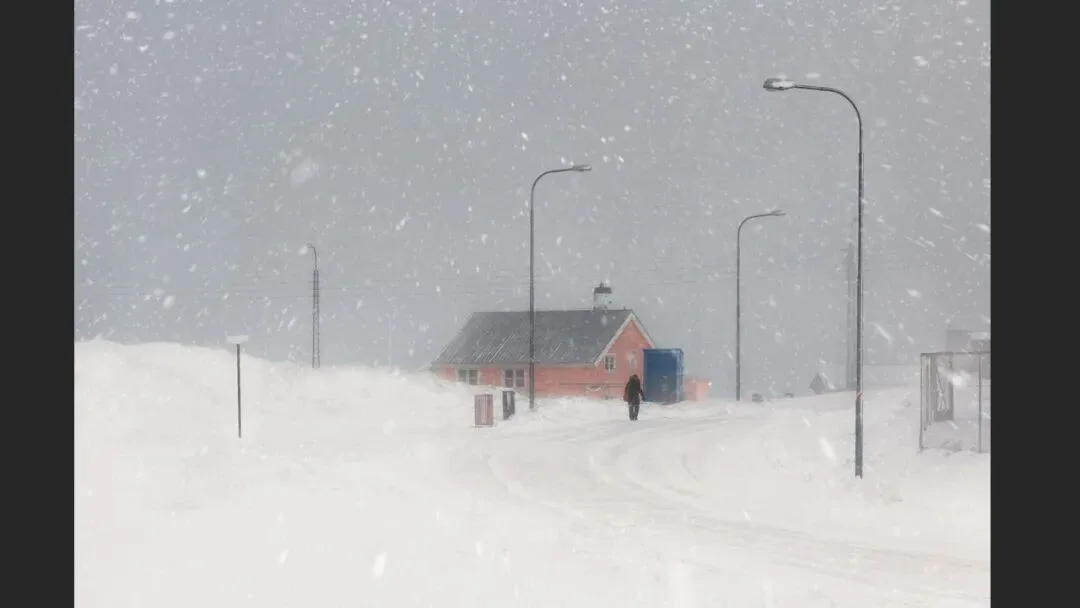
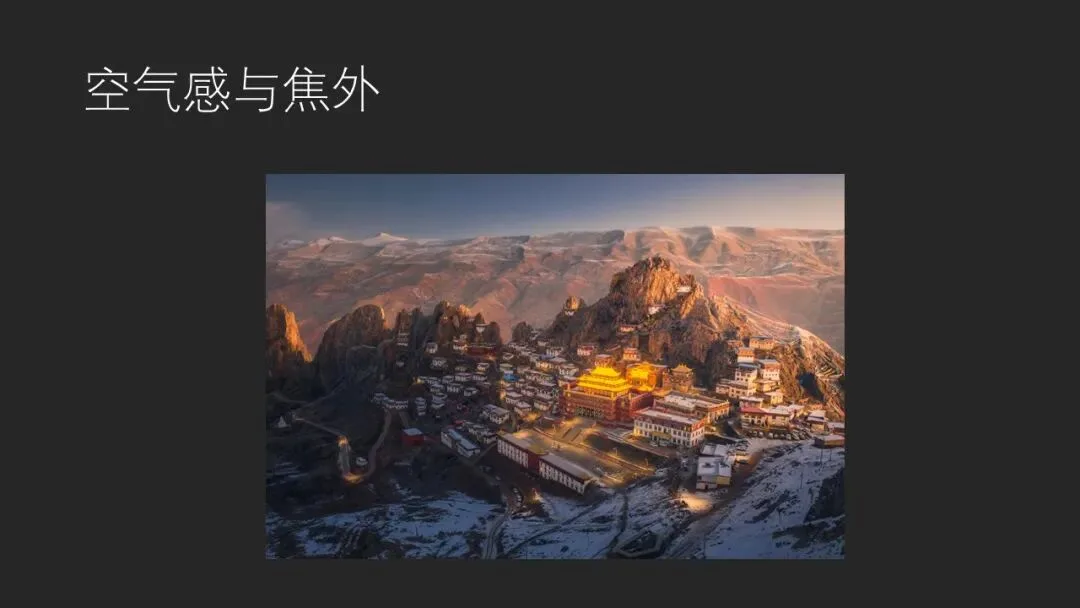
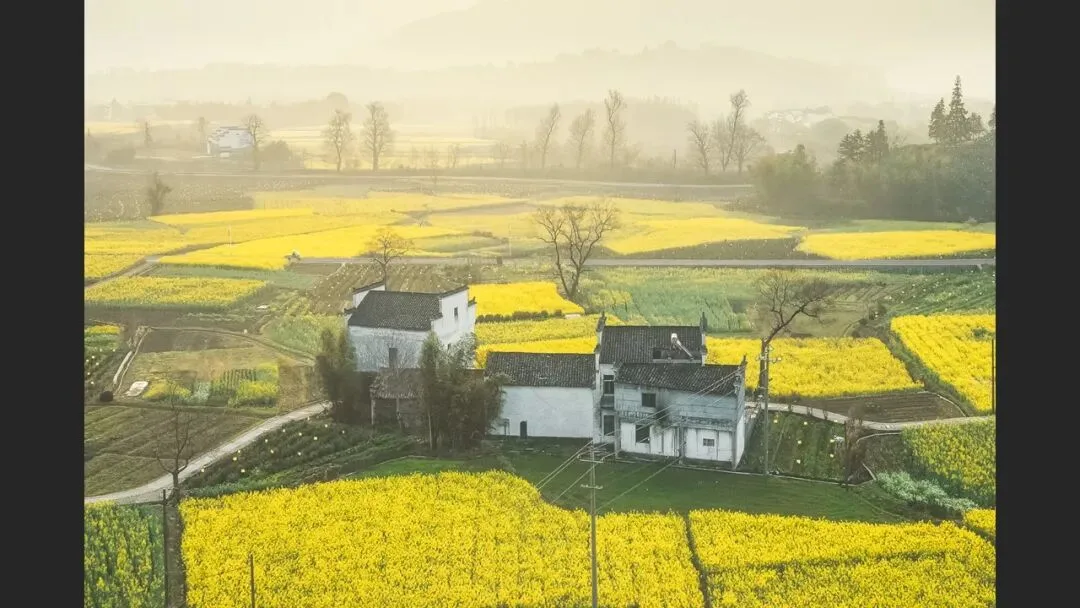
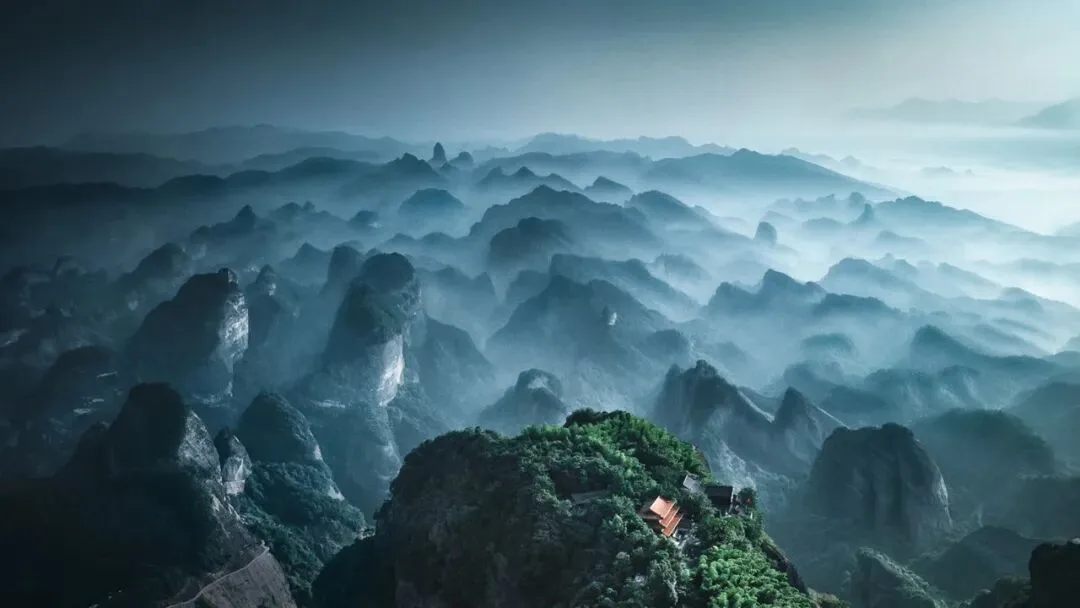
Aerial haze is a device shared with painting: near objects stay sharp while far ones grow soft, and this progressive softening toward the distance is the haze itself — it directly creates depth (at 10:18 in the video). Morning backlight plus mist is the easiest recipe — distant features lose contrast and definition step by step, and the scene layers itself (at 10:41 in the video).
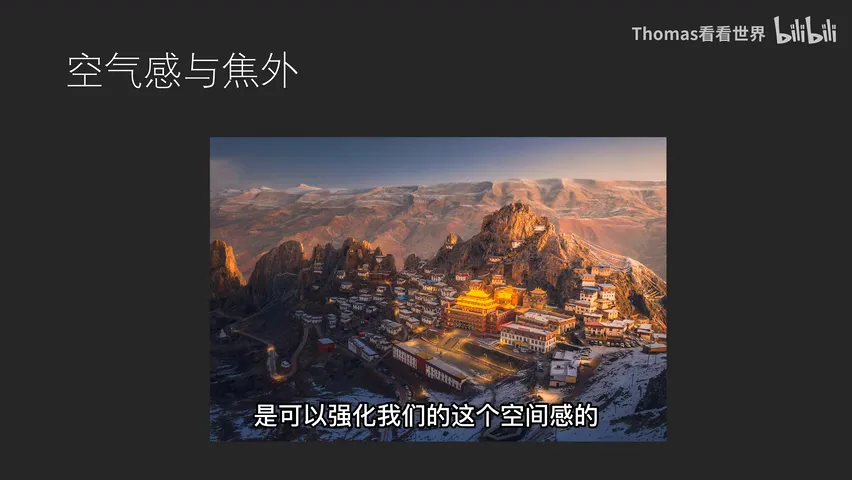
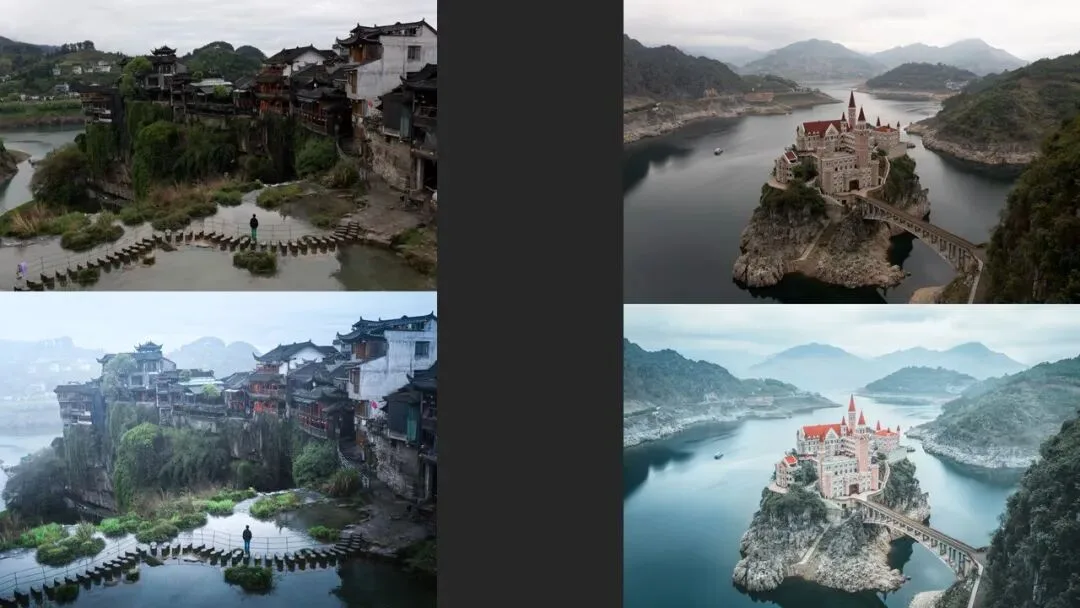
When the air is too clear and the mist is missing, post can shape it: blur the background further and the aerial haze strengthens; even if foreground and background are fused into one mass, brushing a mist effect over the background with a white brush conjures the layering out of nowhere (at 11:08 in the video). The other weapon is bokeh: the drone photo at 11:53 in the video was sharp from front to back under front light, with poor depth to begin with — Thomas used Photoshop's Lens Blur to soften the foreground into bokeh, and the image turned out cleaner with even stronger perspective — a way of building space that only photography offers.
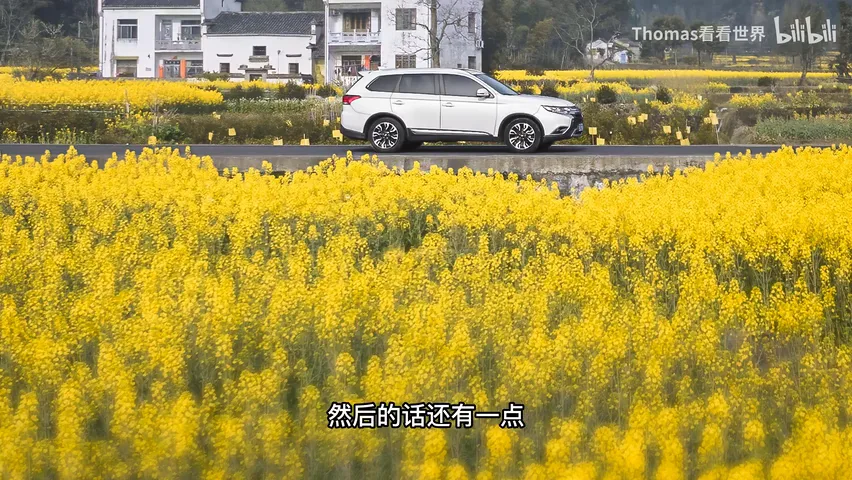
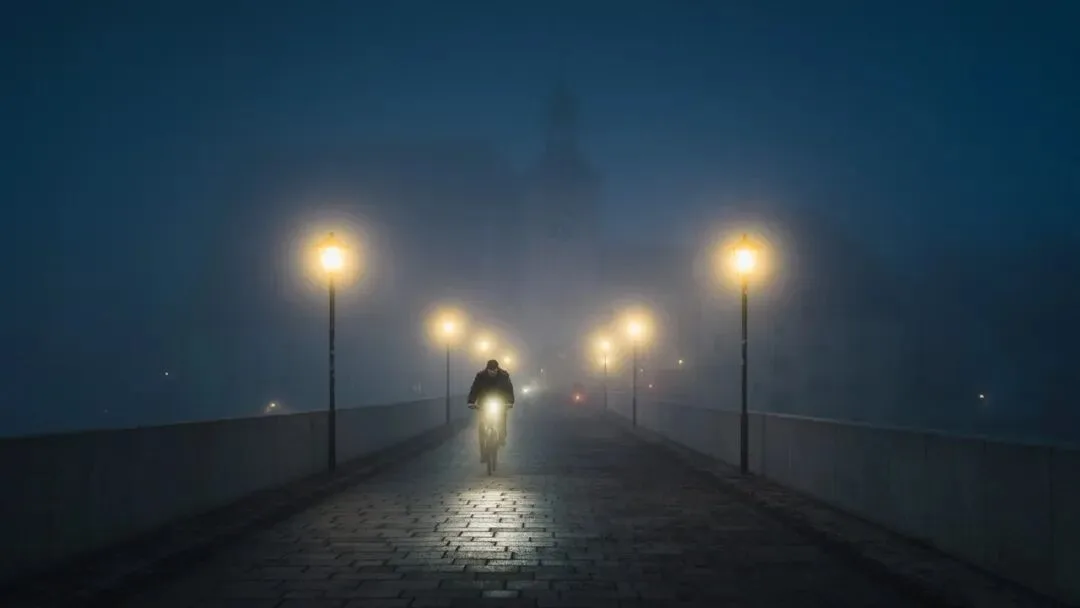
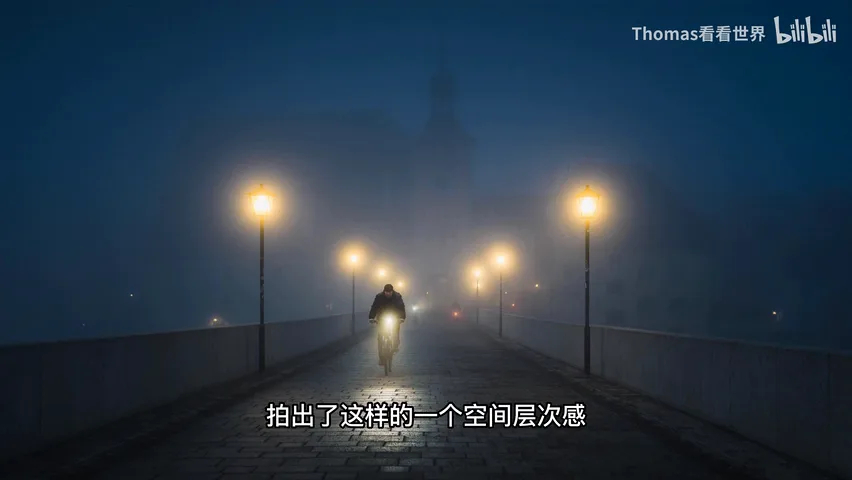
Finally, two exercises. The lamp-lit night street at 12:51 in the video: street lamps and pavement repeating and shrinking, railings and road converging, plus a misty morning — spatial layering in a single pass. The dunes at 12:53 rely on high backlight for volume, joined by repetition and a background haze added in post. Stack these techniques and a flat, two-dimensional photo becomes a more three-dimensional world.
1. Solidity comes from lit and shadowed sides: favor side, side-back and high-back light, then boost it in post with dodge and burn — even invent it from nothing, but never past the point of looking fake; 2. Vertical stacking plus mutual overlap is the strongest depth logic for camera position — high enough to stack the layers, never so high they stop overlapping; 3. Converging lines, repeating elements and foreground-background size mismatch are the three moves that make perspective visible at a glance; 4. Aerial haze and bokeh are a spatial language unique to photos — mist and backlight in the field, blur and Lens Blur in post.
PPT