Photography Tutorial · 2020-02-23
Empty Photos at Crowded Landmarks? PS Stacking & Masking Put to Work
Thomas Chu Photo
How do you shoot photos at popular tourist spots with few — or even zero — tourists in them?
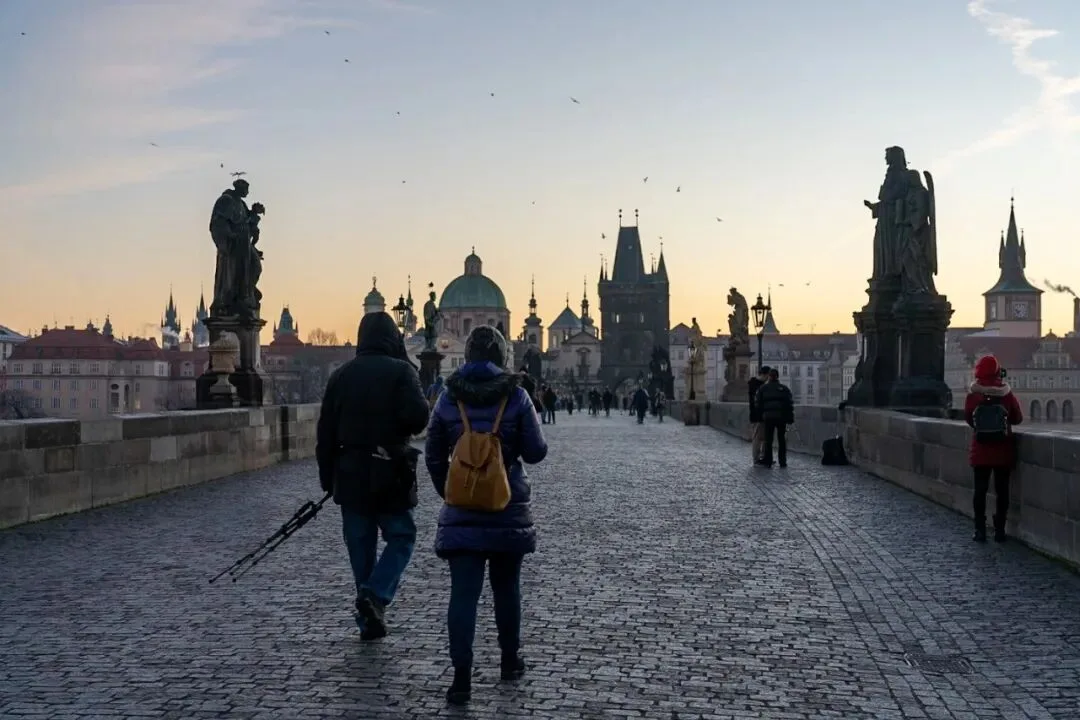
Today Thomas uses a photo of Prague's Charles Bridge (crowded even early in the morning) to demonstrate how to shoot multiple frames on location and then use masking and stacking in post to cleverly remove the crowds.
Video Tutorial
▶ Watch the video tutorial on Bilibili
This is the fully illustrated companion to the video above: shooting on Prague's Charles Bridge, Thomas demonstrates live how to remove almost every tourist from a crowded landmark using continuous shooting in the field plus stacking and masking in Photoshop. All the 12-minute operations are laid out here with keyframe screenshots — skim the images to grasp the workflow, then dive into the video for the details.
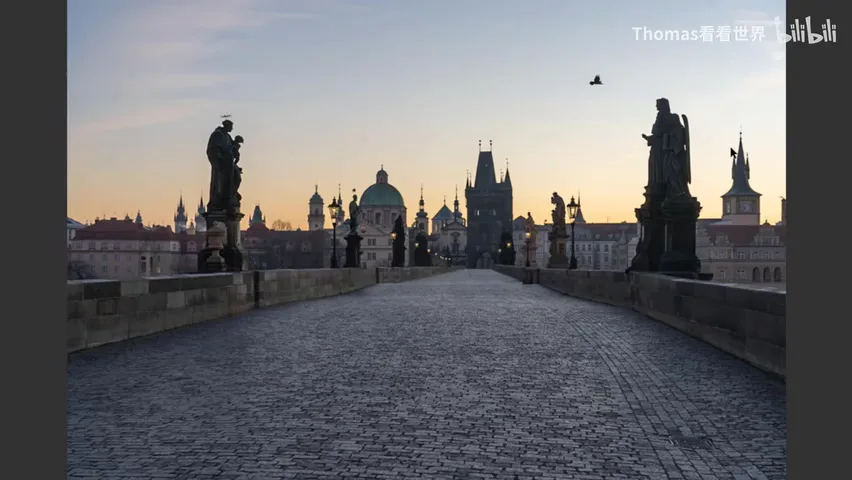
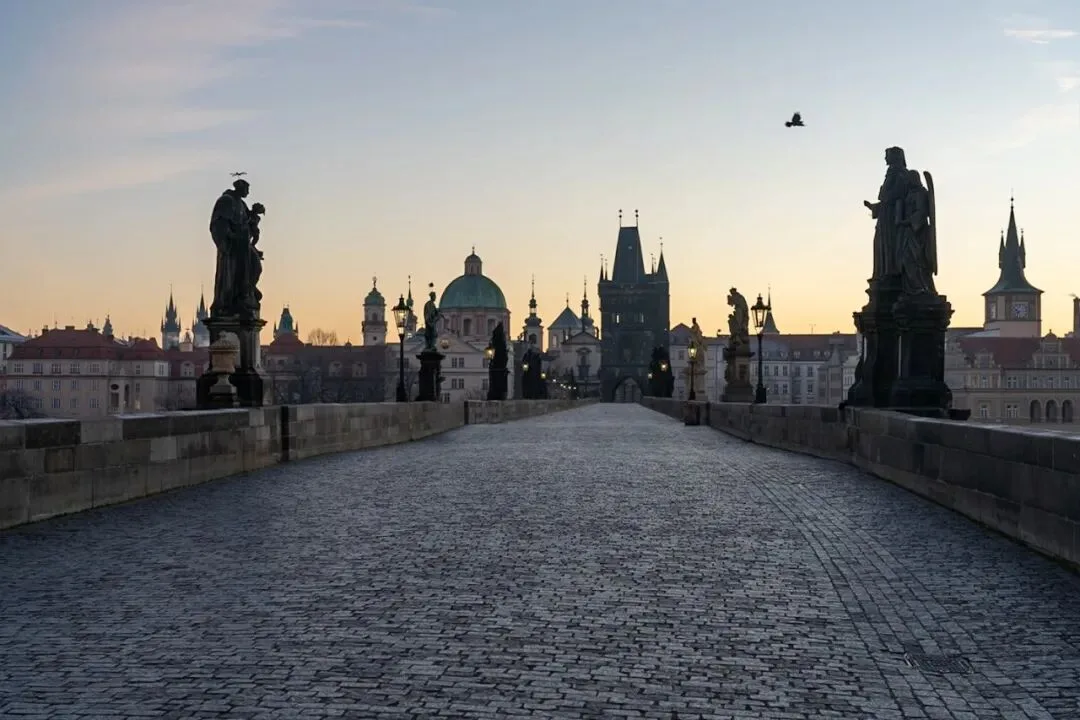
Start with the end result. The finished frame above, captured at 10:54 in the video, shows Charles Bridge at dawn, empty except for the statues, the cobbles and the morning light — while the scene itself was bustling with people. The breakdown follows four steps: shooting, stacking, masking, and cleaning up the background.
01 In the Field: Locked-Off Tripod and Interval Shooting
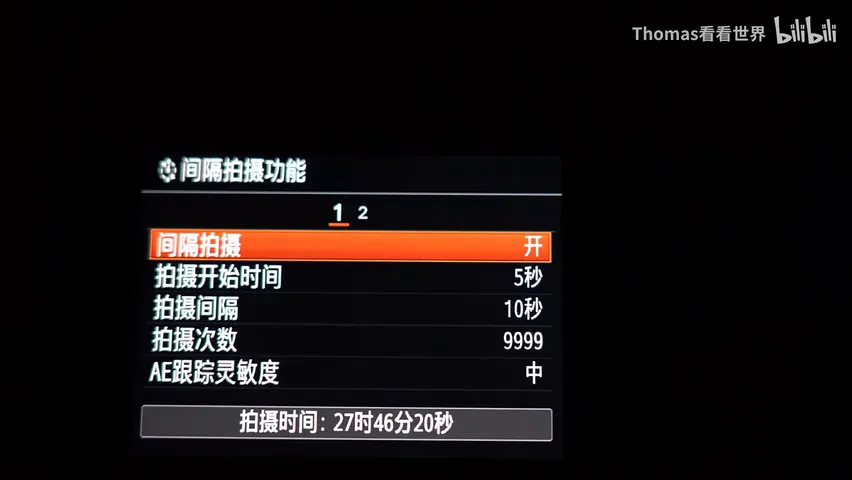
The key to fewer tourists in the final image is simply shooting more. Lock the camera on a tripod so the framing never shifts, then switch on the interval timer — say one frame every 10 seconds; or fire manually every 10 to 15 seconds (at 0:54 in the video).
At 1:01 in the video we see the actual camera menu: the interval timer enabled, one frame every 10 seconds, the shot count maxed out. Keep shooting the same composition for 3 to 5 minutes and you will have plenty of material to erase people later (at 1:06 in the video).
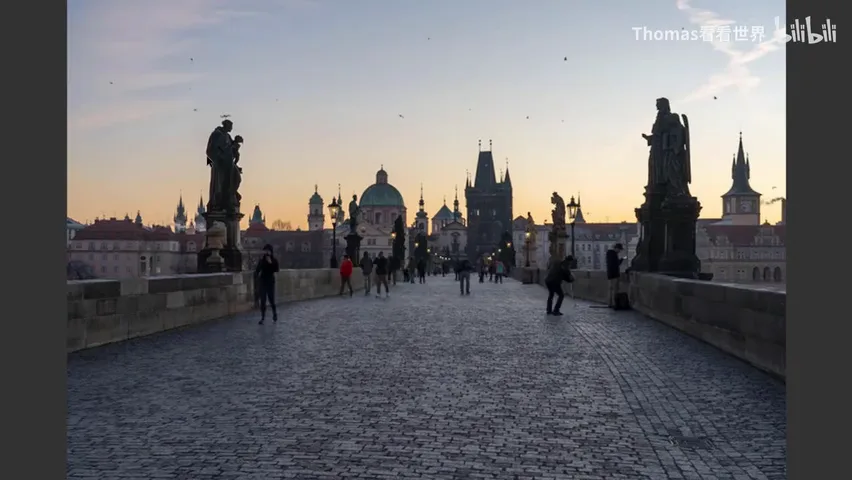
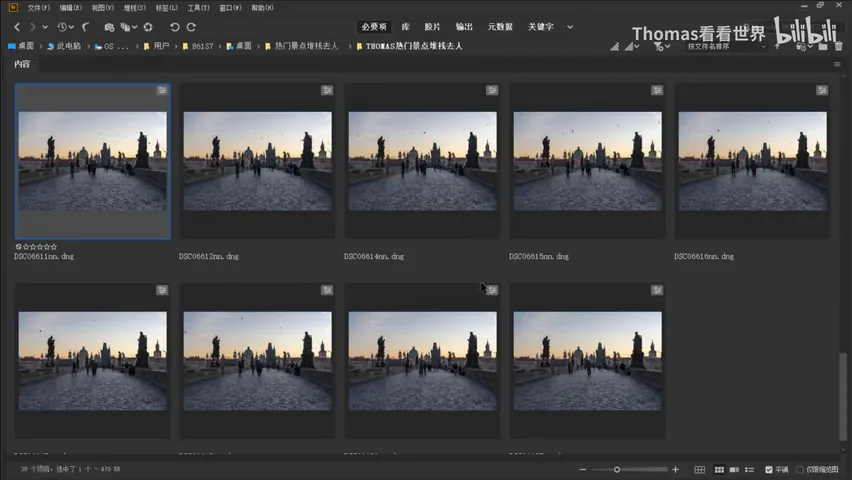
This works because most tourists keep moving: in one frame he stands on the left of the frame, in the previous one that spot is clean background; wherever the person in red is blocking, a longer burst will always catch the moment he walks away and nobody else has stepped in (at 1:29 in the video). Thomas fired 60-plus frames from the same position and picked 30-odd for the stack (at 2:04 in the video).
02 The Stack: Median Blend Removes People in One Pass
Step one in post is loading the files into Photoshop: run File → Scripts → Load Files into Stack, browse to the folder, select all with Ctrl+A and confirm (at 2:19 in the video). Tick both options — "Attempt to Automatically Align Source Images" and "Create Smart Object after Loading Layers" — and PS loads the 30-odd RAW files, aligns them and turns them into one smart object (at 2:44 in the video).
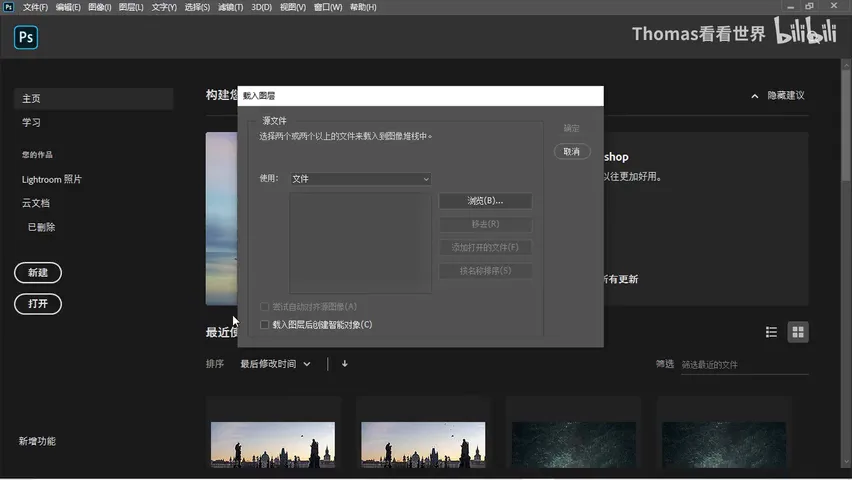
Crunching 30-plus RAW files at once is demanding: more RAM, a faster CPU and an SSD make the process noticeably smoother (at 3:01 in the video). Then run Layer → Smart Objects → Stack Mode and choose Median (at 3:37 in the video): if only four or five frames have a person in a given spot and the other 30 are clean, the median picks the clean one — the more a tourist moves, the more completely they vanish.
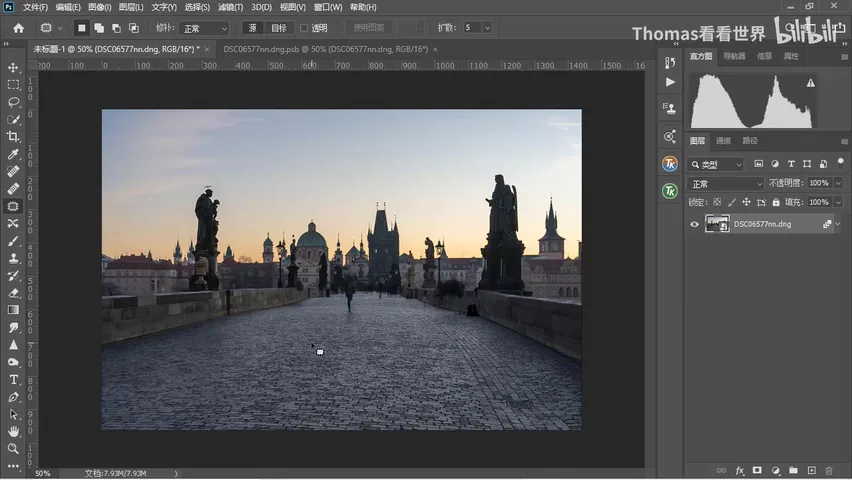
After one simple median pass the frame is already very clean, but flaws remain (at 4:13 in the video): a backpack nobody ever picked up, a tripod present in more than half the frames, and a spot occupied in 20-plus frames — even by different people — that blends into a dark ghost. Median blending swiftly removes foreground tourists who move a lot; the stubborn leftovers go to the next step (at 4:24 in the video).
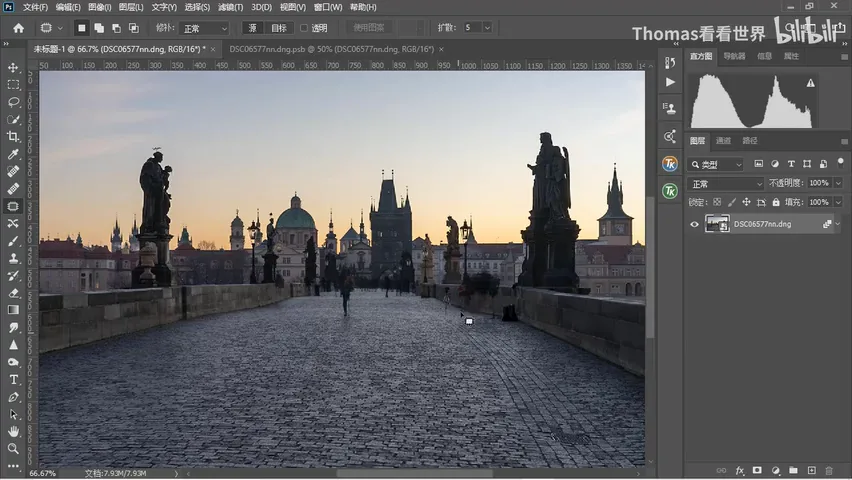
03 The Masks: Borrow the Clean Zone from Each Layer
The repair idea is to hunt through the 30-odd source frames for one where that exact spot happens to be tourist-free. Select that layer, run Layer → Duplicate Layer, and target the stack document (at 5:31 in the video); add a blank layer mask and press Ctrl+I to invert it to black, hiding the whole layer.
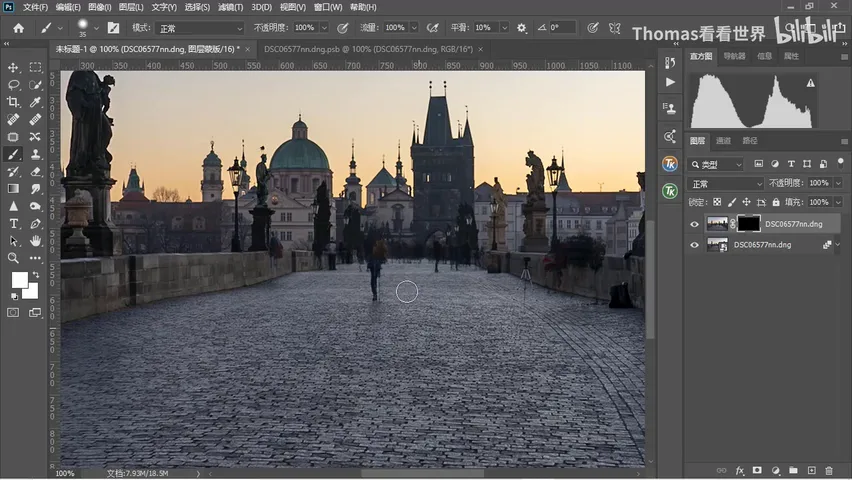
Then paint the clean zone back in with a white brush on the black mask: foreground color white, opacity 100%; keep hardness moderate — 0 leaves ragged edges, too hard looks sharp-edged, somewhere between 20% and 50% is right (at 5:49 in the video). Since the framing never moved, the painted patch lands pixel-perfect and the ghost is covered exactly.
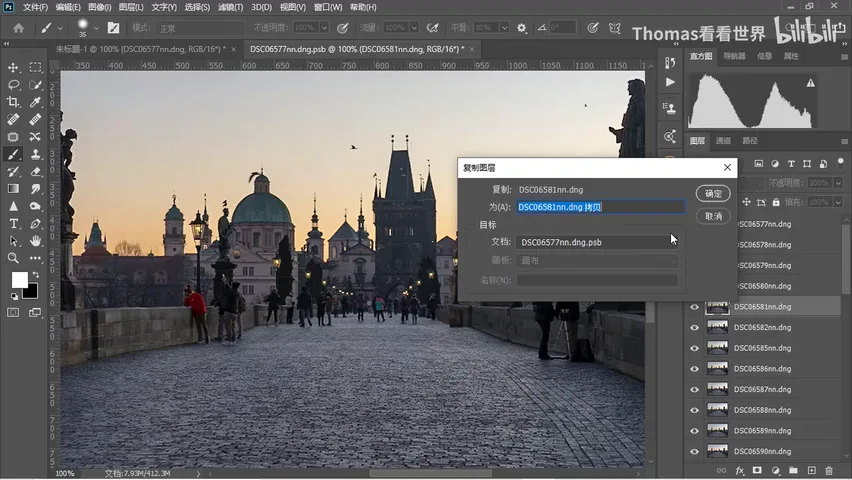
The leftover tripod gets the same treatment: find a frame where the tripod was moved away, duplicate it over, add the black mask and brush in the clean cobbles (at 6:33 in the video). The layers thus cover for each other — take from every layer only the part with nobody in it, and the mid-ground ghosts and tourists are replaced one by one. This is where shooting extra frames pays off: shoot too few, and some tourists stay nailed into every single frame (at 8:33 in the video).
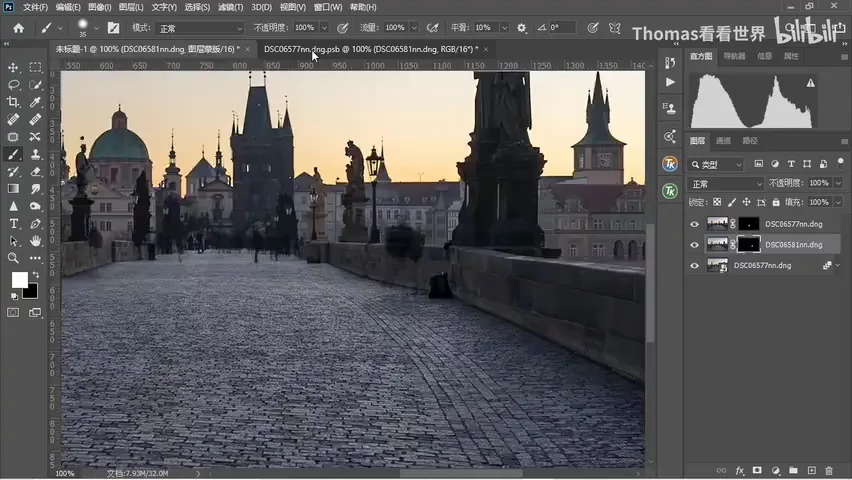
04 The Far Background and the Before-and-After
Tourists deep in the background are nearly impossible to remove — far away everything compresses together and the figures pile up. Two options here: the first is to accept them. Pick the source frame with the cleanest background and paint the distant tourists and lamps back in with the white brush, so all figures dissolve into the far distance — with the foreground and midground completely clean, the image already reads beautifully (at 9:55 in the video).
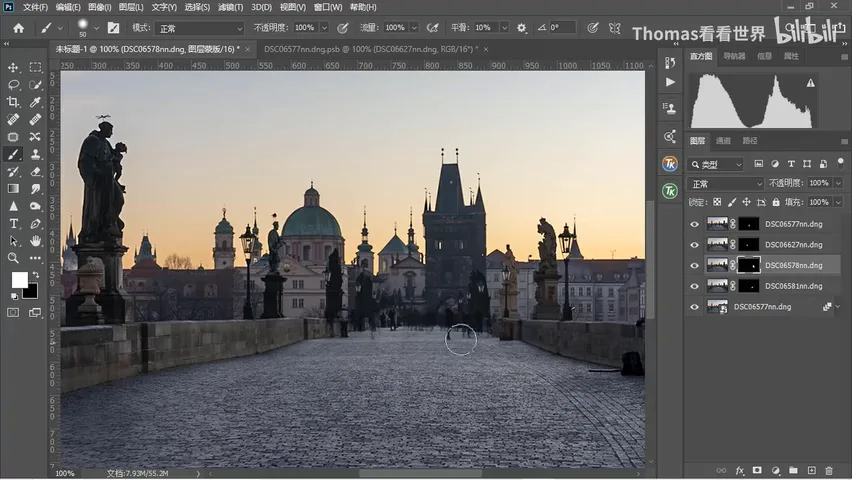
The second option is the Clone Stamp tool and selection brushes, dabbing at the distant figures and repainting the far background for a photo with no background tourists at all (at 10:54 in the video). For most people, reaching "the odd distant visitor only" is already remarkably clean. The final comparison at 11:15 in the video: before, strolling people and fluttering pigeons everywhere; after, the median stack clears the foreground, masks swap out the midground, and the clone stamp finishes the background.
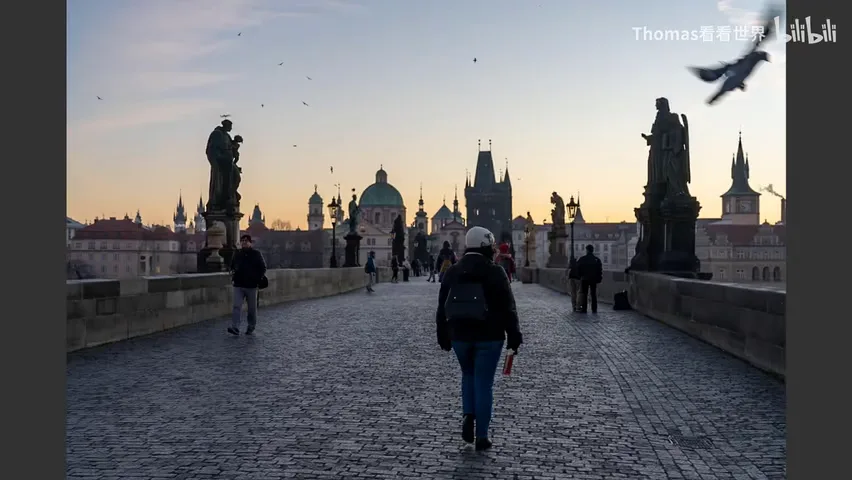
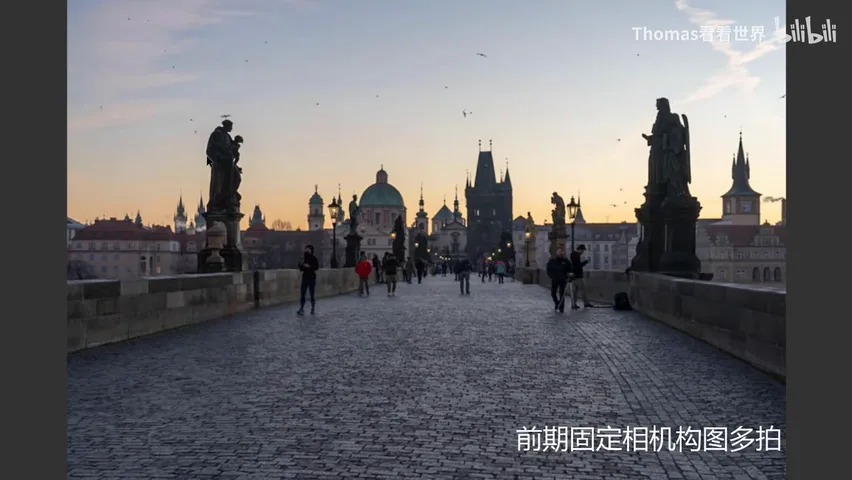
1. Shooting sets the ceiling: lock the composition on a tripod, fire an interval of about 10 seconds for 3-5 minutes — the more frames, the easier the cleanup; 2. Load Files into Stack with auto-align and smart object checked, choose Median stack mode, and moving tourists vanish in one pass; 3. Stubborn leftovers yield to layers covering for each other — borrow the people-free zone from each source frame with a black mask and a 100% white brush; 4. Distant tourists can be painted back and accepted, or erased one by one with the Clone Stamp.