Photography Tutorial · 2020-07-26
One Photo Took Three Hours? Star Trails and Car Trails Can Be Shot Like This
Thomas Chu Photo
In the tutorial 'Sunset Glow Plus City Lights — How Those Rooftop Shots Are Made', Thomas shared the application of time blending in city night photography.
In fact, time blending is a very practical technique in modern landscape photography — it shines in seascapes, starry skies, low light and more.

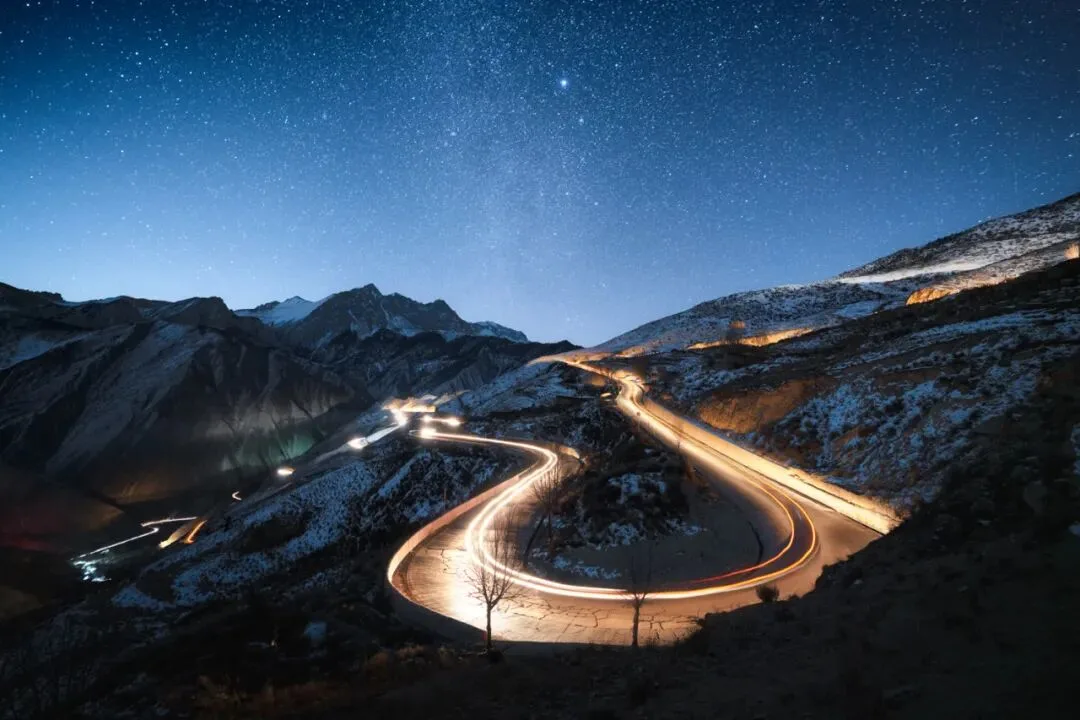
In today's video tutorial, Thomas uses a car-trail star-trail image shot in eastern Tibet to demonstrate a complex light-trail time-blending case.
Video Tutorial
▶ Watch the video tutorial on Bilibili
This is the fully illustrated companion to the video above: Thomas walks through the complete story of a star-trails-and-car-trails photograph shot in January in eastern Tibet — scouting the 72 Turns of the Sichuan-Tibet line, three sets of exposures at different settings, the full time-blend post-production, and the final advertising version finished with a automotive retoucher. The whole 11-minute tutorial is laid out here with keyframe screenshots.
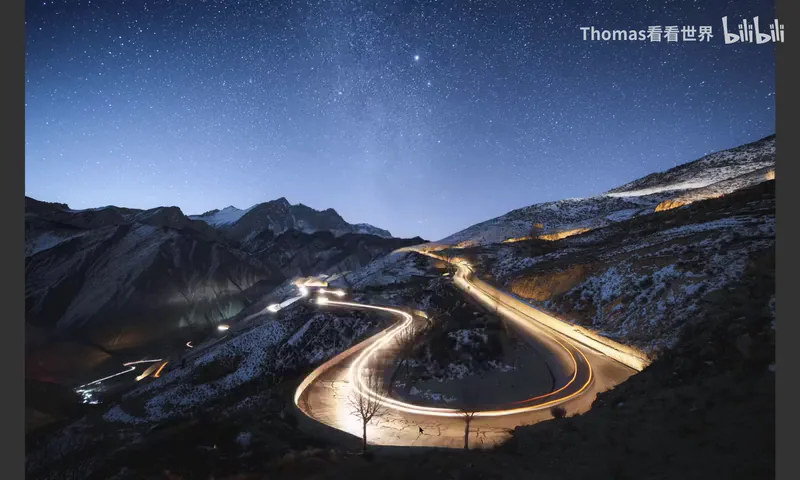
Start with the final image: the product of a three-hour night and 300-plus frames — the Milky Way running vertically above the snow mountains, car trails flowing continuously through the hairpins of the 72 Turns. Yet not a single pair of light trails actually appeared at the same moment; the breakdown follows.
01 In the Field: Scouting the Turn, Planning the Milky Way, 300 Frames
The location is the famous 72 Turns on the Sichuan-Tibet highway. Beyond the classic viewpoint angle, Thomas wanted somewhere more distinctive — the logic for a big road switchback is the same as for a river bend: get close enough and a wide-angle lens delivers dramatic perspective (at 0:37 in the video). He settled on a spot facing a hairpin with snow mountains behind.
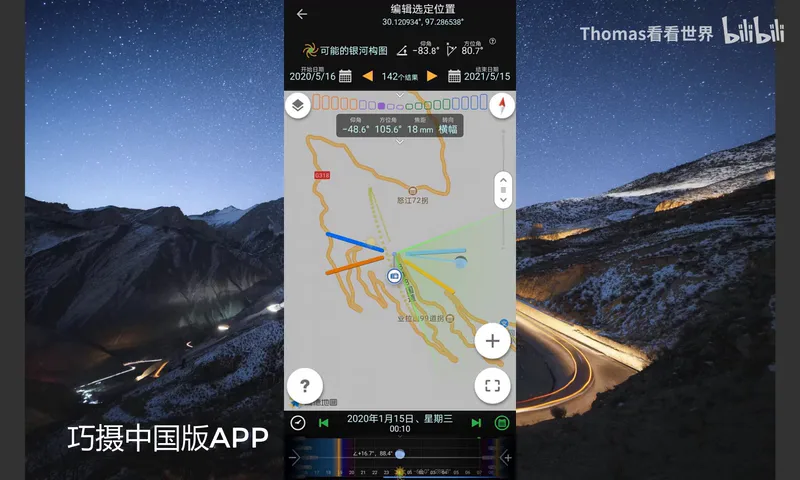
With the vantage set, he planned the sky in the Planit app: January's winter Milky Way shows no galactic core, but the tail of the galaxy would pass vertically right above the snow mountains (at 0:55 in the video). So around eight or nine that night, after driving back over an hour from their lodging, the long shoot began. The finished frame hides 300-plus exposures, later culled and merged (at 1:19 in the video).
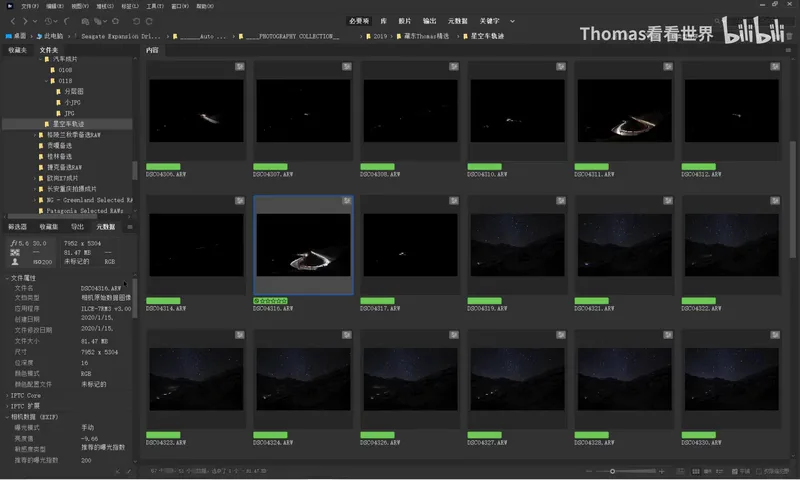
Time blending is simple in principle: keep the camera fixed and shoot continuously, recording the same scene as its light changes. When a truck sweeps through, its headlights light up one stretch of the hairpins; the next truck lights another (at 1:47 in the video); oncoming traffic adds red tail-light streaks. Keep firing so every bend gets lit at some point and the merged lines stay continuous (at 2:07 in the video).
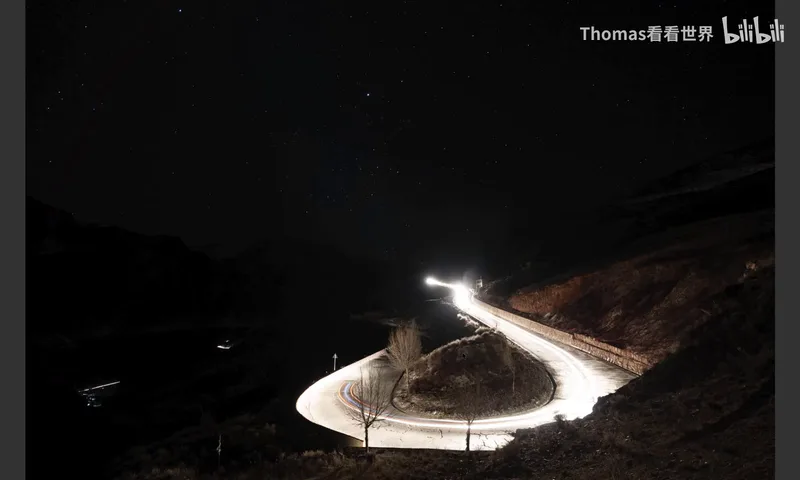
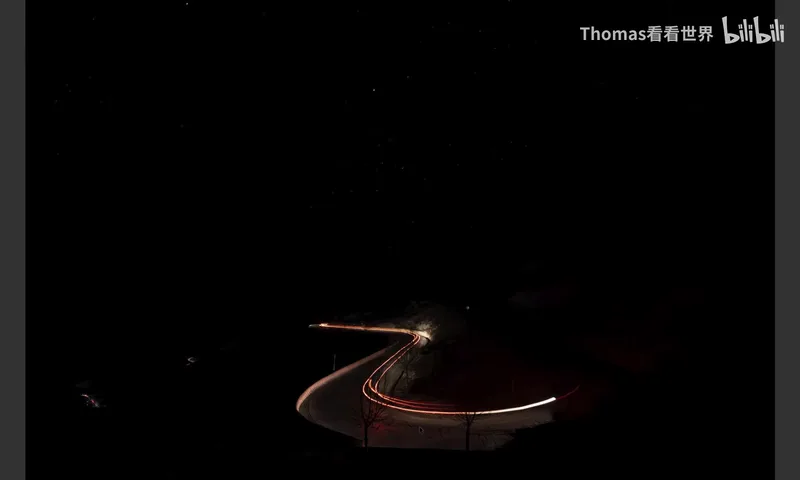
02 Settings: Three Exposure Sets — Trails, Sky, Moonlight
The first set is for the light trails: ISO 200, f/5.6, 30 s (at 2:25 in the video). The low ISO exists because truck headlights are fierce — ISO 200 at f/5.6 records the streaks cleanly without blowing out. The trade-off: only ground trails survive; the sky and the landscape stay pitch black (at 2:45 in the video).
The second set targets the sky: ISO 2500, f/2, 25 s captures a handsome Milky Way (at 2:57 in the video). January is winter in the northern hemisphere, so only the galaxy's tail is visible — the dense, colorful arch people love is the summer core. The tail is sparser and less colorful, but its position and flow still read clearly (at 3:05 in the video).
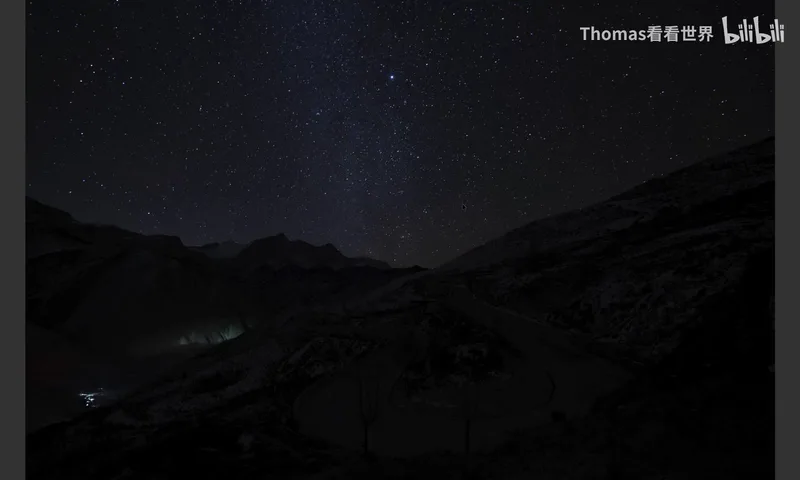
As the moon rose, the sky brightened and its tone shifted from black toward blue; once moonlight hit the ground he kept shooting several more sets (at 3:53 in the video) — though the final image ended up not using them. Last came the advertising material for a Mitsubishi Pajero: a friend drove the car into position, Thomas exposed for the car separately with HDR bracketing, ready to blend it into the final frame (at 4:16 in the video).
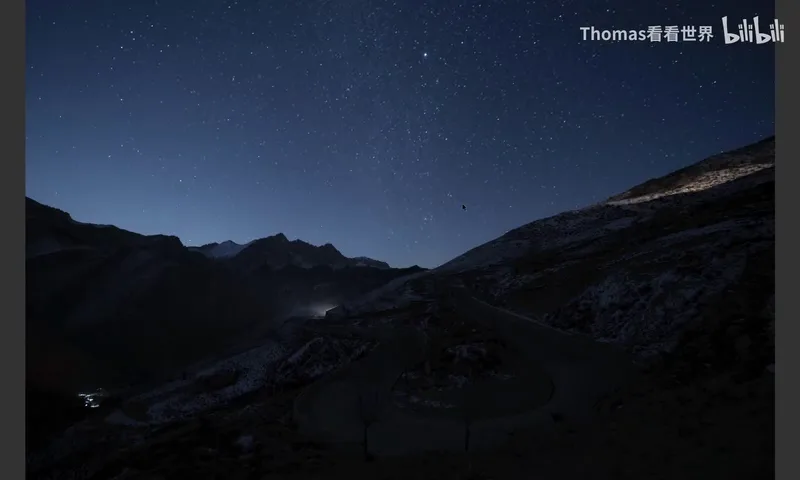
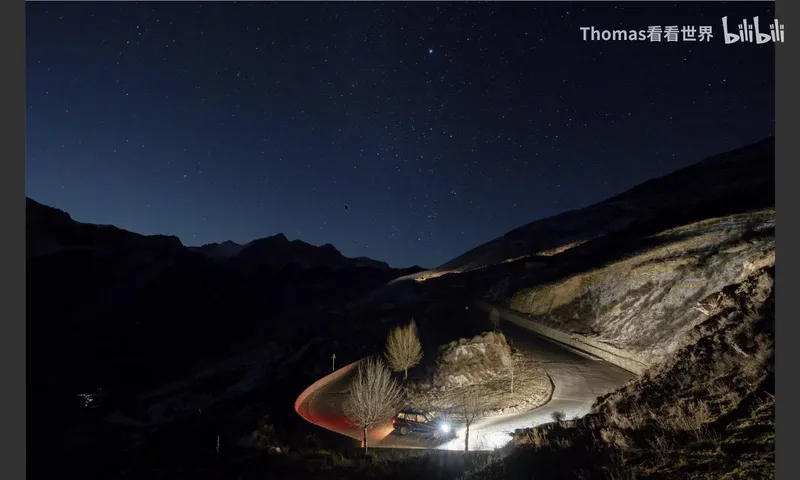
03 In Post: Stack the Base, Lighten in the Trails
The post-production file carries twenty or thirty layers (at 4:47 in the video). The base plate is itself not one photo but 20 blue-toned frames shot after moonrise with no car lights, stacked with average or median blending to suppress noise — mainly supplying the surrounding ridges and areas untouched by headlights or moonlight (at 4:56 in the video).
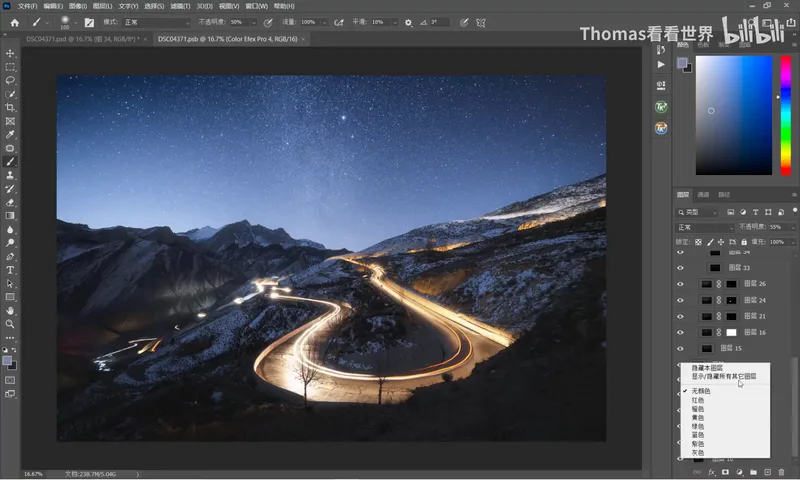
Then the trails come in one by one, with layer blending set to Lighten: Normal mode would simply cover what is below, while Lighten keeps whichever pixels are brighter in each layer (at 5:39 in the video). A trail layer is black except for the streaks, so Lighten leaves just the light trails on the canvas. Frames capturing traffic in other bends are matched and joined; the gaps left by interval shooting — the car has driven on between shutter presses — are bridged by hand with the brush or clone stamp (at 6:39 in the video). Distant headlight glow on the far ridges gets brushed in layer by layer the same way (at 7:10 in the video).
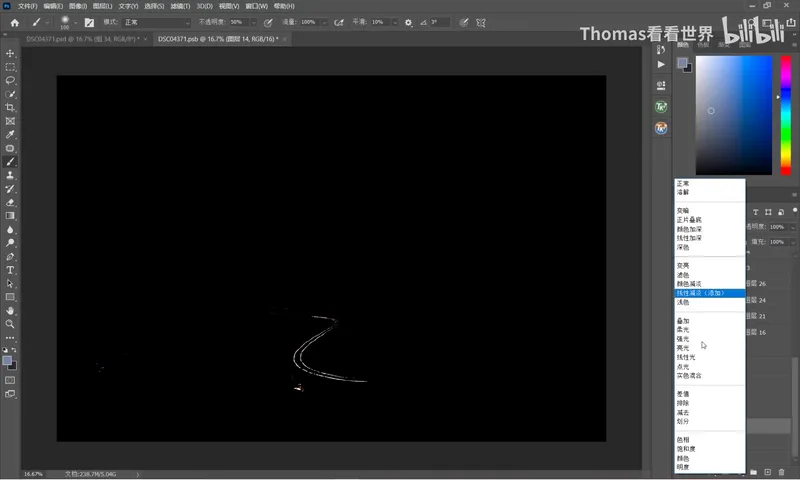
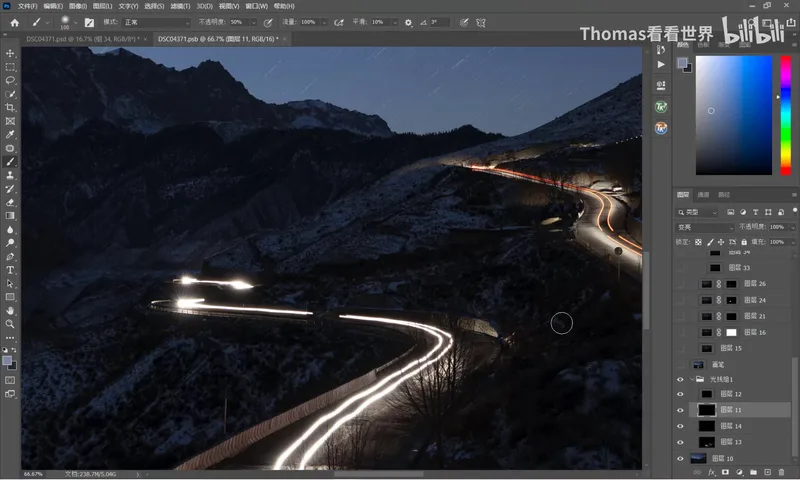
Lighten blending works hand in hand with layer masks — otherwise stray light sneaks in too; with a mask you brush in only the glow you want and dial back anything too strong (at 7:42 in the video). Once all trails are merged he stamps the layers; because Lighten and the stack had mangled the stars, a clean sky frame is masked back over the top (at 8:31 in the video). Color Efex Pro and favorite Nik Collection tools then lift brightness, contrast and texture; the mountains are selectively warped so the snow peaks stand taller and the hairpin gains depth (at 9:12 in the video); finally the whitish trails are toned toward red (at 9:29 in the video).
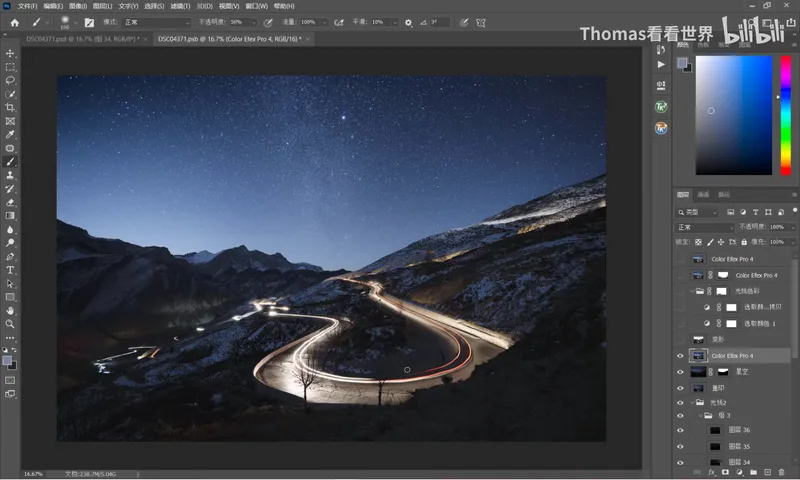
04 The Final Frame: Finishing with a Retoucher
After Thomas's version was done, the file went to a professional automotive retoucher: the HDR-shot car was cut out and enlarged — at its original size it would look too small in the frame — the tree in front was removed, and the car blended naturally onto the road (at 10:02 in the video); saturation was boosted overall for the punchier look an advertisement needs. The result: a car winding along the mountain road, wrapped in light trails under the Milky Way (at 10:37 in the video).
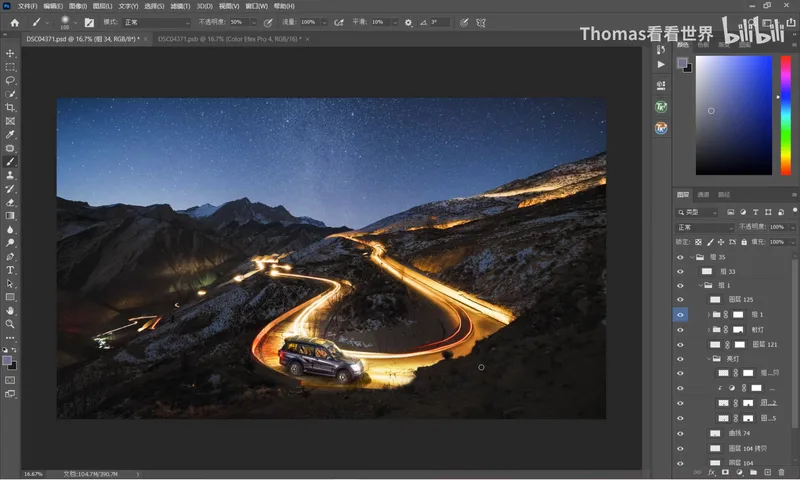
One more thing worth noting: every car in the photo really was there, and every streak of light really crossed that road — nothing was painted in. They simply appeared at different times, and Thomas merged them through time blending (at 10:49 in the video). A photo impossible to take in one frame, built from three hours of honest recording.
1. Think the location through first: a wide-angle position close to the switchback plus Milky Way planning in Planit put perspective, snow peaks and a vertical galaxy in one frame; 2. Keep the camera fixed and shoot continuously — trails at ISO 200, f/5.6, 30 s, sky at ISO 2500, f/2, 25 s, separate sets for separate jobs; 3. In post, stack the no-car-light frames with average or median blending for a low-noise base, then brush trails in one by one with Lighten blending and masks, bridging gaps with the brush or clone stamp; 4. Mask a clean sky back over the mangled stars, then unify texture, warping and color — every streak of light in the photo really happened.