Photography Tutorial · 2021-12-05
How to Subtract from a Photo? Cloud and Mist Rendering Does Wonders
Thomas Chu Photo
Photography is an art of subtraction.
And this subtraction runs through the entire process, from capture to post-processing.
In today's tutorial, using a photo taken at Zizhu Temple as an example, I'll share how I made the image clean and vivid through compositional choices, secondary cropping, multiple rounds of grading, and cloud-mist rendering.
Video Tutorial
▶ Watch the video tutorial on Bilibili
This is the fully illustrated companion to the video above. Photography is the art of subtraction, and the subtraction runs through shooting and post alike. Using a photo of the moon rising over Zizhu Monastery in Tibet, taken last year, Thomas demonstrates subtraction on three levels: recomposing from a different drone position in the field, cropping and color subtraction in post, and a final mist render that solves three problems at once. Keyframe screenshots throughout — read here for the framework, then hear the details in the video.
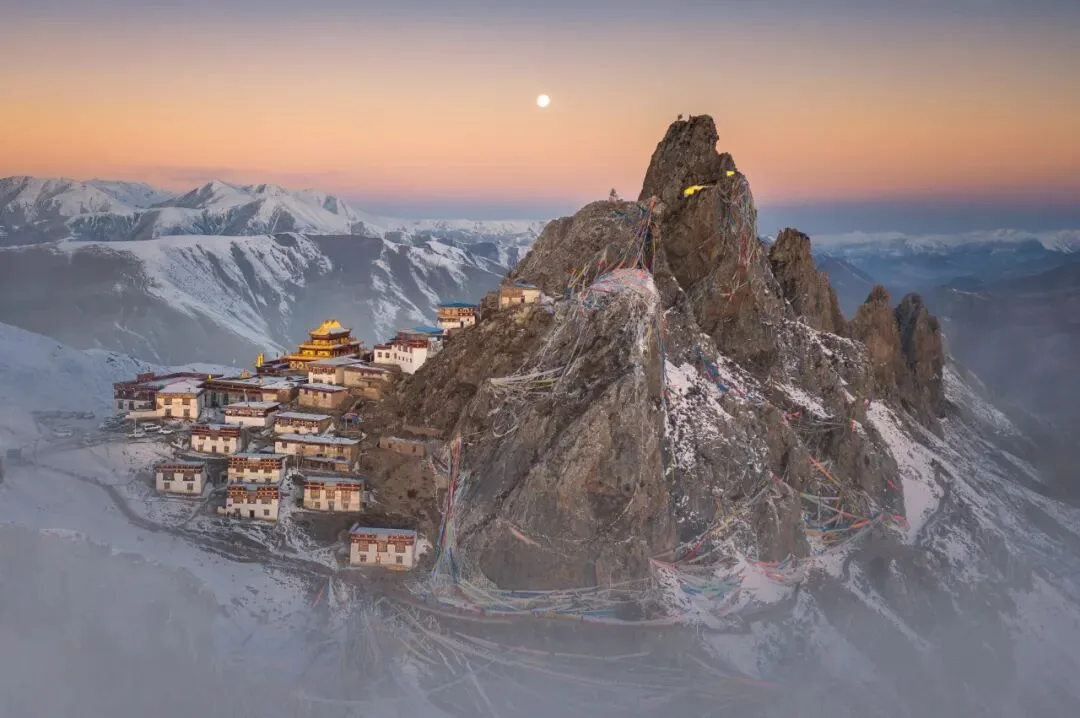
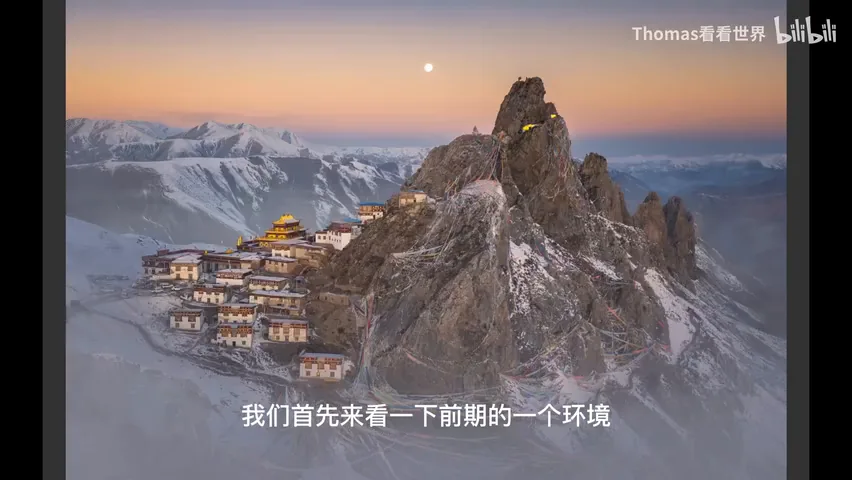
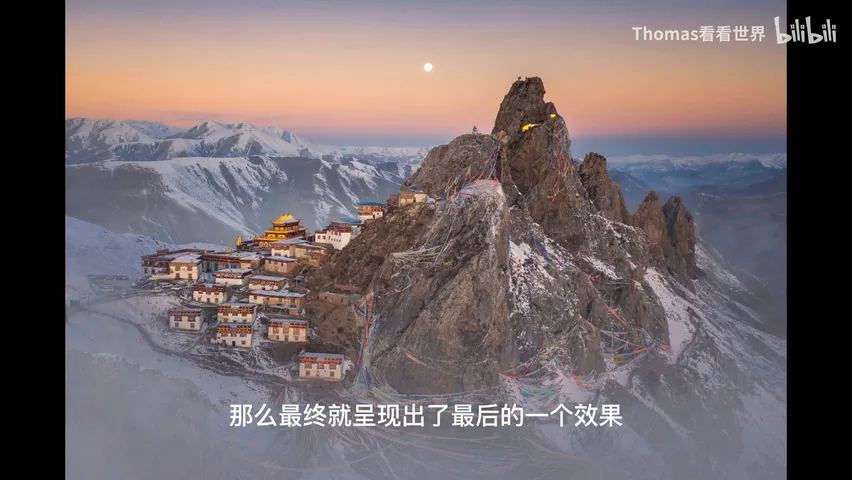
Start with the final image: the moon in the sky, mist swirling, the monastery standing like a fairyland retreat on the summit — this is the end result, and the whole tutorial is about how it was subtracted into being, step by step (at 0:01 in the video).
01 Subtraction in the Field: A New Drone Position
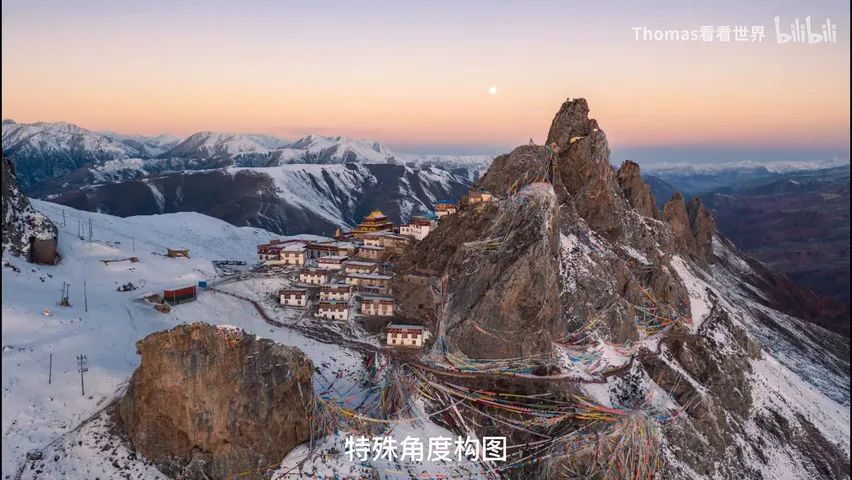
This direction at Zizhu Monastery is the classic viewpoint — the locals even built an observation deck there, and nearly every drone takes off from this spot (at 0:45 in the video). But Thomas felt its subtraction fell short: after a thousand years the monastery has grown into a dense cluster of buildings that looks cluttered — none of the feeling of a fairyland above the clouds where a dozen small houses stand in seclusion; more like a big city perched on a summit (at 1:02 in the video).
The first subtraction: fly the drone to the upper right and look from the side. With the hillside on one flank, the houses in front hide the ones behind; and seen from the side, the buildings read far smaller and cleaner than the rows of long, front-facing houses (at 1:29 in the video).
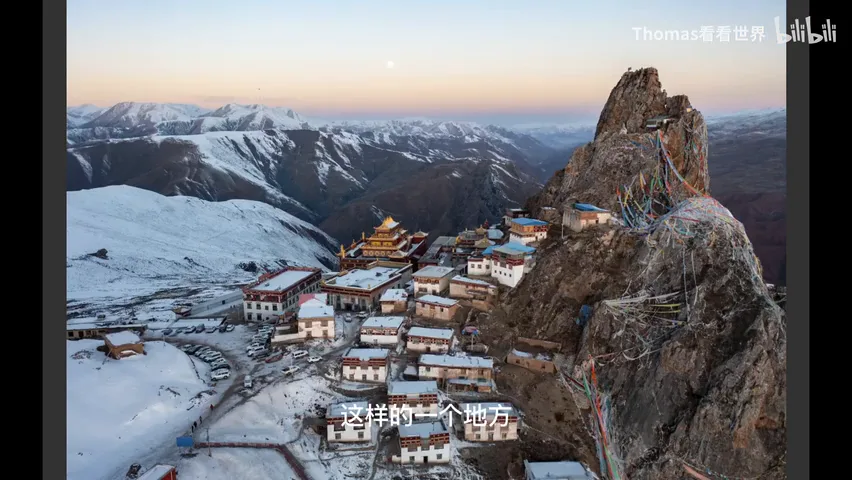
But the angle was still a touch high, and every building's big roof still grabbed attention — so he flew lower and farther back, subtracting the roofs as well. By now the rooftops no longer demand notice, and the buildings merge into the mountain (at 2:04 in the video). The compositional subtraction is complete: a side direction, a low angle, a longer distance.
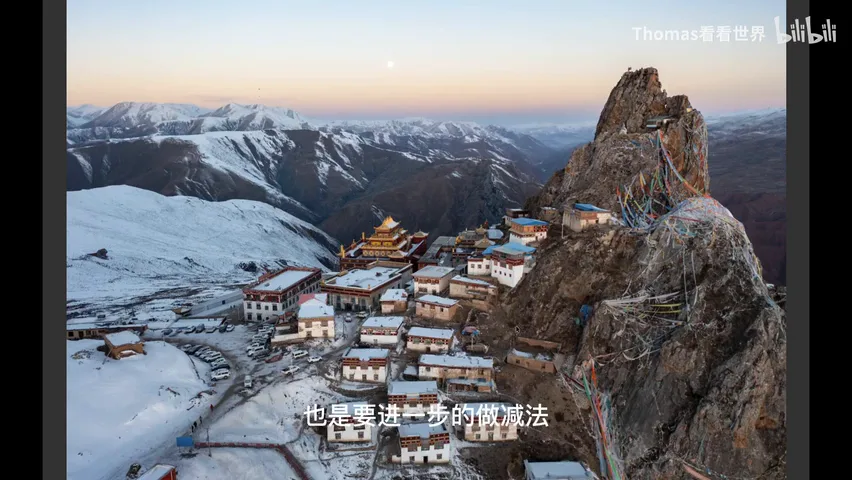
02 Step One, the Crop: Minus Wires, Houses, Flags
Post-production adds three more subtractions: the crop, a subtraction in color, and a special way of masking detail — revealed at the end (at 2:31 in the video). In the crop, the first to go are the power lines on the left; the aspect ratio is set to his preferred 3:2 (at 2:50 in the video).
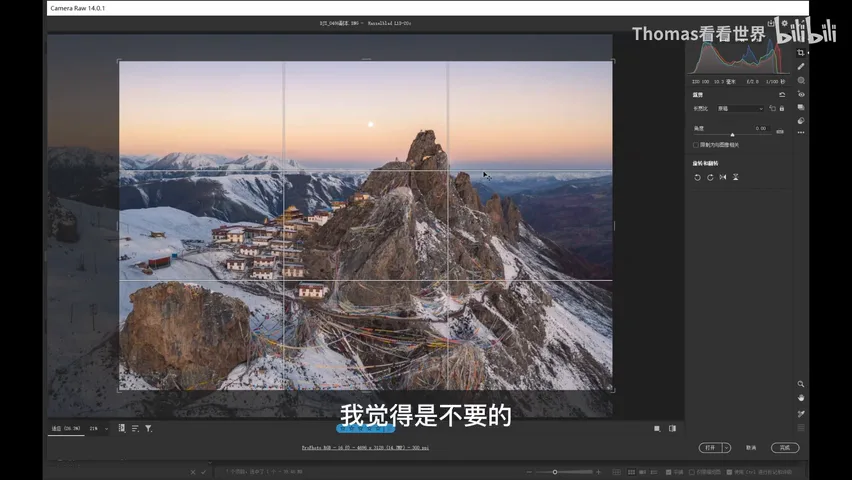
Then out go the two small yellow and red houses and the overly dense mass of prayer flags at the lower right, while the moon is kept roughly in the middle zone of the frame. In the final crop the moon sits near the central axis with the peak and the monastery's tallest building at either end — a rather dynamic balance (at 3:33 in the video).
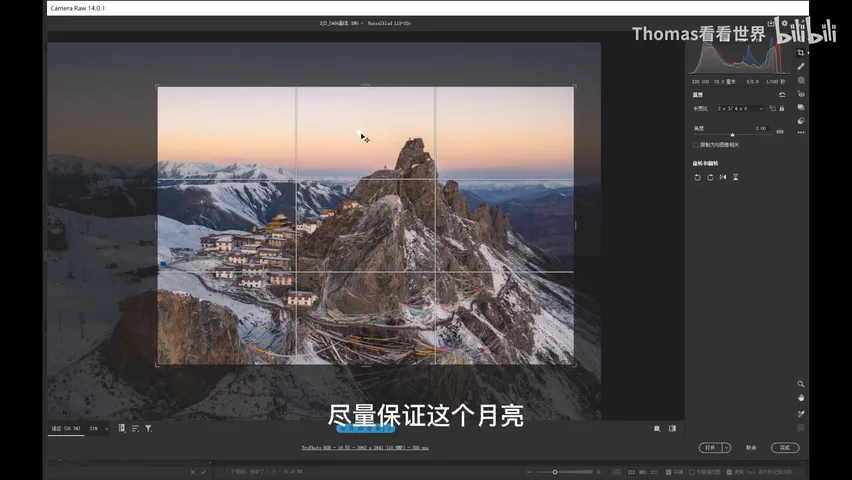
03 Step Two, Color: Subtracting with Masks
After the crop he moves into Photoshop, starting with simple base adjustments in Lightroom (at 4:01 in the video). The first masked operation is Hue/Saturation: the yellow prayer flags and yellowish rocks around them need their color reduced — selecting Yellows and lowering Lightness, which pulls down saturation and brightness together (at 4:22 in the video).
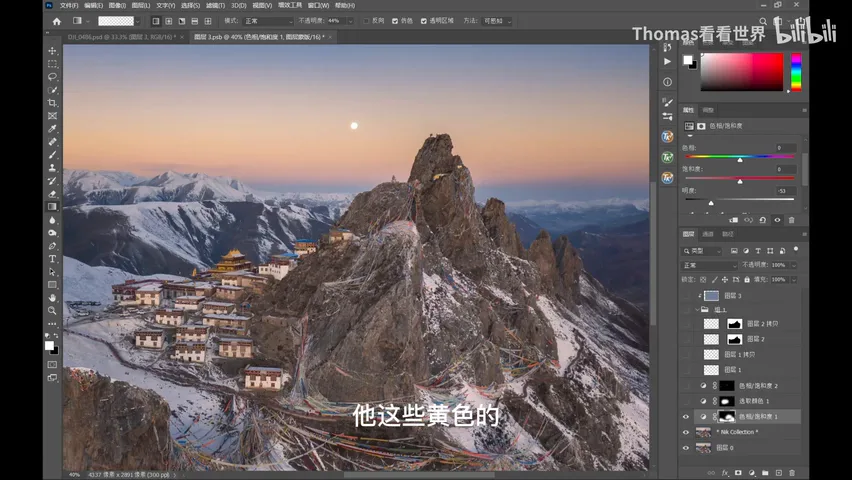
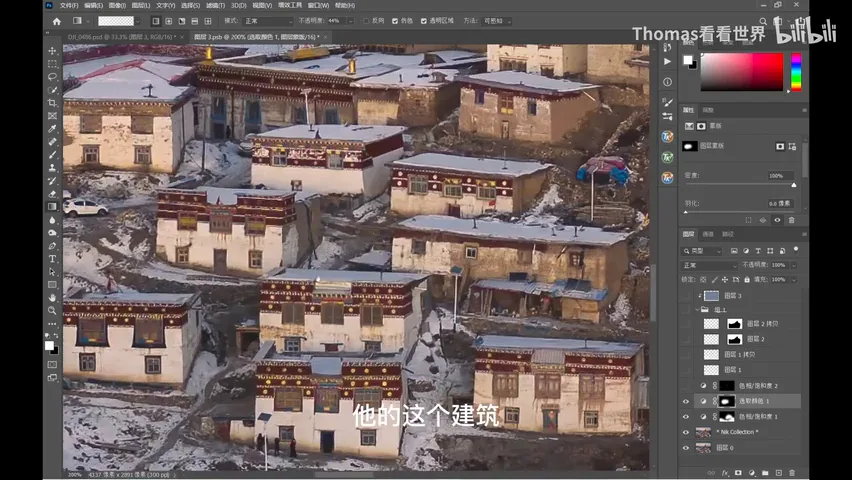
A mask is essential here to limit the range — otherwise desaturating yellows would gray out the sky and the golden roofs too (at 4:47 in the video). The second step works in reverse, adding: with the buildings selected, Selective Color pushes yellow toward red and adds yellow, then reduces black to brighten — Tibetan architecture with its red walls and golden roofs is beautiful already, and this makes it gleam (at 5:24 in the video). The third step gently desaturates the few blue sheds (at 6:01 in the video).
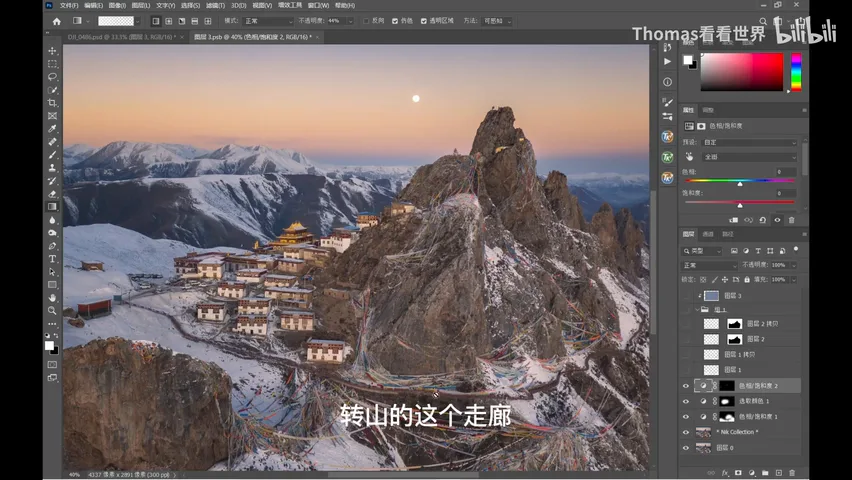
Even after these steps the problems remain: the prayer flags and the kora corridor below are still somewhat messy, weakening the mountain's mystery; and that morning was exceptionally clear, so foreground and background were equally sharp with no sense of depth (at 6:15 in the video). Which brings the third step — rendering mist in post.
04 Step Three, Mist: One Move, Three Wins
The mist render solves three problems in one move (at 6:53 in the video). First, wherever the frame feels messy, fog is painted over it — the areas mist occupies are naturally hazy, so the clutter is secluded rather than deleted; second, the mist adds mystery; third, the layers suddenly separate — fog in front, clear detail in the middle, fog again, then sky and the moon beyond (at 7:24 in the video). As if the shoot had coincided with a misty morning.
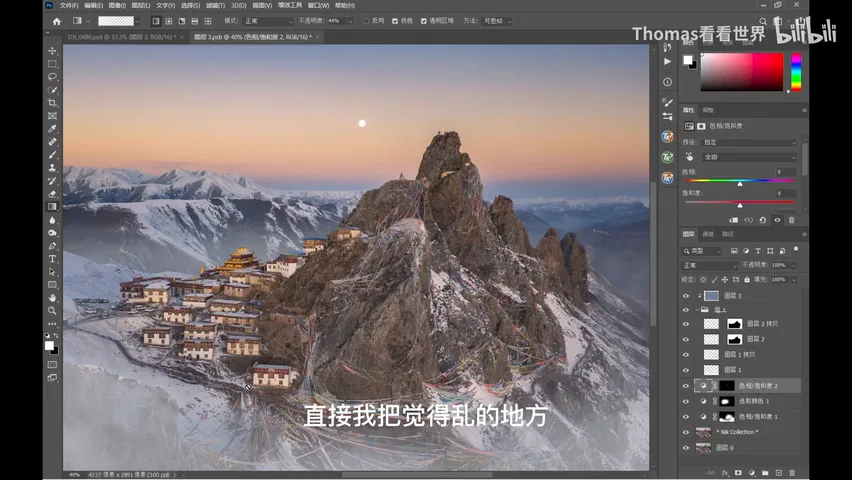
Method one: search online for fog brushes — the resources are plentiful. In use, the same brush can be repeatedly repositioned and resized, its direction nudged with the brush tool; once several brushes are mixed and stacked you cannot tell they came from one brush. Varying the stroke sizes further imitates the texture of natural mist (at 8:13 in the video). This was the method he used.
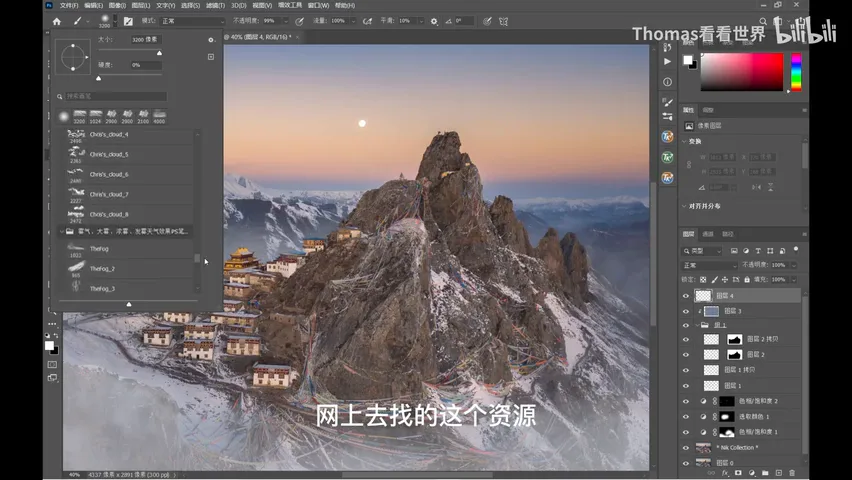
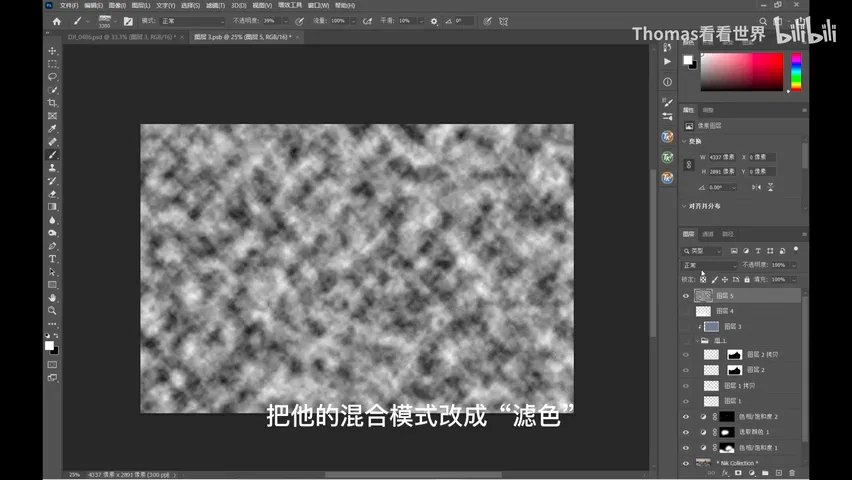
Method two: run Filter → Render → Clouds for a cloud base and set the blend mode to Screen (at 9:13 in the video); then Edit → Transform → Perspective to mimic nearer-clouds-bigger, with Ctrl+T to resize and stretch — clouds tend to be long and flat. A single layer looks fake, so drop opacity to 20-30% and duplicate the layer with repositioning — the clouds are random, so every reposition lays down a fresh random layer (at 9:51 in the video). Finally group the clouds, add a black mask, and brush the mist in where needed (at 10:32 in the video).
With that, all three subtractions are complete, and the final effect is as shown at the start (at 10:35 in the video). The photo is also included in Thomas's Seeing the World 2022 weekly calendar — each page pairs a photograph with the week's grid and space for notes, and the prints carry cut lines so they can become postcards or framed pieces; search "看见世界 2022" on major e-commerce platforms (at 10:44 in the video).
1. Subtraction in the field: skip the classic spot everyone flies, and shoot from the side, lower and farther, subtracting cluttered houses and loud rooftops; 2. Subtraction by crop: a 3:2 frame removes wires, stray houses and dense flags, letting the moon and the two high points strike a dynamic balance; 3. Subtraction in color: Hue/Saturation and Selective Color with masks mute the noise, lift the golden roofs, and calm the blue sheds; 4. The mist render wins three times over — hiding clutter, adding mystery and separating near, mid and far — the step that finishes the picture.