Photography Tutorial · 2019-04-30
How to Create a Sunstar Effect in Post
Thomas Chu Photo
I'm AdventureX member Miller姚明来
"The Heaven Sword and Dragon Saber" tells of Zhang Wuji learning a secret art in the forbidden grounds of the Ming Cult's Bright Peak — a technique originating from the Persian Ming Cult, its most treasured skill, called the Great Shift of Heaven and Earth. "Qian" is heaven and yang; "Kun" is earth and yin. It is a divine skill that moves heaven and shifts earth!

Today, to you — the destined reader of this article — let me say: I can see you have an extraordinary bone structure, a one-in-ten-thousand martial arts prodigy. I happen to have a secret manual here, and since fate has brought us together, it's yours.
This is the Great Shift technique of landscape photography, known as: the Art of Moving the Sun!
The ancient books say the Great Shift has seven levels: the first takes seven years, the second twice as long, and so on — ever harder, and mastering the seventh would make you the greatest in history. The Art of Moving the Sun, by contrast, takes only a few simple steps.
What is the Art of Moving the Sun?
First, look at the image below:
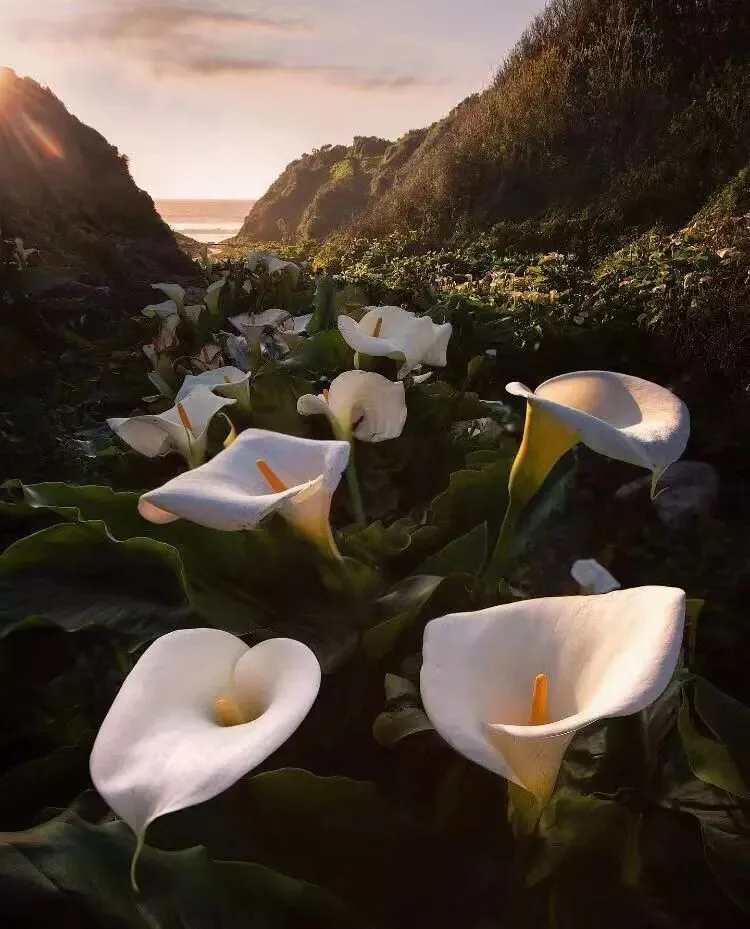
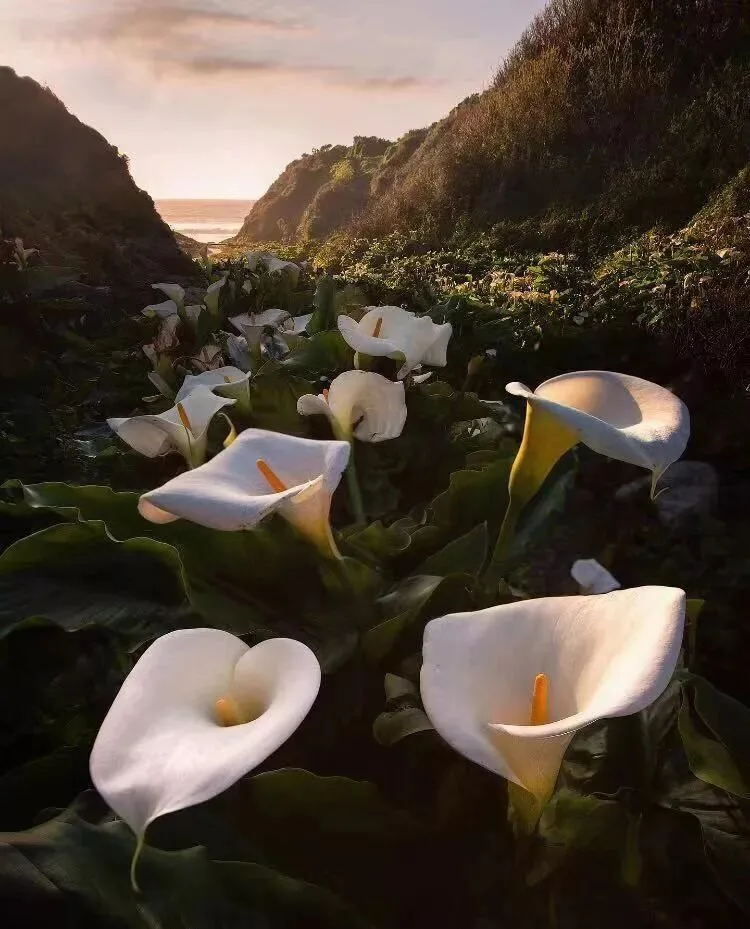
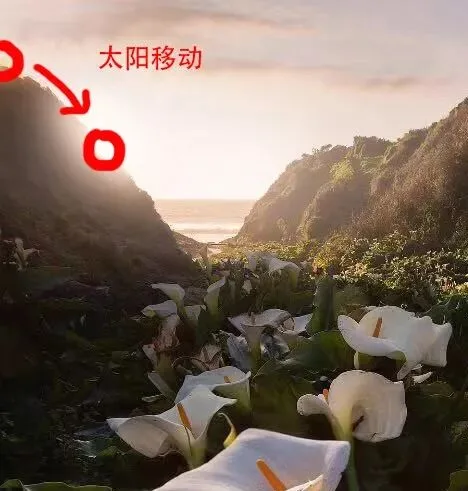
These calla lilies were shot by netizen @hongzimao in California, USA — a classic location. Let me first analyze the image.
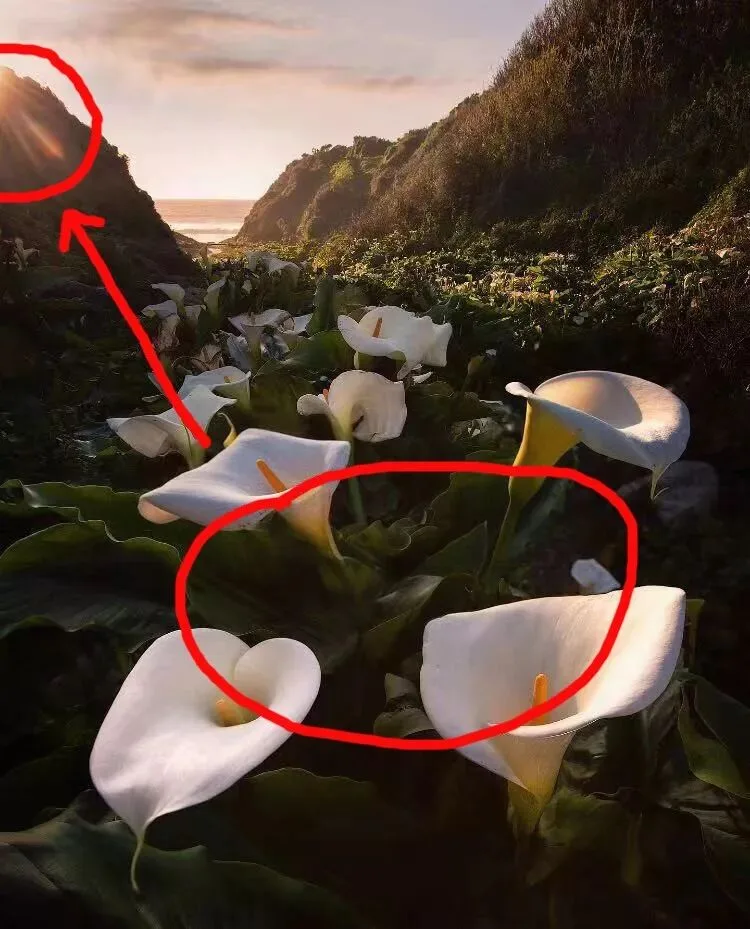
The calla lilies stretching from the foreground into the distance should have been the image's leading line, but the sun's glare at the boundary between the left hillside and the sky breaks the smooth sense of depth — our eyes are easily hijacked by that abrupt glare.
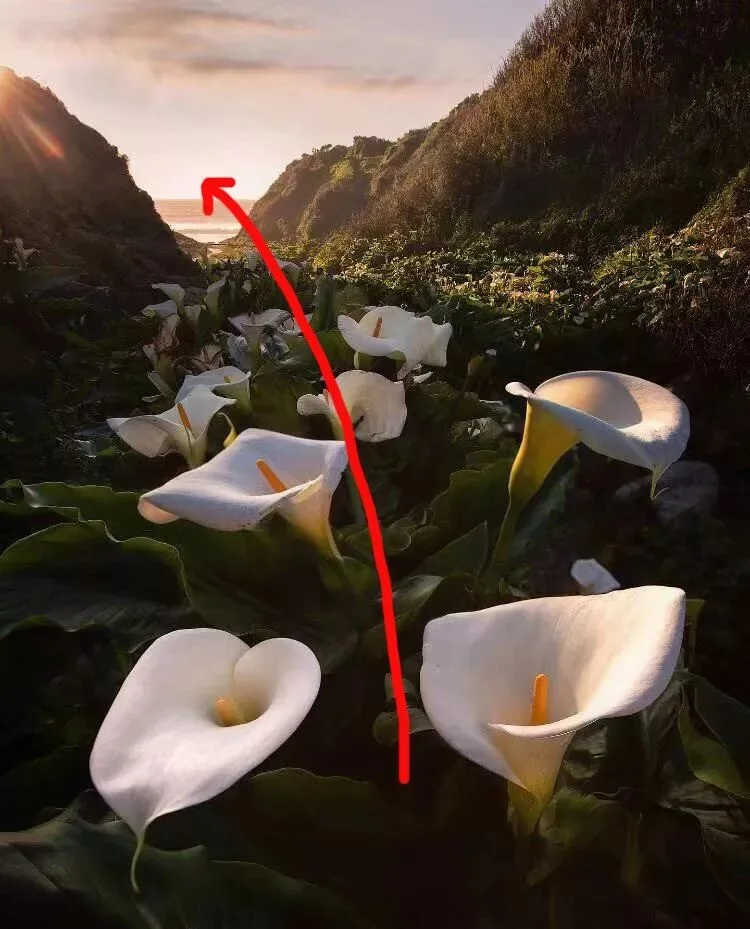
Because the shot was taken at the end of the blooming season, most flowers had withered, and the blooms from midground to background were sparse. Combined with the glare, this greatly weakened the image's sense of extension. What the capture lacks, post must supply: here we can use the Art of Moving the Sun to relocate the light source's entry point and rebuild the vertical depth with light atmosphere and tonal transition.
The Art of Moving the Sun has 3 core steps.
Step 1: Locate the Sun
The ancients had tomb-raiders who divided gold to locate burial chambers; today we have Yao's method of splitting light to pin down the sun.
"Locating the sun" simply means first determining the sun's position and angle within the image.
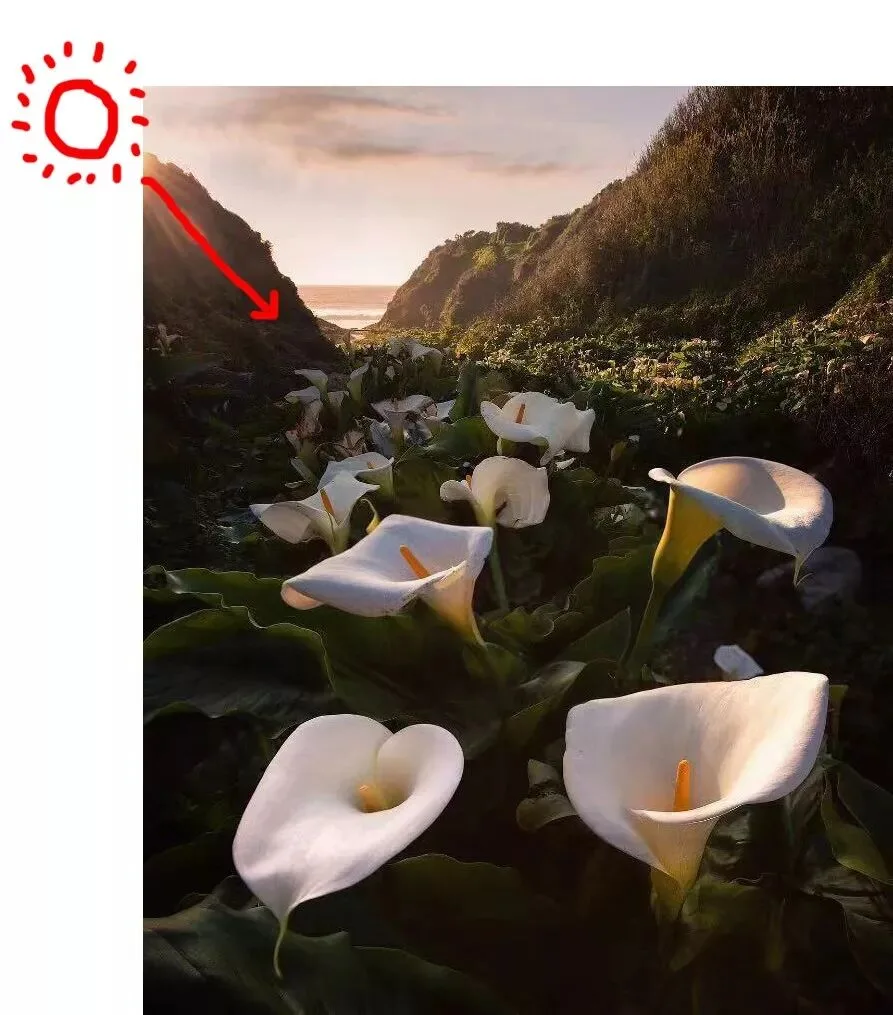
In this image, we can easily work out the sun's position and the angle of incoming light from the glare in the upper left.
For compositions that don't include the sun itself, we can judge the sun's direction from the shadows in the frame.
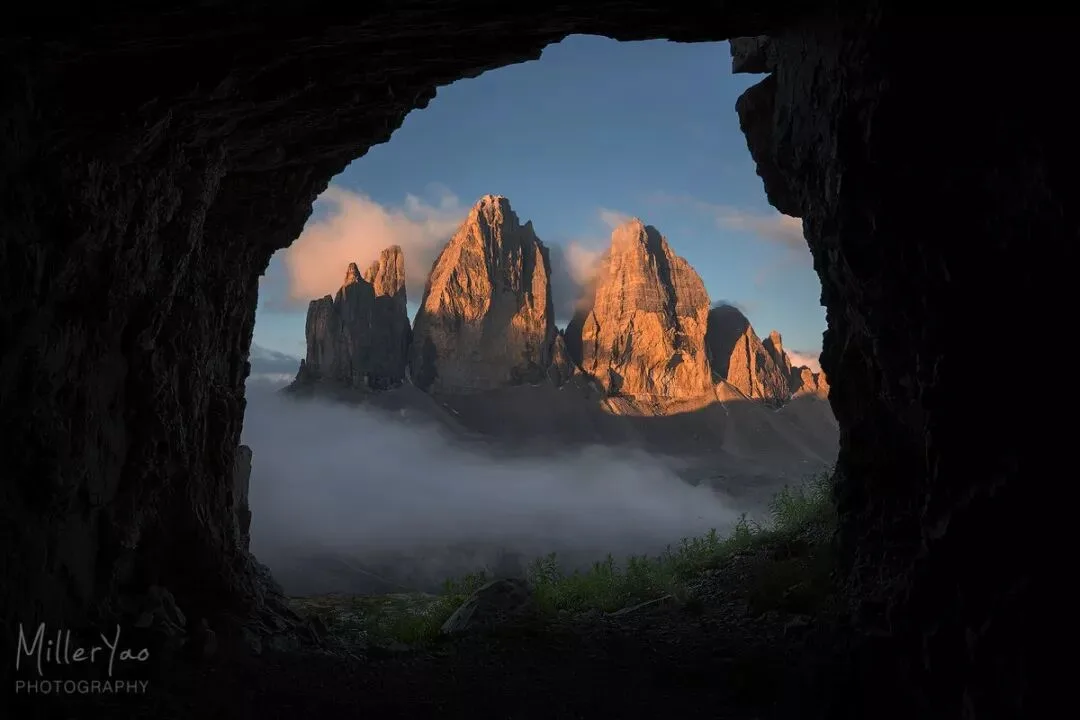
In this image, for example, we can tell the sunlight comes from the upper left by the relative positions of the lit and shaded faces of the peak.
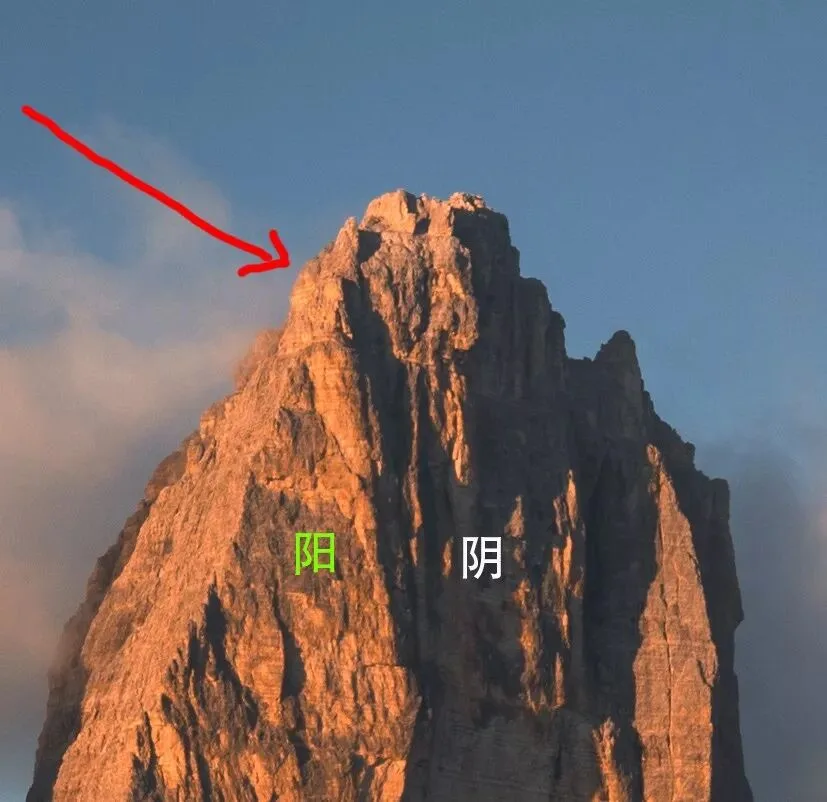
Only by correctly analyzing the light direction can a simulated light source look logical.
However, the Art of Moving the Sun doesn't apply to front-lit images: with the sun at an acute angle to the camera position, it can't appear in the frame,
Step 2: Remove the Sun
For images whose composition includes the sun or its traces, we must first remove them. Only by erasing every trace of the original sun's position can we relocate it without leaving flaws.
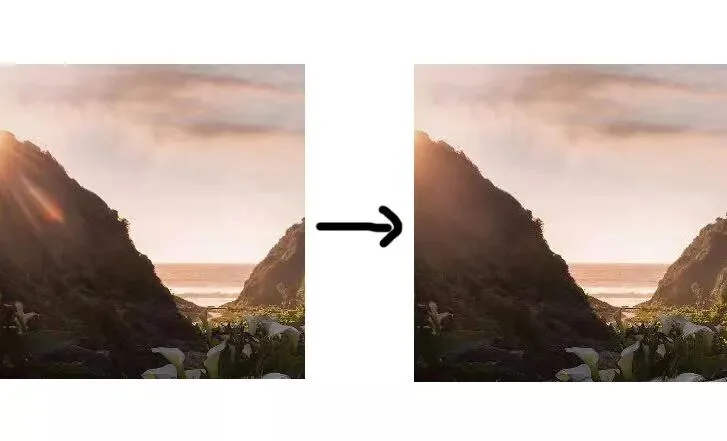
First, use Photoshop's Healing Brush and Clone Stamp to remove the glare.
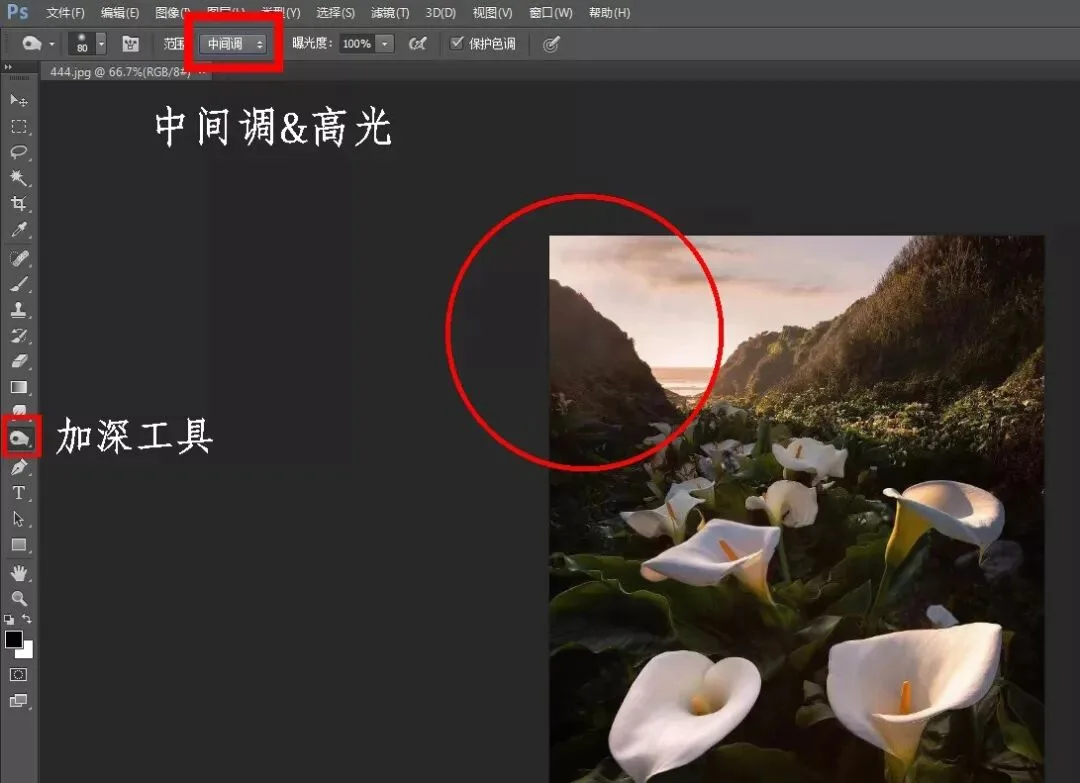
Then use the Burn tool, selecting midtones and highlights in turn, to darken the hillside and remove the brightness where the sun's light spilled over.
With the glare in the upper left removed, the image is visually much cleaner than the original. But we still need to move the sun to a new position to strengthen and shape the sense of light — and to give the eye a resting point in the distance.
Step 3: Relocate and Rebuild the Sun
To master this skill, you must first make sacrifices — and even then success isn't guaranteed; you must follow the Locate-the-Sun method to perform the relocation.
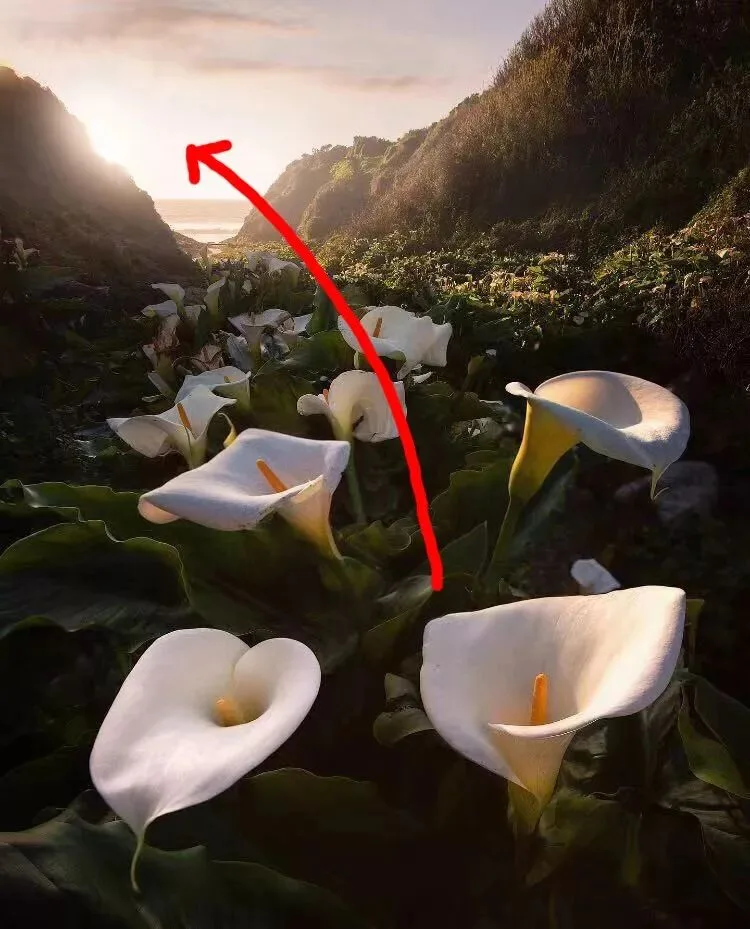
Next, following the shadow direction of the original image, we add a new sun within the plausible light-source zone.
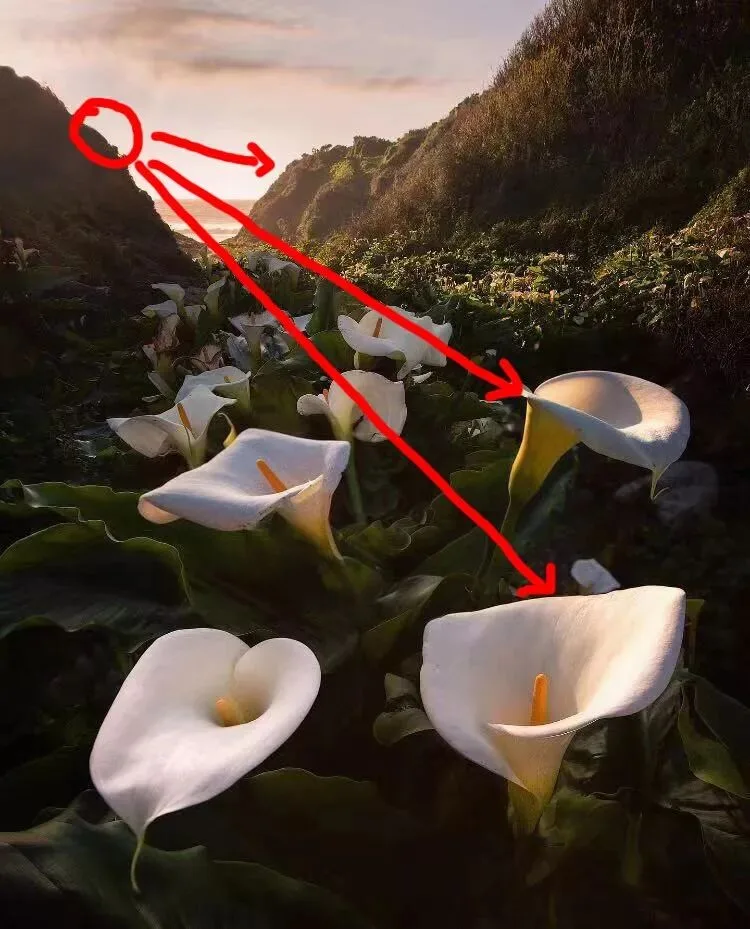
We can place the sun on the left valley wall, for two reasons:
It matches the direction of incoming light.
And it matches the overall visual flow of the image.
Now, the steps to build the sun:
1. Use the Clone Stamp to create the eroded notch where the light spills in.
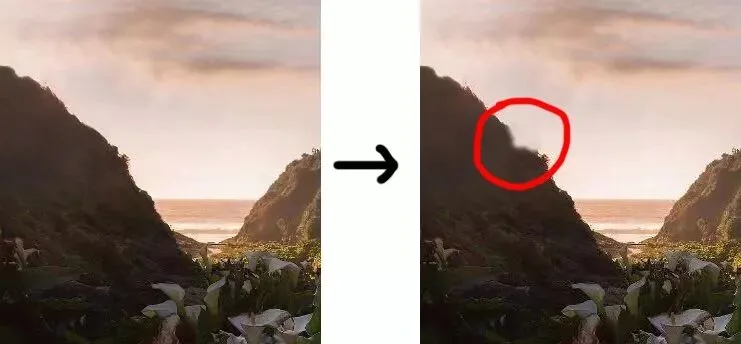
2. Use a Screen layer to build the light core.
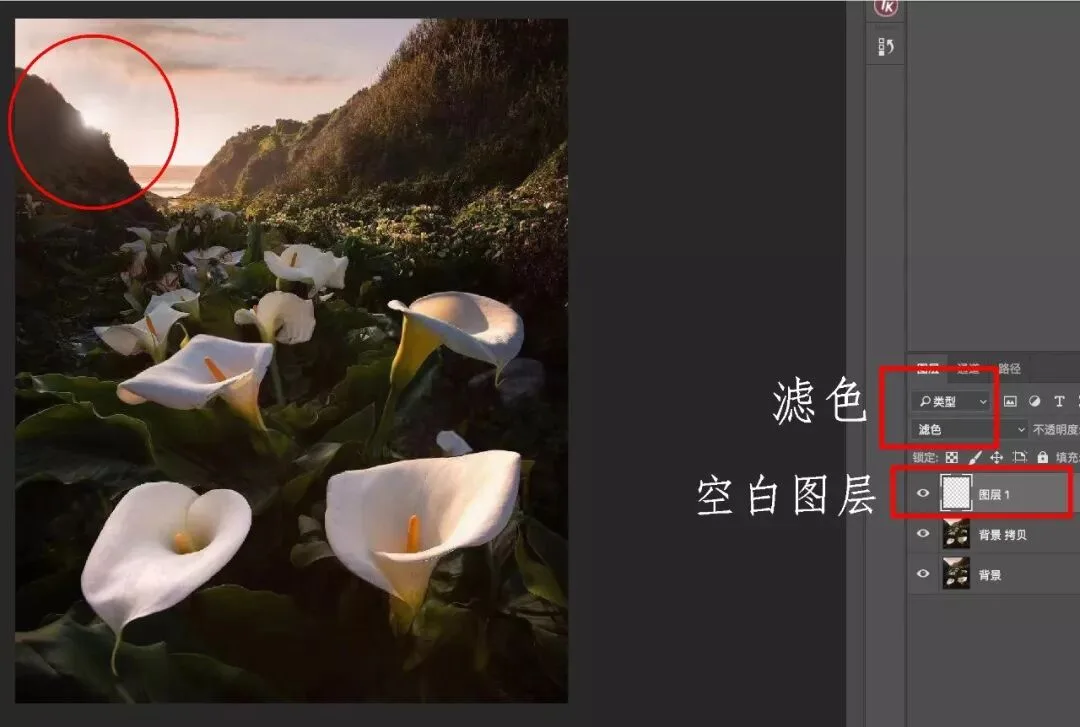
Create a new blank layer, set its blend mode to "Screen," take the Brush tool, hold Alt to sample the highlight color, set 10% opacity and maximum softness, and brush around the eroded notch to create the glowing light core.
3. Use a Soft Light layer for the outer glow.
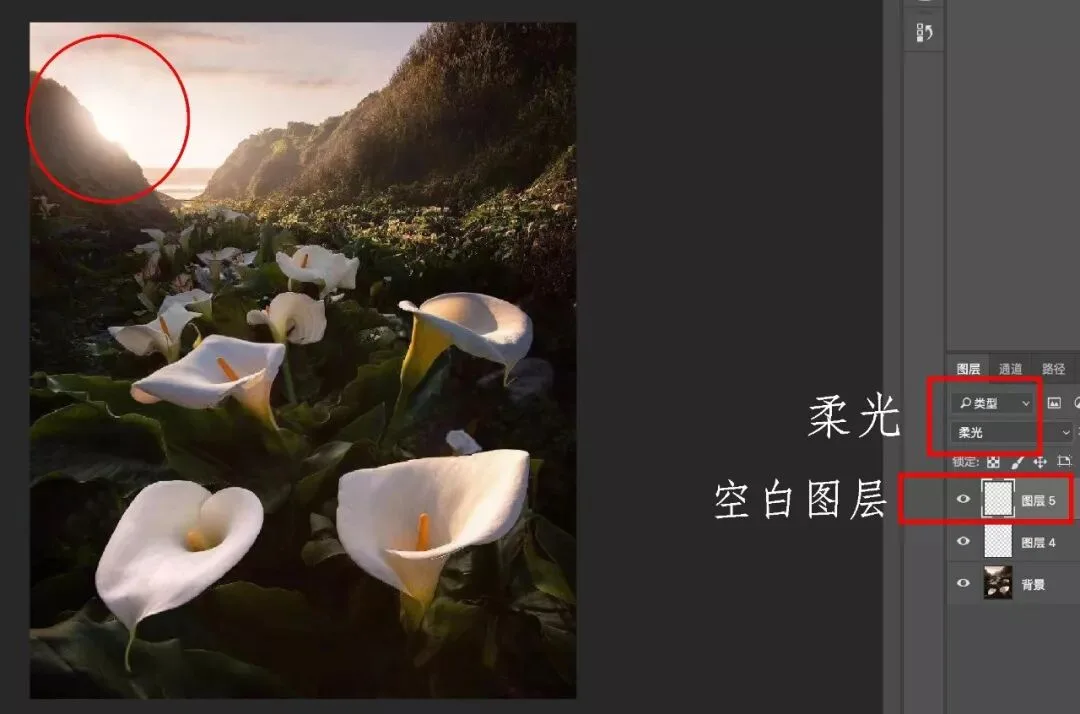
Create another blank layer, set the blend mode to "Soft Light," and use a slightly larger brush around the light core to build the outer glow. Meanwhile, you can use the Clone Stamp on the original layer to refine the notch until you get the shape you want.
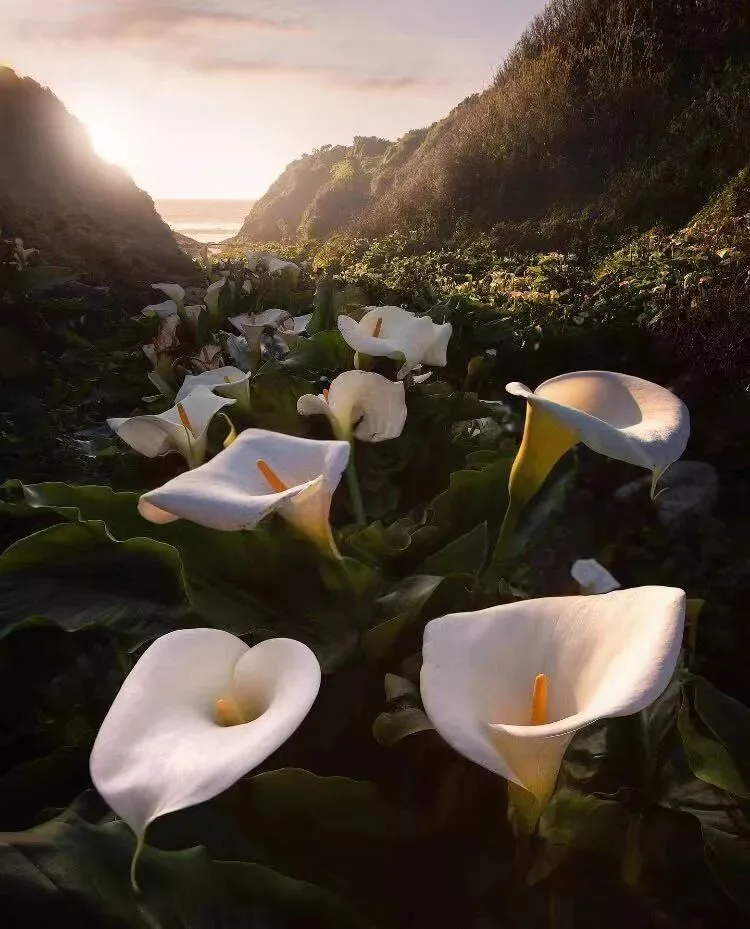
Here is the image after these few simple steps.
The distant light spill gives the eye a resting point in the background. The foreground flowers stretch all the way toward the far valley — the direction of the image's visual flow — which now better serves the compositional intent of its elements.
Below is an image I shot in the Dolomites, Italy (before color grading).
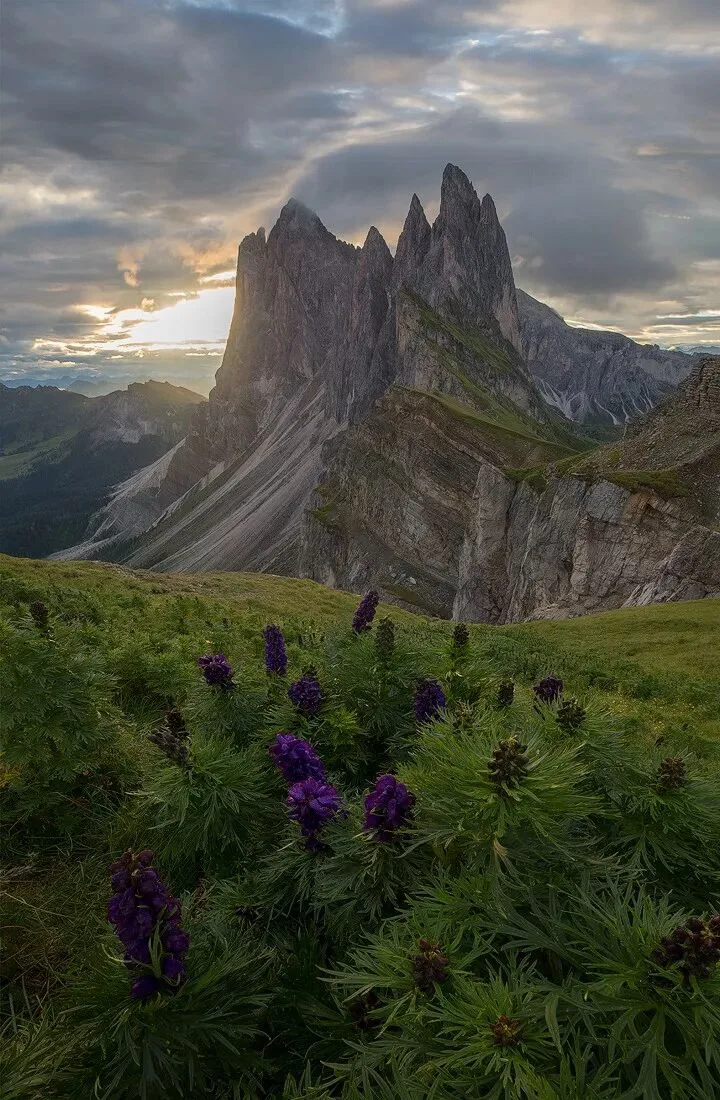
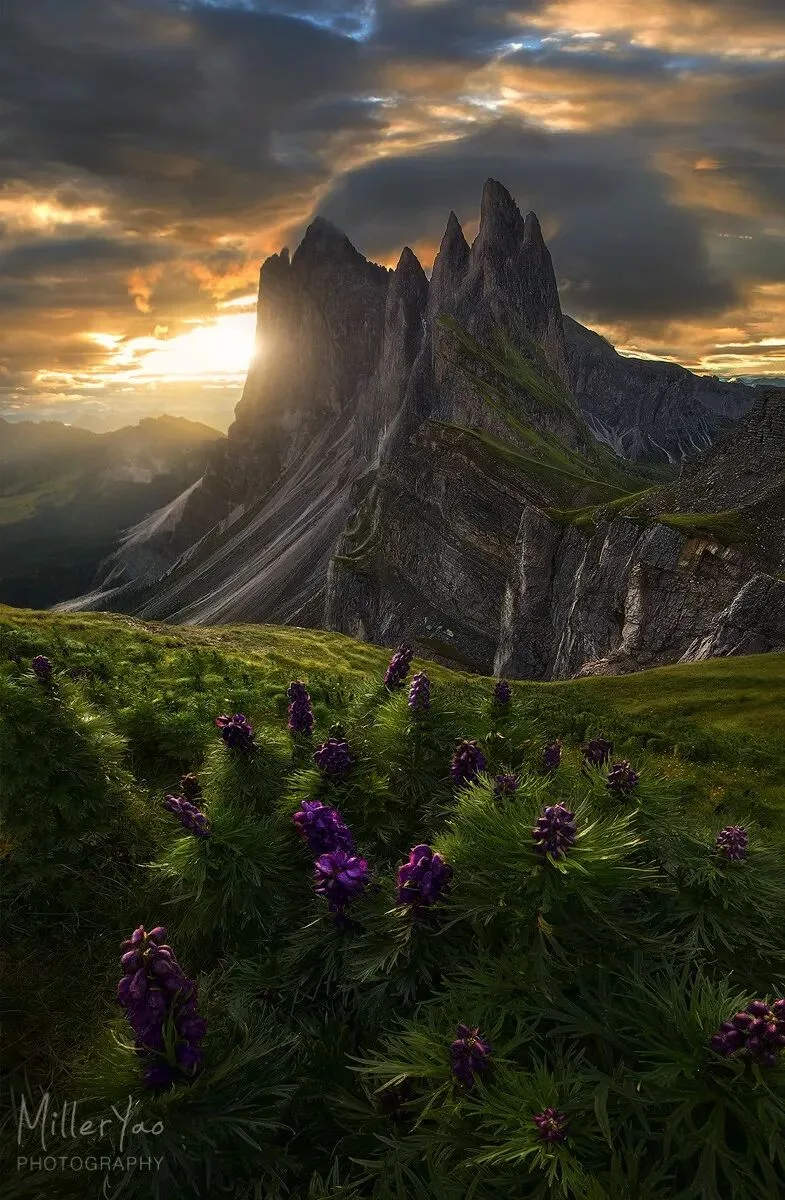
I was unlucky that day: thick clouds on the horizon hid the sun and blocked its light. So I used the Art of Moving the Sun to bring the sun out from behind the clouds, and after a series of light-shaping steps, it became the image below.
Friendly reminder: practitioners of this skill need a certain level of inner strength — you must already be proficient in painting light and basic light-crafting techniques, or you will go astray!
Weibo / Tuchong / 500px ID: miller姚明来
AdventureX
Push the Limits
Ultimate Imagery
Geek Sharing
http://www.theadventurex.com