Photography Tutorial · 2019-10-27
ISO 3200 with Such Good Quality? Shooting in Low Light with Time Blending
Thomas Chu Photo
Those who know my work know this photo well. Shot at ISO 3200 and two stops underexposed, it won first place in the city category of this year's National Geographic photography contest.
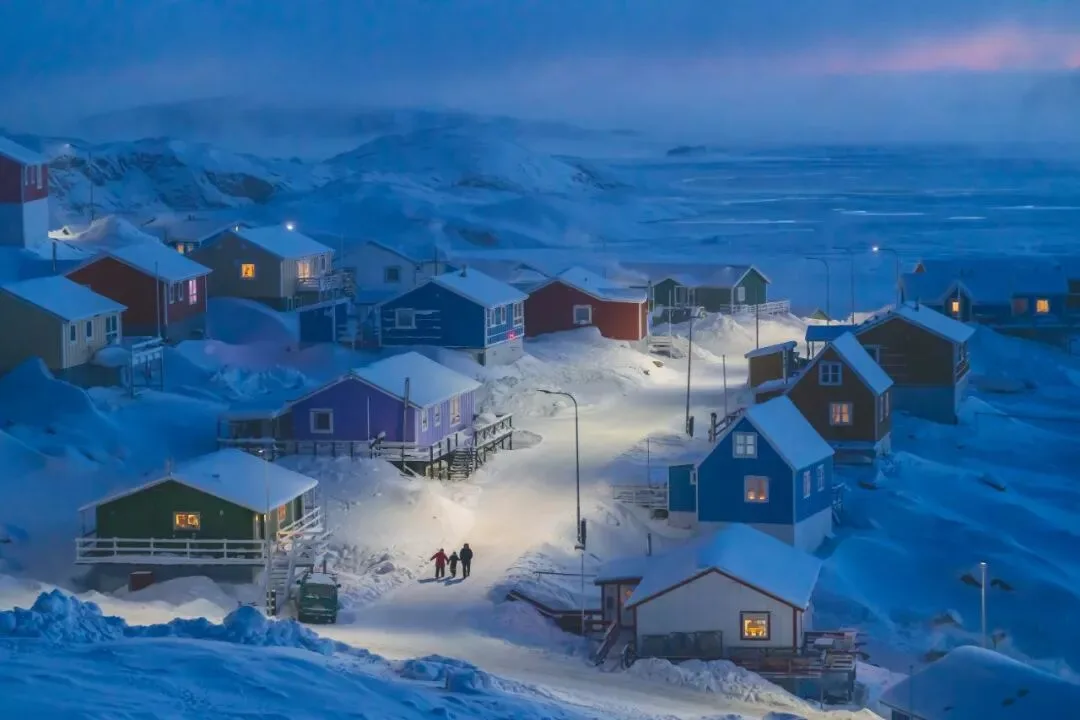
But because it was shot at high ISO, I had to denoise heavily in post — enlarged, the photo still loses a lot of texture and detail.
So for posting on Weibo and for printing, I produced another version.
This version time-blends a high-ISO candid capture of the person with a low-ISO long exposure of the background — yielding exquisite image quality.
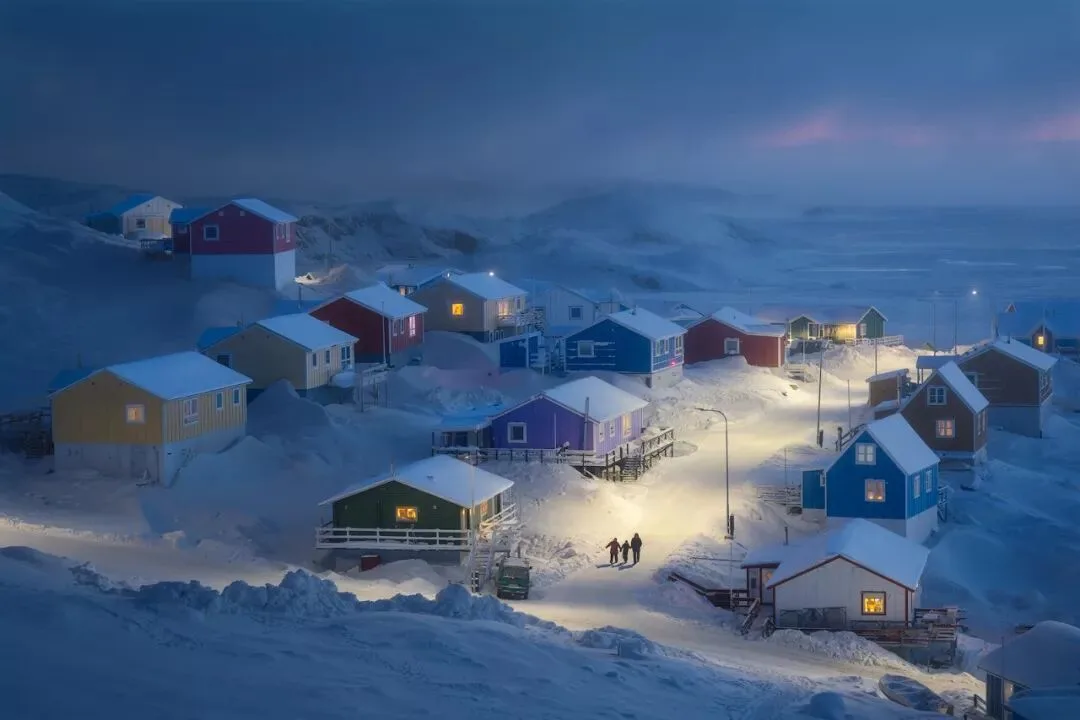
Time blending is a technique I often use for night-time humanistic photography. Today I'll demonstrate it with the photos below.
Video Tutorial
▶ Watch the video tutorial on Bilibili
This is the fully illustrated companion to the video above. Using an aurora street photo from Greenland, Thomas demonstrates the "time blend" technique for low-light photography — a high-ISO burst for the person, a low-ISO long exposure for the background, unified and merged in Camera Raw and Photoshop. Keyframe screenshots follow the video in order for easy reference.
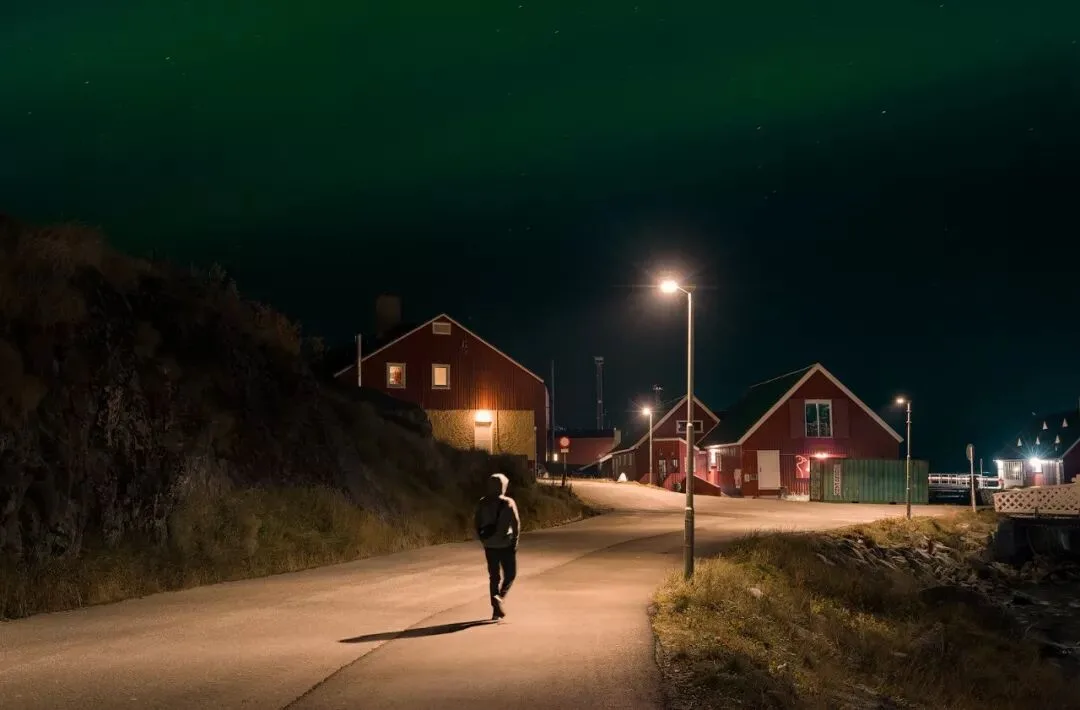
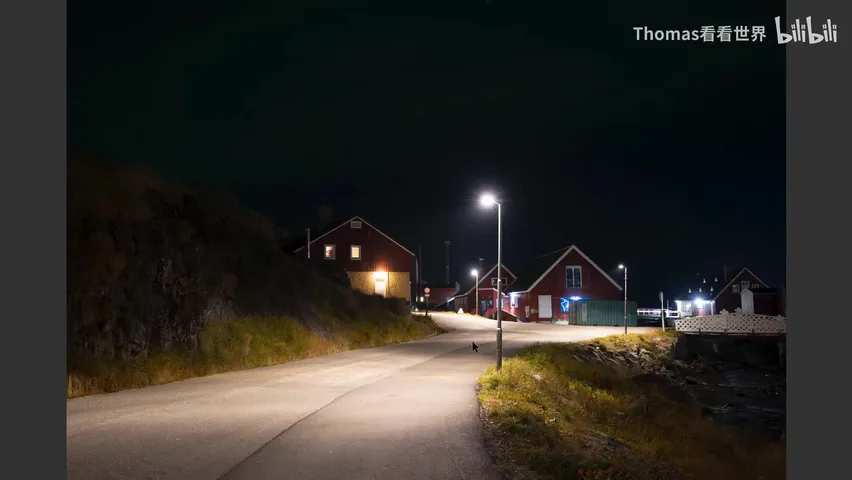
Start with the finished image: this is the final time blend — aurora, colorful cabins and a lone walker sharing one frame, the background clean and noise-free while the person keeps a sense of moment (at 2:01 in the video). How was it made? Read on.
01 Origins: Sunsets and City Lights Rarely Coincide
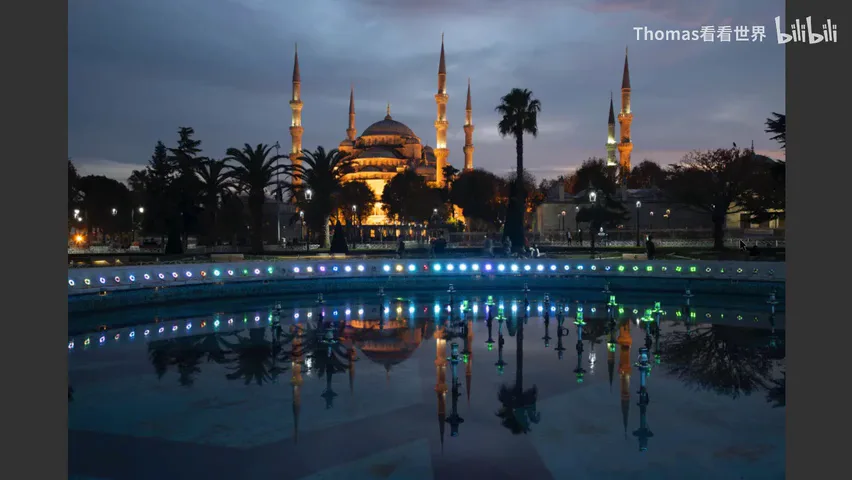
The time blend started in night photography (at 0:30 in the video): photos with both blazing sunsets and glittering city lights are mostly blended, because by the time most cities light up, the sunset is long gone. The prerequisite: the camera sits tripod-locked without any movement — even focal length and focus must not change — so frames taken at different times can be merged effortlessly with masks (at 0:51 in the video).
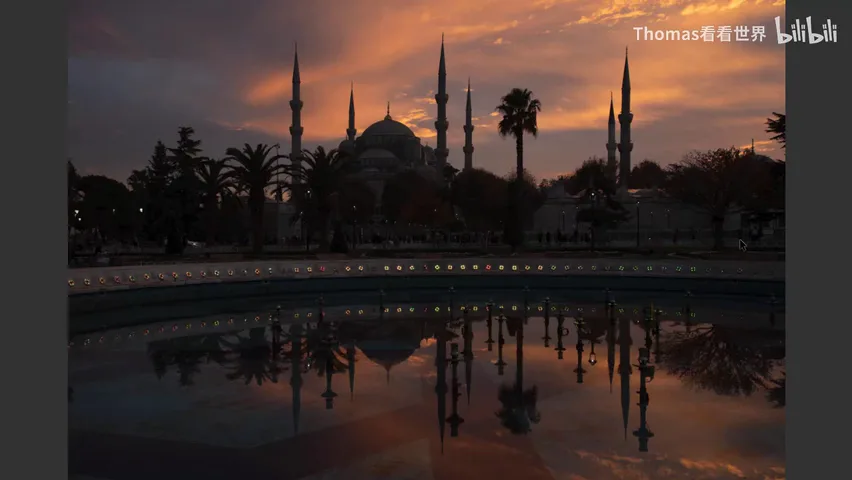
The Istanbul case in the video (at 1:20): set up the tripod, shoot one frame at sunset, hold still for 40 minutes until the blue hour turns the sky blue and the lights come on, shoot a second frame, then merge them with a mask into "a night scene with sunset" (at 1:50). That use, though, alters reality; this episode is about another purpose of the time blend — buying better image quality (at 2:03 in the video).
02 The Setup: High-ISO Snap Plus Low-ISO Long Exposure
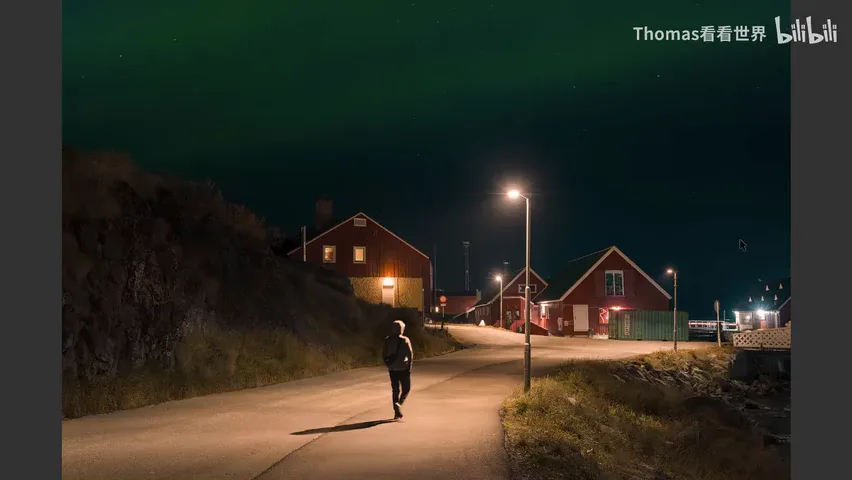
In Greenland, Thomas wanted an information-rich frame: the town's signature street with colorful houses, locals whose dress and daily life read clearly, plus Greenland's iconic aurora (at 2:07-2:31 in the video). He set ISO 3200, f/2.8, 1/20 s — Aperture mode underexposed by three stops — on a Sony A7M4 with a 16-35mm lens, and recorded passersby moving down the street (at 2:34-2:56 in the video).
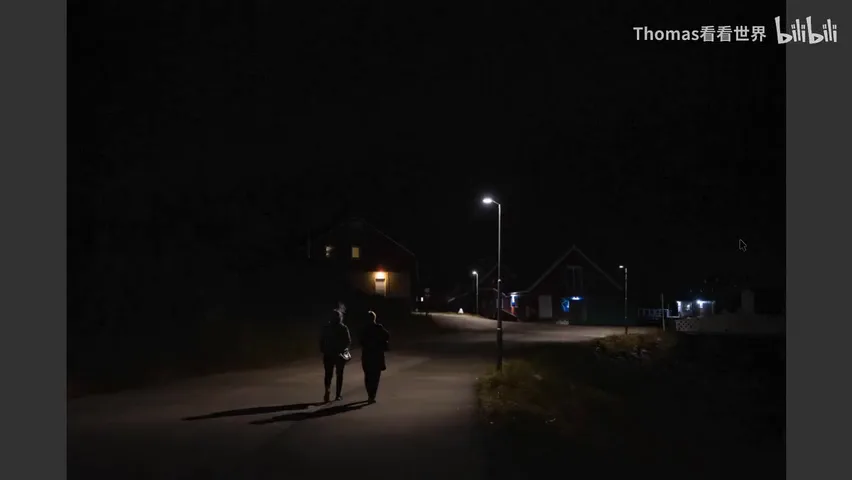
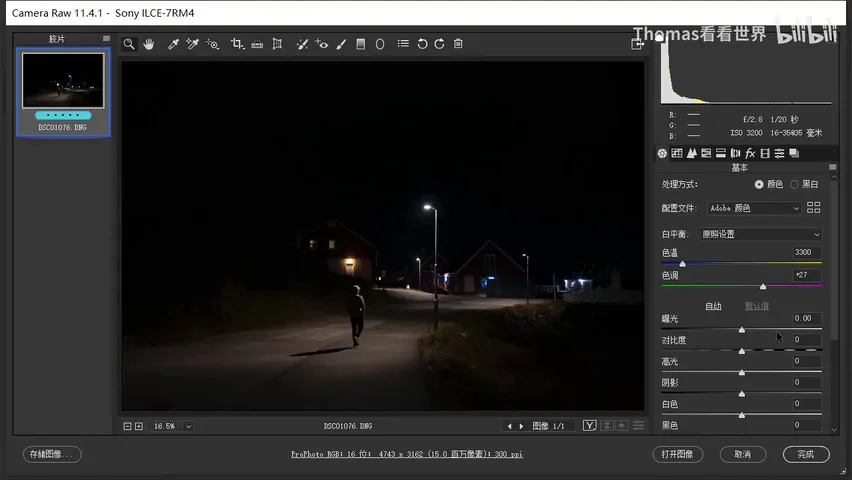
Here's the problem: relying on that one frame alone, recovering shadows and lifting three stops in Camera Raw makes the background unbearably noisy (at 2:59-3:32 in the video) — after all, the scene was underexposed hard just to keep the shutter at 1/20 s and the person from smearing.
The fix is the time blend: with the tripod untouched, he immediately changed to ISO 200, f/6.3, 1/30 s (at 3:41 in the video). ISO 200 delivers excellent quality, and f/6.3 keeps everything from the foreground grass to the buildings behind tack-sharp. That long exposure becomes the high-quality base plate, on top of the earlier high-ISO person frames (at 4:05). The chosen subject was the lone figure — a striking silhouette, and truer to Greenland's mood than a pair (at 4:17 in the video).
03 Camera Raw: Unifying Exposure and Color
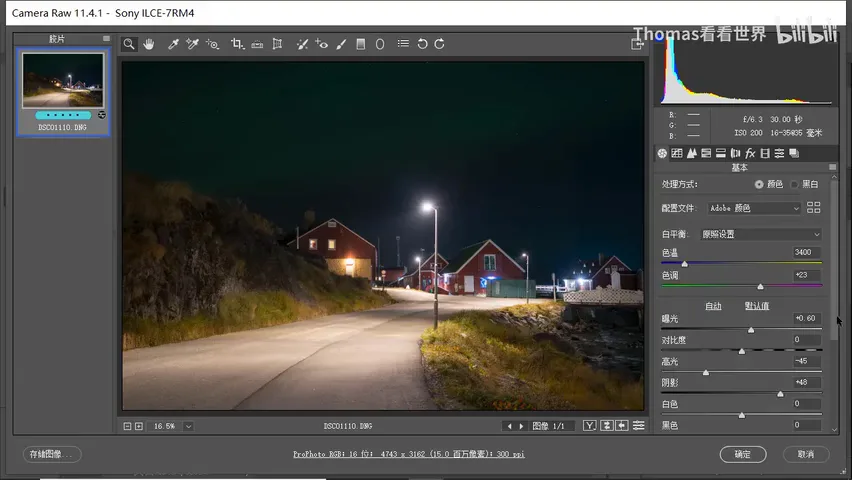
Step one of the blend: unify the basic color and exposure of the two frames (at 4:38 in the video). The base plate goes first: a touch more exposure, the lights pulled back slightly, shadows lifted so the aurora and detail stand out, highlights tamed — leaving a high-quality plate with clean detail everywhere (at 4:43-5:20 in the video).
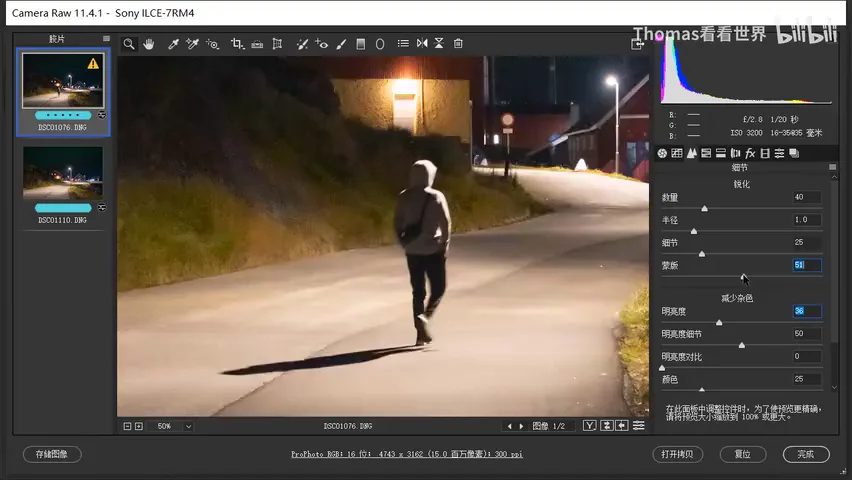
The person frame needs heavy work: roughly three stops more exposure plus shadow recovery — and lifting shadows on a high-ISO file unleashes horrifying noise, with highlights eased down as well (at 5:33-6:05 in the video). Though shot minutes apart, the two frames differ in white balance: one at 3423, the other set to 3400 with +23 tint; the cleaner frame leans purple, so the tint pushes on to 32 and the temperature toward 3500 until the person's area matches (at 6:07-6:50 in the video).
The person frame is too noisy, so noise reduction comes straight in: grain drops dramatically but detail goes with it — so hold Alt and mask out the figure's edges, easing the reduction there to win back a bit of sharpness (at 7:27-7:47 in the video). Thomas also deliberately picked a person with slight motion blur — it suggests movement without dissolving the figure the way a longer exposure would (at 7:00-7:23 in the video).
04 Smart Objects and Mask Blending
A small trick when opening: hover over "Open Image", hold Shift, and it becomes "Open Object" — the photo enters Photoshop as a Smart Object (at 7:53-8:09 in the video). Double-click a Smart Object and you are back in Camera Raw with every adjustment intact — non-destructive and easy to revisit. Then copy the layer across into the other document so both frames live in one PS file (at 8:28-8:36 in the video).
Blending: add a mask to the top layer, pick a black brush at 100% opacity, and paint the figure in completely (at 8:46-9:04 in the video). Because the two exposures were matched beforehand, the paint-over is virtually invisible; where you overshoot, shrink the brush (left and right bracket keys resize it), switch to white and paint the surroundings back to the high-quality layer, softening any heavy shadow; Alt-click reviews the mask at any time (at 9:16-9:59 in the video).
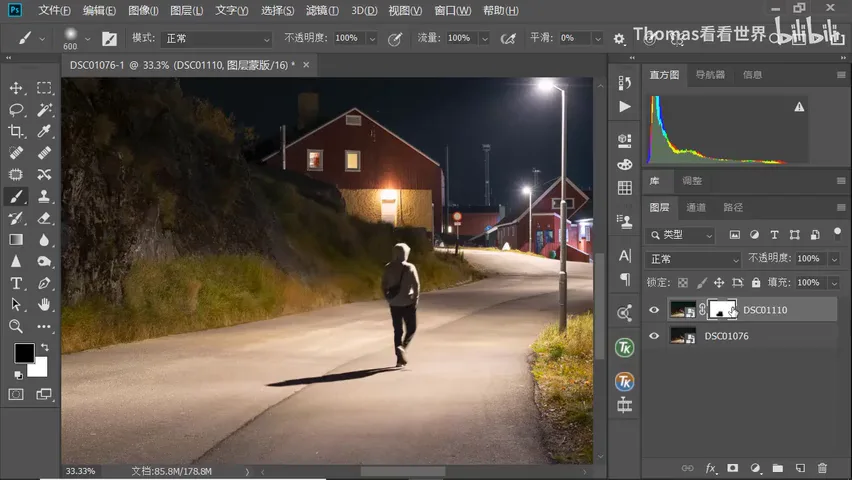
If the white balance still bothers you after blending, this is where Smart Objects shine: double-click the person layer to reopen Camera Raw, nudge the balance further toward purple, add a touch of warmth and contrast, and Photoshop updates automatically (at 10:16-10:55 in the video) — the two frames converge even further, with virtually no visible seam (at 10:06).
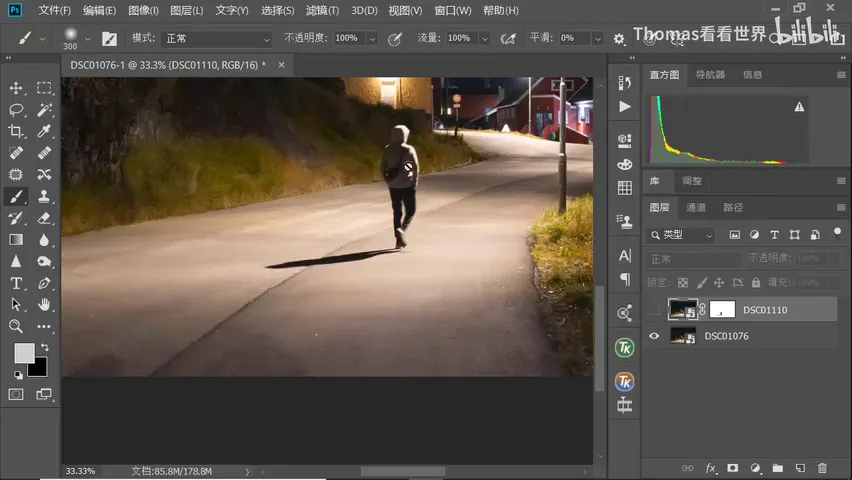
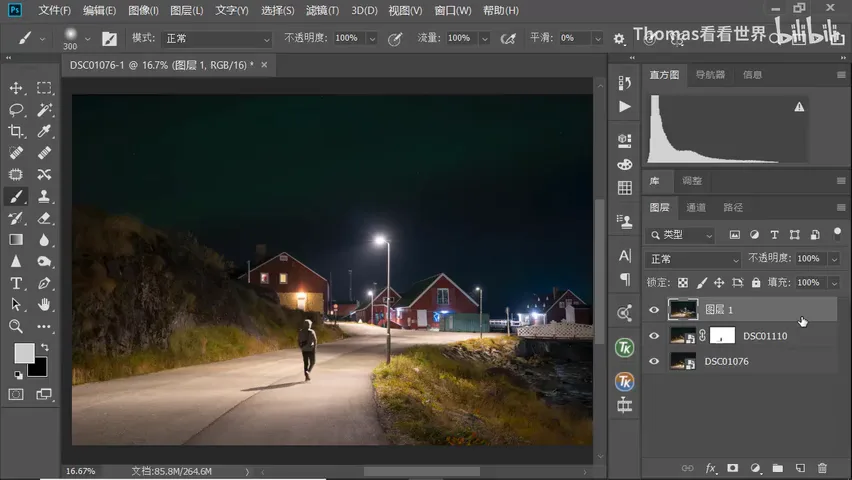
Finally, Ctrl+Alt+Shift+E stamps both frames into one layer (at 10:57 in the video). In the finished photo the long-exposed background carries almost no noise, while the person keeps a little grain that reads as motion — an instant human figure over the aurora and clean backdrop only a long exposure can give: the time blend buying high quality in low-light street work (at 11:01-11:24 in the video).
1. The time blend demands a locked tripod, focal length and focus, so frames from different moments merge seamlessly with masks; 2. In low light, split the job — high ISO with fast shutter for the person, low ISO long exposure for a clean background; 3. Unify exposure and white balance in Camera Raw first, or the blend will show; 4. Open as Smart Objects for endless revisions, paint each part with mask brushes, and finish with a stamped layer.