Photography Tutorial · 2017-02-09
How to Shoot Distinctive Portraits While Traveling
The author of this article is Terry F, a superb portrait photographer. He always skillfully combines natural scenery with portraiture, giving his work strong emotion and style.
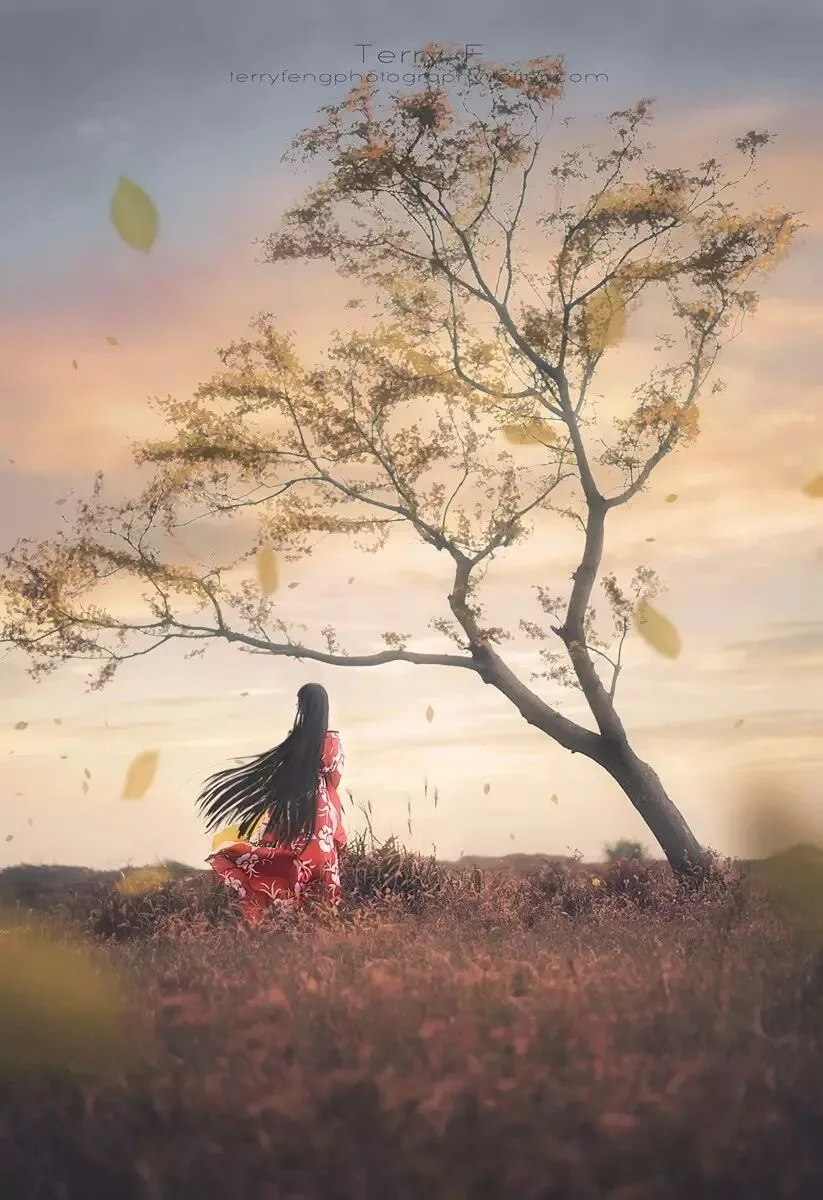
When you pack your bags and set out on a journey with family or friends, you certainly won't forget to capture unforgettable memories with your camera.
For a photographer, perhaps the greater meaning of every trip lies in shooting subjects and content you can't shoot at home.
"Being different" must be one of your core pursuits in photography. Tired of the endless identical V-sign tourist photos on social platforms and the assembly-line studio poses, have you ever thought about finding yourself in your shooting style?
This tutorial series explains the complete workflow of landscape portraiture, from preparation and time planning to shooting ideas and post-processing. Because of its length, the post-processing of landscape portraits will be published separately as its own tutorial later.
1
Shooting Principles
There are so many subjects you can shoot for landscape portraits while traveling. Unlike planned portrait sessions in familiar places, the first thing a photographer should consider during preparation is: what shooting conditions do I have?
If you have an expressive travel companion, emotional subjects are a fine first choice across different environments. If you have a pile of high-quality gear and rich landscape photography experience, making the person the finishing touch of a vista can also add fun and brilliance to your landscape work.
But don't forget: the greatest strength of landscape portraiture is combining the more complex techniques of landscape photography with portraiture's focus on emotion and storytelling, moving the viewer both visually and in content. Of course, achieving this requires some post-processing skill.
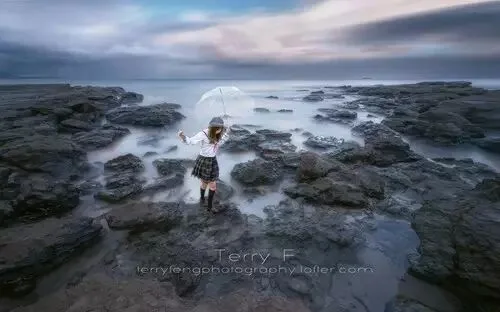
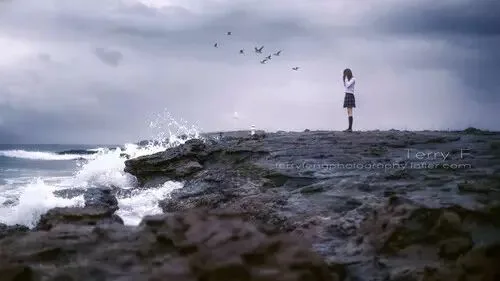
But judging by this image alone, the result is not entirely satisfactory. The main problem: the magnificent scene diminishes the person's presence, and the background's tones don't contrast enough with the person — in short, the person and the environment aren't well integrated. From this we can derive the shooting principle of landscape portraiture:
The shooting principle of landscape portraiture is still portrait-first: the person is the key that leads the image's emotion and story.
Besides multi-frame stacking, the techniques available to landscape portraiture basically include:
Long exposure
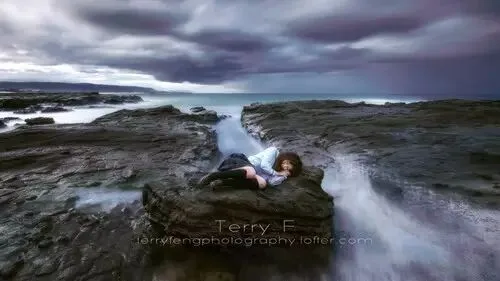
Medium-telephoto depth-of-field control
Of course, all of the above can be combined with HDR shooting and post-processing.
These techniques are actually closer to landscape photography, but as stated above, the subject is still the portrait. So landscape portraiture is not something between landscape and portrait — it's a creative approach that fuses the strengths of both.
2
Shooting Locations
Most of the time, when you decide to travel, the destination is somewhere you've never been. In that case you need to do thorough homework to avoid scrambling upon arrival. This section explains how to choose locations for landscape portraits before departure.
If you ask people what to shoot for portraits in New York, many won't want to miss the Statue of Liberty. But a landmark brings a big problem for portrait photography: it easily steals the show, and what you shoot becomes a mere "I was here" snapshot. Similarly, when traveling in Sydney, you can pose with the Opera House, but it's hard to produce a qualified landscape portrait in front of it on your first try.
Remember: landscape portraiture is still portraiture. No matter how beautiful the scenery, it is only the backdrop.
Example (an environment unsuitable for portraits)
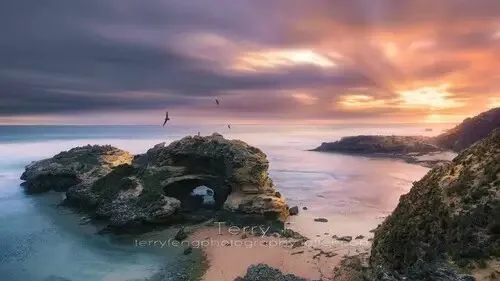
A good location should ideally have the following characteristics:
a) Regional character without being a famous attraction
b) A consistent environmental style that lacks a dominant subject
c) Relatively few tourists
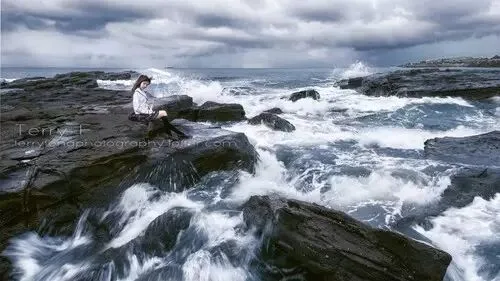
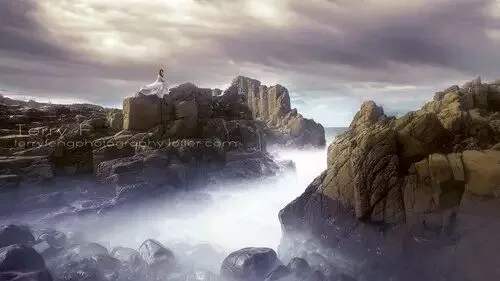
The image below was shot at Bombo, the remains of a coastal quarry — very distinctive, and a uniquely gifted landscape location on its own. Yet once a person is placed in it, their presence is clearly eclipsed by the scenery. After this image was published, much feedback said the person should be removed and it should stand as a pure landscape. (And since the editing wasn't done to landscape standards, it's not a qualified landscape either.)
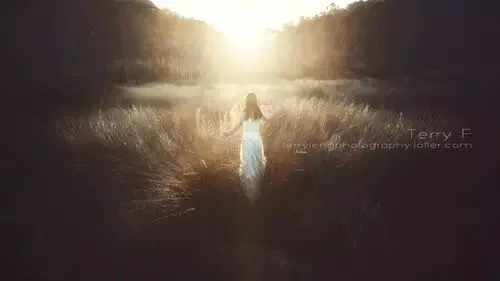
The image below was also shot at Bombo: on the other side of the quarry is a large meadow — an unexpected gain before leaving. This meadow is certainly no attraction, but when the last ray of sunlight squeezed through a gap in the hills and spilled onto a small patch of grass, it harmoniously highlighted the person's presence. Add refinements in detail and gesture, find and express the intended theme, and you have a fairly qualified landscape portrait.
3
Gear Preparation
First you need a camera. The specific body doesn't matter much — an entry-level DSLR costing a few thousand yuan works, so does medium format. The image-quality requirement for landscape portraiture sits between landscape and portrait work; its main purpose is conveying ideas, not reaching some extreme of image quality.
And since landscape portraits can be composited from multiple frames, the weak single-frame quality of entry-level bodies matters much less. So as long as it's not a cheap compact, most interchangeable-lens cameras are up to the job.
For lenses, it's best to cover wide angle to medium telephoto. My choices are a 16-35mm and a 50mm, plus a 135mm if there's spare room. After using them for a while, though, I feel a 24-70mm might be lighter and more convenient.
The ultra-wide end isn't used very often — too wide demands an extremely harmonious and unified environment, or the scene becomes too complex and the person loses prominence. Long telephotos are also rarely used, but for forest subjects or scenes needing layered depth, a fast telephoto can bring unexpected results.
(A mystical meme-worthy lens photo — may you shoot soul-stirring masterpieces. Image from the internet.)

With an entry-level body, consider lenses like a 10-20mm and an 18-105mm — very cheap, and the results are not bad at all.
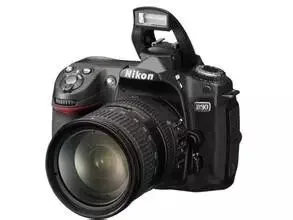
(A mystical photo of the D90, the 500-year legendary camera — may you crush the big black long lenses. Image from the internet.)
If you plan long exposures, don't forget a set of high-quality ND filters. Cheap NDs create color casts that cause trouble when compositing in post (compositing techniques will be covered in Part 4 next issue). If you don't want to invest much in NDs, domestic brands will do — just be extra careful when compositing later.
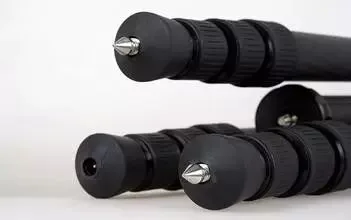
A tripod is essential — within what you can carry, choose the heaviest one with spiked feet. During shoots you often have to place the tripod in all kinds of hostile environments: steep slopes, ocean surf, streams, strong winds. (The sea salt scraped off my tripod could season several dishes.)
(Image from the internet)
Then be sure to bring absorbent lens paper and a blower, so you can clean the lens promptly in harsh environments. I once had an entire set of images — planned for weeks at great cost — ruined by a speck of water mist on the lens that was barely visible to the naked eye.
One last note: if the shoot involves a long trek, the less gear the better, the lighter the better. Fatigue affects both the quality of your photos and your enjoyment of the trip.
4
Time Planning
For a pure portrait session, with good preparation, shooting usually wraps within two hours. For pure landscapes, capturing the moment of sunrise or sunset doesn't take long either, and you don't need to change positions frequently.
Landscape portraiture, however, is often a tug of war. To ensure a decent number of keepers, the photographer must change positions frequently. Each move means setting up the tripod again, reframing, focusing, attaching filters, long exposures, communicating with the model, directing poses — all time-consuming. So leave yourself plenty of margin in scheduling.
From my personal experience, if you want a final set of about 14 images, at least 6 of them using long-exposure compositing, you'd better reserve four hours of shooting time.
Fortunately, landscape portraiture isn't too demanding about ambient light — you don't have to chase the sunrise/sunset window. Times suitable for portraits generally suit landscape portraits too. Shooting in the high-contrast light of sunrise or sunset adds exposure difficulty, and including the eye-catching sun makes composition harder too. Of course, if you're working with a team and an assistant to hold lights and reflectors, that's another story.
So, shooting with natural light, arriving at the location four hours before sunset is ideal. If you're shooting somewhere you've never been, also consider whether the first half hour or hour will become warm-up time that yields nothing ideal.
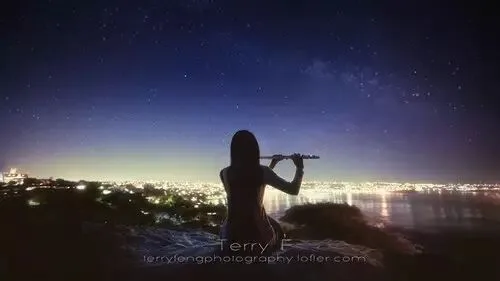
I don't advocate chasing sunrises for landscape portraits. Shooting sunrise means departing at three or four in the morning even with convenient transport. The pressure affects not only the photographer but the model even more, since they need an extra half hour to an hour for makeup and wardrobe. When you both drag your exhausted, dark-circled selves to the location, the success rate of the shoot naturally plummets.
5
Shooting Strategy
After trying many genres, I feel landscape portraiture counts among the more troublesome ones. The biggest challenge is not stacking, long exposures, or compositing — it's whether your composition at the moment you press the shutter is right, and whether it fully anticipates the post-processing plan.
So let's start with composition and analyze what to watch for when shooting.
a) Center composition is great, and so is the golden ratio. When viewers look at an image, the area they can never miss is the center. Placing the person at the center is the safest way to make them stand out.
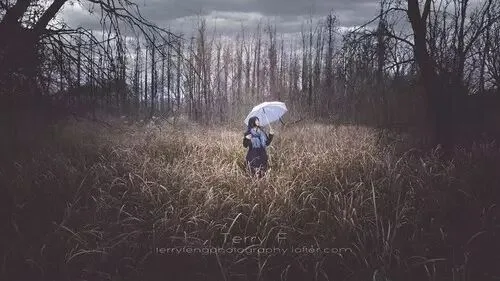
b) The guidance of lines matters too. Never force the person into the middle — abusing center composition easily produces that "I was here" look.
In most cases when I use center composition, it's because I can find radiating lines in the environment — lines that guide the eye to the center or to a specific spot, drawing the whole frame's story inward. That way the information conveyed by the image isn't too complex. Simple yet impactful — an important visual quality of a qualified photo.
In the image below, the direction of the person, their gaze, and the direction of the branches are not in harmony — greatly weakening the image's visual effect and damaging its content.
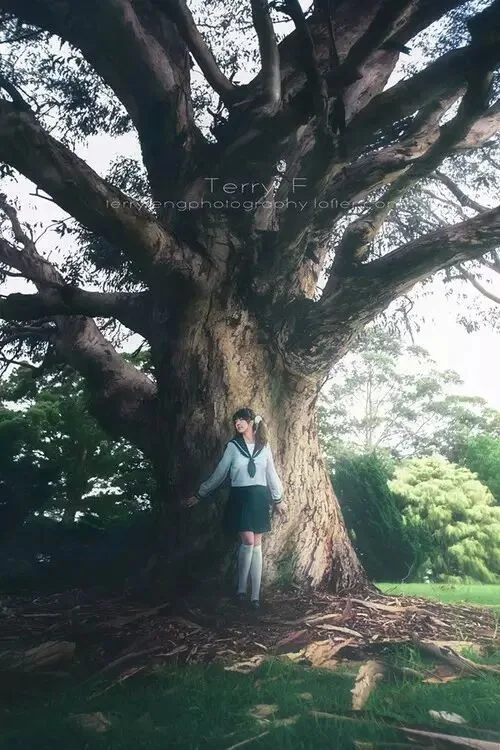
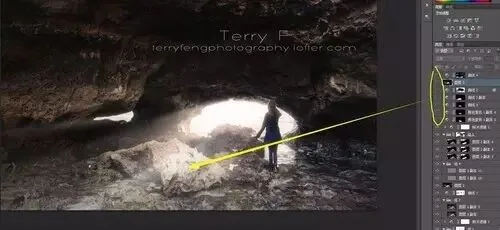
c) Whether you use center composition or a golden-section point, the relationship between person and environment must be harmonious. If the scenery is too bright and eye-catching, it inevitably suppresses the person's presence, making them dispensable — or even counterproductive.
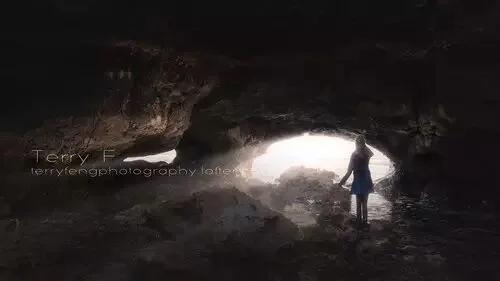
In the image below, the nearby rock is lit up. Sitting relatively central and being the brightest, most detailed part of the frame, it replaced the person as the protagonist. So in post, I forcibly darkened the rock.
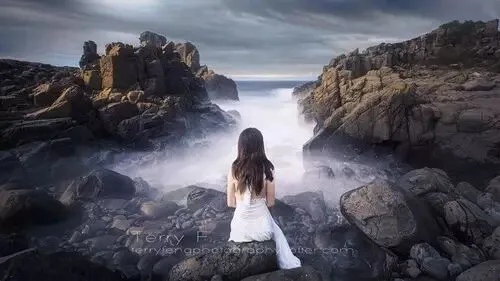
d) Watch the background behind the person. Same principle as environmental portraiture: in landscape portraits the person occupies a small share of the frame, so if the background doesn't set off the person, their presence drops. The general rule: bright background, dark person; bright person, dark background. If sunlight lights both person and background brightly, the person merges into the background. Or if the person is on the lit side and you forcibly lift them too much in post, the contrast between person and environment suffers all the same.
For the image below, I anticipated during shooting that the water surface would turn white in post, so I placed the hair at water level and the body in front of the darker rocks — strengthening the contrast.
e) Eye contact. A photo, whether telling a story or expressing emotion, needs ways to deliver that information to the viewer. The simplest and most effective of these is having the model look into the lens.
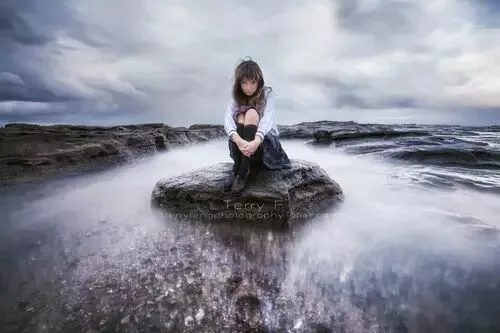
In environmental portraits the person's presence is low, and a gaze is a fine way to attract attention. Take the image below: after it was published, someone suggested it would be better if the model looked at the water or closed her eyes. In fact, I kept several sets of frames with different poses when shooting this photo. But after careful comparison, I still chose the one where her eyes meet the viewer.
The reason: the loneliness of the whole frame — from the sky, the misty water, the reefs, the huddled figure — finally converges in her eyes and passes directly to the viewer. If her gaze pointed elsewhere, the center of the entire mood would be led away, and every element in the frame would become an independent sight. The image would be a failure.
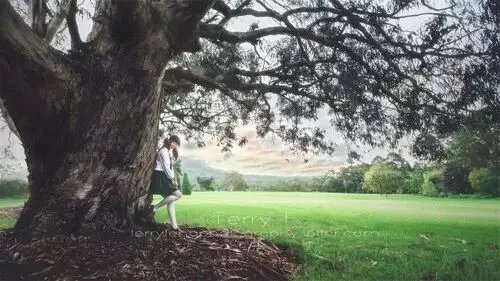
But not every image suits looking into the lens. The one below is a classic case: the trees' direction runs left to right, and the negative space is on the right. When the gaze meets the lens, it breaks that overall direction, making the person or the scenery seem superfluous.
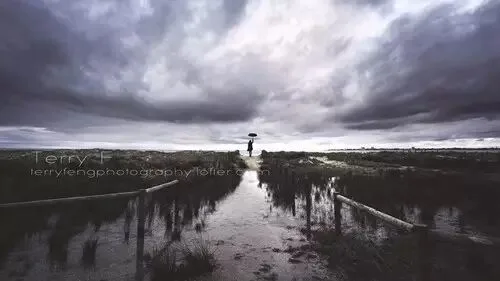
For another example: often, showing the model only from behind works better than having a gaze. Without a gaze to guide the story, expression is driven entirely by the image's lines or the person's posture — and when shot well, that also yields great results.
f) Using long exposures. Some people think a long exposure adds sparkle to the whole frame. In fact, its main purpose is subtraction. Waves or flowing water frozen by a fast shutter are visually complex — if too pretty, they steal the show; if ugly, they backfire. A long exposure turns water into lines or planes, reducing its interference with the subject. Once water becomes lines, it expresses emotion even more easily.
Generally, the longer the exposure, the mistier the water and the more area the mist occupies — but the mist lacks texture. For a long exposure with some texture, around 30 seconds usually does. For waves with lines, judge by the waves' distance — anything above 1/20s works. For the camera, nearby waves move faster and with larger amplitude than distant ones, so exposures can be relatively shorter; distant waves need longer exposures.
Exposure for the image below: 12 seconds
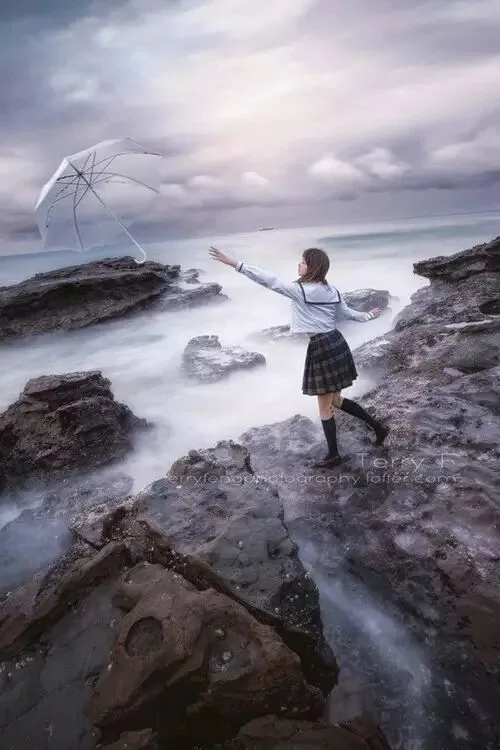
Exposure for the image below: 93 seconds
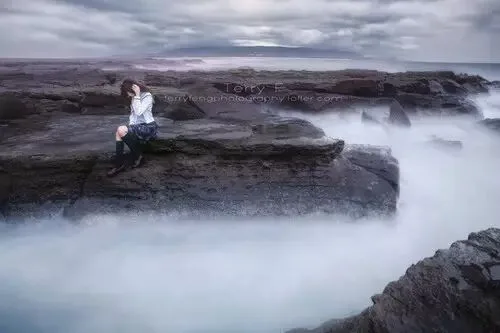
People have asked whether long exposures need compositing. The answer here: absolutely. In certain specific cases — the model sitting or lying down, no wind — a single exposure within 5 seconds may work, but even then, to rigorously render shadows and highlights you still need two more frames for an HDR composite. So before shooting long exposures, it's best to learn the related post techniques, which this tutorial's Photoshop section will explain in detail.
Summary
When shooting landscape portraits on a trip, don't treat it as mere tourist snapshots, but don't place too much hope in it either. Weather, the journey, and people are all highly variable. For rigorous landscape portraiture, you need repeated attempts at the same place to get the best result.
Suggestions: first, prepare thoroughly. Second, when shooting, focus on composition and the relationship between person and environment, while also having a rough plan for the post-processing approach — that way the trip stays as relaxed as possible and the photos come out beautiful.
The handsome author
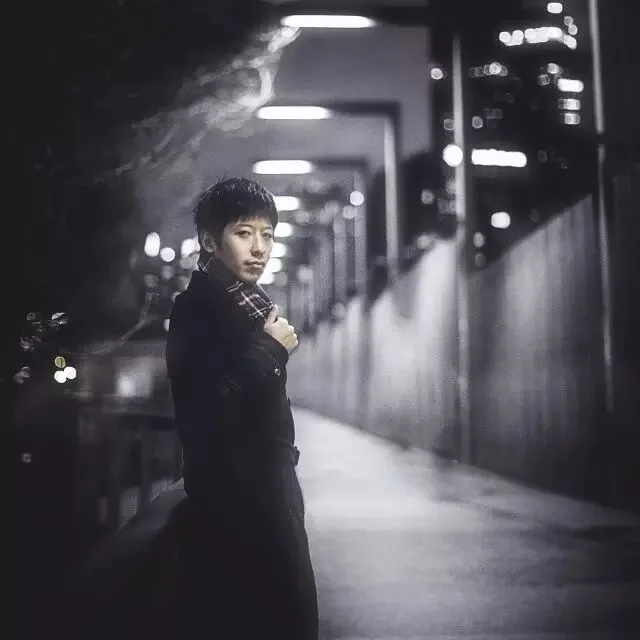
▲ Feng Tao (Terry F)
Getty Images contributing photographer
Huagai Creative contributing photographer
Lofter master
Weibo: @Terry-F
Lofter: terryfengphotography.lofter.com
Thanks to Terry for this brilliant article. The post-processing part of this tutorial will be shared with everyone next week.
Follow @Thomas Chu Photo, and learn one photography skill every week.