Photography Tutorial · 2023-01-15
The Simplest Yet Most Effective Post Move: Vignetting — A Detailed Tutorial
Adding a vignette must be one of photographers' favorite post-processing techniques — simple to apply, with an immediate effect.
But which photos suit a vignette, and which don't? And what does a vignette actually do?
I will analyze all of this in detail in today's tutorial, and share the three best tools for adding vignettes in post.
Video
▶ Watch the video tutorial on Bilibili
This is the fully illustrated companion to the video above. Vignetting is the simplest, most effective and most easily botched move in photo editing. Using ten of his own photos, Thomas explains the three functions of a vignette, which photos suit it and which it ruins, plus three handy tools and their settings — with keyframe screenshots throughout.
Start with the summary card. The slide at 0:22 in the video splits the episode into three parts: what a vignette does, which photos take one well and which do not, and three handy vignetting tools — each unpacked below.

01 What a Vignette Does
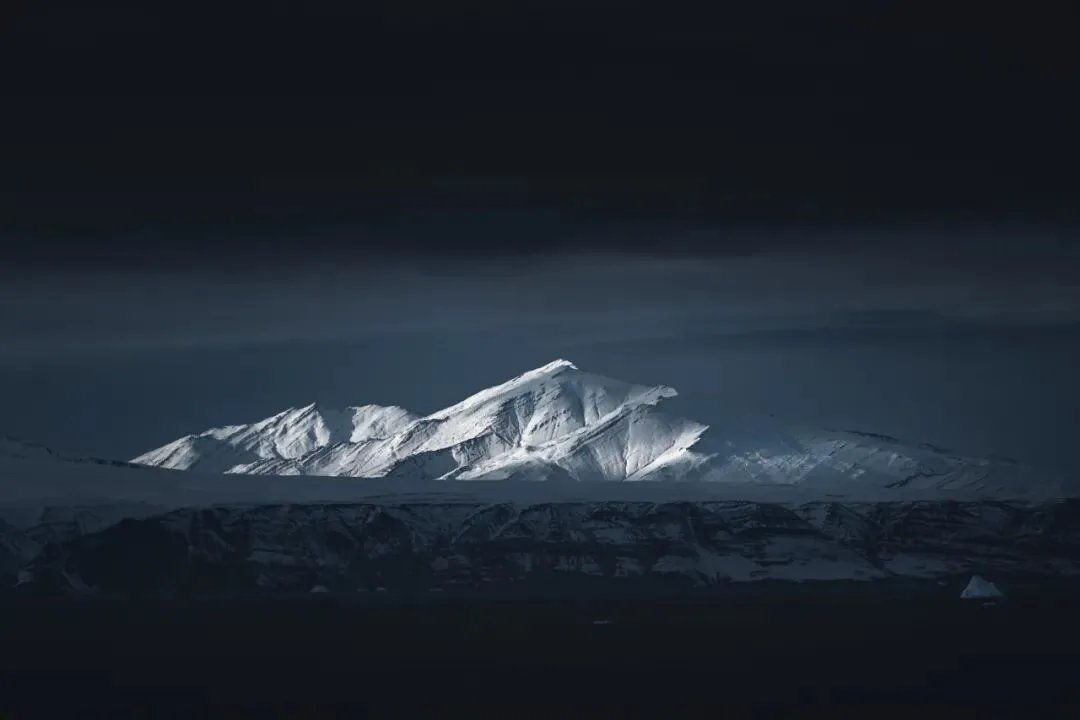
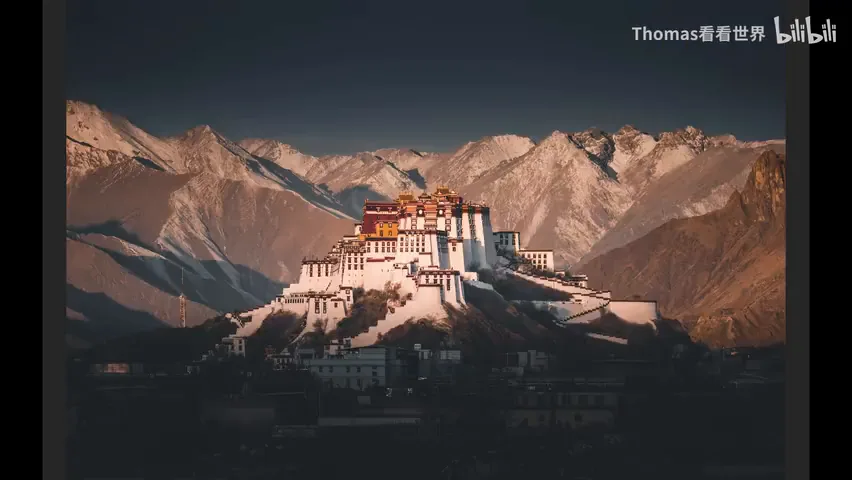
Function one: visual guidance (at 1:04 in the video). A vignette's chief job is pulling the eye toward the center of the frame — a snow mountain or the Potala Palace, when the subject sits at the center or the central third, darker edges and a brighter middle push the eye straight onto those points of interest.
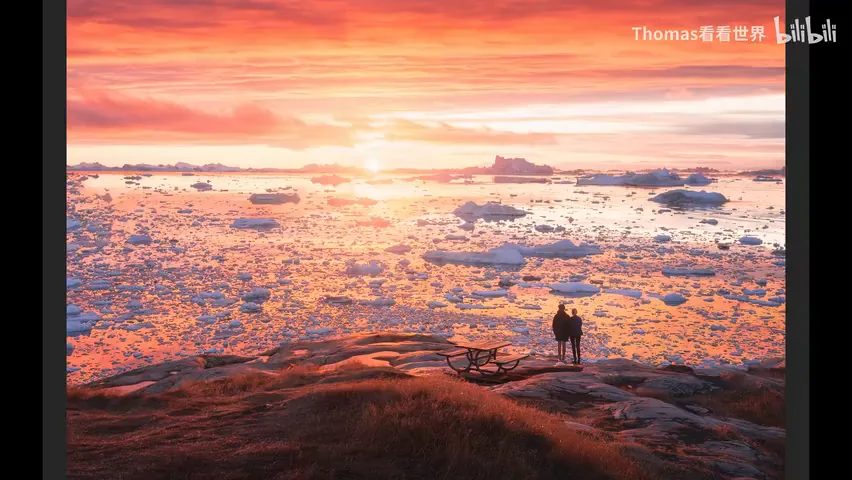
Function two: depth through luminance (at 1:36 in the video). Take the photo with the sun at its center — in the original you could never see sunlight falling off across such a small span; with a vignette, the middle glows and the edges fade, as if light genuinely decayed within the photo, and the whole frame suddenly gains body and space.
Function three: hiding clutter (at 2:09 in the video). Wires, debris and distractions at the frame's edge can all be pressed quietly into shadow — a big reason vignettes "work" in landscape editing. The solar water heaters before the Potala Palace will demonstrate this later.
02 Which Photos Take a Vignette — and Which Do Not
Vignettes suit dark-toned photos best (at 2:24 in the video): the effect hides inside the shadows, so it can be pushed hard without looking fake. Second, photos whose key subject sits in the middle — three meteors, a centered Potala; frame-within-frame compositions are ideal too, since the surrounding frame already leads inward (at 2:41-3:04 in the video). Images with existing light-dark layering take vignettes even better.
Three cases demand caution (at 3:17 in the video). Non-centered structures: on a symmetric sheet of ice, a vignette injects a strange luminance gradient into what was a clean expanse. High-key photos: even a touch of vignette is glaring — keep it tiny or skip it. And compositions that unfold top-to-bottom clash head-on with an outside-in vignette (at 3:37-4:08 in the video).
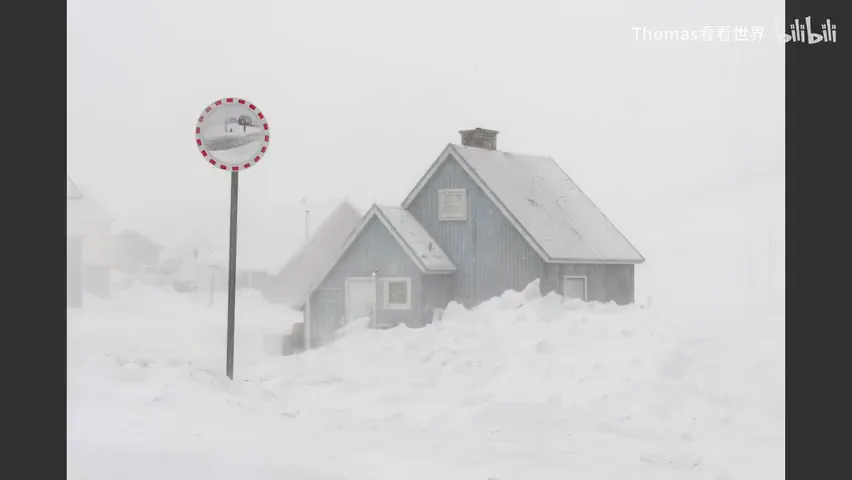
So before touching the sliders, analyze the photo on its own terms: does it take a vignette, and how much? Forcing one where it does not belong only backfires (at 4:08 in the video).
03 Three Tools and Their Settings
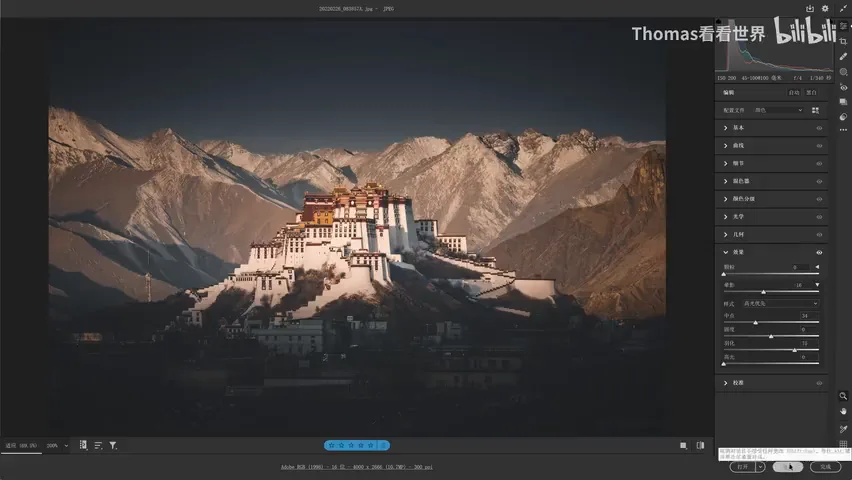
Tool one: the Effects panel's Vignette in Camera Raw (at 4:24 in the video) — simplest and best. Amount left darkens, right brightens; Feather usually 50-100, the higher the smoother — at zero you get a hard-edged box; Roundness 0 is an ellipse, 100 a circle, -100 near-rectangular — just leave it at 0; Midpoint slides the falloff toward center or edge, and it usually wants to come slightly inward (at 4:39-5:38 in the video).
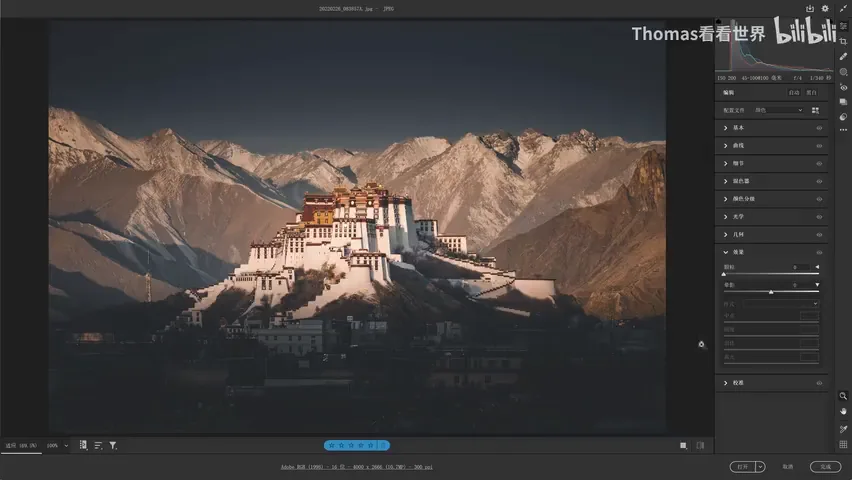
Leave the Highlights slider alone as a rule (at 5:43 in the video): it restores brightness to bright objects inside the vignetted zone — yet those edge highlights are usually exactly what we want gone. The solar water heaters at the edge of the Potala photo, for instance, instantly cheapen the palace's sacred air; a vignette swallows them whole (at 6:07-6:27 in the video).
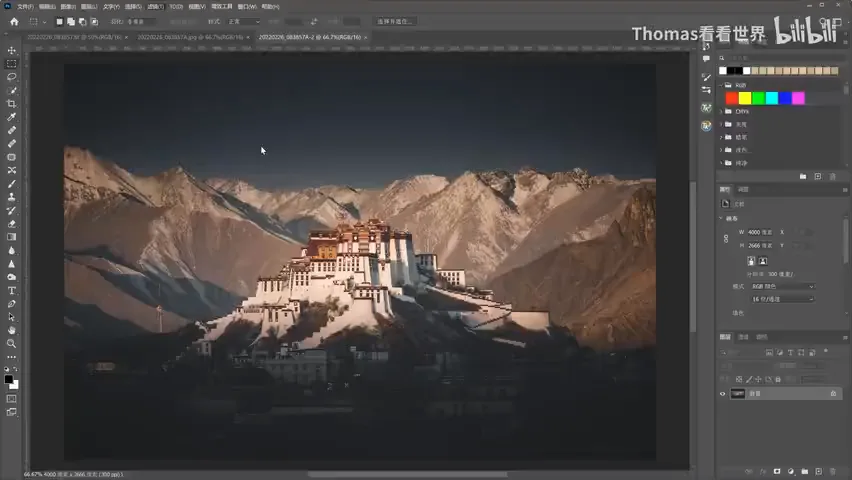
Tool two: the "Brighten/Darken Center" filter in Nik Collection's Color Efex Pro (at 6:32 in the video). Landscape photographers almost all own Nik, so the vignette can ride along with other filters. It beats the effects panel in three ways: besides darkening the edges it can brighten the center; its shape adjusts; and above all its center point can sit anywhere — for the Greenland frame with the sun in the upper third, placing the point between that third and the center reads far more naturally (at 6:53-7:29 in the video).
Tool three, the freest and mightiest: Camera Raw's local filters — the Radial Filter (at 7:38 in the video). Draw a radial gradient and simply lift the center; feather from 0 to 100 controls the transition. For a standard vignette, invert the radial mask and pull exposure down around the edges; or lower only the shadows — touching what was already dark without shifting overall brightness; or just drag the edge highlights down so they stop shouting (at 7:45-8:58 in the video).
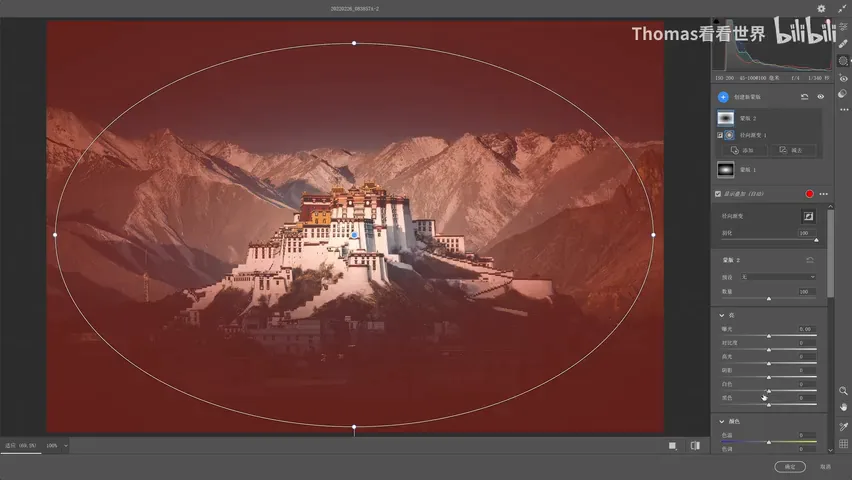
The radial filter's position, feather and shape are all freely adjustable, and it often teams up with the Graduated Filter — when the bottom of a frame needs to sink into darkness while the top stays untouched, a gradient is nimbler than a plain vignette (at 9:13-9:34 in the video). Most of the time, though, you will not need this nuclear option: a small tug on the Vignette slider already does the job (at 9:01 in the video).
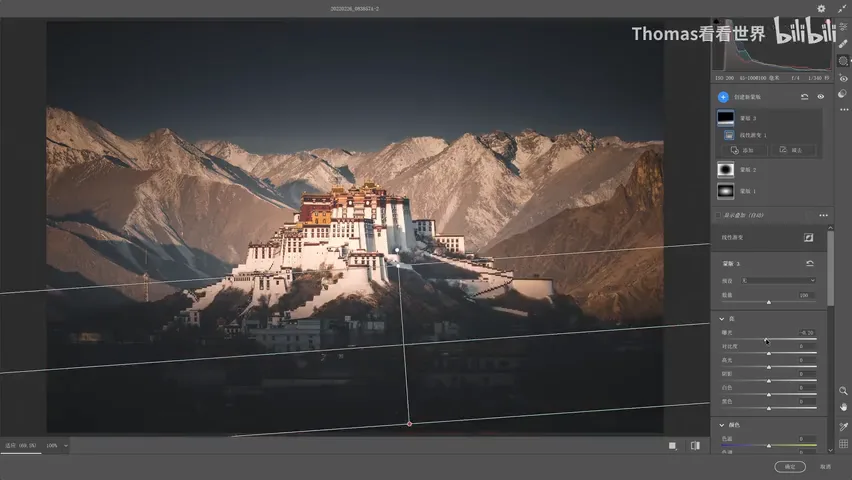
In the end, a vignette serves two purposes (at 9:37 in the video): guiding the eye to the center and strengthening the photo's luminance structure — the sunlit Potala Palace stands prouder inside its ring of shadow, while the cluttered rooftops and water heaters below sink into darkness as if bathed in shade, restoring the frame's cleanliness (at 9:48-10:16 in the video). That is what a vignette is for.
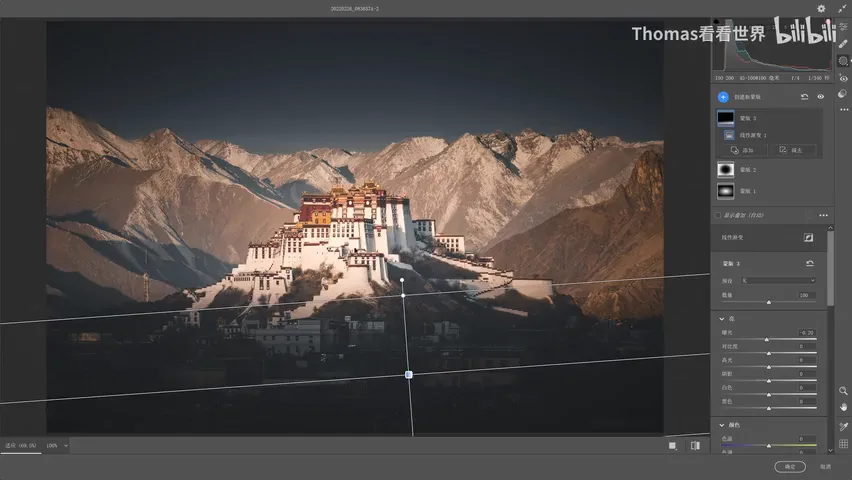
1. A vignette guides the eye inward, deepens the luminance structure, and buries clutter at the edges; 2. Dark-toned, center-composed and frame-within-frame photos take vignettes well; symmetric, high-key and top-down structures can easily backfire; 3. Day to day, Camera Raw's Vignette is enough — feather 50-100, roundness 0, midpoint slightly inward, highlights untouched; 4. For more freedom, use Nik's Brighten/Darken Center or a radial filter paired with a gradient — position and shape at will.