Photography Tutorial · 2016-09-16
What Exactly Is ACR in Photoshop? And How Does It Differ from Lightroom?
Thomas has written many tutorials about Adobe Camera Raw (ACR) before. Many friends still aren't clear: what exactly is ACR? Why does Thomas say that learning ACR means learning Lightroom editing? And what's the difference between ACR and Lightroom?
Today Thomas answers these questions in detail, one by one.
Topics: ACR, Lightroom, Photoshop
Reading time: about 5 minutes
1
What exactly is ACR? How do you open it?
ACR stands for Adobe Camera Raw — Adobe's RAW file processor. Photoshop ships with ACR included, so installing PS automatically installs ACR.
RAW files, also called digital negatives, are the original format files generated by digital cameras and store far more information than JPEG. Nearly every camera maker has its own RAW format; common extensions include .NEF, .DNG, .CR2 and so on.
Precisely because each maker's RAW format differs, Photoshop itself cannot directly recognize these varied formats — they must first be parsed and converted by ACR. ACR also provides many adjustment options, all completely non-destructive on top of the RAW file: the negative data is never overwritten and can be reset with one click at any time.
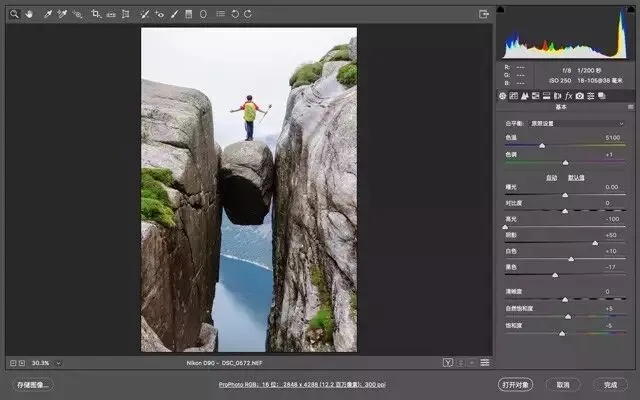
Opening ACR is very simple; there are generally two ways.
With Photoshop installed, just double-click a RAW file (e.g. Nikon's .NEF) and the ACR adjustment panel pops up automatically.
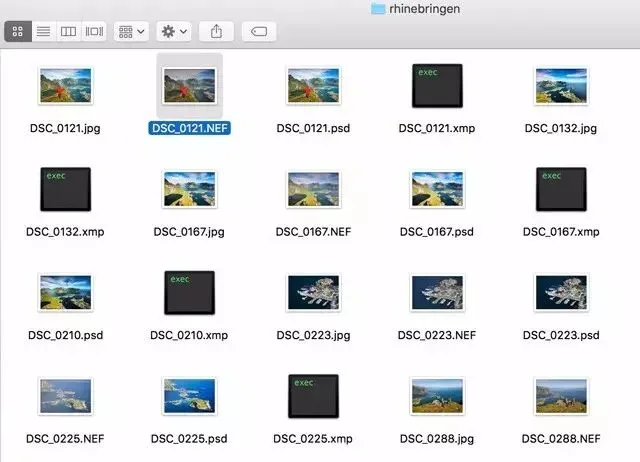
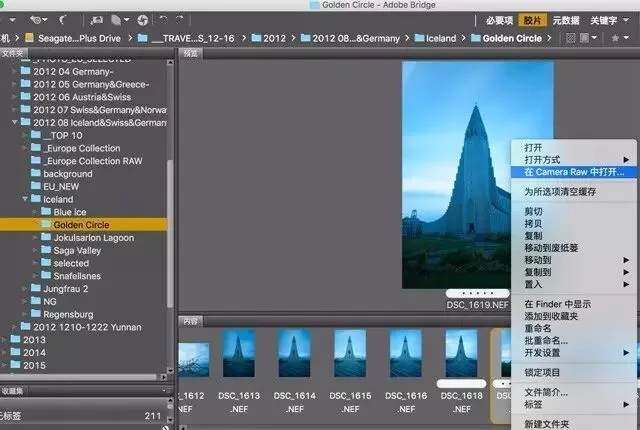
If you also have camera-management software like Adobe Bridge installed, you can right-click a photo in Bridge and choose 'Open in Camera Raw'.
Either way, the RAW file opens in ACR, ready for all kinds of non-destructive adjustments.
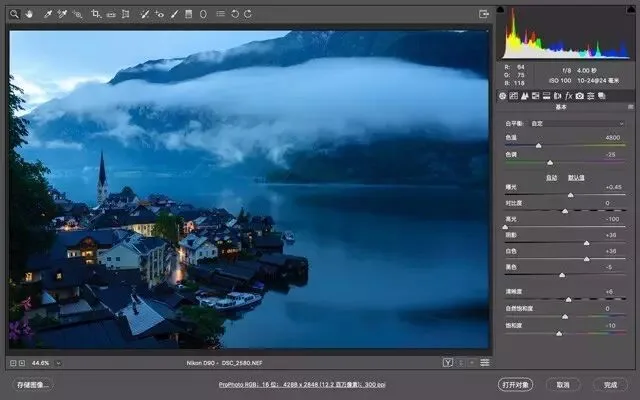
After processing a RAW file in ACR, there are 3 ways to save:
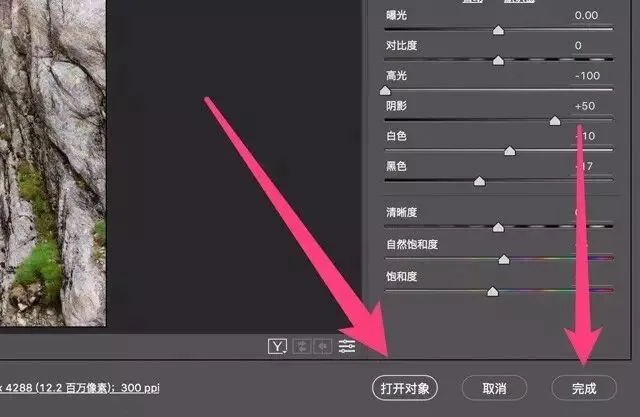
1) Click 'Done' at ACR's bottom right — your processing steps are recorded on disk in an additional .xmp file. Next time you open this photo, the saved results in the .xmp are imported along with it.
2) Click 'Open Object' at ACR's bottom right — your steps are likewise recorded in an .xmp file, and ACR converts the processed RAW into a format Photoshop understands and opens it there, so you can continue in PS.
3) Click 'Save Image' at ACR's bottom left to output the photo to common formats like .JPEG.
2
What's the difference between ACR and Lightroom?
Lightroom is an image management and processing application from Adobe.
After reading the above you may have spotted one difference: besides processing RAW files, Lightroom has very powerful management features. Lightroom offers photographers a full workflow solution, including library management, photo editing, print output and more.
Lightroom's Develop panel is almost identical to ACR. So Lightroom is essentially ACR's editing functionality plus additional features.
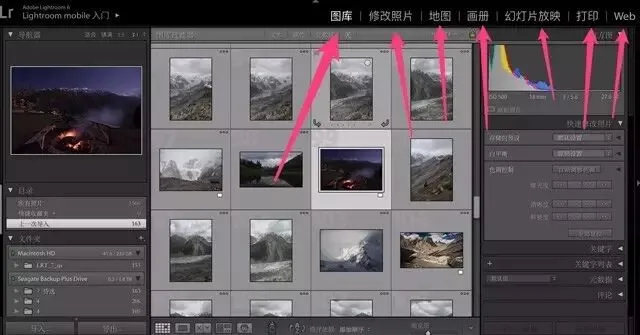
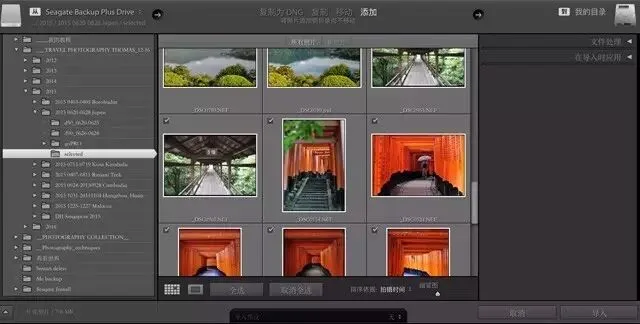
ACR is file-based, so opening a RAW file is as simple as double-clicking it in a folder. Lightroom, to manage photos, keeps a 'central catalog' recording all photos' tags and edits — so working in Lightroom requires an extra 'import photos' step.
In the editing part, although Lightroom is nearly identical to ACR, it has some other useful features.
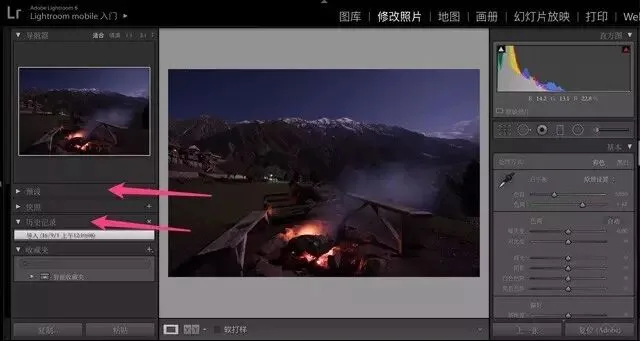
For example, Lightroom 'Presets' can save a photo's processing parameters and apply the same style to other photos. ACR also has presets, but the various 'master grading presets' circulating online are all Lightroom presets — Lightroom wins hands down here.
Another feature Lightroom has but ACR lacks is 'History'. Every adjustment you make in Lightroom is recorded, and you can return to any previous state at any time.
What? Lightroom is that much more powerful than ACR — so why use ACR at all?
3
ACR's advantages
One big advantage of ACR is convenience. Sometimes we don't need to manage and batch-process large numbers of photos — we just want to quietly perfect one or two. That's where ACR is much handier.
More importantly, ACR is simple and easy to learn — once you've learned ACR, you've learned Lightroom's Develop panel. So beginners can start with ACR and, once proficient, master Lightroom's extra features step by step.
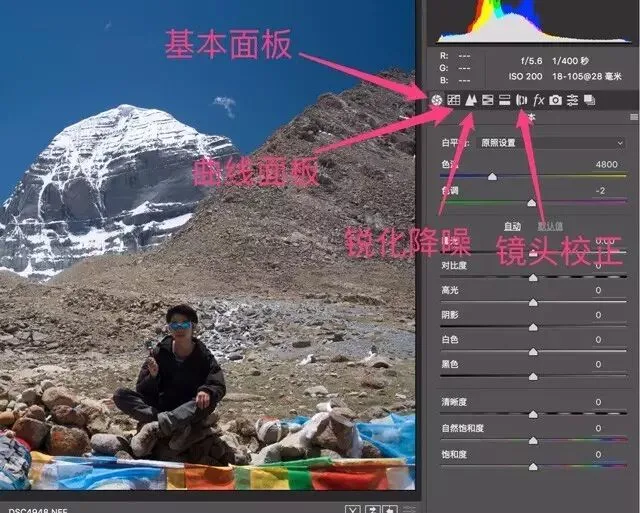
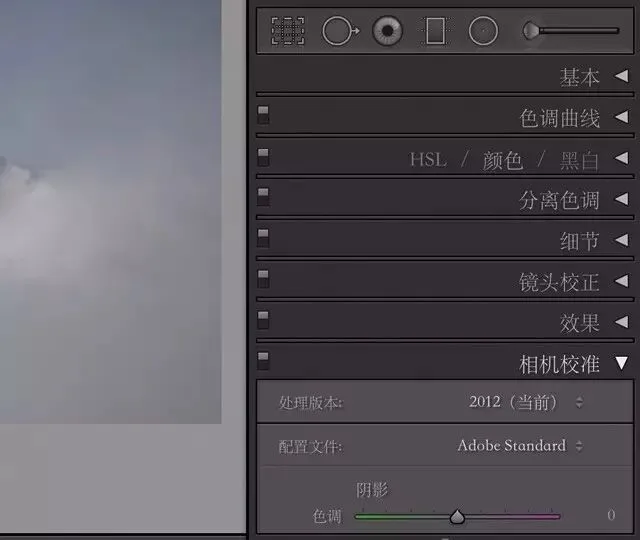
ACR's editing functions are almost the same as Lightroom's — only the layout differs. In ACR, basic adjustments, curves, sharpening/noise reduction, lens corrections and so on are presented as panels.
In Lightroom, Basic, Curves, Lens Corrections and others appear as dropdown sections.
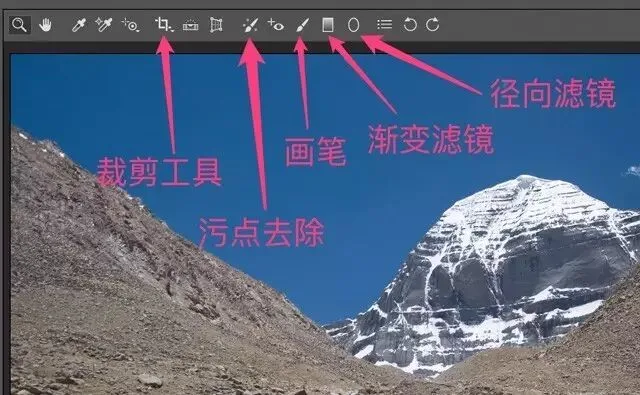
ACR's powerful crop, spot removal, brush, graduated filter and radial filter functions sit in the row of icons at the very top of the software.
Lightroom is similar — these functions are in the row of icons below the histogram.
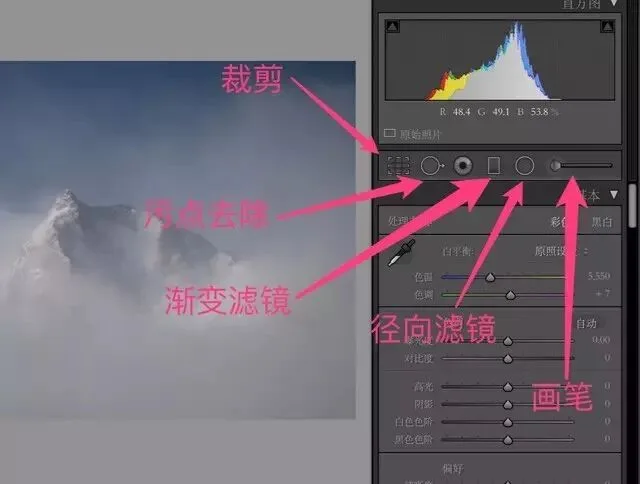
In short, once you've learned ACR editing, you've learned Lightroom editing.
Summary
1. ACR (Adobe Camera Raw) is the RAW processor built into Photoshop. 2. Beyond ACR's photo processing, Lightroom has extra features like image management — more powerful but also more complex. 3. The editing parts of ACR and Lightroom are essentially the same: learn ACR and you've learned Lightroom editing.
I'm @Thomas Chu Photo — every Sunday evening I share an original piece of photography know-how.