Photography Tutorial · 2024-08-25
Black Myth-Style Color Grading: Making Rainy-Day Photos Look Amazing
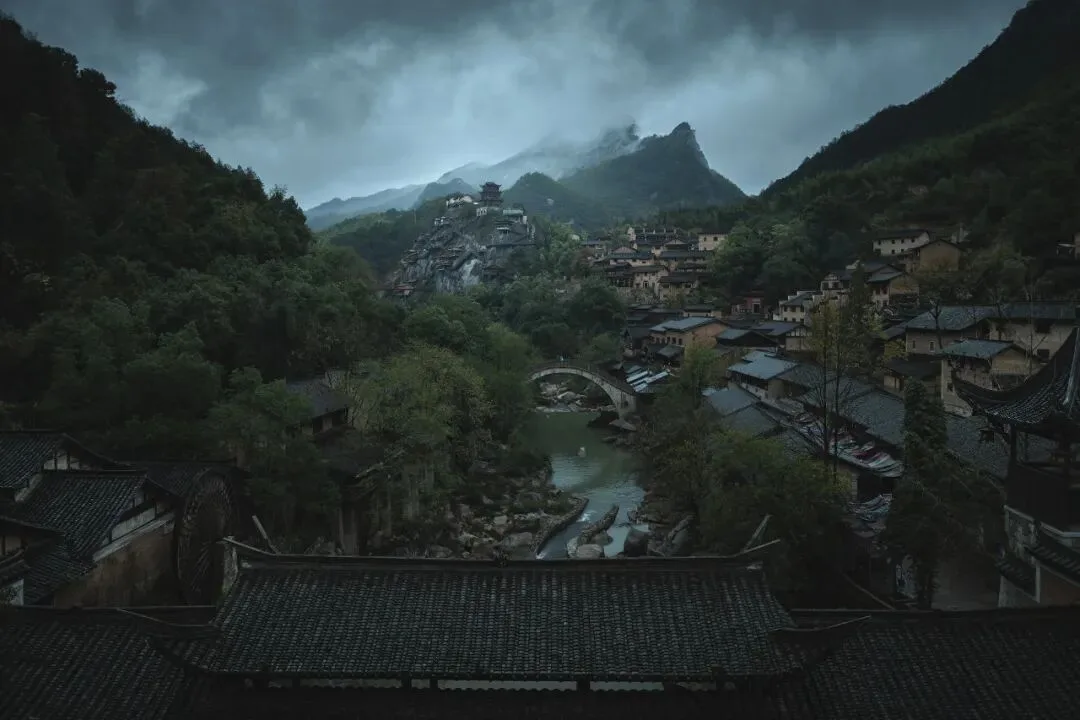
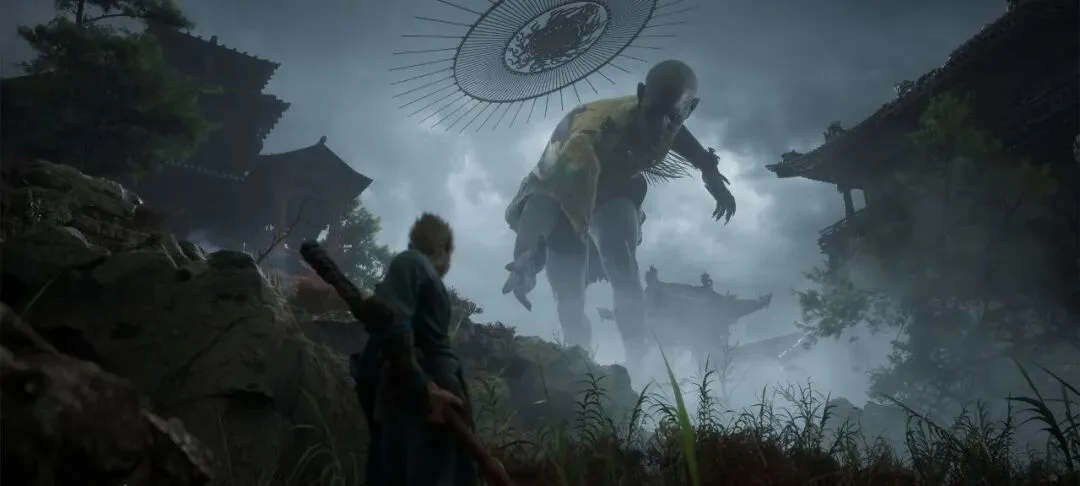
In today's tutorial, Thomas imitates the rainy-scene tones of the early chapters of the game "Black Myth: Wukong," teaching you how to turn a flat, rainy-day photo into something with a dark, magical texture and palette.
Video
▶ Watch the video tutorial on Bilibili
This article is the illustrated companion to the video above: the rainy forests of Black Myth: Wukong left a deep impression on everyone — gloomy, damp, in low-saturation cyan-blue tones. In this tutorial Thomas imitates that grade, turning plain overcast photos into something with the game's dark atmosphere. The main example was shot with a Mavic 3 Pro over Wangxian Valley in Jiangxi, in three steps: tone, color, and local shaping.
Start with the result. Here is the before-and-after of the main example — a flat, gray aerial photo on an overcast day, transformed into a moody, mist-shrouded cyan-blue frame that looks straight out of a game (at 0:01-0:05).
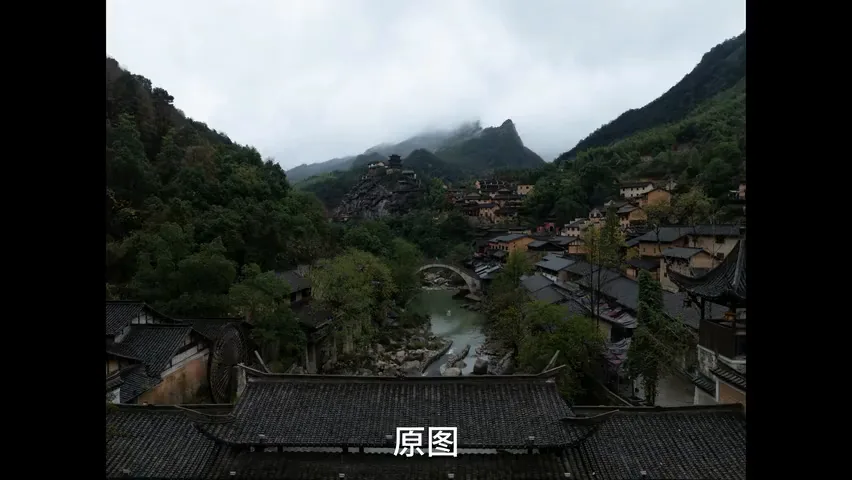
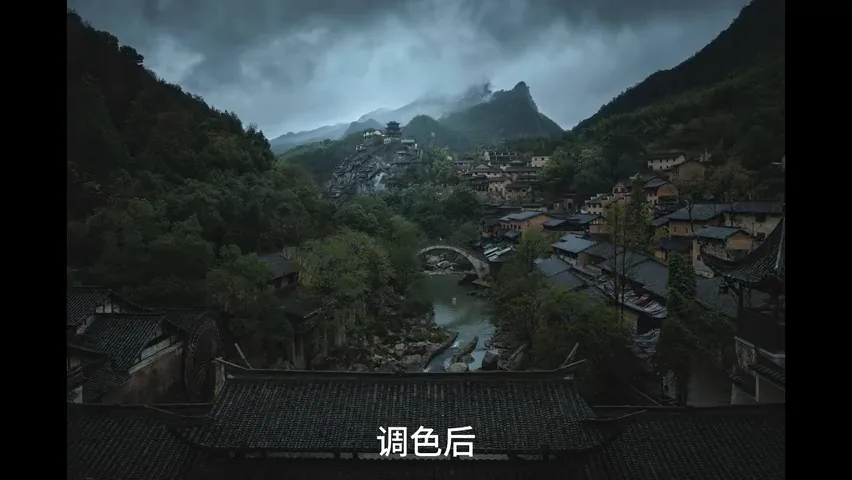
The approach works for all kinds of overcast material. The video demos two more examples: a photo framed through a Chinese gateway, and an aerial of a lakeside golf course on a gray day — after grading, both take on the same dark, rainy atmosphere (at 0:05-0:10).
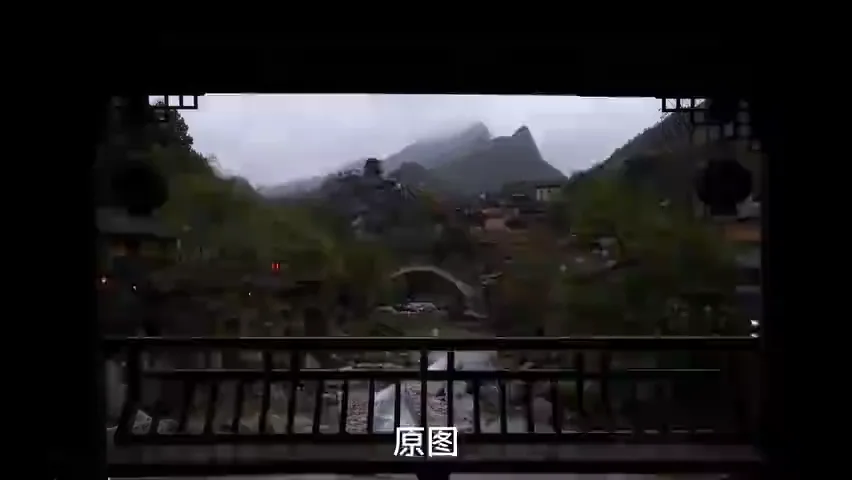
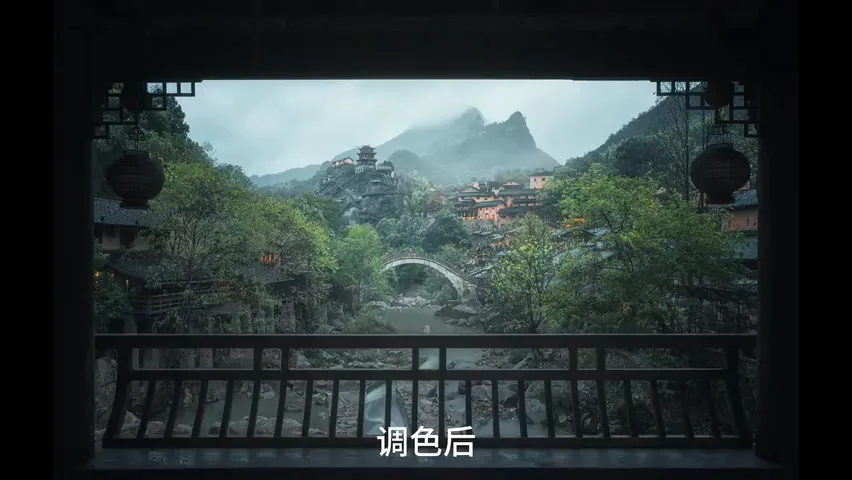
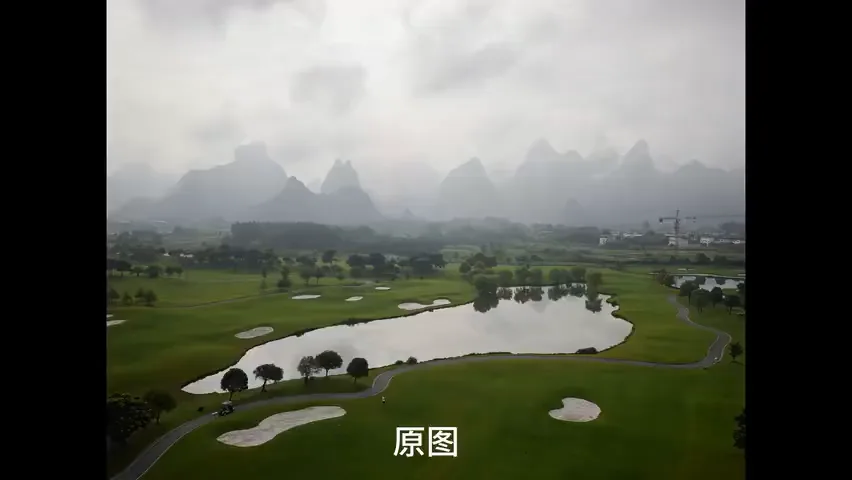
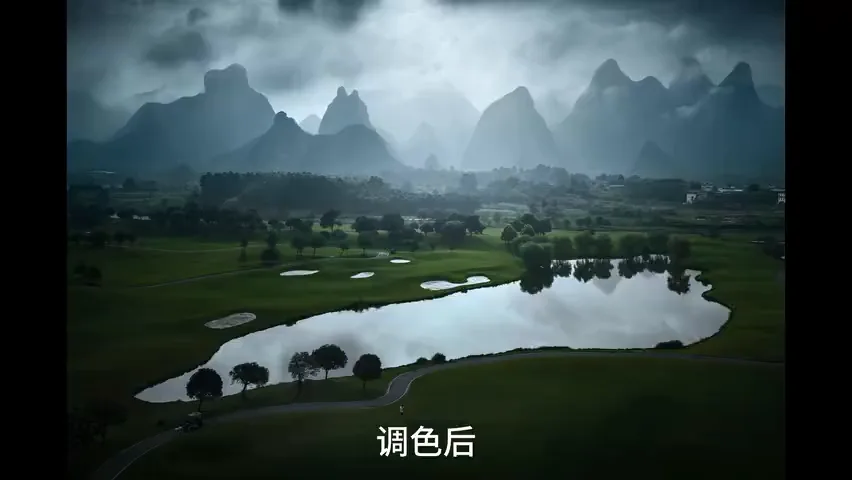
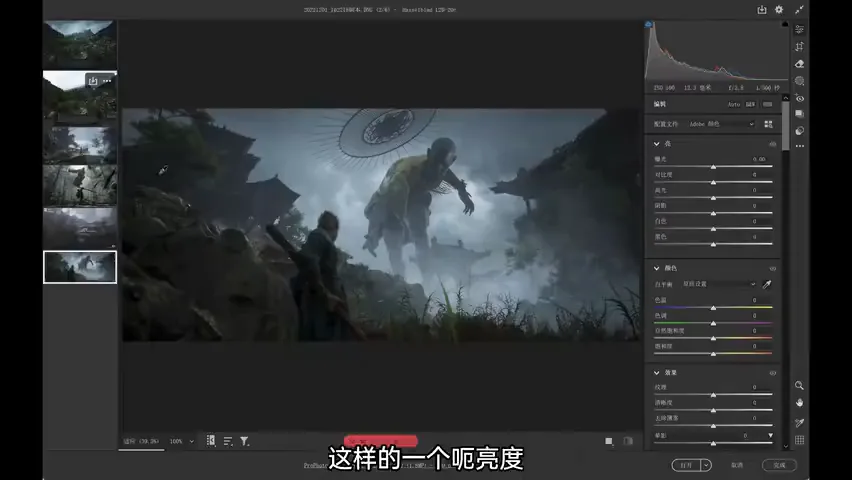
The reference is the game's art itself — rainy forests in cyan-blue, with strong contrast, heavy shadows and lingering mist (at 0:18). Let's break it down step by step.

01 Tone: Tame Highlights, Lift the Blacks
Step one is tone (at 0:53). The key logic of overcast scenes: unless the sun is out, the sky is never much brighter than the land, let alone near blowout — so pull the highlights down first; then recover shadows and blacks to bring back detail in the dark; lift the whites, and add some overall contrast to give the photo its skeleton.
Next, add a simple vignette (at 1:31): darken the edges, move the midpoint toward the center, and lift the middle just a touch. Then build a curve — the key is to raise the black point slightly, pull overall brightness down a little, but not let the highlights sink; restore the highlights back up. At this point the tonal structure is basically set.
02 Color: Cyan-Blue and Low Saturation
Step two is color (at 2:12). The whole photo must lean cyan-blue, so nudge both color temperature and tint downward; the other key move is cutting saturation significantly — let the whole image calm down first, then fine-tune locally.
For local fine-tuning, enter the HSL tool (at 2:40). Hue: shift red slightly toward purple (it affects the temple gate's plaques); leave orange alone; push yellow a bit toward orange; take the green off pure green toward yellow; keep blue unchanged; move purple slightly toward blue; and magenta a touch toward red.
For luminance, Thomas adjusts it before saturation (at 3:14): darken the buildings ruled by red and orange so they sit more harmoniously; yellow affects many buildings too, so pull it down; green governs vegetation — lift it for layered foliage; and boost blue's luminance strongly — the sky will brighten with it, but that's fine, local masks will pin it back later. The real reason to lift blue is the rooftops: with their blue reflections brightened, they gain instant texture. Raising blue's luminance lowers its saturation, so restore some; and cut the saturation of warm tones like orange hard, for that overall mood.
Then comes the finishing touch (at 4:43): add color into the highlights. Put a cyan-blue with a hue around 200 into the highlights, with a touch of saturation — and the whole photo instantly gains that misty, moody atmosphere.
03 Local Shaping: The Secret of 50-Plus Masks
The heart of this photo is local adjustment (at 5:06). When Thomas posted his editing screenshot, many were scared off by the 50-plus masks — but once you're fluent, it's not that complex. First crop: 3:2, trimming extra sky and cutting the lamp at the bottom (at 5:19).
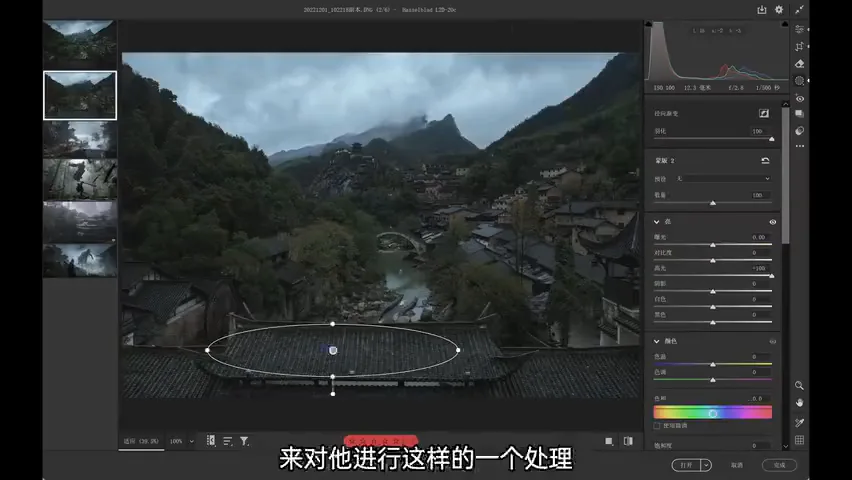
First, lift the highlights with the highlights tool (at 5:39): bring out the buildings' texture while adding some texture and clarity — the architecture gains presence instantly. Don't overdo it in one go; combine with radial gradients on the rooftops so the tiled roofs stand out without exaggerating the surrounding leaves (at 6:01). Soon Thomas had seven masks — don't be frightened by the number; many are repeats of the same function.
After building masks, push some areas back down (at 7:25): recover a little highlight in the upper sky; the water behind is too bright — ease it; a building's lit face is too hot, the rocks by the water too bright, another block overexposed — each gets its own mask. Thomas follows a 'less, but more often' rule: adjust each region separately, in many small steps, never lifting exposure too much at once or it looks abrupt (at 8:24).
The trees need texture too (at 8:48): raise their whites and a bit of exposure to model the lit side — but skip texture and clarity, or the trees turn too sharp. Be careful never to drag the gradient into the sky; the sky is already a highlight zone and will blow out. Then use linear gradients to lower exposure around the frame (at 9:52), creating plenty of darkness — with shadows in place, the later highlights will truly shine.
Finally, brighten (at 10:20): use radial gradients to add exposure — about +0.2 on the first, another +0.4 where needed; and crucially, while adding exposure, pull Dehaze to -10, giving the distant mountains that misty, suddenly-open feeling and building the bright side of the frame. Now the photo carries Black Myth's rainy blue tone, its contrast and dark texture.
04 Before and After
A final before-and-after (at 11:26): from a flat gray overcast aerial to a Black Myth-style frame — cyan-blue, dark and moody, with clear light and shadow. Thomas's earlier version of this grade pushes the contrast even further.
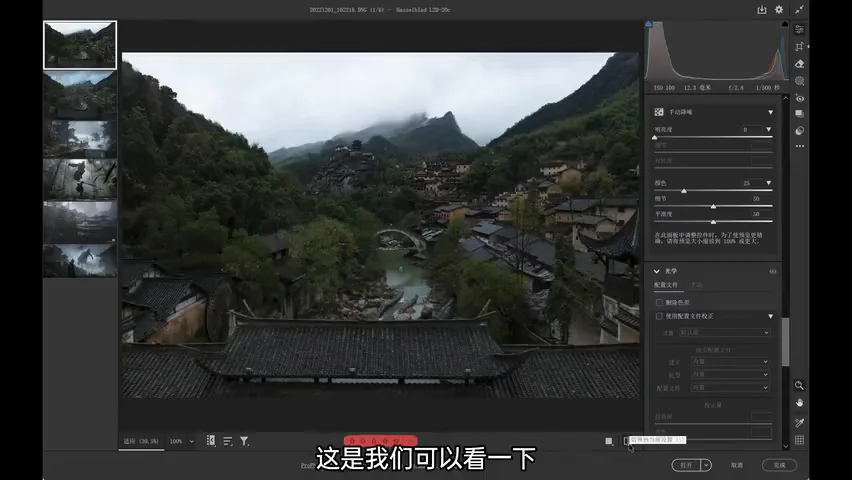
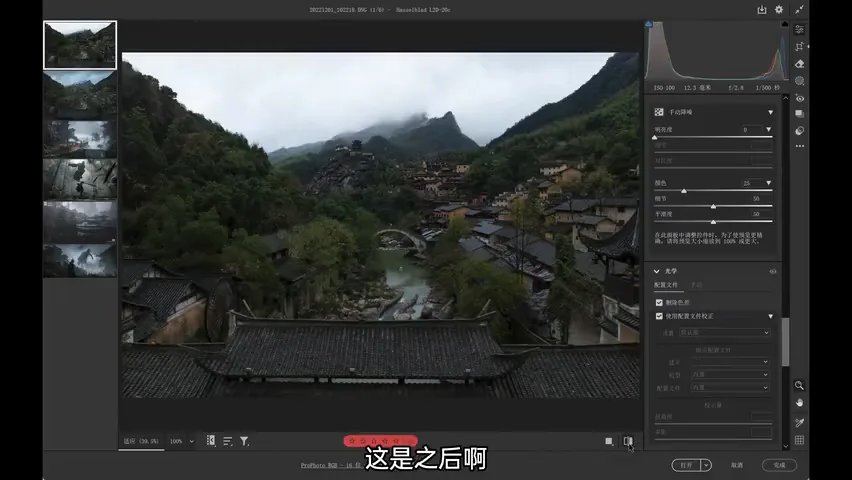
1. Tone in three moves: pull highlights, recover shadows and blacks, lift whites and contrast, then a vignette and a curve to raise the black point; 2. Set the palette: shift temperature and tint toward cyan-blue, cut saturation hard, then fine-tune with HSL — darken and desaturate warm tones, brighten blue for texture; 3. Add cyan-blue into the highlights (hue around 200) and the misty atmosphere appears at once; 4. Locally, less but more often: adjust each region separately in small steps, build shadows before brightening, and use Dehaze -10 for misty distant mountains.