Photography Tutorial · 2017-03-16
Start to Finish: Landscape Photographer Yao Minglai Reveals His Full Workflow
Hello everyone, I'm Yao Minglai (Miller Yao), photographer of AdventureX.
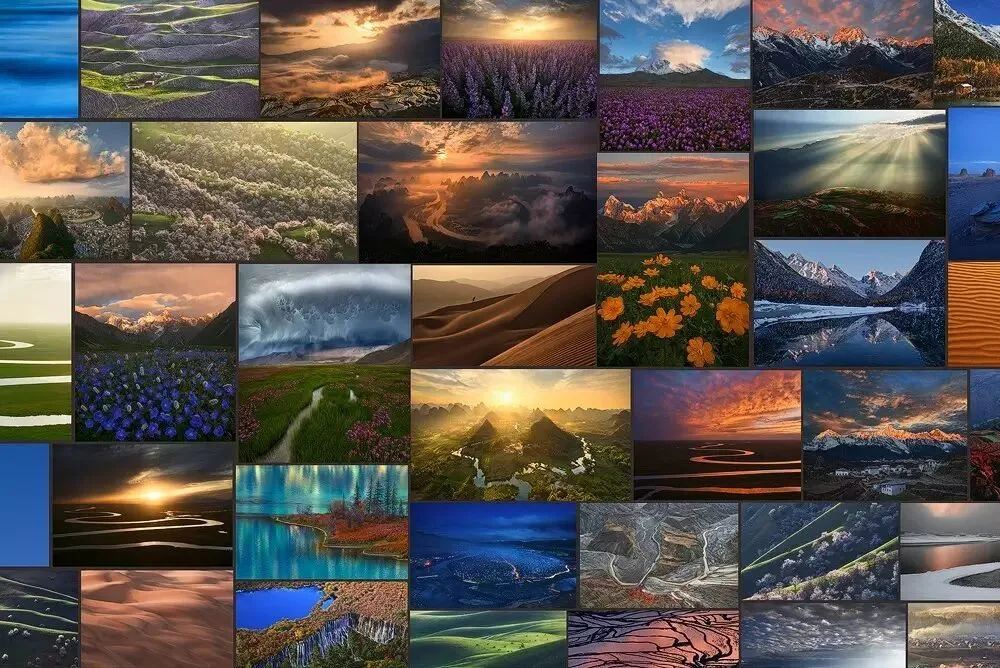
People often ask me how to make a great photo. Today I'll reveal my complete workflow — from pre-trip preparation, through shooting, to post-production — hoping you'll find your answer in my article.

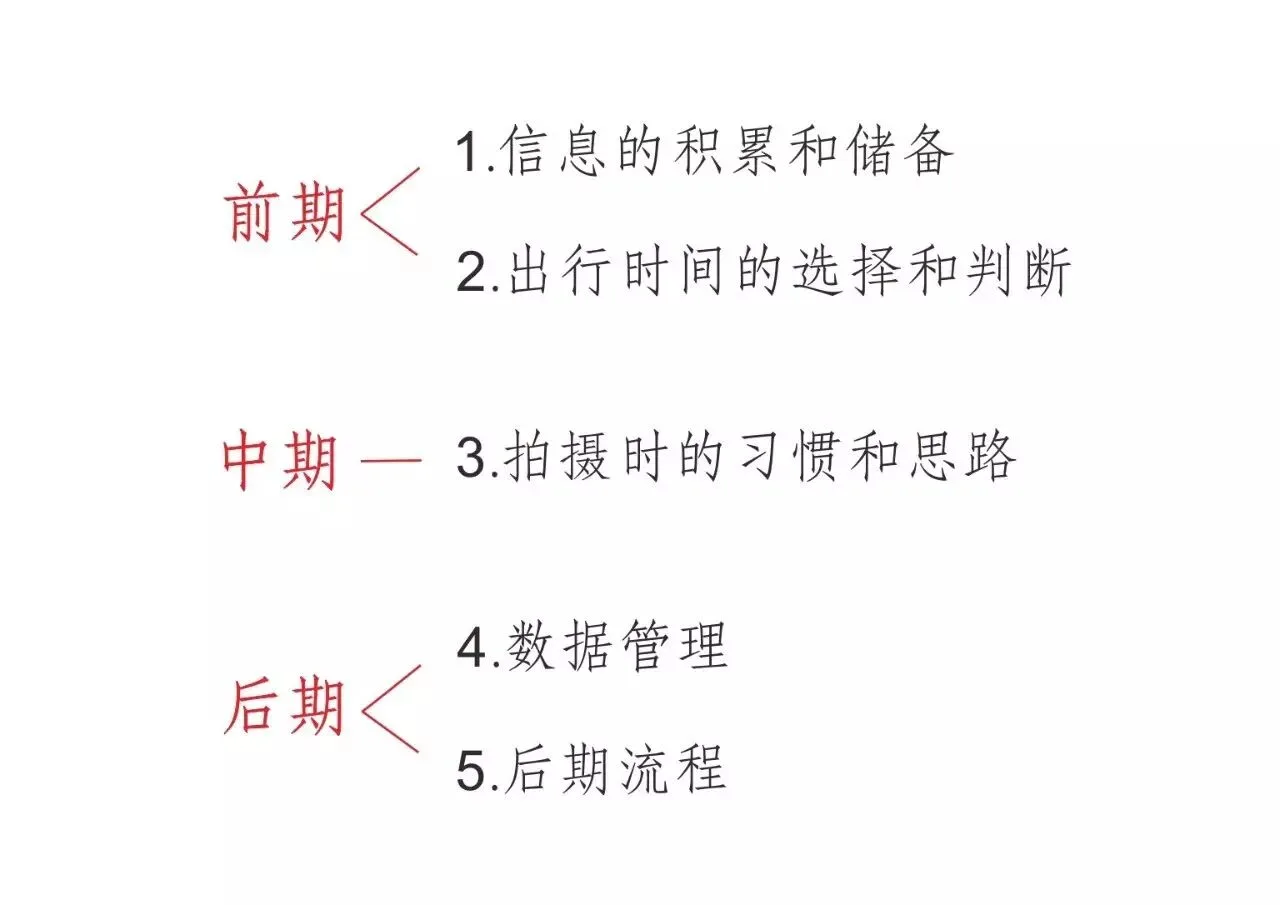
1. Accumulating and storing information
Choosing the right location determines the floor of a photo series, while your shooting skill and post-processing determine its ceiling. Information accumulation is the foundation of all my shoots, so my workflow starts here.
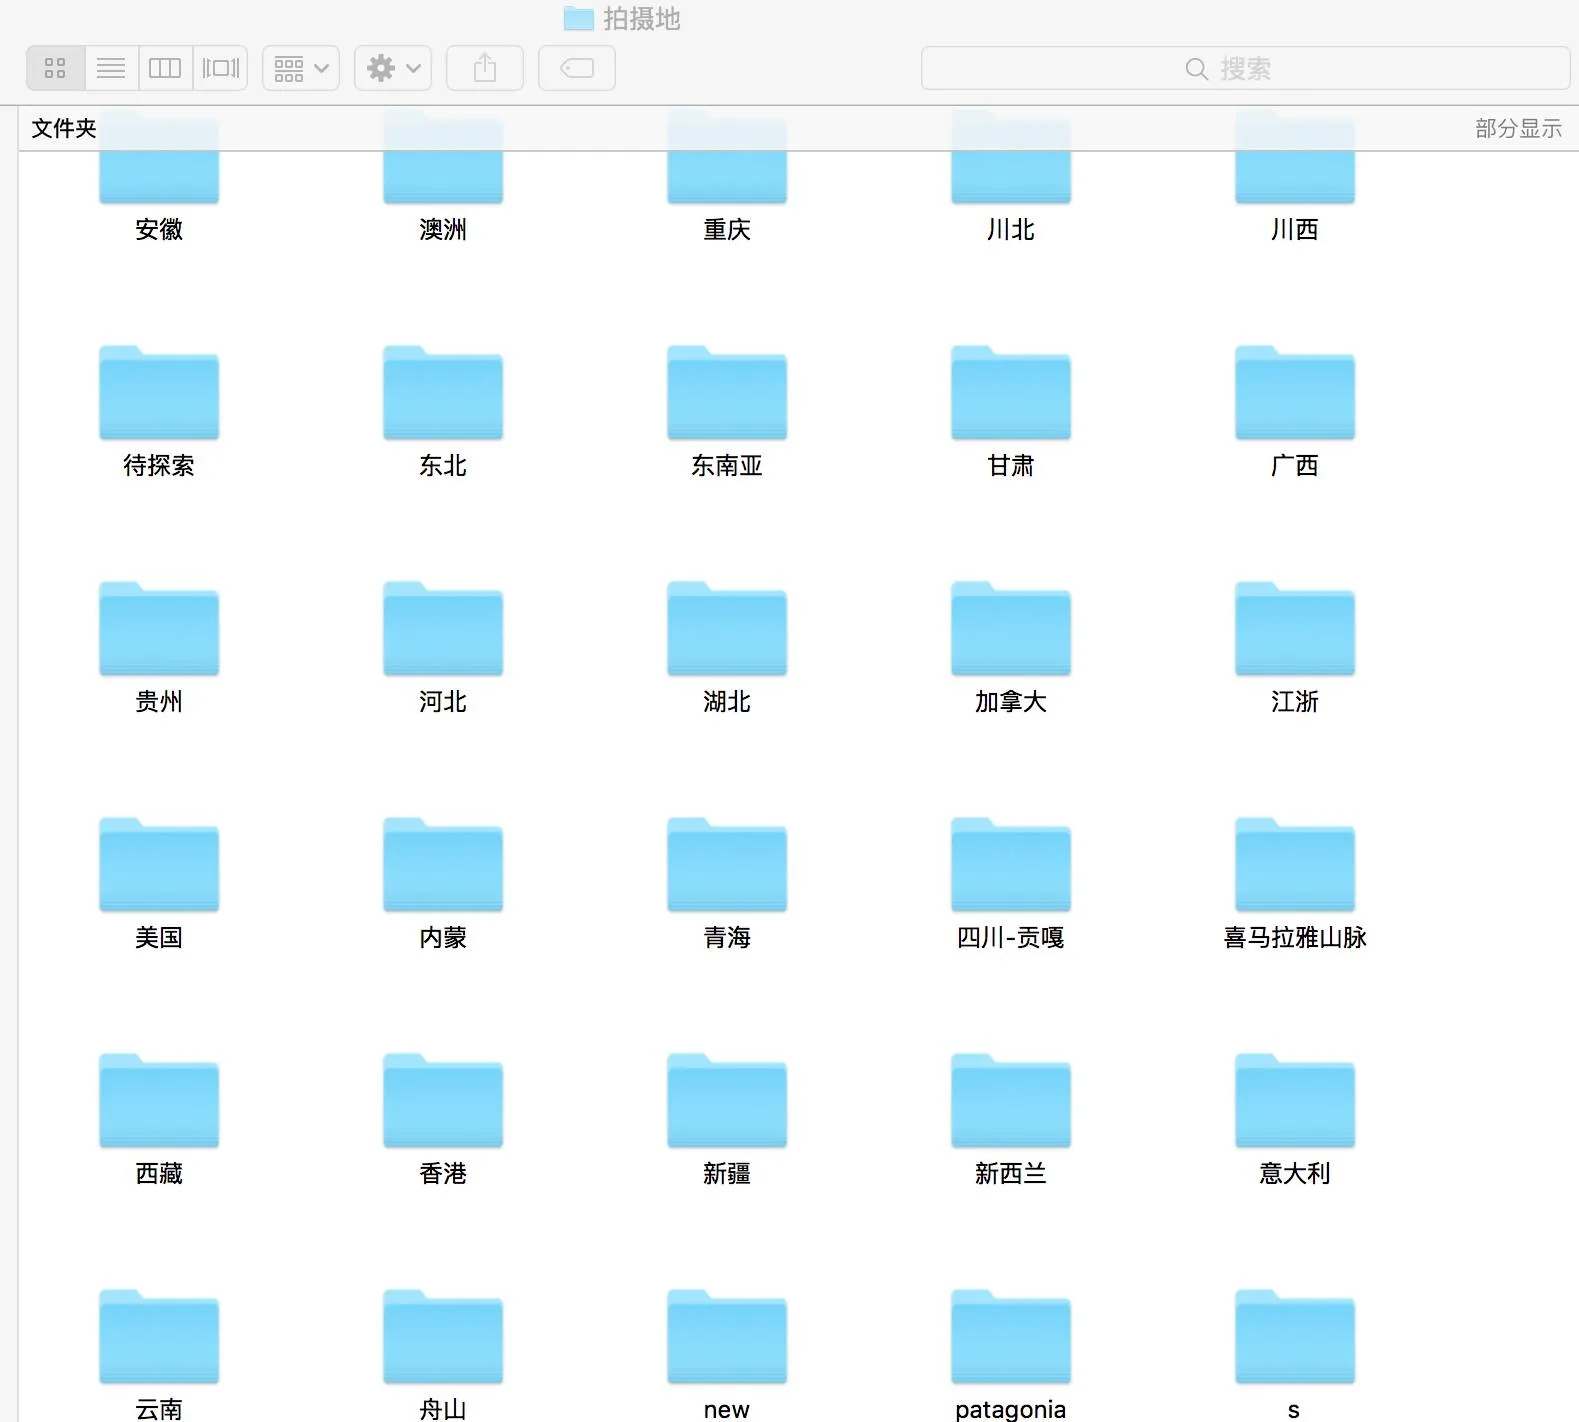
Collecting information is a long process. I keep a folder called 'Locations' on my computer with subfolders named by region. Whenever I see an image of a promising location online or in life, I screenshot or photograph it and file it — if an image belongs to Sichuan, it goes into the 'Sichuan' subfolder. Over time, you build an image library that is uniquely yours.
Also, while saving images I note the shooting time and season from the metadata or caption, which helps you make predictions before ever scouting in person.
2. Choosing and judging the timing of a trip
I often see comments online: 'I went to the same place, so why can't I shoot photos as beautiful as yours?' The answer, I believe, is likely that you went to the wrong place at the wrong time.
Landscape shooting must suit the weather and the terrain. Use the information accumulated in step 1 to determine the best season, then decide the exact departure date. How to pick the right day? Watch weather websites!
As we all know, good clouds often decide the success of a landscape work. The best clouds are the highly layered low clouds before and after a storm. 'Storm' here broadly means weather processes during strong weather systems — the 'cold fronts', 'typhoons' and 'tropical storms' we hear in forecasts all count.
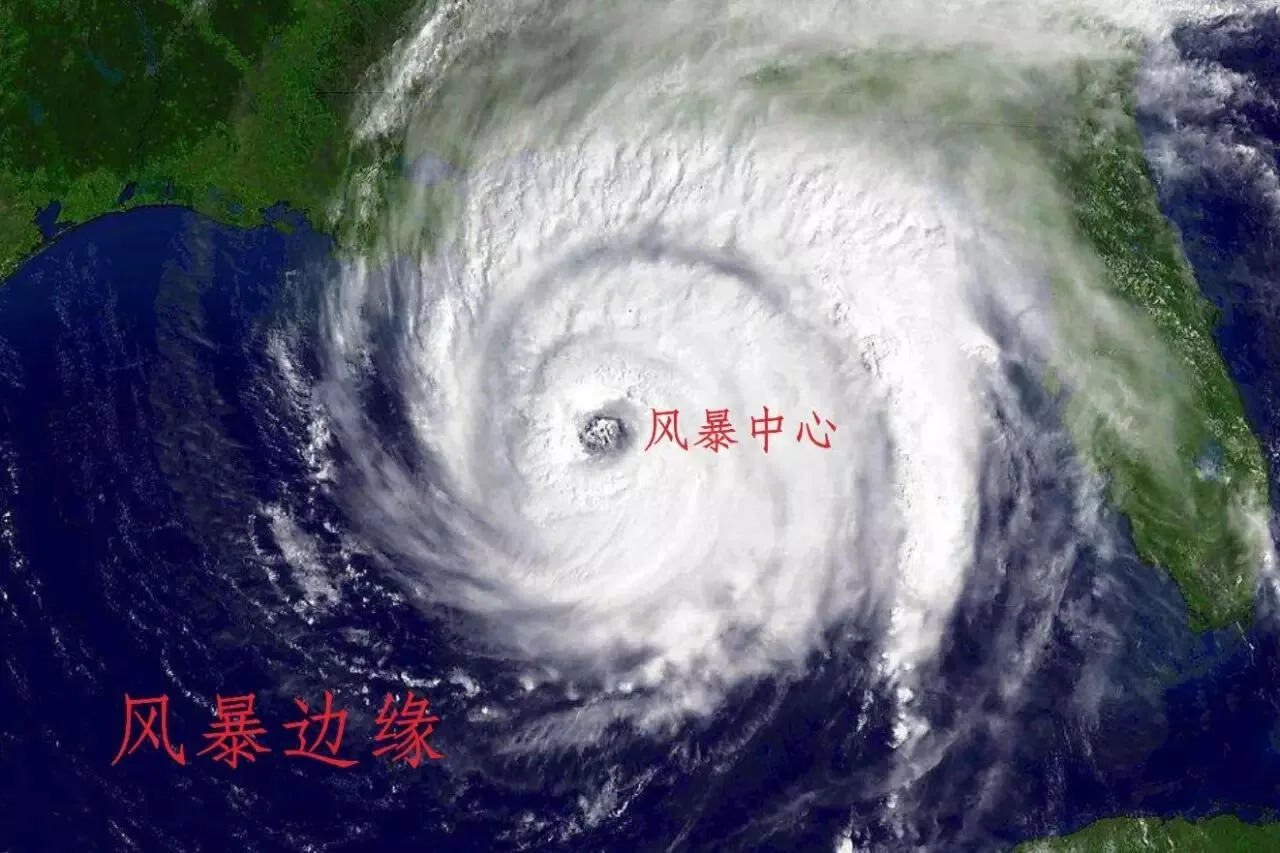
Near a storm's center the weather is usually terrible — overcast skies, no light — the worst conditions for landscape photography. But the storm's edge is the best place to be: dramatic light, magnificent fiery clouds and rainbows appear there with high probability. So chasing storms is the most efficient way to get great shots.
The two photos below were captured by correctly reading weather charts:
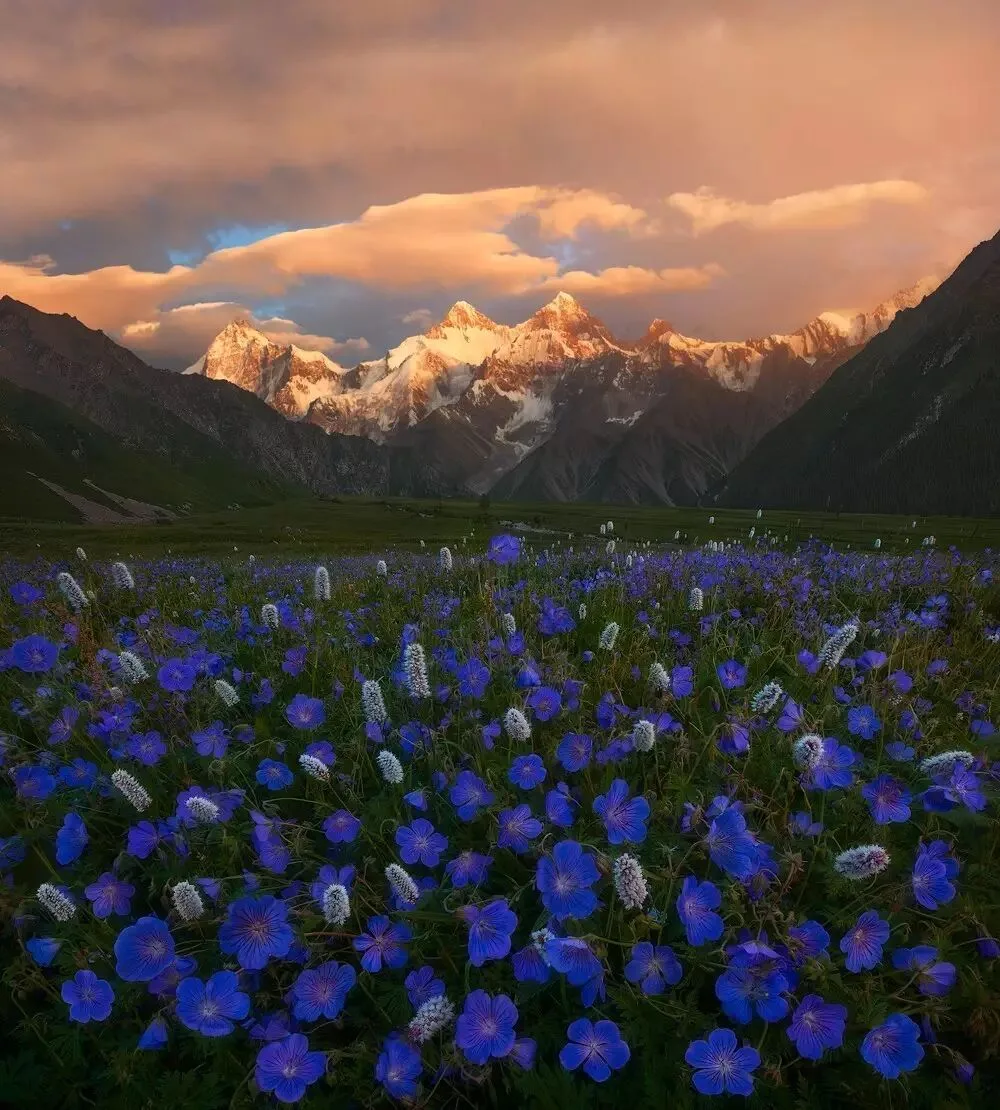
Shot by me in the Tianshan mountains of Xinjiang, on the eve of a regional summer storm
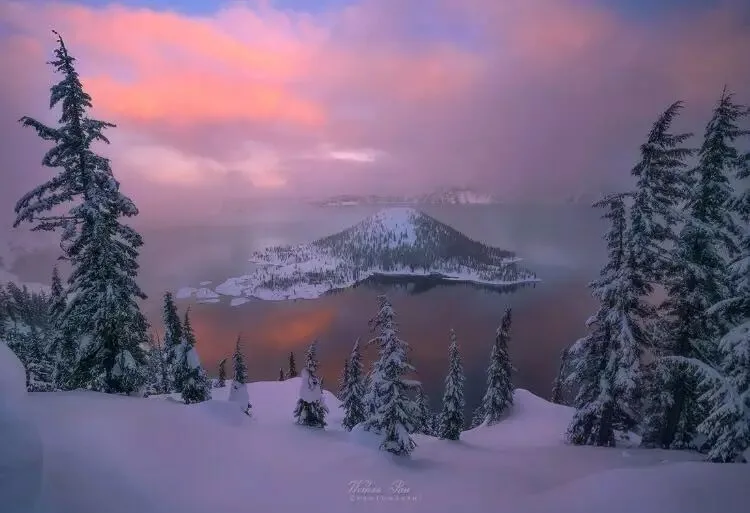
AdventureX member Pan Weihao, shot at Crater Lake, Oregon, USA, after a winter storm
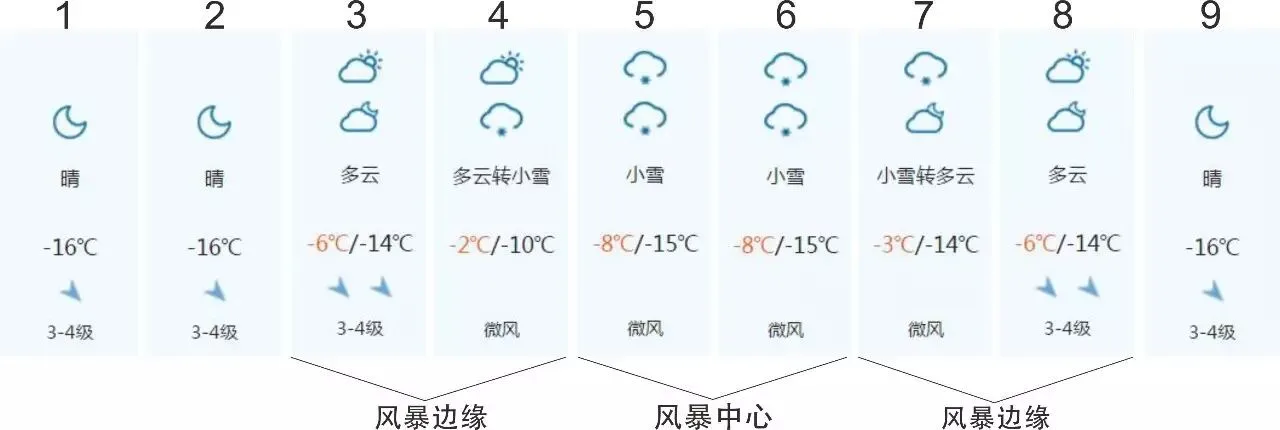
Someone will surely ask: how do you chase storms? What if you can't read weather charts? Here's the simplest effective entry-level method: once you decide to go, keep watching the forecast. When the forecast shifts from fine weather to several days of precipitation as in the chart, a storm is coming.
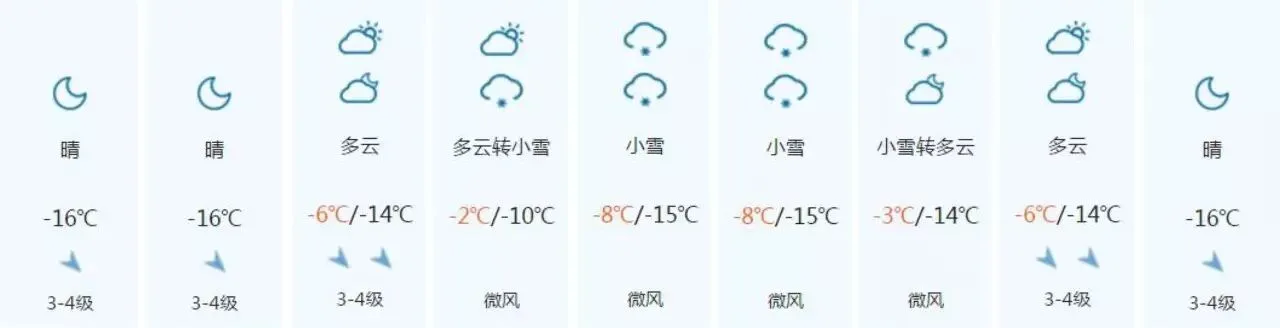
The rainy days represent how long the storm's center lingers (days 5 and 6); the cloudy days before the rain (days 3 and 4) and after it (days 7 and 8) are when the storm's edge enters and leaves the region. Those first and last days (3, 4, 7, 8) are very likely the best days for shooting.
If that region rarely sees storms in this season, you can only avoid clear days and pick a cloudy one. Such skies often have layered-deficient high clouds, but that's still far better than a cloudless sunny day.
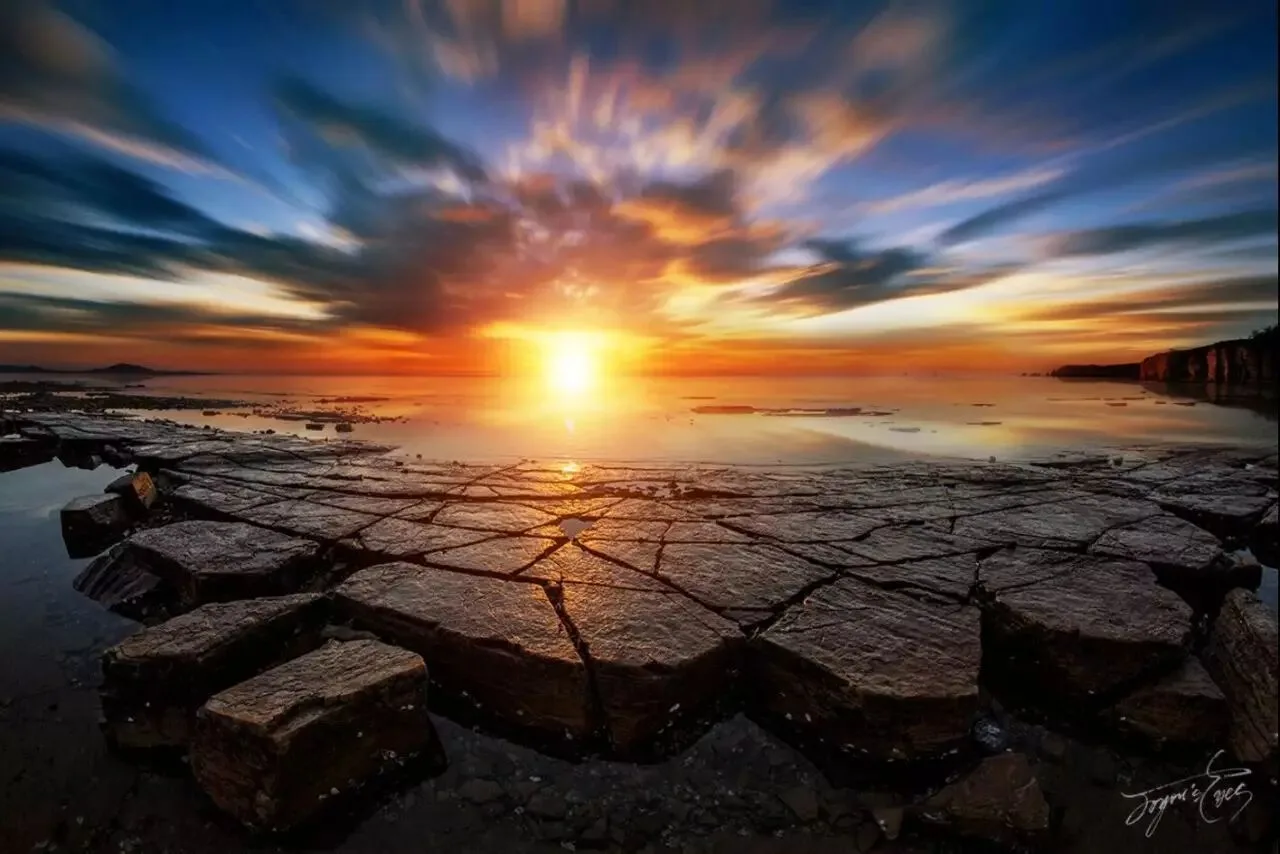
AdventureX member Zhou You (joyous), shot in Dalian — using long exposure to compensate for sparse, layered-deficient high clouds.
3. Habits and thinking while shooting
Countless textbooks and books exist about shooting; here I'll only share my personal habits and thinking in the field.
Sunrise and sunset are the best times for landscape photography, so scouting in advance is crucial. When planning a trip I always reserve enough daytime for exploring and scouting, saving the precious dawn and dusk for actual creation.
While scouting in daylight, I take test shots with my camera at various spots, then mentally simulate the sunrise or sunset scene based on the environment and light direction. I compare the test shots, pick one best position and several secondary ones — the secondary spots serve as backups and fillers after the best spot is done. Usually I'm in place an hour before sunset or sunrise, and I start thinking about how to shoot for maximum post-processing potential.
So for me, a photo's post-production absolutely does not start in Photoshop on the computer — it is conceived in my mind before shooting.
The more complex the post work, the more thorough the planning during capture. Take this image for example:
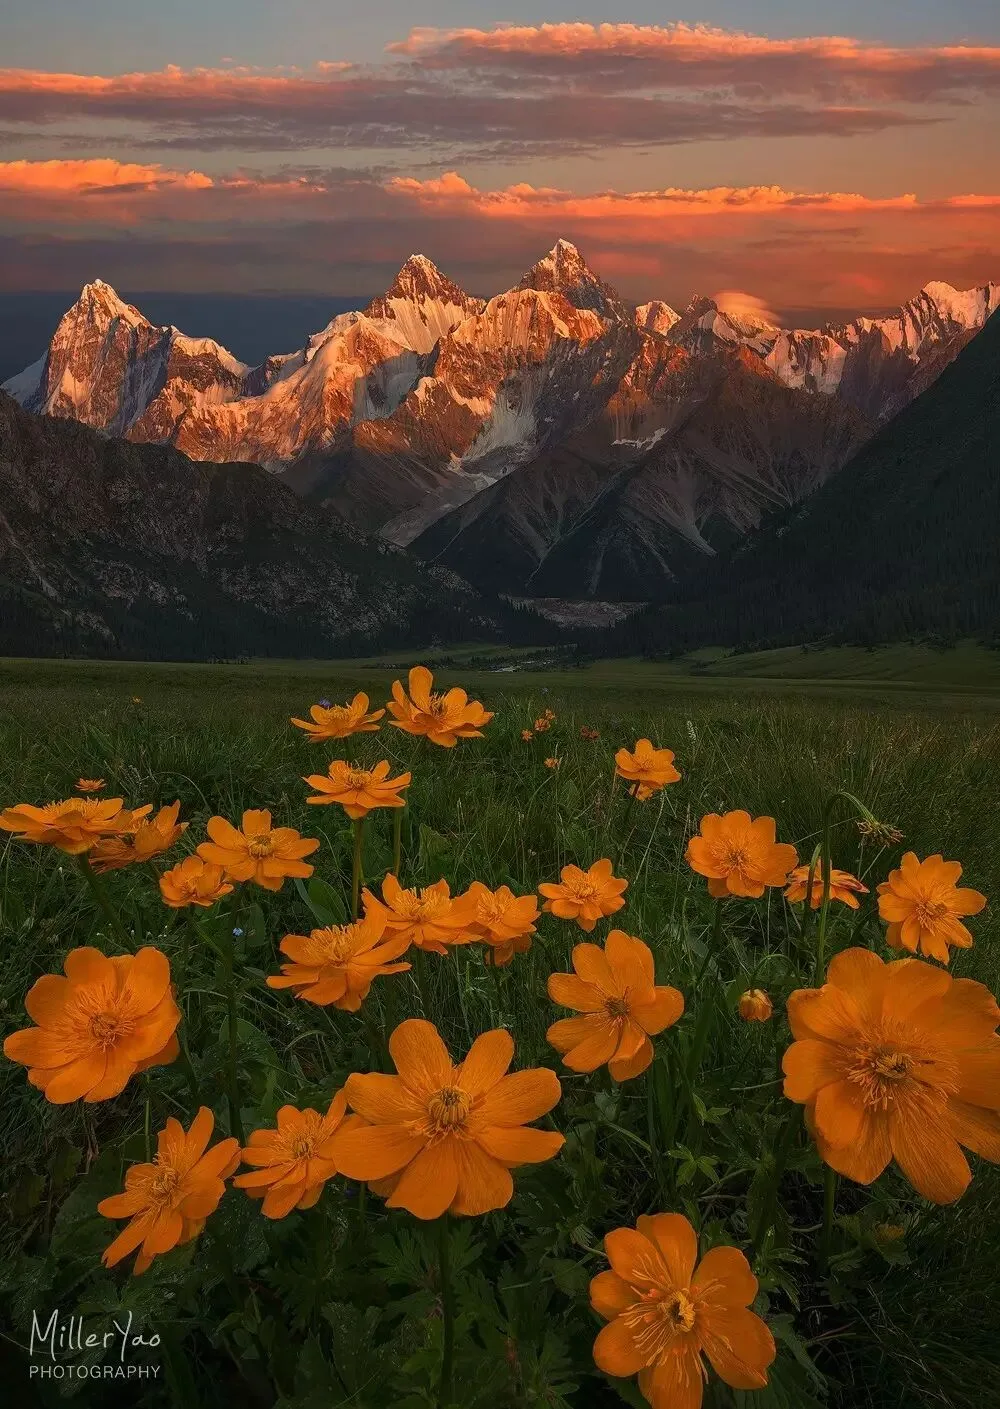
For this image I used a series of blending techniques: two to three focus-bracketing sets during focus stacking to be safe, zooming in on the camera screen to check that even the nearest petals are tack sharp; finding easy transition zones for focal-length blending to keep the stitching simple; verifying exposure accuracy for the parts to be exposure-blended...
This method of letting post guide the capture is what I always use — 'reverse-order thinking': first sketch the final image in your mind, then deduce the required post techniques, and keep adjusting the composition according to the intended post workflow.
4. Data management
After shooting, I immediately export the photos from the memory card to my computer, usually with another backup on a portable drive, naming folders by date + location, then drag the folder into Lightroom.
Next comes culling. I rate the best photos of the trip 5 stars — these get refined first and uploaded online; slightly weaker but still valuable ones get 4 stars; good documentary shots from the trip get 3 stars.
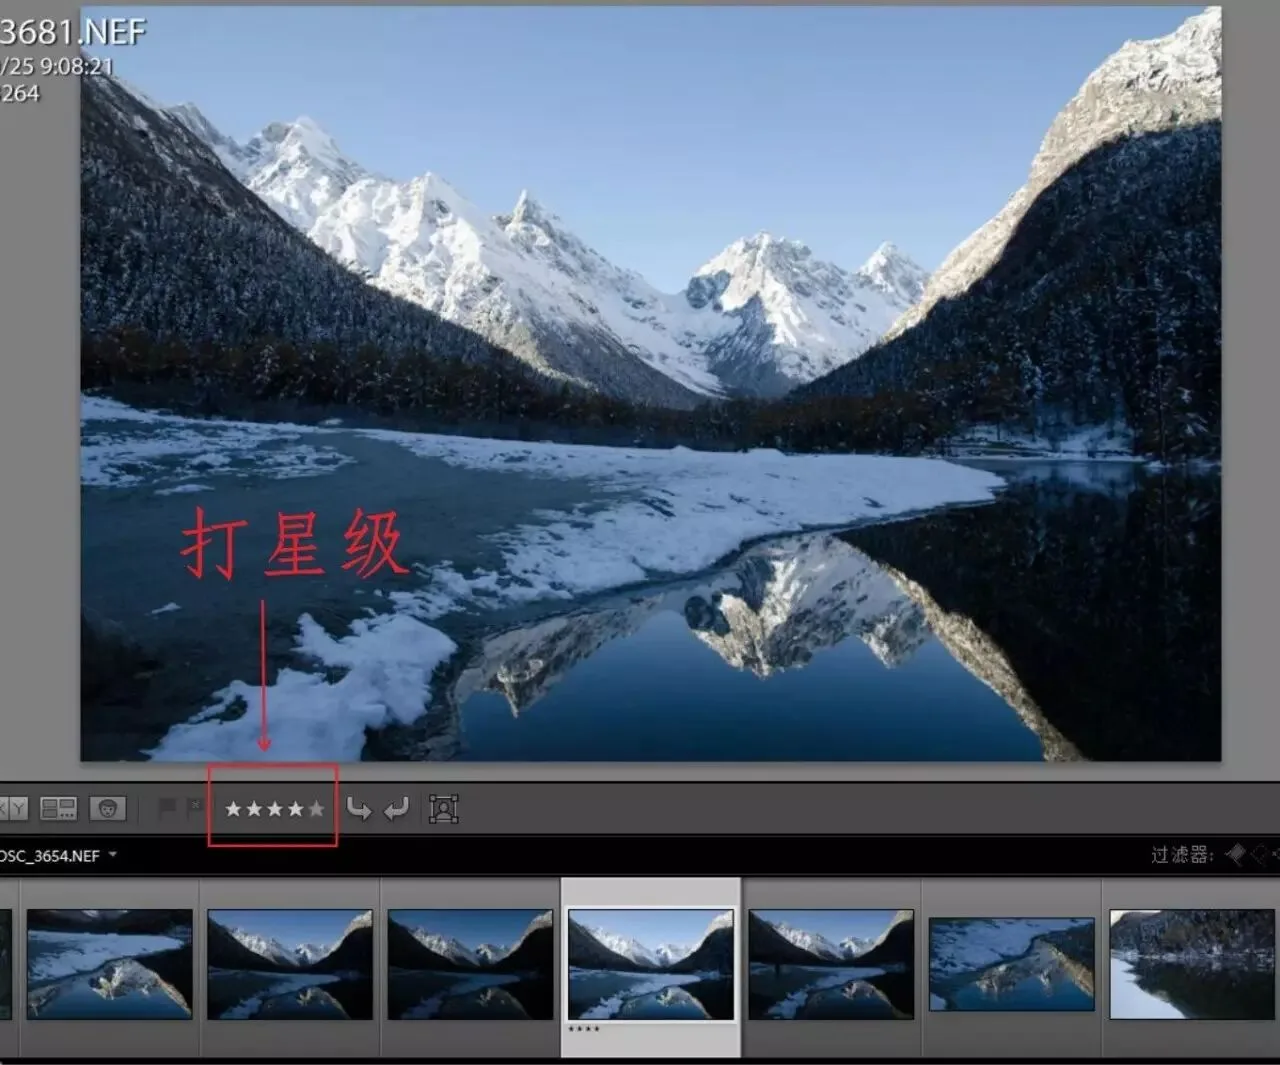
Just click a photo and press a number key to rate it (press 4 for 4 stars, for example).
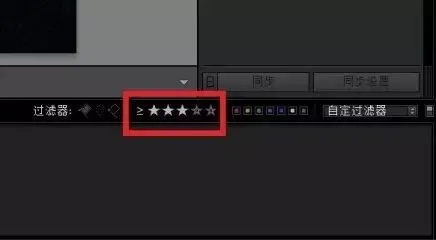
Then I set the filter to rating ≥ 3, and all the starred photos are automatically filtered out by the software.
Finally, export all the selected photos as a catalog.
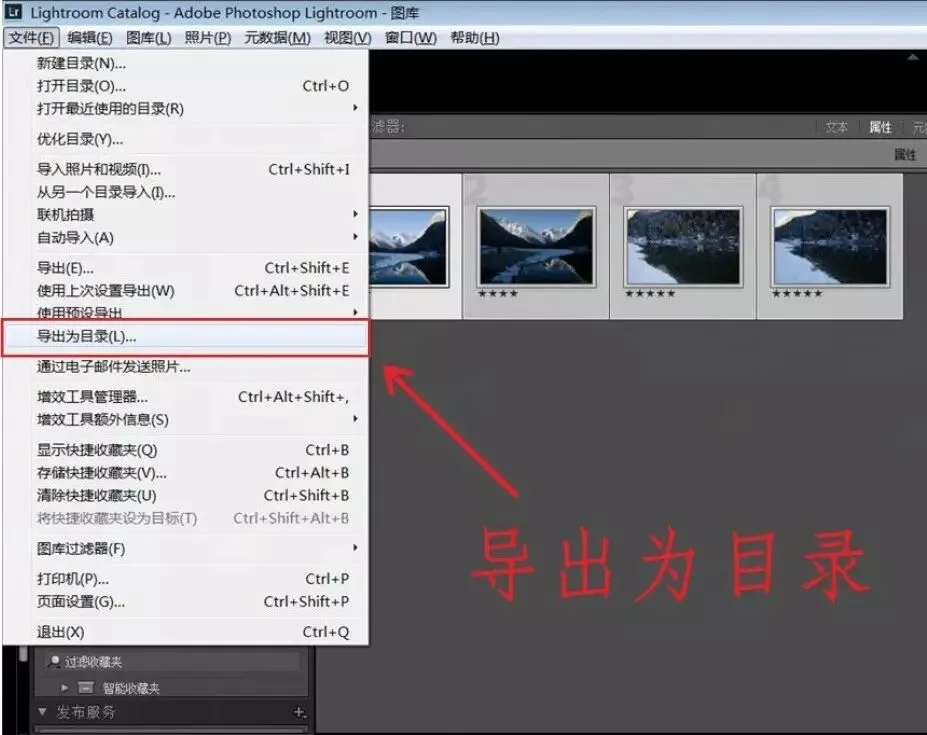
That way, every photo you consider valuable from the trip is copied into a single folder, forming an independent Lightroom catalog.
Next, find some free time to open that catalog and begin the final step of the whole process — post-production.
5. Post-processing workflow
First, I do basic processing in Lightroom to lay a good foundation for deeper work. Of course every photo needs different adjustments, but the following are ones I apply to almost every photo:
1: Adjust exposure
The advantage of RAW is not just 16-bit color depth but its huge dynamic range. Usually, through combined adjustment of exposure, highlights, shadows and blacks/whites, I compensate for exposure flaws from capture, aiming for a histogram with no clipping at either end, as shown below:
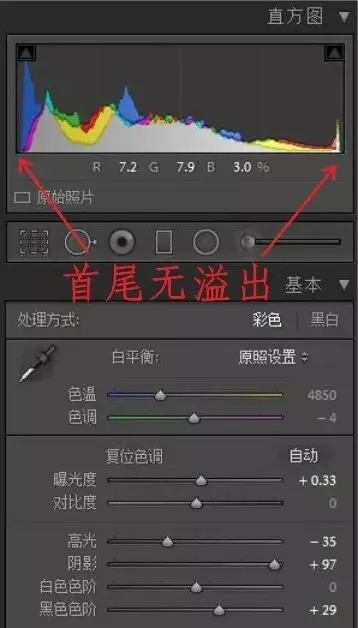
2: Boost blue primary saturation
At the bottom of Lightroom's right panel is the Camera Calibration section — I usually push the blue primary saturation to 100%.
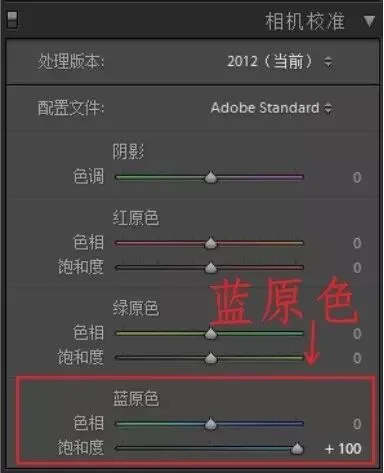
Ever feel your RAW files look much duller on the computer screen than on the camera display? This trick raises the saturation of all colors in the raw file without banding.
3: Adjust clarity
I use Lightroom's adjustment brush to work on the photo's clarity.
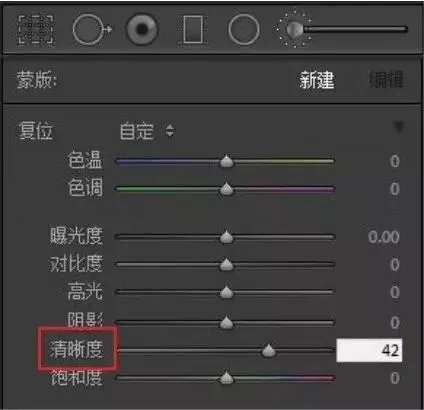
A good photo values mood and atmosphere, which means combining sharpness and softness. I usually reduce clarity where softening is needed — like distant peaks under a setting sun — and increase clarity where detail deserves emphasis, like the texture of foreground rocks.
4. Remove chromatic aberration
Check the 'Remove Chromatic Aberration' box in the Lens Corrections panel.
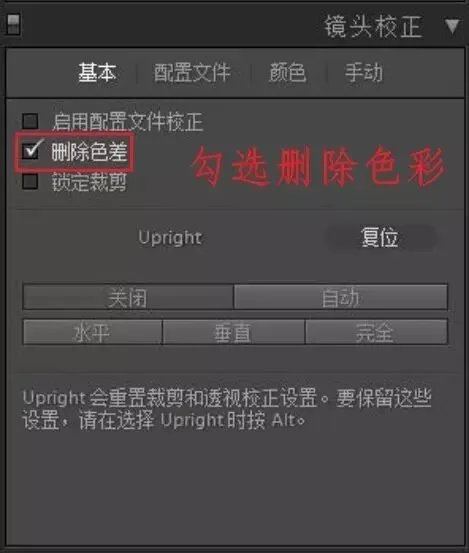
This removes lens chromatic aberration and makes colors more faithful.
5. Noise reduction
Long exposures, high ISO, or underexposed shadows usually carry more noise. I adjust the Noise Reduction parameters in the Detail panel to improve image quality.
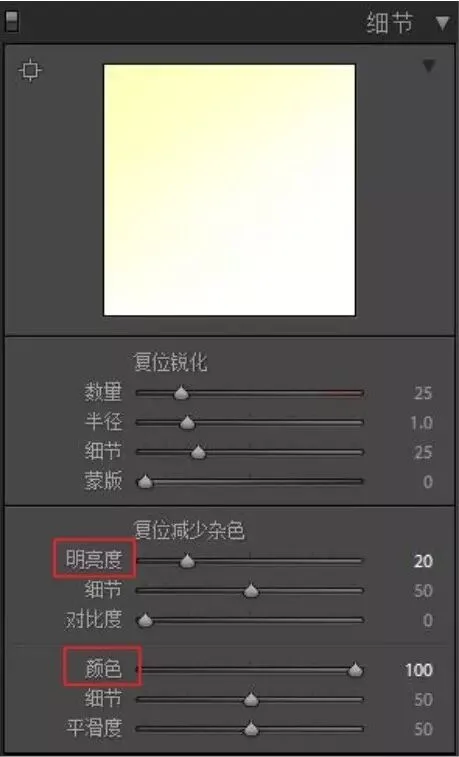
Generally drag the Color slider all the way right; set Luminance based on the amount of noise — more noise, higher value.
6. Sharpening
This step squeezes out the RAW file's local detail, laying the groundwork for texture work later in Photoshop.
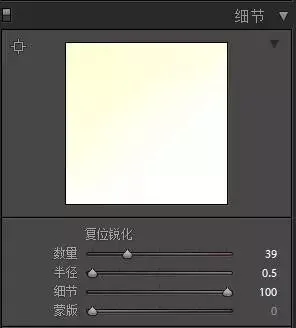
Usually set Radius to minimum (0.5), Detail to maximum (100), and Amount according to the image.
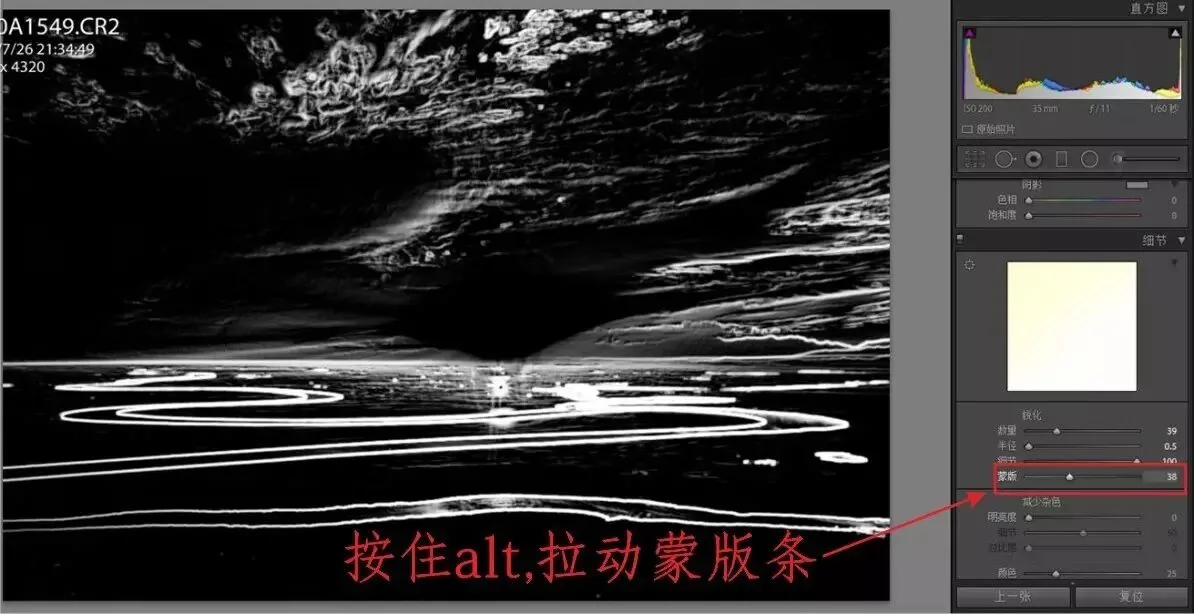
Then hold Alt while sliding the Masking slider — the image turns into the grayscale view shown above. White means fully sharpened areas, black means unsharpened. I slide to control the sharpening threshold, avoiding over-sharpening detail-free areas.
After basic processing in Lightroom, I import the image into Photoshop for deeper creation.
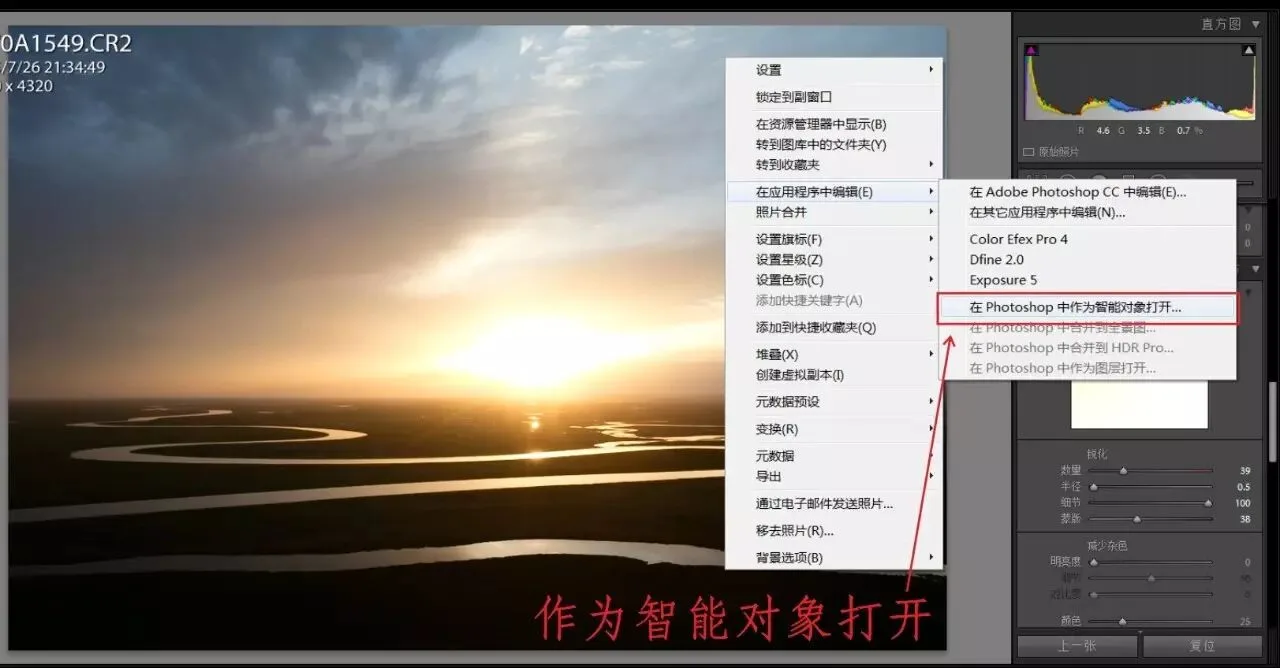
Right-click the image and choose 'Open as Smart Object in Photoshop'. The benefit: if you're unhappy with the Lightroom adjustments later, double-click the layer to reopen the Camera Raw filter and modify — still non-destructive.
Before explaining my Photoshop workflow, let me briefly share my understanding of post-processing: landscape photography is not documentary — it is art. Good post-processing is not merely restoring reality, but creating in moderation. How to gauge that degree is crucial!
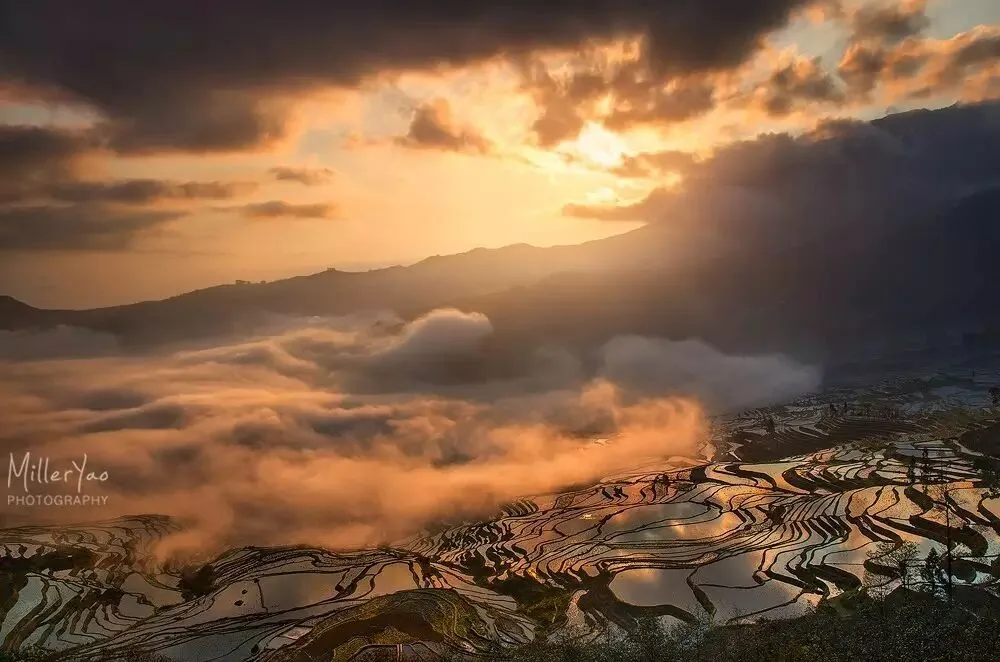
This is a terraced-field sunrise I shot in Yuanyang, Yunnan, soon after I started landscape photography. Above is my newly reprocessed version; below is the version I edited 4 years ago:
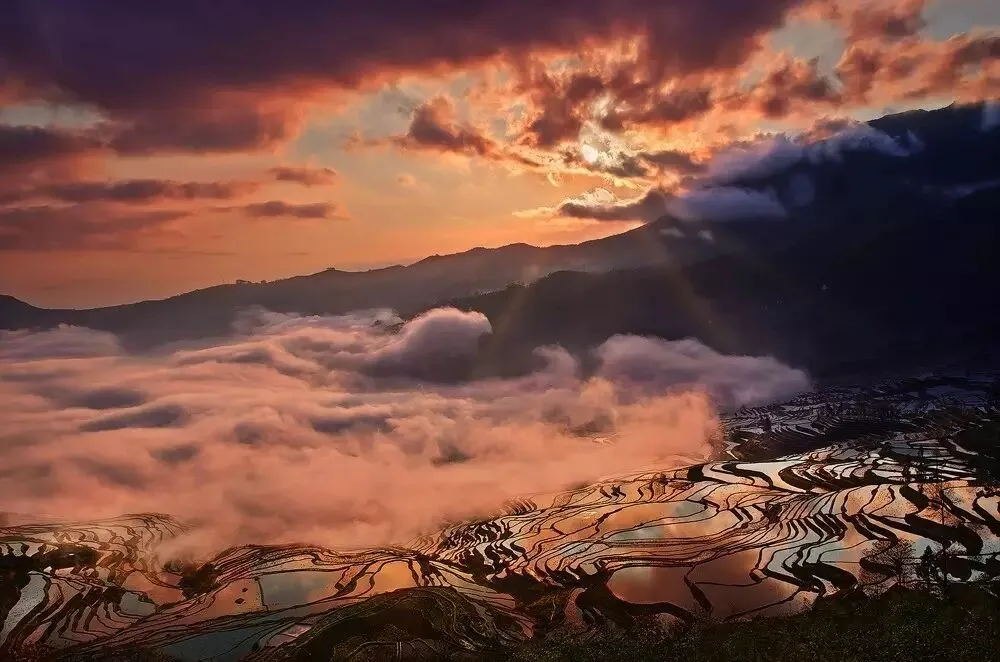
That 4-year-old edit is my dark history! I often see similar over-processed imitations online — the recently trendy heavy glow softening, the pitch-black forced-contrast dark style, and clumsy composites that defy natural light.
In my view, excellent post-processing is moderate creation based on nature and the logic of light.
Below, using this photo, I'll walk you through my Photoshop workflow:
1. Photo blending: my shots usually involve a series of blending techniques, so the first step after importing from Lightroom to Photoshop is combining the frames. (For this image I used exposure blending — taking the ground from frame one and the sky from frame two to form a high-dynamic-range image.)
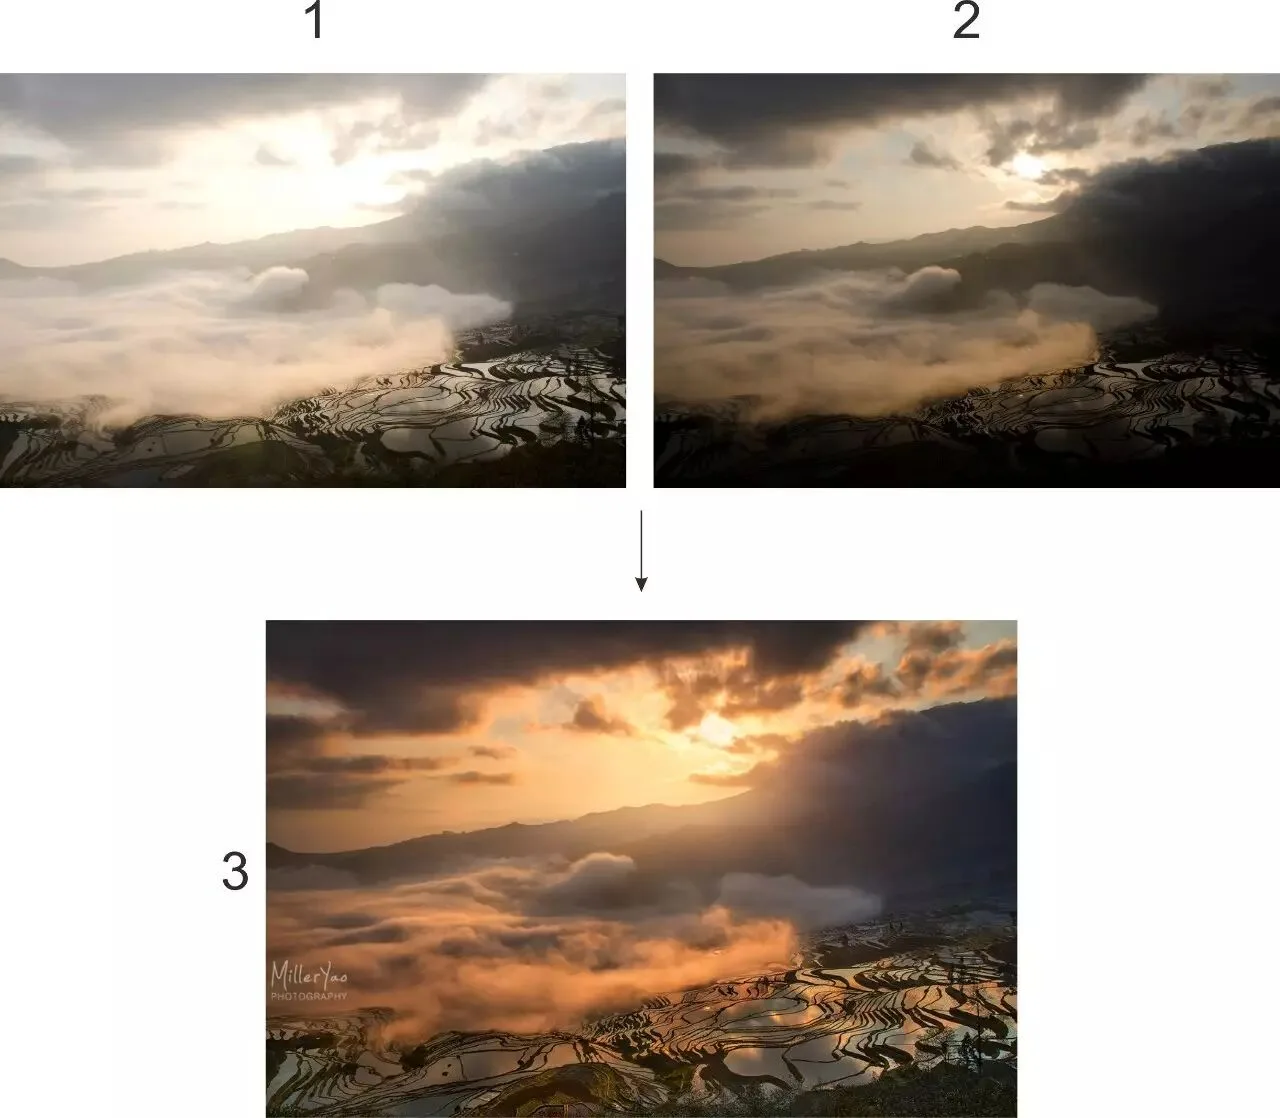
2. Retouching: after blending, the final look begins to emerge. Before painting and shaping comes retouching — I usually use the clone stamp to remove distracting objects or sensor dust spots, making the frame cleaner. I also use warp tools to readjust the proportions of elements. (In this image I removed flare spots caused by shooting into the light with the clone stamp.)
3. Color adjustment: next, adjust the colors to set the tonal foundation for the final piece. There are many methods — I usually use Color Balance and Selective Color adjustment layers plus the Camera Raw filter, combined with masks and luminosity masks. (For this image I added red-orange to the highlights and blue-cyan to the shadowed mountains, enhancing contrast and creating a warm-cool opposition.)
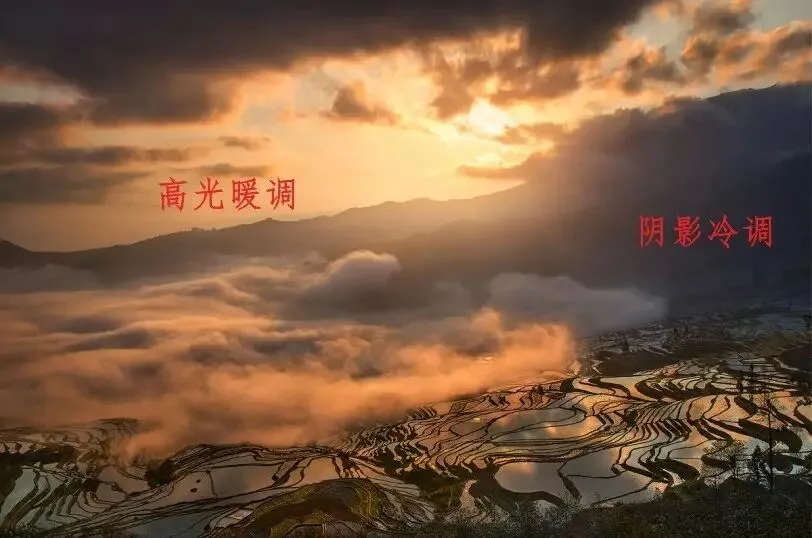
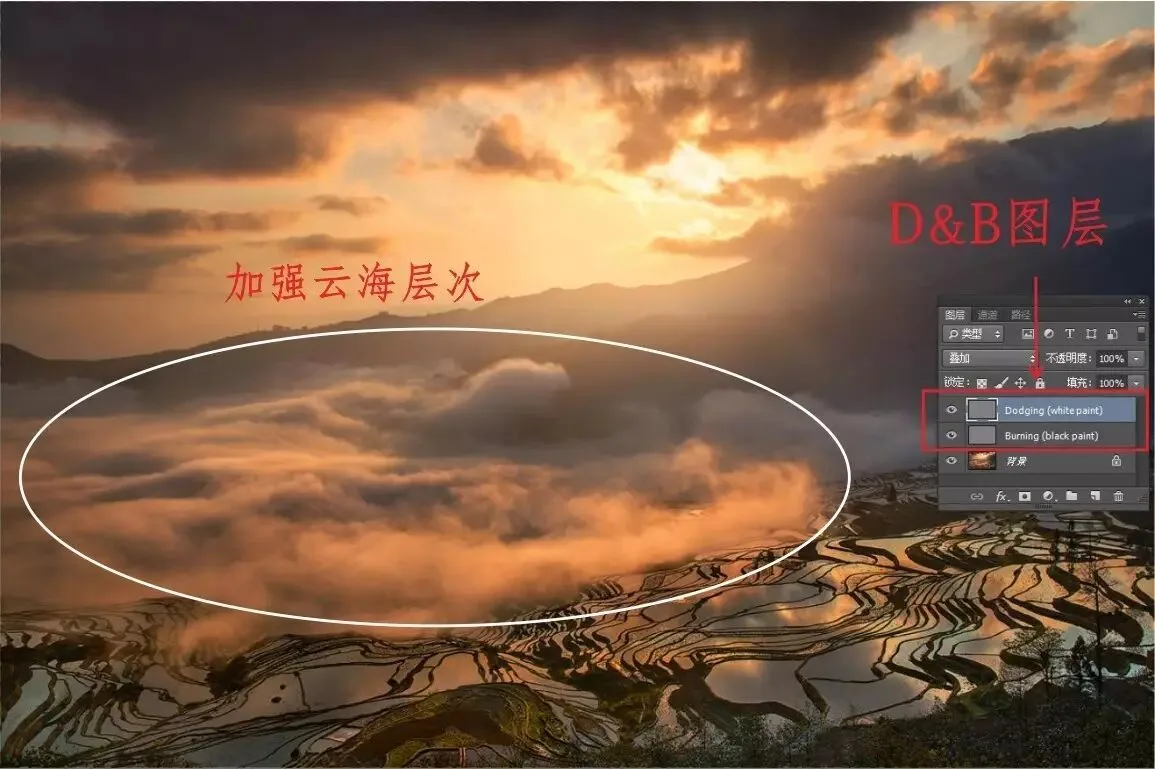
4. Dodge & burn: this step is crucial and time-consuming — it determines the tonalities, layering, transitions and atmosphere. Simply put, use dodge/burn tools or brushes with different foreground colors to lighten and darken areas of the photo. (Here I used dodge & burn to carve out the layers of the cloud sea and strengthen its three-dimensionality.)
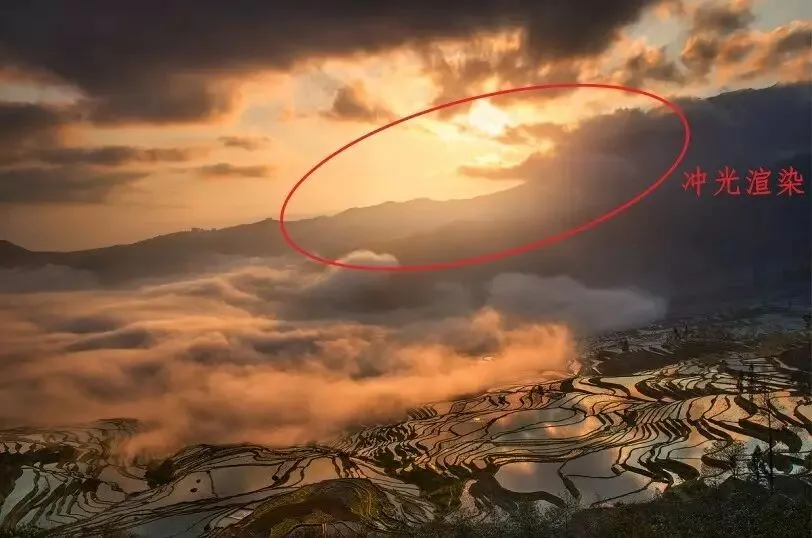
5. Building light and atmosphere: this is the finishing touch that elevates a photo — and it greatly tests your post skills and artistic taste. I use many techniques here: color dodge to strengthen the sense of light, light bleeding to create glow effects, luminosity masks to adjust brightness and enhance mood, the Orton effect to strengthen the sharp-soft contrast... (In this image I used color dodge to render the light burst around the sun, enhancing the dreamlike backlit atmosphere.)
6. Revision and finalizing: after finishing post, I don't finalize and upload immediately. I let it sit for days or even weeks, occasionally reopening it to see whether changes are needed. Post-production is artistic creation; creation needs inspiration, and inspiration takes time. I often revise many times before finalizing.
7. Saving and output: when you've finished all post work on an image, the last step is saving and output. First I merge all layers to save storage space and save as PSD; then I export a separate JPG for online publishing — and TKaction is my go-to choice. It has a remarkably smart resize-and-sharpen algorithm and very convenient operation. In this big-screen mobile era, I output at 1920px on the long edge:
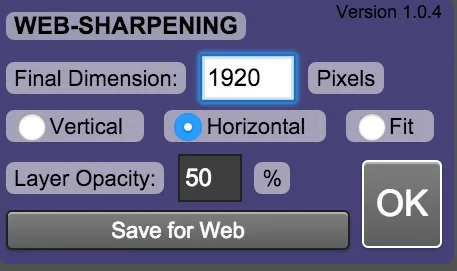
Then click 'Save for Web' to export:
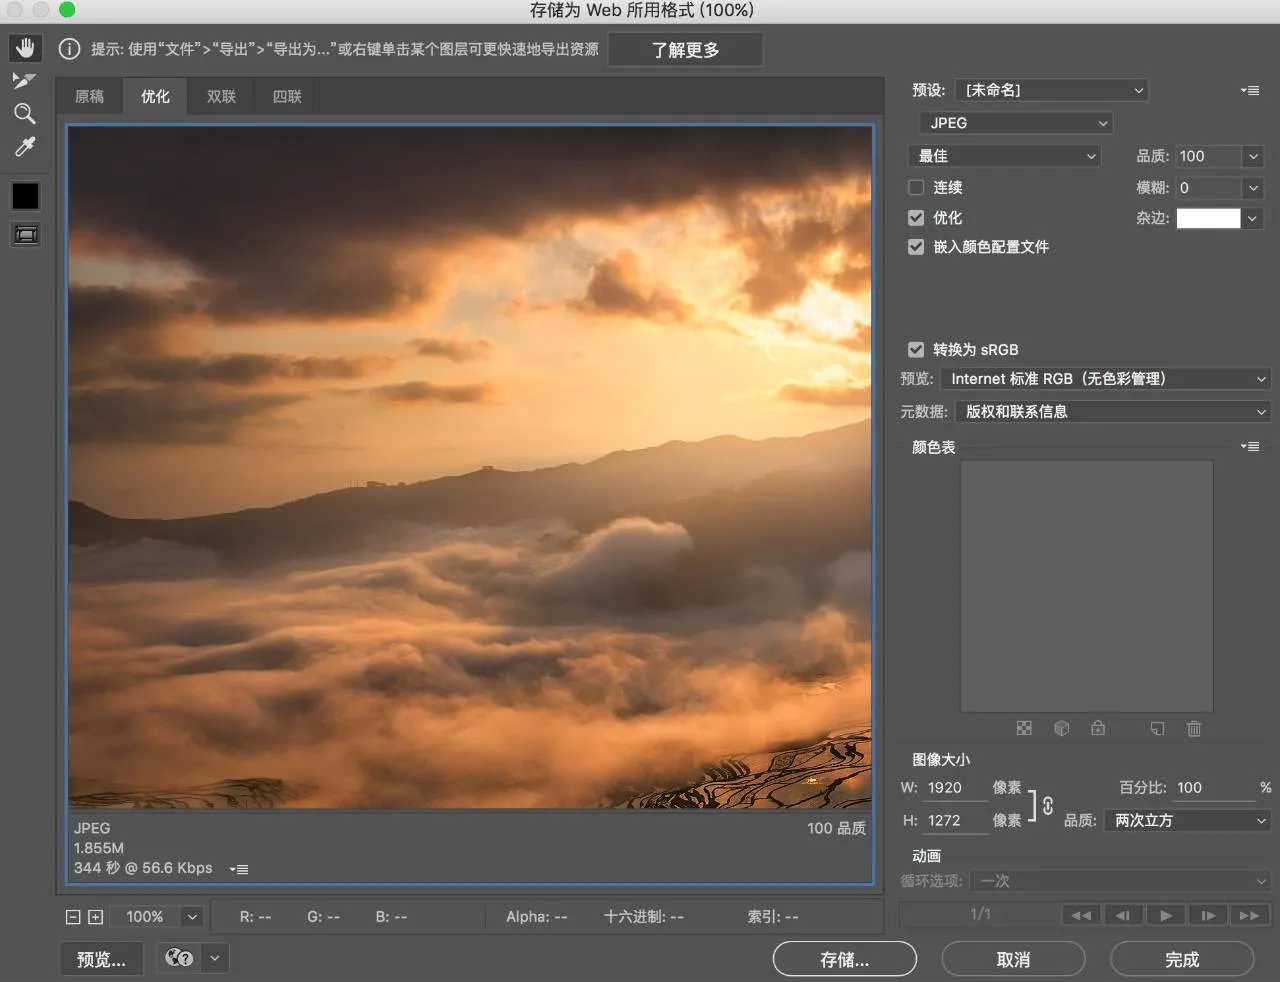
Later, if you want to submit to agencies or enter contests, open the saved PSD and export at the required size and color space.
The above is my complete workflow from start to finish!
I'm Yao Minglai, AdventureX photographer (Tuchong ID: miller姚明来). Our team and I will regularly bring you photography tutorials and outdoor guides.
AdventureX is a team of six Chinese outdoor landscape photographers and one professional high-altitude explorer. Want more in-depth landscape techniques and outdoor guides? Scan the code and follow us!
AdventureX
http://www.theadventurex.com
Extreme challenges
Ultimate imagery
Geek sharing
Follow @Thomas Chu Photo — learn one photography skill every week.